Love this? Save it for later!
Share the inspiration with your friends
It was 10:47 PM on a random Thursday, and I was staring into the fridge like it held the secrets to the universe. My teenager had just casually dropped the bomb that they needed a “fun lunch” for tomorrow’s field trip—something that wouldn’t get soggy, something that felt more like a snack than a meal. I didn’t have any fancy lunch containers or pre-portioned snack packs, but I had a few jars I’d saved from pasta sauce and a sudden, desperate idea. That night, standing in the dim kitchen light, the Easy Antipasto Jar Salad was born out of pure parental panic and a half-empty jar of olives. Honestly, it was one of those moments where you just throw things together and hope for the best. I grabbed salami, some cheese cubes, a handful of cherry tomatoes, and a little jar of Italian dressing. I layered them in, screwed the lid on tight, and prayed it wouldn’t be a disaster. The next day, my kid came home and said it was the best lunch they’d had all year. No joke. They said the layers stayed perfect, the dressing didn’t make everything mushy, and they actually felt like they were eating something cool. That’s when I knew I’d stumbled onto something real. This recipe isn’t fancy, and it’s not complicated. It’s just smart. Maybe you’ve been there—staring at the clock, needing a lunch that works, not just one that survives. This one does more than survive. It thrives.
Why You’ll Love This Recipe
Let’s be real for a second. Packing a lunch for a teenager can feel like a high-stakes game of roulette. Will they eat it? Will they trade it? Will it come back home untouched, only to be thrown away? This Easy Antipasto Jar Salad takes all the guesswork out of the equation. It’s built for real life, not a Pinterest-perfect fantasy.
- Quick & Easy: This comes together in under 15 minutes. Seriously. You can prep a whole week’s worth of lunches on a Sunday night and just grab and go.
- Simple Ingredients: You probably already have most of this stuff in your fridge. Salami, cheese, olives, veggies—it’s all stuff you can buy without a special trip to a fancy grocery store.
- Perfect for Busy Mornings: No more scrambling to make a sandwich at 7 AM. Just grab a jar from the fridge, toss it in a lunch bag, and you’re done.
- Crowd-Pleaser: I’ve yet to meet a teenager who doesn’t love this. It feels like a grown-up Lunchable, and that’s a huge win in my book.
- Unbelievably Delicious: The flavor combo is just perfect. The salty salami, the tangy cheese, the briny olives, and that zesty Italian dressing all come together in a way that’s way more than the sum of its parts.
What makes this recipe different? It’s not just about the ingredients—it’s about the method. The layering technique keeps everything crisp and separate until you’re ready to eat. No soggy bread, no wilted lettuce. Just a perfect, crunchy, flavorful salad every single time. This isn’t just another lunch idea; it’s the lunch idea that will save your sanity on a hectic school morning.
What Ingredients You Will Need
This recipe is all about using simple, flavorful ingredients that you can find at any grocery store. The beauty of this salad is its flexibility, but here’s the core lineup that makes it work so well.
- For the Salad Base:
- Romaine Lettuce, chopped: (About 2 cups per jar) Romaine holds up well and stays crunchy. You can use iceberg if you prefer, but romaine has a bit more flavor.
- Salami, sliced and quartered: (4-6 slices per jar) I love using Genoa salami, but any hard salami works. It adds that savory, salty punch.
- Mozzarella Cheese, cubed: (1/4 cup per jar) Fresh mozzarella pearls are perfect. If you can only find a block, just cut it into small cubes.
- Cherry Tomatoes, halved: (4-5 per jar) They add a burst of sweetness and acidity. Grape tomatoes work just as well.
- Kalamata Olives, pitted: (3-4 per jar) These add that briny, Mediterranean flavor. You can use black olives if your teen prefers a milder taste.
- Pepperoncini, sliced: (2-3 per jar) This is the secret ingredient! They add a gentle heat and a ton of tangy flavor without being spicy.
- Red Onion, thinly sliced: (A few rings per jar) For a little bite. If your teen isn’t a fan, you can leave it out or use a shallot for a milder flavor.
- For the Dressing:
- Italian Dressing: (2-3 tablespoons per jar) You can use your favorite store-bought brand. I personally like Ken’s Steakhouse Italian, but any zesty vinaigrette works.
- Optional: A sprinkle of dried oregano and black pepper.
Ingredient Selection Tips: For the best texture, look for salami that’s not too dry. A good quality, slightly soft salami will have the best flavor. When it comes to cheese, avoid pre-shredded cheese—it has a coating that prevents it from melting well, and it just doesn’t taste as fresh. Cubing your own is worth the extra 30 seconds.
Equipment Needed
You don’t need a professional kitchen to make this recipe. In fact, you probably already have everything you need.
- Wide-Mouth Mason Jars (Pint or Quart size): These are the star of the show. Wide-mouth jars are much easier to fill and eat from. Pint jars are perfect for a standard lunch, while quart jars are great for a bigger appetite. I’ve used regular pasta sauce jars in a pinch, and they work okay, but the wide mouth makes a huge difference.
- A Sharp Knife and Cutting Board: For chopping your veggies and slicing the salami. A dull knife will just make you frustrated and crush your tomatoes.
- A Small Bowl or Measuring Cup: For mixing your dressing, if you’re making it from scratch. Otherwise, just grab the bottle.
- A Funnel (Optional but Helpful): If you’re using a narrow-mouth jar, a funnel makes layering much less messy. I learned this the hard way after spilling dressing all over the counter.
- Lunch Bag with an Ice Pack: To keep everything cold until lunchtime. The salad is fine at room temperature for a couple of hours, but it’s best when it’s chilled.
Preparation Method
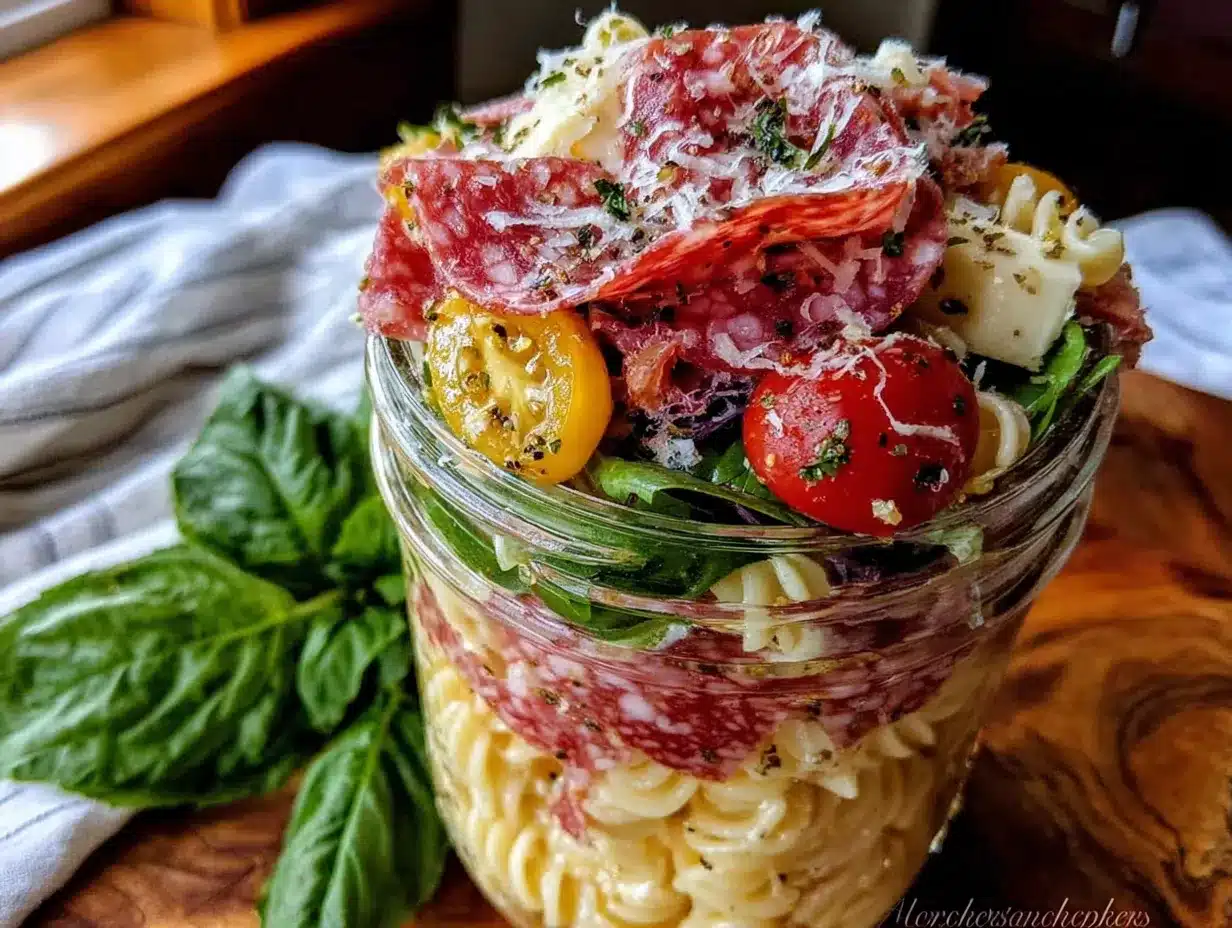
Here’s the step-by-step process to build the perfect jar. The order matters, so don’t skip around!
- Prep Your Ingredients: Start by washing and drying your romaine lettuce. Chop it into bite-sized pieces. Slice your salami into quarters, cube your mozzarella, halve your cherry tomatoes, and slice your pepperoncini and red onion. Having everything ready makes the layering process a breeze.
- Layer 1: The Dressing: Pour 2-3 tablespoons of Italian dressing into the bottom of your clean, dry jar. This is the most important layer. The dressing sits at the bottom, away from the lettuce, so it stays crisp. I usually do a little more than I think I need, because the dressing has to coat everything when you shake it.
- Layer 2: The Hard Veggies: Add your pepperoncini and red onion on top of the dressing. These are hearty and won’t get soggy. They also start to marinate in the dressing, which makes them even more flavorful.
- Layer 3: The Protein: Add your salami and mozzarella cubes. This creates a barrier between the wet dressing and the more delicate ingredients. The cheese and salami also benefit from sitting in the dressing for a few hours.
- Layer 4: The Tomatoes and Olives: Add your halved cherry tomatoes and Kalamata olives. These are a bit more delicate, but they’re still sturdy enough to hold up for a few hours. Don’t press them down too hard.
- Layer 5: The Lettuce: This is the final layer. Pack your chopped romaine lettuce tightly on top, right up to the rim. You want to fill the jar completely, so when you screw the lid on, it compresses the lettuce just a little. This keeps everything snug and prevents the ingredients from shifting around.
- Seal and Store: Screw the lid on tightly. Store the jars in the refrigerator for up to 4 days. When you’re ready to eat, just shake the jar vigorously to distribute the dressing, or dump everything into a bowl. I prefer the bowl method because it’s easier to mix, but shaking is way more fun.
Pro Tip: If you’re making these for the whole week, don’t add the dressing until the morning of. The salad will stay even fresher. I’ve also found that if you use a really dry lettuce like romaine, it holds up incredibly well even with the dressing in there for a day or two.
Cooking Tips & Techniques
I’ve made a lot of these jars, and I’ve definitely learned a few things the hard way. Here are my best tips for guaranteed success.
- The Biggest Mistake: Using wet lettuce. If you wash your lettuce and don’t dry it thoroughly, you’ll end up with a watery, sad salad. Use a salad spinner or pat the leaves dry with a paper towel. It makes a huge difference.
- Don’t Overcrowd the Jar: It’s tempting to pack in as much as possible, but leave a little bit of room at the top. If the jar is too full, the dressing won’t be able to coat everything when you shake it.
- Keep it Cold: These jars are best kept refrigerated until you’re ready to eat. If you’re packing them for a school lunch, put them in a good insulated bag with an ice pack. Nobody wants warm salami.
- My Own Failure: The first time I made these, I layered the lettuce at the bottom. Mistake. By lunchtime, it was a wilted, soggy mess. The lettuce needs to be as far away from the dressing as possible. That’s the whole secret to this recipe.
- Timing is Everything: You can prep the ingredients on Sunday and layer the jars on Sunday night. They’ll be perfect for Monday through Thursday. By Friday, the lettuce might start to lose a little crunch, but it’s still delicious.
Variations & Adaptations
This recipe is a template, not a rulebook. Feel free to make it your own!
- Vegetarian Version: Swap the salami for marinated artichoke hearts, roasted red peppers, or some chickpeas. You can also add hard-boiled eggs for extra protein.
- Gluten-Free Friendly: This recipe is naturally gluten-free as long as you check your Italian dressing label. Some brands use malt vinegar, which contains gluten. Most are safe, but it’s always good to double-check.
- Protein Swap: Not a fan of salami? Use chopped pepperoni, grilled chicken, or even some leftover steak. Turkey or ham also work great.
- Cheese Swap: Swap mozzarella for provolone, cheddar, or even some crumbled feta. Feta will give it a much tangier flavor.
- Add Some Crunch: Throw in some croutons or roasted chickpeas right before serving. If you add them to the jar, they’ll get soft. I like to pack them separately and add them at lunchtime.
- My Go-To Variation: I love adding a handful of fresh basil leaves to the jar. It adds such a fresh, aromatic flavor that takes the whole thing to another level. It’s a small change, but it makes it feel fancy.
Serving & Storage Suggestions
This salad is designed to be eaten cold, straight from the jar or dumped into a bowl. It’s perfect as is, but here are a few ways to serve it.
- Serving Temperature: Best served cold. If you’ve stored it in the fridge, just grab it and go. It’s fine for a couple of hours at room temperature, but it’s at its best when it’s chilled.
- Presentation: For a fun lunch, just hand them the jar and a fork. For a slightly more civilized experience, dump the contents into a bowl and give it a good toss. The layers look beautiful in the jar, so it’s a great option for a packed lunch that feels special.
- Complementary Sides: Serve with some crusty bread, breadsticks, or a handful of crackers on the side. It’s also great with some fresh fruit or a small cup of soup.
- Storage: Store the assembled jars in the refrigerator for up to 4 days. Do not freeze them—the lettuce will turn into a mushy, watery mess.
- Reheating: Do not reheat this salad! It’s meant to be eaten cold. If you want a warm lunch, this isn’t the recipe for you.
- Flavor Development: The flavors actually get better after a day or two in the fridge. The salami and cheese absorb a little bit of the dressing, and the pepperoncini infuse everything with their tangy brine. It’s one of those rare recipes that’s even better on day two.
Nutritional Information & Benefits
This salad is a balanced, satisfying meal that’s packed with protein and healthy fats. It’s a great option for a teen who needs sustained energy throughout the afternoon.
- Estimated Nutritional Values (per pint jar): Calories: 350-450, Protein: 20-25g, Fat: 25-30g, Carbohydrates: 10-15g, Fiber: 3-5g. (These are estimates and will vary based on your specific ingredients and portions.)
- Health Benefits: The protein from the salami and cheese helps keep you full and focused. The healthy fats from the olives and olive oil in the dressing are great for brain health. The veggies provide essential vitamins and fiber.
- Dietary Considerations: This recipe is naturally low-carb and gluten-free (check your dressing label). It’s also a great option for a keto or paleo diet if you choose the right ingredients.
- Potential Allergens: This recipe contains dairy (cheese) and may contain gluten (depending on the dressing). Always check labels if you’re cooking for someone with allergies.
- My Personal Take: I love that this salad feels indulgent but is actually pretty healthy. It’s not a sad, diet-y lunch. It’s a real meal that just happens to be good for you. That’s a win in my book.
Conclusion
This Easy Antipasto Jar Salad is more than just a lunch idea—it’s a game-changer for busy mornings and picky eaters. It’s quick, it’s delicious, and it’s so simple that even a teenager could make it themselves. Honestly, that’s the dream, right? I love this recipe because it takes the stress out of packing lunch. No more worrying about soggy sandwiches or hungry kids. Just grab a jar, toss it in a bag, and you’re done. It’s that easy. I really hope you give this a try. Customize it with your family’s favorite ingredients, and make it your own. When you do, I’d love to hear about it! Leave a comment below and tell me what variations you tried. Did your teen love it? Did they ask for it again? Share your stories and your tips. Let’s make lunchtime a little bit easier, one jar at a time. Happy eating!
Frequently Asked Questions
Can I use a different type of lettuce?
Absolutely! Romaine is my top choice because it’s crunchy and holds up well, but you can use iceberg, green leaf, or even a spring mix. Just make sure it’s very dry before you layer it in the jar to prevent sogginess.
How long do these jars last in the fridge?
They will stay fresh for up to 4 days. The key is the layering technique. As long as the dressing stays at the bottom and the lettuce is packed tightly on top, everything will stay crisp. By day 5, the lettuce might start to wilt a little, but it’s still safe to eat.
Can I make these without a jar?
Yes, you can! If you don’t have mason jars, you can use any airtight container. Just layer the ingredients in the same order: dressing, hard veggies, protein, tomatoes/olives, and lettuce on top. The jar just makes it more fun and portable.
My teen doesn’t like olives. What can I use instead?
No problem at all! You can leave the olives out entirely, or swap them for something like chopped pickles, cucumber slices, or even some roasted red peppers. The goal is to add a little briny or tangy flavor, so feel free to get creative.
Is this recipe expensive to make?
Not at all! It’s actually very budget-friendly. You’re using small amounts of each ingredient, and most of them are pantry staples. A single jar of olives or a package of salami will last for several lunches. It’s way cheaper than buying pre-made lunch kits or eating out.
Pin This Recipe!
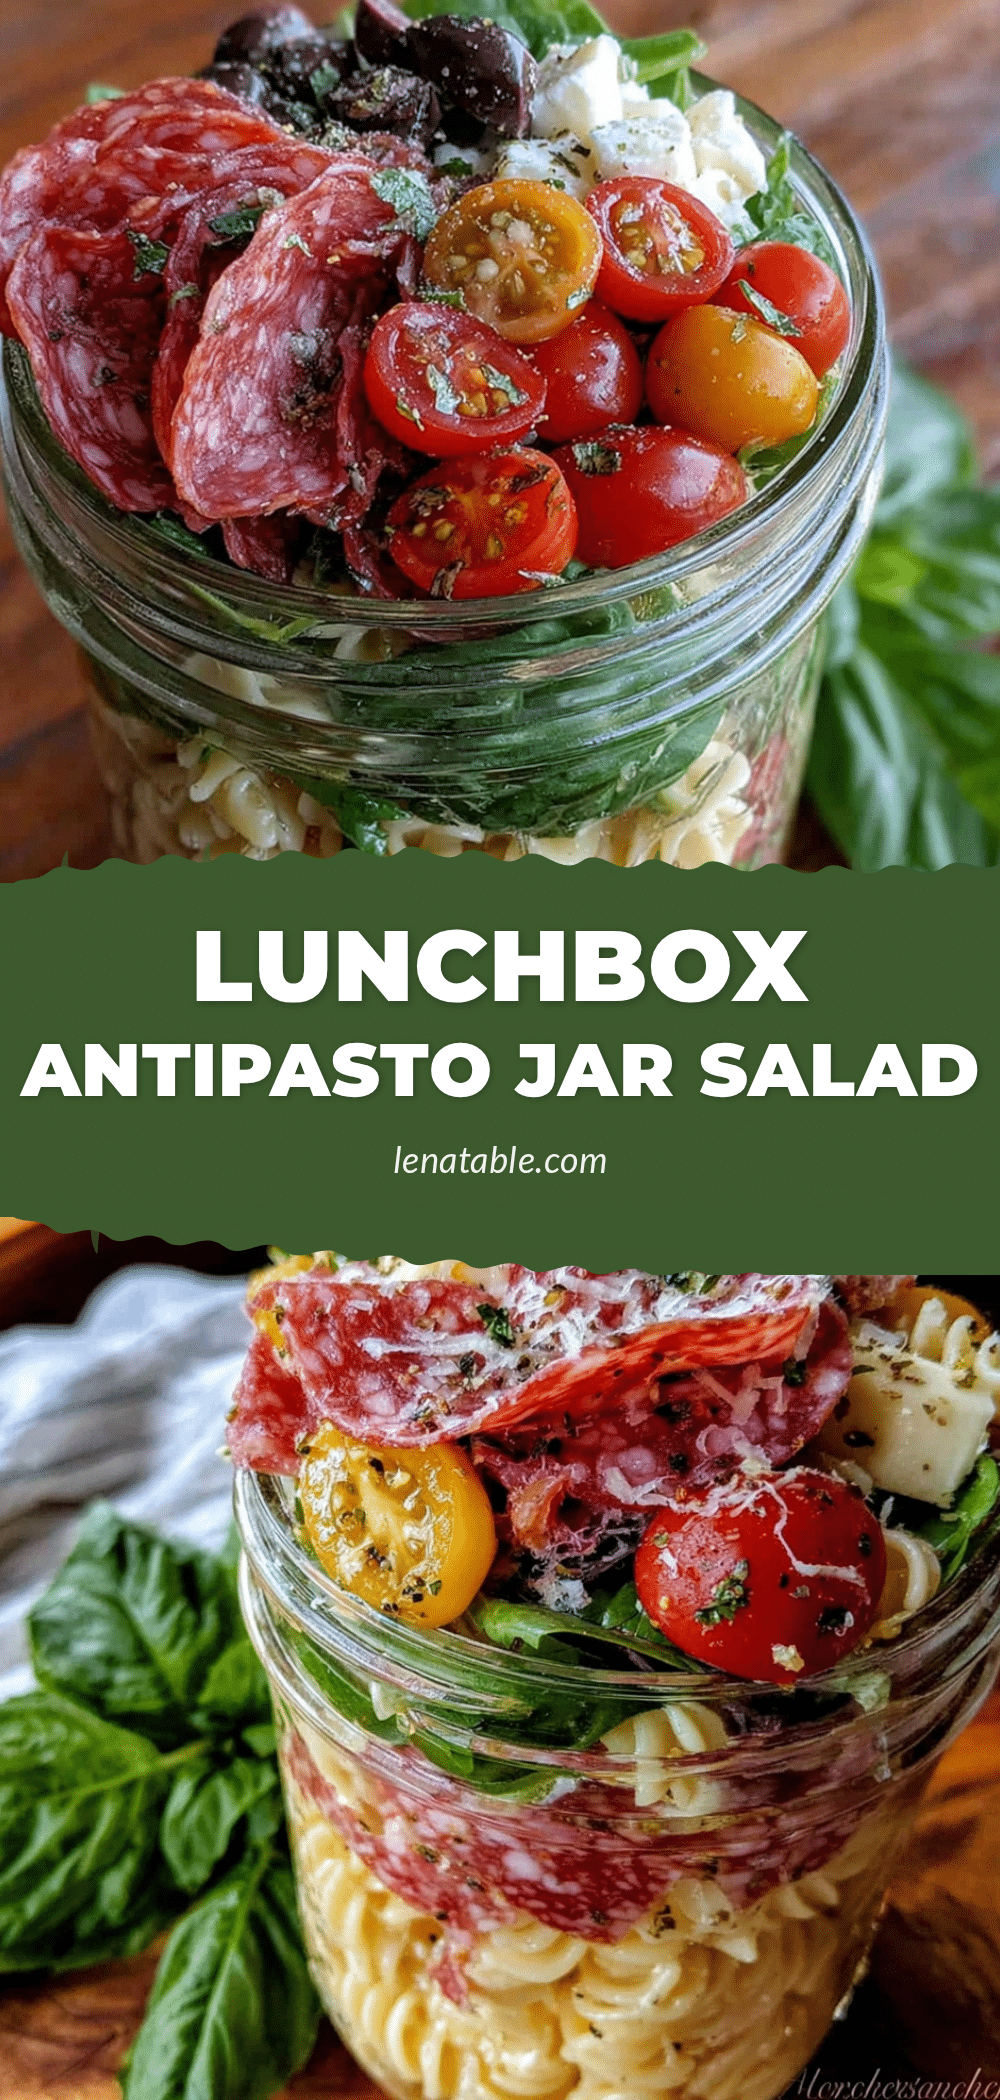
Easy Antipasto Jar Salad Perfect for Teen Lunches
This Easy Antipasto Jar Salad is a quick, no-fuss lunch that stays crisp and delicious. Perfect for busy mornings, it layers salami, cheese, olives, and veggies with Italian dressing for a fun, portable meal that teens love.
- Prep Time: 15 minutes
- Cook Time: 0 minutes
- Total Time: 15 minutes
- Yield: 1 serving per jar
- Category: Lunch
- Cuisine: Italian-American
Ingredients
- Romaine lettuce, chopped (about 2 cups per jar)
- Salami, sliced and quartered (4-6 slices per jar)
- Mozzarella cheese, cubed (1/4 cup per jar)
- Cherry tomatoes, halved (4-5 per jar)
- Kalamata olives, pitted (3-4 per jar)
- Pepperoncini, sliced (2-3 per jar)
- Red onion, thinly sliced (a few rings per jar)
- Italian dressing (2-3 tablespoons per jar)
- Optional: dried oregano and black pepper
Instructions
- Prep your ingredients: Wash and dry romaine lettuce, chop into bite-sized pieces. Slice salami into quarters, cube mozzarella, halve cherry tomatoes, slice pepperoncini and red onion.
- Layer 1: Pour 2-3 tablespoons of Italian dressing into the bottom of a clean, dry wide-mouth mason jar.
- Layer 2: Add pepperoncini and red onion on top of the dressing.
- Layer 3: Add salami and mozzarella cubes.
- Layer 4: Add halved cherry tomatoes and Kalamata olives.
- Layer 5: Pack chopped romaine lettuce tightly on top, filling the jar to the rim.
- Seal the jar with the lid and store in the refrigerator for up to 4 days.
- When ready to eat, shake the jar vigorously to distribute the dressing, or dump into a bowl and toss.
Notes
The layering order is crucial: dressing at the bottom, then hard veggies, protein, tomatoes/olives, and lettuce on top. This keeps the lettuce crisp. For best results, use dry lettuce and don’t add dressing until the morning of if making for the week. Jars stay fresh for up to 4 days. Do not freeze or reheat.
Nutrition
- Serving Size: 1 pint jar
- Calories: 350450
- Sugar: 46
- Sodium: 8001000
- Fat: 2530
- Saturated Fat: 810
- Carbohydrates: 1015
- Fiber: 35
- Protein: 2025
Keywords: antipasto salad, jar salad, teen lunch, easy lunch, no-cook lunch, portable lunch, meal prep


