Love this? Save it for later!
Share the inspiration with your friends
There used to be a tiny bakery tucked between a vintage lamp shop and a dusty bookstore in my old neighborhood called “The Midnight Morsel.” They made these incredible black velvet cupcakes that were only available for the two weeks leading up to Halloween. When the owner retired and the shop closed three years ago, I genuinely mourned that cupcake. I mean, it wasn’t just a dessert—it was the official start of my Halloween season. After twelve tries—some were gray, some were dry, and one batch actually turned a weird purple-ish color—I finally cracked the code. Let me tell you, the victory dance I did in my kitchen that day was something else. My neighbor probably thought I’d lost my mind, but honestly, that first perfect bite of a dark, velvety cupcake with that tangy cream cheese frosting was worth every failed attempt.
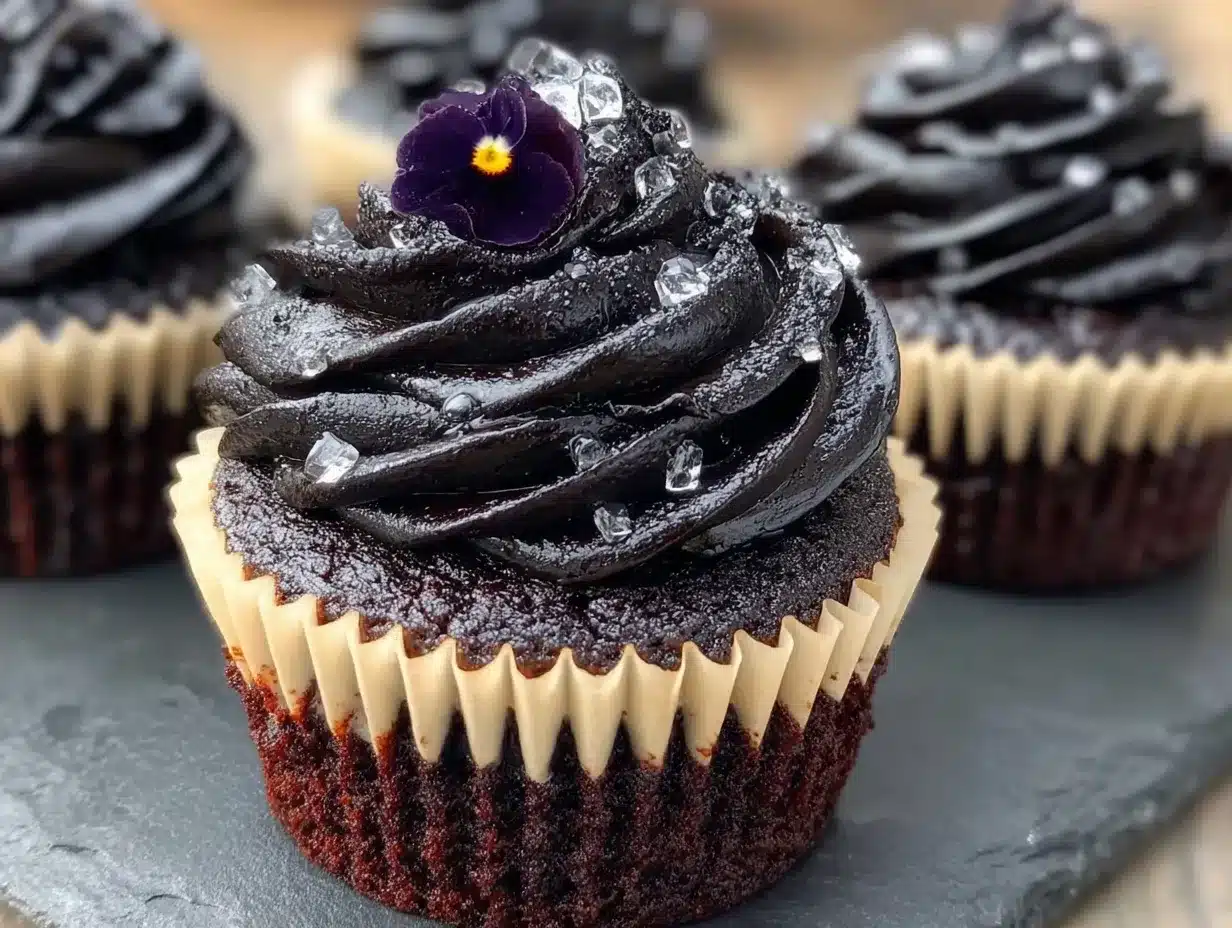
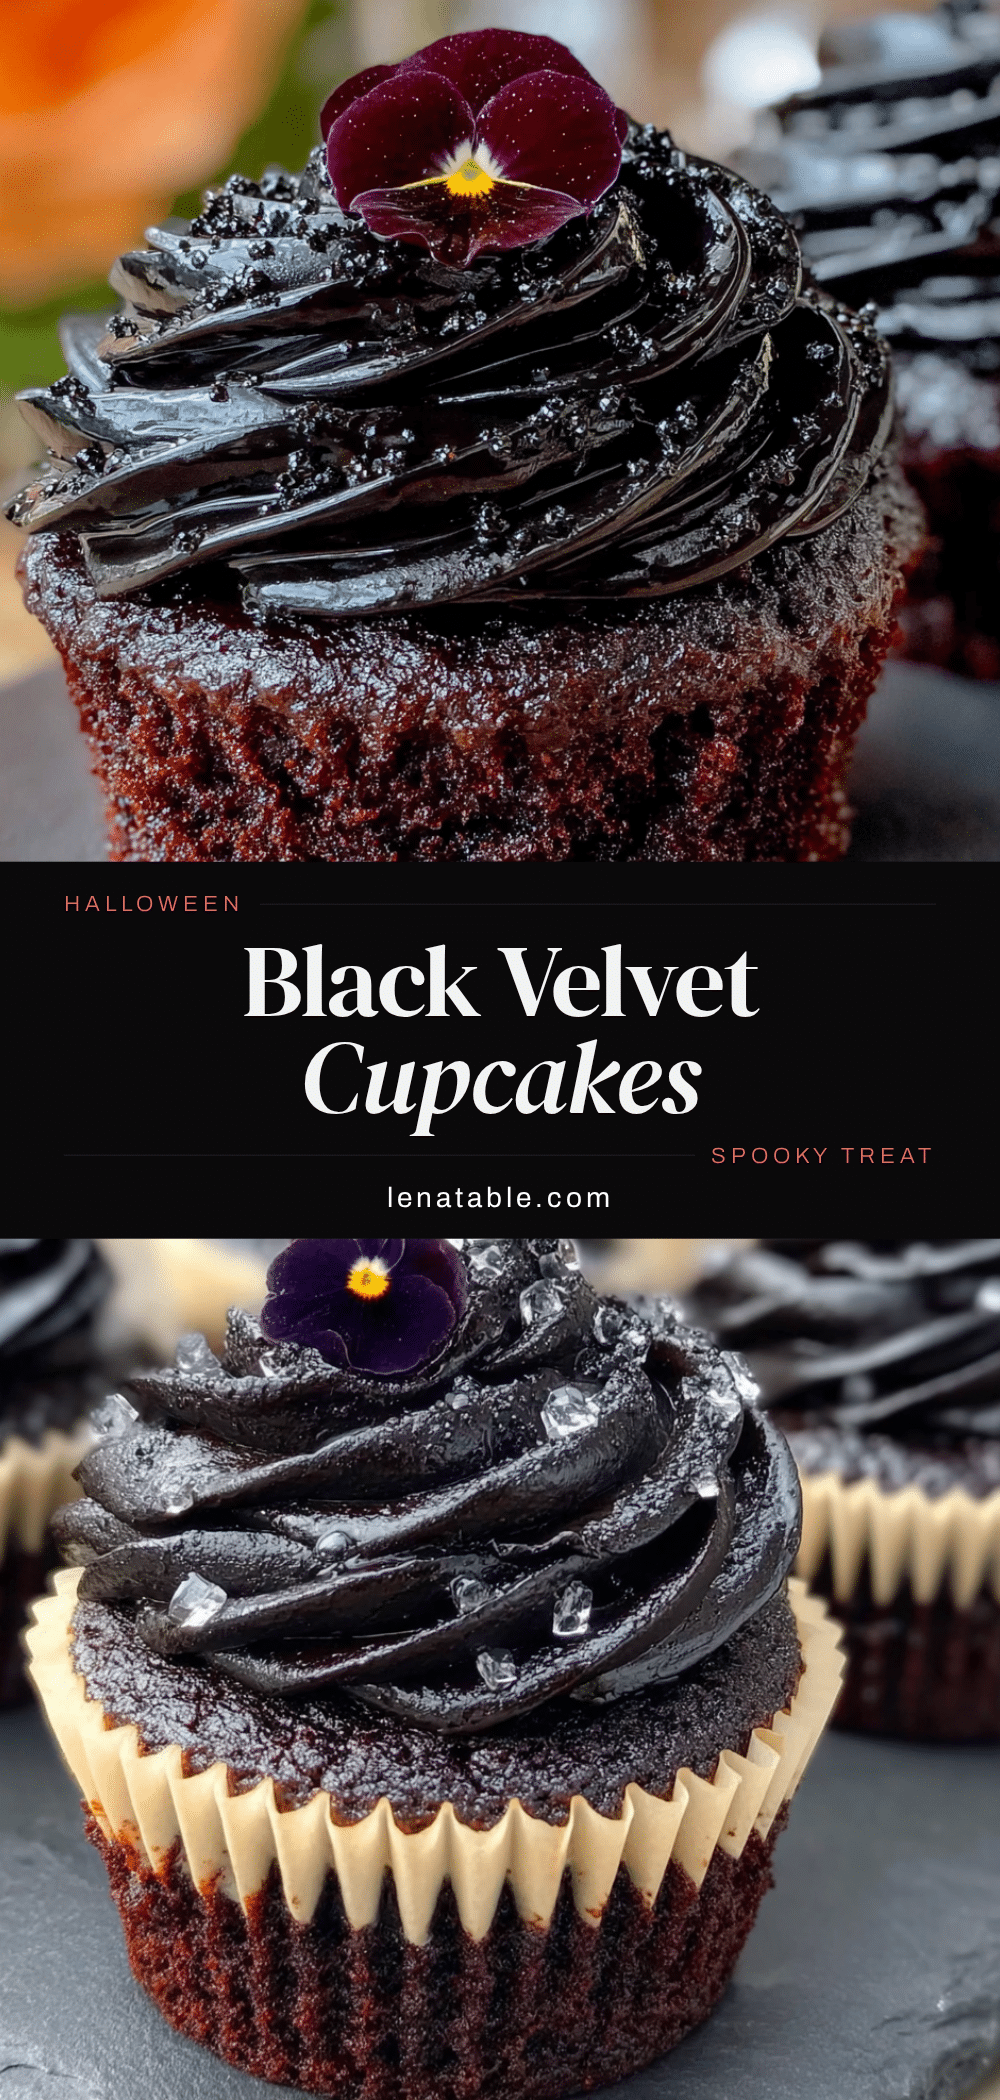
These spooky black velvet Halloween cupcakes look like they came straight from a gothic bakery window, but they’re surprisingly simple to make. The secret isn’t just black food coloring—it’s a careful balance of cocoa powder, vinegar, and buttermilk that gives you that signature velvet texture while keeping the color deep and true. I remember staring at my first successful batch, thinking about how the bakery owner must have felt when she perfected her recipe. There’s something magical about recreating a lost taste, you know? That feeling when you take a bite and suddenly you’re transported back to a rainy October afternoon, standing in front of a glass case, trying to decide which treat to pick.
The best part? These aren’t just pretty faces. The cake is incredibly moist with a tender crumb that practically melts in your mouth. And that cream cheese frosting—oh, it’s the perfect partner. Tangy enough to cut through the richness, sweet enough to make you close your eyes after the first bite. Maybe you’ve been there too, chasing a memory through recipe after recipe. If so, I promise this is the one. This is the batch that brings it all back.
Why You’ll Love This Recipe
These aren’t your average Halloween cupcakes. After testing this recipe more times than I’d like to admit, I can confidently say these are the best black velvet cupcakes you’ll ever make. Here’s why they’re going to become your new October tradition:
- Perfectly Black Every Time: No grayish or purple disasters here. The combination of black cocoa powder and the right food coloring gives you that deep, dramatic color that looks incredible against the white frosting.
- Incredibly Moist Texture: The buttermilk and oil keep these cupcakes soft for days. I’ve had people ask me if I used a box mix because they’re so tender—that’s how good the texture is.
- Simple Pantry Ingredients: Nothing weird or hard to find. You probably have most of these in your kitchen right now, minus maybe the black cocoa powder (which you can order online easily).
- Perfect for Halloween Parties: These are total showstoppers. Every time I bring them to a gathering, people stop and stare. They look like something from a fancy bakery, but you made them yourself.
- Crowd-Pleasing Flavor: The cake has a subtle chocolate flavor with a hint of tanginess from the buttermilk. It’s not overly sweet, which makes the creamy frosting the perfect finishing touch.
What really sets this recipe apart is the technique. I spent weeks figuring out how to get that velvet texture without the color turning muddy. The trick is using black cocoa powder—it’s darker and has a richer flavor than regular cocoa. Plus, the vinegar and baking soda reaction creates those tiny bubbles that give velvet cake its signature lightness. This isn’t just another black cupcake recipe; it’s the one that finally made me stop searching.
These cupcakes are the kind that make you feel like a baking genius. Friends will ask for the recipe, kids will beg for them at every Halloween party, and you’ll feel that little rush of pride every time you pull a batch out of the oven. Trust me, I’ve been there. It’s a good feeling.
What Ingredients You Will Need
Every ingredient in this recipe has a job to do. From the black cocoa that gives the cupcakes their dramatic color to the buttermilk that makes them impossibly tender, each component works together to create something truly special. Here’s what you’ll need:
For the Black Velvet Cupcakes
- 1 ½ cups all-purpose flour (spooned and leveled—don’t scoop straight from the bag or you’ll get too much)
- ½ cup black cocoa powder (I prefer King Arthur or Rodelle for the deepest color and richest flavor)
- 1 teaspoon baking soda
- ½ teaspoon salt
- 1 cup granulated sugar
- ½ cup vegetable oil (or any neutral oil like canola or grapeseed)
- 1 large egg, room temperature
- 1 teaspoon vanilla extract
- 1 cup buttermilk, room temperature (adds tenderness and helps activate the baking soda)
- 1 tablespoon white vinegar (reacts with the baking soda for that light, airy crumb)
- 1 to 2 teaspoons black gel food coloring (I recommend Americolor Super Black—it’s concentrated and won’t mess with the batter consistency)
For the Cream Cheese Frosting
- 8 ounces cream cheese, softened (full-fat works best for stability and flavor)
- ½ cup unsalted butter, softened (European-style butter like Kerrygold gives a richer taste)
- 3 to 4 cups powdered sugar, sifted (start with 3 cups and add more if needed)
- 1 teaspoon vanilla extract
- Pinch of salt (balances the sweetness)
For Decoration
- Orange and purple sprinkles (or any Halloween-themed decorations)
- Optional: Candy eyeballs, edible glitter, or mini pumpkins for extra spooky flair
When it comes to the black cocoa powder, don’t skip it. Regular cocoa will give you a dark brown color, not that dramatic black. I’ve tried substituting Dutch-process cocoa and adding extra food coloring, and it just isn’t the same. The black cocoa also has this amazing Oreo-like flavor that makes the cupcakes taste extra special. If you can’t find it in stores, it’s easy to order online—one bag will last you through many batches.
For the buttermilk, I’ve used both store-bought and homemade (just add a tablespoon of lemon juice to regular milk and let it sit for 5 minutes). Both work great, but I find the store-bought version gives a slightly more consistent texture. And please, please use gel food coloring, not liquid. Liquid coloring will thin out your batter and you’ll need way too much to get the right shade. Gel is concentrated and won’t mess with the chemistry of the recipe.
Equipment Needed
You don’t need a professional bakery setup for these cupcakes, but having the right tools makes the process so much smoother. Here’s what I use every time:
- 12-cup muffin tin (standard size—non-stick is nice but not necessary if you use liners)
- Paper cupcake liners (I like using black or white liners for Halloween, but any color works)
- Two large mixing bowls (one for dry ingredients, one for wet)
- Whisk (for combining dry ingredients)
- Hand mixer or stand mixer (for the frosting—you can whisk by hand, but your arm will thank you for using a mixer)
- Rubber spatula (for scraping down the bowl and folding ingredients)
- Measuring cups and spoons
- Kitchen scale (optional but helpful for consistent results)
- Cooling rack (lets air circulate so the cupcakes cool evenly)
- Piping bag with star tip (I use a Wilton 1M tip for that classic swirl look)
If you don’t have a piping bag, you can absolutely use a zip-top bag with the corner snipped off. It won’t be as pretty, but the taste is exactly the same. I’ve also used a cookie scoop to portion the batter into the liners—it’s faster and gives you evenly sized cupcakes every time. Trust me, your future self will thank you for that little trick.
Preparation Method
Making these spooky black velvet Halloween cupcakes is easier than you think. Just follow these steps and you’ll have a batch of perfectly dark, velvety cupcakes ready to impress. Let’s get started!
- Preheat your oven to 350°F (175°C). Line your muffin tin with paper liners. I like to spray the inside of the liners lightly with non-stick spray—it’s an extra step, but it guarantees the cupcakes won’t stick.
- In a medium bowl, whisk together the flour, black cocoa powder, baking soda, and salt. Make sure there are no lumps. The cocoa powder can be clumpy, so really give it a good whisk. Set this aside for now.
- In a large bowl, whisk together the sugar and vegetable oil. It should look like wet sand. Then add the egg and vanilla extract, whisking until everything is smooth and well combined.
- Pour in the buttermilk and vinegar, and whisk until the mixture is uniform. Don’t worry if it looks a little thin—that’s normal. The vinegar and buttermilk are going to react with the baking soda later to create those beautiful tiny bubbles that make velvet cake so light.
- Add the black gel food coloring. Start with 1 teaspoon and mix it in. The batter will look gray at this point. Add another teaspoon and stir again. You want the batter to be a deep, dark black before you add the dry ingredients. I usually end up using about 1 ½ teaspoons, but it depends on the brand of coloring you’re using.
- Gradually add the dry ingredients to the wet ingredients, stirring gently with a rubber spatula. Mix just until the flour disappears—overmixing will make the cupcakes tough. The batter should be smooth, dark, and slightly thick but still pourable.
- Divide the batter evenly among the 12 cupcake liners. I use a cookie scoop to get consistent portions, filling each liner about ⅔ to ¾ full. Don’t overfill or they’ll overflow and lose that nice dome shape.
- Bake for 18 to 20 minutes, or until a toothpick inserted into the center of a cupcake comes out clean. The tops should spring back when lightly touched. Every oven is different, so start checking at 16 minutes. My first batch came out dry because I left them in too long—learn from my mistake!
- Let the cupcakes cool in the pan for 5 minutes. This gives them time to set. Then transfer them to a cooling rack to cool completely. Don’t even think about frosting them while they’re warm—the frosting will melt into a sad puddle. I speak from experience here.
- While the cupcakes cool, make the cream cheese frosting. In a large bowl, beat the softened cream cheese and butter together until smooth and creamy. This takes about 2 minutes with a hand mixer. Scrape down the sides of the bowl.
- Add the vanilla extract and salt, then gradually beat in the powdered sugar. Start with 3 cups and add more if you want a stiffer frosting. Beat until the frosting is light and fluffy, about 2 to 3 minutes. Don’t overbeat or it can become too soft.
- Once the cupcakes are completely cool, frost them. I like to use a piping bag with a star tip for that classic bakery look. Start from the outside and work your way in, creating a swirl. Top with Halloween sprinkles or candy decorations right away before the frosting sets.
One thing I learned the hard way—cream cheese frosting can be a little soft if your kitchen is warm. If it seems too runny after mixing, pop it in the fridge for 15 minutes to firm up. It’ll pipe much easier. And if you’re making these ahead of time, keep the unfrosted cupcakes in an airtight container and frost them the day you plan to serve them. The texture stays so much better.
Cooking Tips & Techniques
After making these cupcakes more times than I can count, I’ve picked up a few tricks that make a real difference. Let me share what I’ve learned so you don’t have to make the same mistakes I did.
Getting the Color Right: The biggest challenge with black velvet cupcakes is getting that deep, true black color without making the batter too wet. The key is using black cocoa powder as your base. It’s naturally darker than regular cocoa and has that amazing Oreo flavor. Then add gel food coloring gradually—start with 1 teaspoon and keep going until the batter looks like black paint. Remember, the color will darken slightly as the cupcakes bake, so don’t panic if it looks a little lighter in the bowl.
Room Temperature Ingredients Matter: I know it’s tempting to use cold buttermilk and eggs straight from the fridge, but room temperature ingredients mix together more evenly. Cold ingredients can make the batter lumpy and affect how the cupcakes rise. Take everything out of the fridge about 30 minutes before you start baking. Set a timer if you’re like me and tend to forget these things.
Don’t Overmix the Batter: This is probably the most common mistake I see. Once you add the dry ingredients to the wet, stir gently until the flour just disappears. A few small lumps are totally fine. Overmixing develops the gluten in the flour, which makes the cupcakes tough and dense instead of light and velvety. I ruined my third batch this way—they came out like little hockey pucks.
Check for Doneness Early: Every oven runs differently. My old oven would bake these in exactly 18 minutes, but my new one takes 20. Start checking at 16 minutes by inserting a toothpick into the center of a cupcake. If it comes out clean or with just a few moist crumbs, they’re done. If there’s wet batter on the toothpick, give them another minute or two.
Cool Completely Before Frosting: This one is non-negotiable. If you frost warm cupcakes, the cream cheese frosting will melt and slide right off. I’ve made this mistake more times than I’d like to admit. Let them cool in the pan for 5 minutes, then transfer to a wire rack and let them cool completely. Patience pays off here.
Frosting Consistency: Cream cheese frosting can be tricky because it’s softer than buttercream. If your kitchen is warm, the frosting might be too soft to pipe. Pop it in the fridge for 15 to 20 minutes to firm up. If it’s too stiff, add a tablespoon of milk or cream and beat again. The perfect consistency is smooth, spreadable, and holds its shape when piped.
Variations & Adaptations
One of the best things about this recipe is how easy it is to customize. Whether you’re dealing with dietary restrictions or just want to try something different, here are some variations I’ve tested and loved.
Gluten-Free Version: Swap the all-purpose flour for a 1:1 gluten-free baking flour blend. I’ve used King Arthur’s Measure for Measure blend with great results. The texture is slightly more delicate, so handle the batter gently and don’t overmix. Everything else stays the same—the buttermilk, the black cocoa, the whole shebang.
Vegan Black Velvet Cupcakes: Replace the egg with a flax egg (1 tablespoon ground flaxseed mixed with 3 tablespoons water, let sit for 5 minutes). Use plant-based buttermilk (add 1 tablespoon lemon juice to 1 cup oat or almond milk) and vegan butter for the frosting. The color might be slightly less intense, but they’re still delicious and perfectly spooky.
Chocolate Cream Cheese Frosting: Add ¼ cup of melted and cooled dark chocolate to the cream cheese frosting for an extra indulgent twist. It gives the frosting a richer flavor and a slightly darker color that looks amazing against the black cupcakes. I did this for a Halloween party once and people went crazy for it.
Spider Web Design: Instead of a simple swirl, pipe a spiral of cream cheese frosting on each cupcake, then use a toothpick to drag lines from the center outward to create a web pattern. Top with a candy spider for the full effect. It’s easier than it sounds and looks incredibly impressive.
Mini Cupcakes: Use a mini muffin tin and bake for 10 to 12 minutes instead of 18 to 20. You’ll get about 36 mini cupcakes—perfect for parties where people want to try a little bit of everything. Adjust the frosting amount accordingly; you won’t need as much for each tiny cake.
Serving & Storage Suggestions
These spooky black velvet Halloween cupcakes are at their absolute best when served at room temperature. The cake is soft and tender, and the cream cheese frosting has that perfect creamy texture that just melts on your tongue. Here’s how to make sure they’re perfect when you’re ready to serve them:
Serving Temperature: Take the cupcakes out of the fridge about 30 minutes before serving. This lets the cake come to room temperature and softens the frosting just enough. Cold cupcakes can taste a little dense, and the frosting can be too firm. Room temperature is where the magic happens.
Presentation Ideas: Arrange the cupcakes on a black cake stand or a dark wooden board for that gothic Halloween aesthetic. Sprinkle some edible glitter or silver luster dust over the tops for a subtle sparkle. I like to add a few candy eyeballs or mini pumpkins around the base of the stand for extra Halloween flair.
Storage Instructions: Store unfrosted cupcakes in an airtight container at room temperature for up to 3 days. If you’ve already frosted them, keep them in the refrigerator in an airtight container for up to 5 days. The cream cheese frosting needs to stay chilled if you’re not serving them right away.
Freezing Tips: You can freeze the unfrosted cupcakes for up to 3 months. Wrap each one individually in plastic wrap, then place them in a freezer-safe bag. When you’re ready to use them, thaw at room temperature for about an hour, then frost as usual. I’ve done this for Halloween parties and no one could tell they were frozen.
Reheating: If you prefer your cupcakes slightly warm, pop an unfrosted cupcake in the microwave for about 10 seconds. The cake becomes extra soft and almost pudding-like. Don’t microwave frosted cupcakes, though—the frosting will melt into a mess.
Flavor Development: Here’s something interesting—the flavors actually get better after a day. The black cocoa flavor deepens and the buttermilk tang becomes more pronounced. So if you can, make these a day ahead. Your taste buds will thank you.
Nutritional Information & Benefits
Let’s be real—these are cupcakes, not health food. But that doesn’t mean we can’t talk about what’s in them. Here’s a rough nutritional breakdown for one cupcake with cream cheese frosting:
| Nutrient | Amount per Cupcake |
|---|---|
| Calories | 380-420 |
| Total Fat | 22g |
| Saturated Fat | 10g |
| Carbohydrates | 45g |
| Sugar | 32g |
| Protein | 4g |
| Calcium | 4% DV |
| Iron | 6% DV |
On the plus side, black cocoa powder is rich in antioxidants—more so than regular cocoa because it’s less processed. The cream cheese adds a bit of calcium and protein, and the buttermilk provides probiotics that are good for gut health. But honestly, these are a treat. They’re for Halloween parties and cozy October nights when you want something that feels special.
Dietary Considerations: This recipe contains gluten, dairy, and eggs. For a gluten-free version, use a 1:1 gluten-free flour blend. For a dairy-free version, use plant-based buttermilk and vegan cream cheese. For an egg-free version, use a flax egg as mentioned in the variations section. These substitutions work well, though the texture will be slightly different.
I personally believe that food is about joy and connection. These cupcakes bring people together, make kids smile, and turn an ordinary October day into something memorable. That’s worth every calorie.
Conclusion
These spooky black velvet Halloween cupcakes are more than just a dessert—they’re a little piece of Halloween magic you can make in your own kitchen. The deep black color, the velvety texture, the tangy cream cheese frosting—every bite brings back that childhood excitement of Halloween night. And honestly, that’s why I keep making them year after year.
I hope you give this recipe a try and make it your own. Add your favorite sprinkles, experiment with different frosting designs, or double the batch for a party. The beauty of baking is that every batch tells a story, and I’d love to hear yours. Did you add a special decoration? Did your kids help you pipe the frosting? Did you bring them to a Halloween potluck and watch them disappear?
Drop a comment below and let me know how your black velvet Halloween cupcakes turned out. Share a photo if you can—I love seeing your creations. And if you tweaked the recipe to make it your own, tell me about that too. Happy Halloween, and happy baking! May your cupcakes be dark, your frosting be creamy, and your Halloween be full of sweet moments.
Frequently Asked Questions
Can I use regular cocoa powder instead of black cocoa?
You can, but the color won’t be as dark. Regular cocoa will give you a dark brown cupcake, not the dramatic black color that makes these cupcakes so special. If you can’t find black cocoa, you can try adding extra black food coloring to regular cocoa, but the flavor won’t be the same. Black cocoa has that distinctive Oreo-like taste that really sets these cupcakes apart.
How do I get the cupcakes to be really black without using too much food coloring?
The key is starting with black cocoa powder as your base. It’s naturally much darker than regular cocoa, so you need less food coloring to achieve that deep black color. Also, use gel food coloring instead of liquid—it’s more concentrated and won’t thin out your batter. I usually use about 1 to 2 teaspoons of Americolor Super Black gel for a perfectly dark batch.
Can I make these cupcakes ahead of time?
Absolutely! You can bake the cupcakes up to 3 days ahead and store them unfrosted in an airtight container at room temperature. You can also freeze the unfrosted cupcakes for up to 3 months—just wrap them individually in plastic wrap and store in a freezer bag. Frost them the day you plan to serve them for the best texture and appearance.
Why did my cupcakes turn out gray instead of black?
This usually happens when there isn’t enough black cocoa powder or food coloring in the batter. The gray color can also appear if you overmix the batter, which incorporates too much air and lightens the color. Make sure you’re using black cocoa powder (not regular) and enough gel food coloring. The batter should look like black paint before you bake it. Also, check that your baking soda is fresh—old baking soda won’t react properly and can affect both the color and texture.
Can I make these into a cake instead of cupcakes?
Yes! Pour the batter into two greased and floured 8-inch round cake pans and bake at 350°F (175°C) for 25 to 30 minutes, or until a toothpick comes out clean. You’ll need to double the cream cheese frosting recipe to have enough for the layers and outside. The cake will have that same beautiful black color and velvety texture, perfect for a Halloween birthday or spooky celebration.
Pin This Recipe!
Easy Black Velvet Halloween Cupcakes Recipe
These spooky black velvet Halloween cupcakes look like they came straight from a gothic bakery window, but they’re surprisingly simple to make. The secret is a careful balance of cocoa powder, vinegar, and buttermilk that gives you that signature velvet texture while keeping the color deep and true.
- Prep Time: 15 minutes
- Cook Time: 20 minutes
- Total Time: 35 minutes
- Yield: 12 servings 1x
- Category: Dessert
- Cuisine: American
Ingredients
- 1 ½ cups all-purpose flour (spooned and leveled)
- ½ cup black cocoa powder
- 1 teaspoon baking soda
- ½ teaspoon salt
- 1 cup granulated sugar
- ½ cup vegetable oil (or any neutral oil like canola or grapeseed)
- 1 large egg, room temperature
- 1 teaspoon vanilla extract
- 1 cup buttermilk, room temperature
- 1 tablespoon white vinegar
- 1 to 2 teaspoons black gel food coloring (recommend Americolor Super Black)
- 8 ounces cream cheese, softened
- ½ cup unsalted butter, softened
- 3 to 4 cups powdered sugar, sifted
- 1 teaspoon vanilla extract
- Pinch of salt
- Orange and purple sprinkles (or any Halloween-themed decorations)
- Optional: candy eyeballs, edible glitter, or mini pumpkins
Instructions
- Preheat your oven to 350°F (175°C). Line your muffin tin with paper liners. Lightly spray the inside of the liners with non-stick spray.
- In a medium bowl, whisk together the flour, black cocoa powder, baking soda, and salt until no lumps remain.
- In a large bowl, whisk together the sugar and vegetable oil until it looks like wet sand. Add the egg and vanilla extract, whisking until smooth and well combined.
- Pour in the buttermilk and vinegar, and whisk until the mixture is uniform.
- Add the black gel food coloring. Start with 1 teaspoon and mix in. Add another teaspoon and stir until the batter is a deep, dark black.
- Gradually add the dry ingredients to the wet ingredients, stirring gently with a rubber spatula. Mix just until the flour disappears. The batter should be smooth, dark, and slightly thick but still pourable.
- Divide the batter evenly among the 12 cupcake liners, filling each about ⅔ to ¾ full.
- Bake for 18 to 20 minutes, or until a toothpick inserted into the center comes out clean. Start checking at 16 minutes.
- Let the cupcakes cool in the pan for 5 minutes, then transfer to a cooling rack to cool completely.
- While the cupcakes cool, make the cream cheese frosting. In a large bowl, beat the softened cream cheese and butter together until smooth and creamy, about 2 minutes. Scrape down the sides.
- Add the vanilla extract and salt, then gradually beat in the powdered sugar. Start with 3 cups and add more if needed. Beat until light and fluffy, about 2 to 3 minutes.
- Once the cupcakes are completely cool, frost them using a piping bag with a star tip. Start from the outside and work your way in, creating a swirl. Top with Halloween sprinkles or candy decorations immediately.
Notes
For the deepest black color, use black cocoa powder and gel food coloring. Room temperature ingredients mix more evenly. Do not overmix the batter. Cool cupcakes completely before frosting. If frosting is too soft, refrigerate for 15 minutes before piping. Unfrosted cupcakes can be stored at room temperature for up to 3 days; frosted cupcakes should be refrigerated for up to 5 days. Unfrosted cupcakes can be frozen for up to 3 months.
Nutrition
- Serving Size: 1 cupcake
- Calories: 400
- Sugar: 32
- Sodium: 280
- Fat: 22
- Saturated Fat: 10
- Carbohydrates: 45
- Fiber: 2
- Protein: 4
Keywords: black velvet cupcakes, Halloween cupcakes, black cocoa cupcakes, cream cheese frosting, spooky cupcakes, Halloween dessert


