Love this? Save it for later!
Share the inspiration with your friends
I was standing in line at a tiny hardware store in Santa Fe, holding a bag of lightbulbs I didn’t really need, when the woman in front of me turned around and started talking about chiles. Not just any chiles—Hatch green chiles. She was probably seventy, with silver braids and a denim apron, and she was telling the cashier about the bushel she’d just roasted in her backyard. The smell, she said, still clung to her hair. I admitted I’d never cooked with fresh Hatch chiles, and she looked at me like I’d just confessed to never tasting a sunset. She wrote her recipe on the back of a receipt—her hand shaky but her instructions clear. “You make these enchiladas,” she said, “and you’ll never look at a can of sauce the same way.” I stuffed the receipt into my pocket, bought my lightbulbs, and went home to figure out what I’d just gotten myself into.
That receipt sat on my counter for three days before I got up the nerve to try it. Honestly, I was intimidated. Hatch chiles have a reputation, you know? They’re smoky, a little spicy, and deeply, almost stubbornly flavorful. But the recipe she’d scribbled down was surprisingly simple—no complicated roux, no long simmering. It was all about letting the chiles do the work. The first time I made these Creamy Hatch Green Chili Chicken Enchiladas, I burned my fingers peeling the roasted chiles, forgot to soften the cream cheese, and still ended up with a pan of food that made me close my eyes after the first bite. That’s the kind of recipe this is. It doesn’t need perfection. It just needs a little trust.
Maybe you’ve been there—standing in a grocery aisle, staring at a can of green enchilada sauce, wondering if homemade is really worth the extra effort. Let me tell you, it is. These enchiladas are creamy without being heavy, smoky without being overpowering, and they come together faster than you’d expect from something that tastes this layered. I’ve made them for weeknight dinners, for potlucks, and for that one friend who claims they don’t like green chiles. They liked these. I keep making them because they remind me of that woman in the hardware store, and because honestly, they’re the best enchiladas I’ve ever eaten.
Why You’ll Love This Recipe
These Creamy Hatch Green Chili Chicken Enchiladas aren’t just another casserole. They’re the result of trial and error, a few burned fingertips, and one very convincing stranger. I’ve tested this recipe at least a dozen times, tweaking the cream-to-chile ratio, adjusting the salt, and figuring out exactly how long to roast the peppers. What I ended up with is a dish that’s both weeknight-friendly and impressive enough for company.
- Quick & Easy: From start to table in about 45 minutes. The active prep time is even shorter—mostly just shredding chicken and mixing the sauce.
- Simple Ingredients: No fancy grocery store runs. You’ll find almost everything in your pantry or fridge, especially if you keep cream cheese and canned chiles on hand.
- Perfect for Potlucks: This dish travels beautifully. Make it in a disposable pan, bring it to a friend’s house, and watch it disappear.
- Crowd-Pleaser: I’ve served these to kids, spice-wimps, and serious chile heads. Everyone finds something to love—the creamy sauce, the tender chicken, or that subtle smoky kick.
- Unbelievably Delicious: The texture is what gets me every time. The sauce is velvety but not gloppy, with little flecks of green chile in every bite. It’s comfort food, but it’s also something more.
What makes this recipe different from all the others? It’s the cream cheese. Most green chile enchiladas rely on a roux or a can of condensed soup. This one uses cream cheese for richness without the heaviness. It melts into the sauce, creating a silky texture that clings to the tortillas without making them soggy. Plus, the Hatch chiles—whether you use fresh roasted or canned—bring a brightness that cuts through the cream. It’s balanced, it’s satisfying, and it’s honestly the best version I’ve ever made.
This is the kind of recipe that makes you close your eyes after the first bite. It’s comfort food reimagined—faster, creamier, and with the same soul-soothing satisfaction. Perfect for impressing guests without stress, or turning a simple Tuesday dinner into something memorable.
What Ingredients You Will Need
This recipe uses simple, wholesome ingredients to deliver bold flavor and satisfying texture without the fuss. Most of these are pantry staples, but the Hatch chiles are the star—they bring a smoky, slightly fruity heat that you just can’t replicate with anything else.
For the Filling
- 3 cups cooked chicken, shredded (rotisserie chicken works great here)
- 8 ounces cream cheese, softened (I prefer Philadelphia for its consistent texture)
- 1 cup Hatch green chiles, roasted and chopped (fresh or canned—both work)
- 1/2 cup sour cream (full-fat gives the best texture)
- 1 teaspoon garlic powder
- 1/2 teaspoon cumin
- 1/2 teaspoon salt
- 1/4 teaspoon black pepper
For the Sauce
- 2 tablespoons butter
- 2 tablespoons all-purpose flour
- 2 cups chicken broth (low-sodium preferred)
- 1 cup Hatch green chiles, chopped (separate from the filling chiles)
- 1/2 cup heavy cream
- 1/2 teaspoon salt
- 1/4 teaspoon white pepper (optional, but adds a nice warmth)
For Assembly
- 10-12 corn or flour tortillas (I use flour for a softer texture, but corn works for a more traditional feel)
- 2 cups shredded Monterey Jack cheese (or a Mexican blend)
- 1/2 cup shredded cheddar cheese (for that golden top)
- Fresh cilantro, chopped (for garnish)
- 1/2 cup diced white onion (optional, for extra crunch)
Ingredient Notes: If you can’t find fresh Hatch chiles, canned ones are a perfectly good substitute. Look for brands like Bueno or 505 Southwestern. For the chicken, I usually grab a rotisserie chicken from the store—it saves time and adds a little extra flavor from the seasoning. If you’re feeling ambitious, you can poach your own chicken breasts with a bay leaf and some garlic. Both work, but the rotisserie shortcut is my go-to on busy nights.
Substitution Guidance: Need a dairy-free version? Use vegan cream cheese and a cashew-based cream for the sauce. For a gluten-free option, swap the all-purpose flour with a 1:1 gluten-free flour blend or cornstarch slurry. And if you’re not a fan of heat, use mild Hatch chiles or mix them with diced green bell peppers to tone things down.
Equipment Needed
You don’t need a professional kitchen to pull these off. Here’s what I use every time:
- 9×13-inch baking dish: The standard size for this recipe. Glass or ceramic works best—metal can sometimes react with the acidic chiles.
- Large skillet: For making the sauce. A 10-inch non-stick or stainless steel pan works perfectly.
- Mixing bowls: One large for the filling, one medium for the sauce.
- Whisk: Essential for a lump-free sauce. I’ve used a fork in a pinch, but a whisk is better.
- Tongs: For handling the tortillas and flipping them if you’re lightly frying them first.
- Chef’s knife and cutting board: For chopping chiles and onions.
- Box grater: Pre-shredded cheese is fine, but freshly grated melts so much better. I learned this the hard way when my sauce turned grainy.
If you don’t have a 9×13 dish, you can use two smaller dishes or even a cast-iron skillet. Just adjust the baking time slightly—smaller dishes mean thicker layers, so add 5-10 minutes. And honestly, I’ve made these in a disposable aluminum pan for a camping trip, and they turned out great. Don’t overthink the equipment.
Preparation Method
Let’s get cooking. This method is broken down into clear steps, with a few personal tips I’ve picked up along the way. Trust me, these little tricks make a difference.
- Preheat your oven to 375°F (190°C). While it’s heating, lightly grease your 9×13 baking dish with butter or non-stick spray. This prevents sticking and makes cleanup easier.
- Make the filling. In a large bowl, combine the shredded chicken, softened cream cheese, 1 cup of chopped Hatch chiles, sour cream, garlic powder, cumin, salt, and pepper. Mix until everything is well combined. The cream cheese should be soft enough to blend in smoothly—if it’s too cold, you’ll end up with little white lumps. Let it sit on the counter for 15 minutes before mixing if you forgot to soften it. I’ve made that mistake before, and it’s fixable, but it takes extra elbow grease.
- Prepare the sauce. In a large skillet over medium heat, melt the butter. Whisk in the flour and cook for 1-2 minutes, stirring constantly. This is your roux, and it should smell slightly nutty. Slowly pour in the chicken broth while whisking to prevent lumps. Add the remaining 1 cup of chopped Hatch chiles, heavy cream, salt, and white pepper. Bring the sauce to a gentle simmer, then reduce the heat to low. Let it cook for 5 minutes, stirring occasionally, until it thickens enough to coat the back of a spoon. Taste it and adjust the salt if needed.
- Soften the tortillas. This step is optional but highly recommended. Warm the tortillas in the microwave for 30 seconds, or lightly fry them in a dry skillet for 10 seconds per side. Softening them prevents cracking when you roll them. I’ve skipped this step before, and the tortillas split right down the middle—frustrating and messy. Don’t be like me. Soften them.
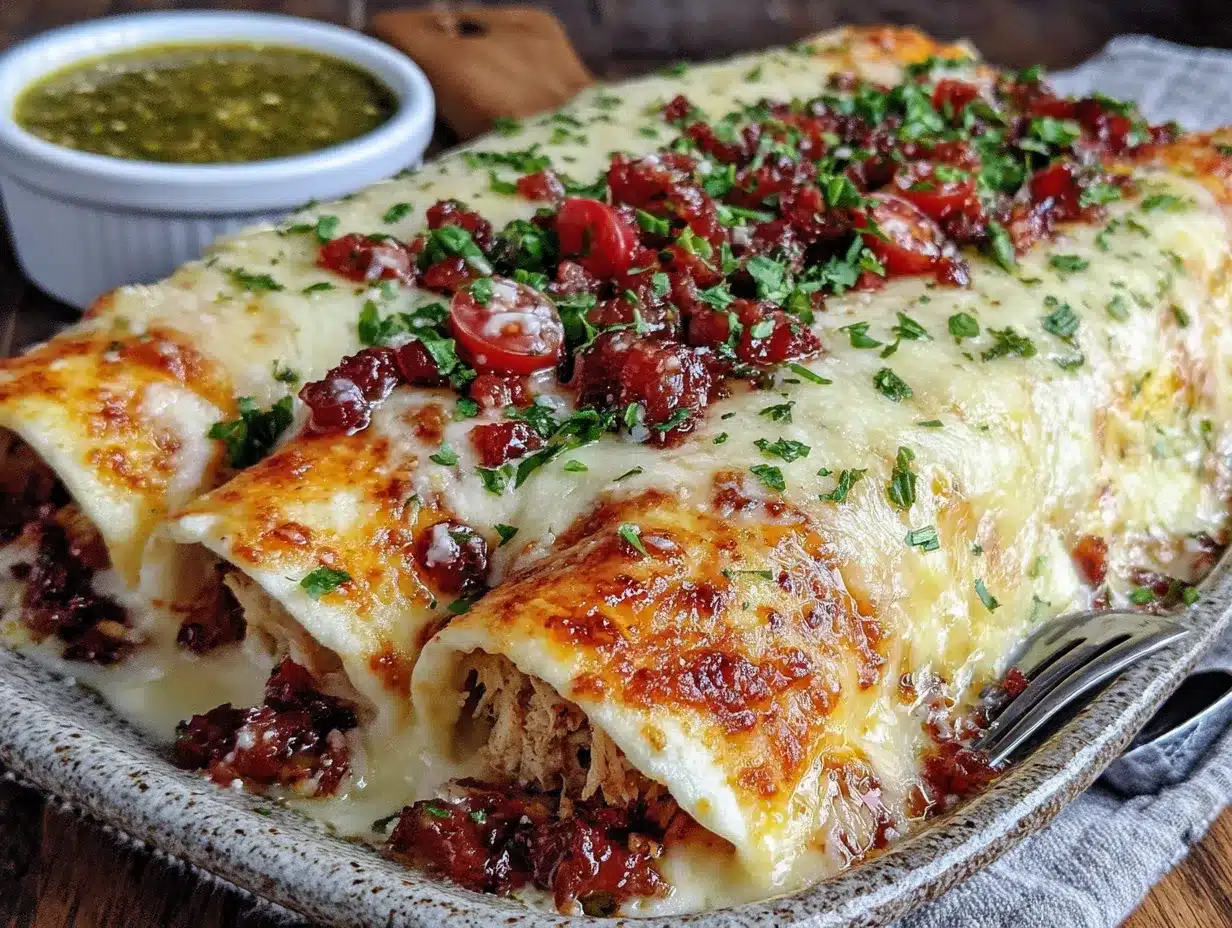
- Assemble the enchiladas. Pour about 1/2 cup of the sauce into the bottom of your prepared baking dish, spreading it evenly. Take a tortilla, place about 1/4 cup of the chicken filling in a line down the center, and roll it up tightly. Place it seam-side down in the dish. Repeat with the remaining tortillas and filling, arranging them snugly in a single layer. If you have extra filling, just spoon it over the top—no waste here.
- Top with sauce and cheese. Pour the remaining sauce evenly over the rolled enchiladas, making sure to cover the edges. Sprinkle the Monterey Jack cheese and cheddar cheese on top. Don’t skimp—the cheese is what gives you that beautiful, bubbly golden crust.
- Bake. Place the dish in the preheated oven and bake for 20-25 minutes, until the cheese is melted and bubbly and the edges are slightly browned. If you want a darker top, switch the oven to broil for the last 2 minutes. Watch it carefully—broiling can go from golden to burnt in seconds.
- Rest and serve. Let the enchiladas rest for 5 minutes before serving. This allows the sauce to set slightly, so you get clean slices instead of a saucy mess. Garnish with fresh cilantro and diced white onion if you like.
Sensory cues: When you’re making the roux, it should smell like toasted butter and flour—if it smells raw, cook it a little longer. The sauce is ready when it coats the back of a spoon and leaves a clear path when you run your finger through it. The finished enchiladas should be bubbly around the edges, with a golden, slightly crispy cheese top.
Cooking Tips & Techniques
I’ve made this recipe more times than I can count, and I’ve learned a few things the hard way. Here’s what I wish someone had told me:
- Roast your own chiles if you have the time. There’s nothing like the flavor of fresh-roasted Hatch chiles. Place them on a baking sheet under the broiler, turning occasionally, until the skin is blackened and blistered. Transfer them to a bowl, cover with plastic wrap, and let them steam for 10 minutes. The skin will slip right off. It’s a little messy, but the smoky flavor is worth it.
- Don’t overfill the tortillas. I know it’s tempting to stuff them to the brim, but too much filling makes them hard to roll and they’ll burst open during baking. Stick to about 1/4 cup per tortilla. You’ll get a better ratio of tortilla to filling in every bite.
- Use room-temperature cream cheese. Cold cream cheese doesn’t blend evenly into the filling. You’ll end up with little white chunks that don’t melt properly. Let it sit out for 20-30 minutes before mixing, or microwave it in 10-second bursts until it’s soft but not hot.
- Make the sauce ahead of time. The sauce can be made up to two days in advance and stored in the fridge. This actually helps the flavors meld together. Just reheat it gently on the stove before assembling the enchiladas.
- Watch the salt. Canned Hatch chiles can be salty, and so is the cheese. Taste your filling and sauce before adding extra salt. You can always add more, but you can’t take it out.
- My biggest failure? The first time I made these, I used pre-shredded cheese from a bag. The sauce turned out grainy and the top didn’t get that beautiful golden crust. Pre-shredded cheese is coated with anti-caking agents that don’t melt smoothly. Grate your own cheese—it takes two extra minutes and makes a world of difference.
Variations & Adaptations
One of the best things about this recipe is how adaptable it is. Here are a few ways I’ve changed it up depending on my mood, the season, or who I’m cooking for:
- Vegetarian Version: Swap the chicken for 2 cups of black beans and 1 cup of corn. The creamy sauce and chiles pair beautifully with the earthy beans. I’ve also used roasted sweet potatoes for a heartier option.
- Spicy Upgrade: Add 1-2 minced jalapeños to the filling, or use hot Hatch chiles instead of mild. For extra heat, drizzle some hot sauce over the top before serving. My friend Dave loves these with a habanero hot sauce, but I can barely handle a few drops.
- Low-Carb Option: Skip the tortillas entirely and turn this into a casserole. Layer the filling and sauce in the baking dish, top with cheese, and bake. Serve it over cauliflower rice or a bed of greens. It’s less pretty but just as tasty.
- Breakfast Enchiladas: Use scrambled eggs instead of chicken, and add some crumbled chorizo. Top with a fried egg and serve with salsa verde. I made this for a brunch once, and it was the first thing to disappear.
- Different Cheese: Not a fan of Monterey Jack? Try pepper jack for extra heat, or use a sharp white cheddar for a tangier flavor. Cotija cheese crumbled on top adds a salty, crumbly finish.
My personal favorite variation? I add a layer of sautéed spinach between the tortillas and the sauce. It adds color, a little extra nutrition, and the spinach wilts perfectly under the creamy sauce. It’s become my go-to winter version.
Serving & Storage Suggestions
These enchiladas are best served hot, fresh out of the oven, with the cheese still bubbling. Let them rest for 5 minutes before cutting—this helps the layers hold together. I like to serve them with a simple side salad dressed with lime juice and cilantro, or with Mexican rice and refried beans for a heartier meal. A dollop of sour cream on top adds a cool, tangy contrast to the smoky chiles.
For drinks, a cold Mexican lager like Modelo or a crisp margarita pairs beautifully. If you’re going non-alcoholic, a tart limeade or horchata works wonders.
Storage: Leftover enchiladas keep well in the refrigerator for up to 4 days. Store them in an airtight container, or cover the baking dish tightly with foil. The flavors actually deepen overnight, so leftovers might taste even better the next day.
Reheating: The best way to reheat these is in the oven. Place them in a 350°F (175°C) oven for 10-15 minutes, until warmed through. The microwave works in a pinch, but the tortillas can get a little soggy. If you’re in a hurry, microwave individual portions for 1-2 minutes, then finish them under the broiler for a minute to crisp the cheese.
Freezing: These enchiladas freeze beautifully. Assemble the dish completely, but don’t bake it. Cover it tightly with plastic wrap and then foil, and freeze for up to 3 months. When you’re ready to eat, thaw it in the refrigerator overnight, then bake as directed, adding 10-15 minutes to the cooking time. You can also freeze individual portions in freezer-safe containers for quick lunches.
One note: the sauce can separate slightly after freezing, so give it a good stir before serving. It’s not a flaw—it’s just the cream cheese re-adjusting. A quick whisk usually fixes it right up.
Nutritional Information & Benefits
Here’s an approximate nutritional breakdown for one serving (two enchiladas) based on the recipe as written:
| Nutrient | Amount per Serving |
|---|---|
| Calories | 520 |
| Total Fat | 34g |
| Saturated Fat | 18g |
| Cholesterol | 120mg |
| Sodium | 780mg |
| Total Carbohydrates | 28g |
| Dietary Fiber | 3g |
| Sugars | 5g |
| Protein | 32g |
These numbers are estimates and will vary based on the specific ingredients and brands you use. The good news? Hatch green chiles are packed with vitamin C and capsaicin, which can boost metabolism and reduce inflammation. Chicken provides lean protein, and the cream cheese and sour cream add calcium. If you’re watching your sodium, use low-sodium broth and go easy on the added salt. For a lighter version, swap the heavy cream for half-and-half and use reduced-fat cream cheese. It won’t be as rich, but it’ll still be delicious.
This recipe is not gluten-free as written, but it can easily be adapted with gluten-free flour and tortillas. It’s also not dairy-free, but the substitutions I mentioned earlier work well. Honestly, I don’t make these every week—they’re a treat, not an everyday meal. But when I do make them, I feel good about the protein and the veggies, and I don’t worry too much about the rest.
Conclusion
These Creamy Hatch Green Chili Chicken Enchiladas have become a staple in my kitchen, and I think they’ll become one in yours too. They’re the kind of recipe that feels special without being fussy—rich, smoky, and deeply satisfying. Whether you’re making them for a crowd or just for yourself on a quiet Tuesday, they deliver every single time.
I love this recipe because it reminds me of that woman in the hardware store, and because it’s proof that the best dishes often come from the most unexpected places. Don’t be afraid to tweak it—add more chiles, swap the cheese, or throw in some spinach. Make it your own. That’s the beauty of cooking, right?
I’d love to hear how yours turn out. Leave a comment below and let me know what variations you tried, or share a photo of your enchiladas. And if you have a recipe story of your own—someone who handed you a scribbled note or a secret tip—I’d love to hear that too. Happy cooking!
Frequently Asked Questions
Can I use canned Hatch green chiles instead of fresh?
Absolutely. Canned Hatch chiles are a great time-saver and still deliver that signature smoky flavor. Just drain them well before using to avoid adding too much liquid to the filling. If you can find them, look for the “fire-roasted” variety for extra depth.
What’s the best way to shred chicken for this recipe?
I use a stand mixer with the paddle attachment on low speed—it shreds a whole chicken breast in about 30 seconds without any mess. You can also use two forks to shred it by hand, or just buy a rotisserie chicken and pull the meat off. Any method works, as long as the chicken is cooked and tender.
Can I make these enchiladas ahead of time?
Yes! You can assemble the entire dish up to 24 hours in advance. Cover it tightly with foil and refrigerate. When you’re ready to bake, add about 10 minutes to the cooking time since you’re starting from cold. The sauce might thicken a bit in the fridge, so don’t worry if it looks different.
How do I prevent my tortillas from getting soggy?
The key is to not oversaturate them. Use just enough sauce to coat the bottom of the dish and to cover the rolled enchiladas. Also, lightly frying or warming the tortillas before rolling creates a barrier that helps them hold up to the sauce. And don’t skip the resting time after baking—it lets the sauce absorb without turning everything into mush.
Can I freeze these enchiladas after baking?
You can, but they’re better frozen before baking. If you’ve already baked them, let them cool completely, then wrap individual portions in plastic wrap and foil. Reheat in the oven at 350°F until warmed through. The texture won’t be quite as perfect as fresh, but they’re still delicious for a quick meal.
Pin This Recipe!
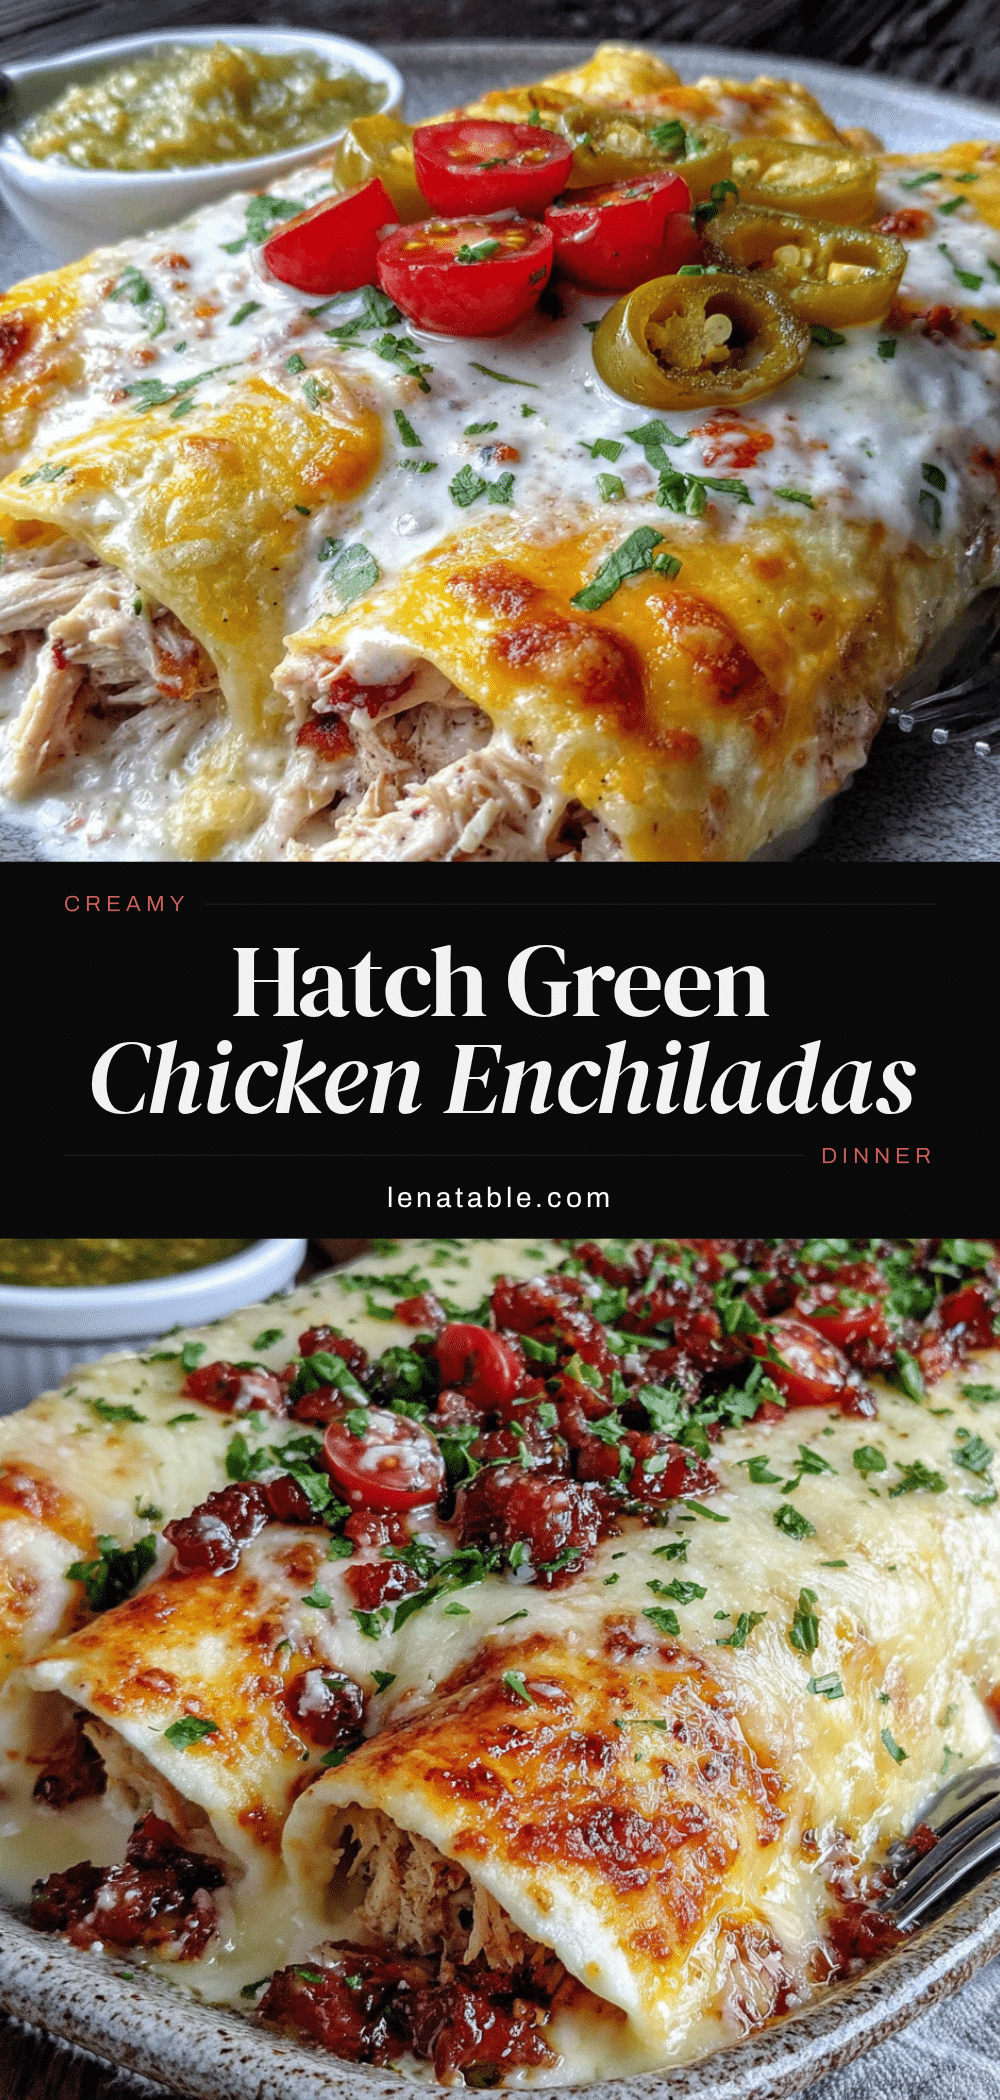
Easy Creamy Hatch Green Chili Chicken Enchiladas

These creamy, smoky enchiladas come together in about 45 minutes with simple ingredients. The cream cheese-based sauce is velvety and rich, while Hatch green chiles add a bright, slightly spicy kick that makes every bite unforgettable.
- Prep Time: 20 minutes
- Cook Time: 25 minutes
- Total Time: 45 minutes
- Yield: 4 servings 1x
- Category: Main Course
- Cuisine: Mexican
Ingredients
- 3 cups cooked chicken, shredded (rotisserie chicken works great)
- 8 ounces cream cheese, softened
- 1 cup Hatch green chiles, roasted and chopped (fresh or canned)
- 1/2 cup sour cream
- 1 teaspoon garlic powder
- 1/2 teaspoon cumin
- 1/2 teaspoon salt
- 1/4 teaspoon black pepper
- 2 tablespoons butter
- 2 tablespoons all-purpose flour
- 2 cups chicken broth (low-sodium preferred)
- 1 cup Hatch green chiles, chopped (separate from filling)
- 1/2 cup heavy cream
- 1/2 teaspoon salt
- 1/4 teaspoon white pepper (optional)
- 10–12 corn or flour tortillas
- 2 cups shredded Monterey Jack cheese
- 1/2 cup shredded cheddar cheese
- Fresh cilantro, chopped (for garnish)
- 1/2 cup diced white onion (optional)
Instructions
- Preheat your oven to 375°F (190°C). Lightly grease a 9×13-inch baking dish with butter or non-stick spray.
- Make the filling: In a large bowl, combine shredded chicken, softened cream cheese, 1 cup chopped Hatch chiles, sour cream, garlic powder, cumin, salt, and pepper. Mix until well combined.
- Prepare the sauce: In a large skillet over medium heat, melt the butter. Whisk in the flour and cook for 1-2 minutes, stirring constantly. Slowly pour in the chicken broth while whisking to prevent lumps. Add the remaining 1 cup chopped Hatch chiles, heavy cream, salt, and white pepper. Bring to a gentle simmer, then reduce heat to low. Cook for 5 minutes, stirring occasionally, until thickened.
- Soften the tortillas: Warm tortillas in the microwave for 30 seconds, or lightly fry in a dry skillet for 10 seconds per side.
- Assemble the enchiladas: Pour about 1/2 cup of sauce into the bottom of the prepared baking dish. Place about 1/4 cup of filling down the center of each tortilla, roll tightly, and place seam-side down in the dish.
- Top with remaining sauce and cheeses. Sprinkle Monterey Jack and cheddar cheese evenly over the top.
- Bake for 20-25 minutes, until cheese is melted and bubbly and edges are slightly browned. For a darker top, broil for the last 2 minutes.
- Let rest for 5 minutes before serving. Garnish with fresh cilantro and diced white onion if desired.
Notes
For best results, use room-temperature cream cheese and freshly grated cheese. The sauce can be made up to 2 days ahead. To freeze, assemble without baking, cover tightly, and freeze for up to 3 months. Thaw overnight in the refrigerator before baking, adding 10-15 minutes to the cooking time.
Nutrition
- Serving Size: 2 enchiladas
- Calories: 520
- Sugar: 5
- Sodium: 780
- Fat: 34
- Saturated Fat: 18
- Carbohydrates: 28
- Fiber: 3
- Protein: 32
Keywords: Hatch green chile, chicken enchiladas, creamy enchiladas, green chile enchiladas, easy enchiladas, New Mexican recipe