Love this? Save it for later!
Share the inspiration with your friends
The woman at the community garden plot next to mine watched me struggle with a wobbly piping bag for a good five minutes before she said anything. I was trying to get stiff peaks out of egg whites on a humid September afternoon, and honestly, it wasn’t going well. She just reached over, took the bowl from my hands, and wiped the rim clean with her finger. “Your bowl has a little grease,” she said quietly. “That’s all.” Then she showed me how she wipes everything down with vinegar first, a trick her grandmother used back in Poland for making these light-as-air cookies every All Saints’ Day. I’d never thought about meringue cookies before that moment, but watching her work—so calm, so sure—I knew I had to learn.
That conversation turned into a whole afternoon of baking together under the garden shed’s tin roof while a light rain fell. She didn’t speak much English, and my Polish was limited to “thank you” and “delicious,” but somehow we communicated perfectly through cracked eggs and careful whisking. I remember her laughing when I over-whipped the first batch and the mixture went grainy. She just pointed at the bowl, shook her head with a smile, and said something that I’m pretty sure translated to “start over, dear.” So we did. And the second batch? Pure magic. Ghost-shaped meringues that practically floated off the baking sheet.
These easy ghost meringue cookies with chocolate chip eyes have become my go-to Halloween treat ever since. Maybe you’ve been there—wanting something festive that doesn’t require a ton of effort or a pantry full of specialty ingredients. That’s exactly what this recipe delivers. They’re spooky, they’re adorable, and they literally melt in your mouth. I’ve tweaked her original method just a little to make it even more weeknight-friendly, but the soul of it—that patient, gentle approach to egg whites—stays the same. Every time I make them, I think of her wiping that bowl clean and saving my baking day.
Why You’ll Love This Recipe
Let me tell you why these ghost meringue cookies have earned a permanent spot in my Halloween rotation. First off, they’re ridiculously easy to make once you know the simple tricks. No complicated equipment, no hard-to-find ingredients, and the whole thing comes together in about 30 minutes of active time. The oven does the rest of the work while you go about your evening.
- Quick & Easy : From start to finish, you’re looking at about 30 minutes of hands-on work. The oven handles the rest, slowly drying them out to that perfect crisp texture. Perfect for a Tuesday night when the kids suddenly announce they need treats for the school party tomorrow.
- Simple Ingredients : You probably have everything already—egg whites, sugar, vanilla, cream of tartar, and chocolate chips. No special trips to the craft store or fancy baking aisle required.
- Perfect for Halloween Parties : These little ghosts are the life of any spooky gathering. Kids adore them, adults sneak them, and they make the cutest addition to any dessert table without being overly sweet or heavy.
- Crowd-Pleaser : I’ve brought these to potlucks, classroom parties, and even office Halloween celebrations. They always disappear first. People can’t resist the combination of crunchy meringue and tiny chocolate eyes staring up at them.
- Unbelievably Delicious : There’s something magical about meringue—that ethereal crunch that dissolves into sweetness on your tongue. The chocolate chips add just enough richness to balance the sugar. Honestly, it’s next-level comfort food disguised as a spooky snack.
What makes these different from other meringue recipes is the technique I picked up from my garden friend: the vinegar wipe-down. It’s such a small thing, but it guarantees stable, glossy peaks every single time. No more weeping meringues or flat cookies. Plus, the ghost shape is naturally forgiving—perfect for beginners who worry about piping. And let’s be real, even lopsided ghosts look charming. It’s comfort food reimagined—lighter, faster, but with the same soul-soothing satisfaction as a warm cookie fresh from the oven.
What Ingredients You Will Need
This recipe uses simple, everyday ingredients to create something truly special. The magic is in how they come together, not in fancy components. Most of these are probably already in your pantry right now.
- 4 large egg whites, room temperature (cold eggs separate easier, but room temperature whites whip up fluffier—plan ahead and let them sit out for 30 minutes)
- 1 cup (200g) granulated sugar (regular white sugar works best; superfine sugar dissolves even faster if you have it)
- 1/2 teaspoon cream of tartar (this stabilizes the egg whites and helps prevent over-whipping—don’t skip it)
- 1 teaspoon vanilla extract (pure vanilla adds warmth, but imitation works fine too)
- 1/4 cup (about 60g) mini chocolate chips (mini chips are perfect for ghost eyes—regular chips look too big and heavy. I like Enjoy Life brand for allergy-friendly options)
- 1 teaspoon white vinegar (for wiping down your bowl—trust me on this one)
A few notes on ingredient selection: Use the freshest eggs you can find for the best volume. Older eggs actually whip up better because the whites are thinner, but I’ve had great success with both. If you’re concerned about salmonella, look for pasteurized egg whites in a carton—they work perfectly and save you from having to separate eggs. Just make sure they’re at room temperature before you start.
For the sugar, granulated is your best bet. Powdered sugar contains cornstarch, which can affect the texture. And please don’t try to reduce the sugar too much—meringue is essentially sugar stabilized by egg whites. Cut it too far, and you’ll end up with flat, sticky cookies. I’ve tested it, and the full cup is really necessary for that perfect crunch.
The cream of tartar is worth buying if you don’t have it. It’s cheap, lasts forever, and makes a noticeable difference in stability. If you absolutely can’t find it, you can substitute with 1 teaspoon of lemon juice or white vinegar added to the egg whites before whipping. But honestly, cream of tartar gives the most reliable results.
As for chocolate chips, mini chips are non-negotiable here. Regular chocolate chips will sink into the meringue or look disproportionate on your little ghosts. I’ve tried both, and mini chips win every time. You can also use dairy-free chocolate chips if needed—just check the label.
Equipment Needed
You don’t need a professional bakery setup for these cookies. Here’s what you’ll need:
- Stand mixer or hand mixer (a stand mixer with the whisk attachment is ideal, but a hand mixer works great too. I’ve made these with both, and the key is just having something that can whip for several minutes without your arm falling off)
- Large glass or metal mixing bowl (plastic bowls can retain grease even after washing—use glass or metal for the most stable meringue)
- Piping bag with a large round tip (a #10 or #12 tip works well. No piping bag? No problem—use a sturdy zip-top bag with the corner snipped off)
- Baking sheets lined with parchment paper (parchment is non-negotiable—wax paper will stick, and silicone mats can sometimes cause spreading)
- Kitchen scale (optional but helpful for consistent results, especially if you’re halving or doubling the recipe)
- Clean kitchen towel (for wiping down bowls and utensils with vinegar)
If you don’t have a piping bag, the zip-top bag method is genuinely foolproof. Just fill the bag, squeeze out the air, twist the top, and snip off about 1/2 inch from one corner. It gives you great control and costs nothing. I actually prefer it for small batches because there’s less cleanup.
One maintenance tip: if you use a stand mixer, wipe the whisk attachment with vinegar too. Grease hides in those little crevices, and it only takes a tiny bit to sabotage your meringue. I learned this the hard way after three failed batches in a row.
Preparation Method
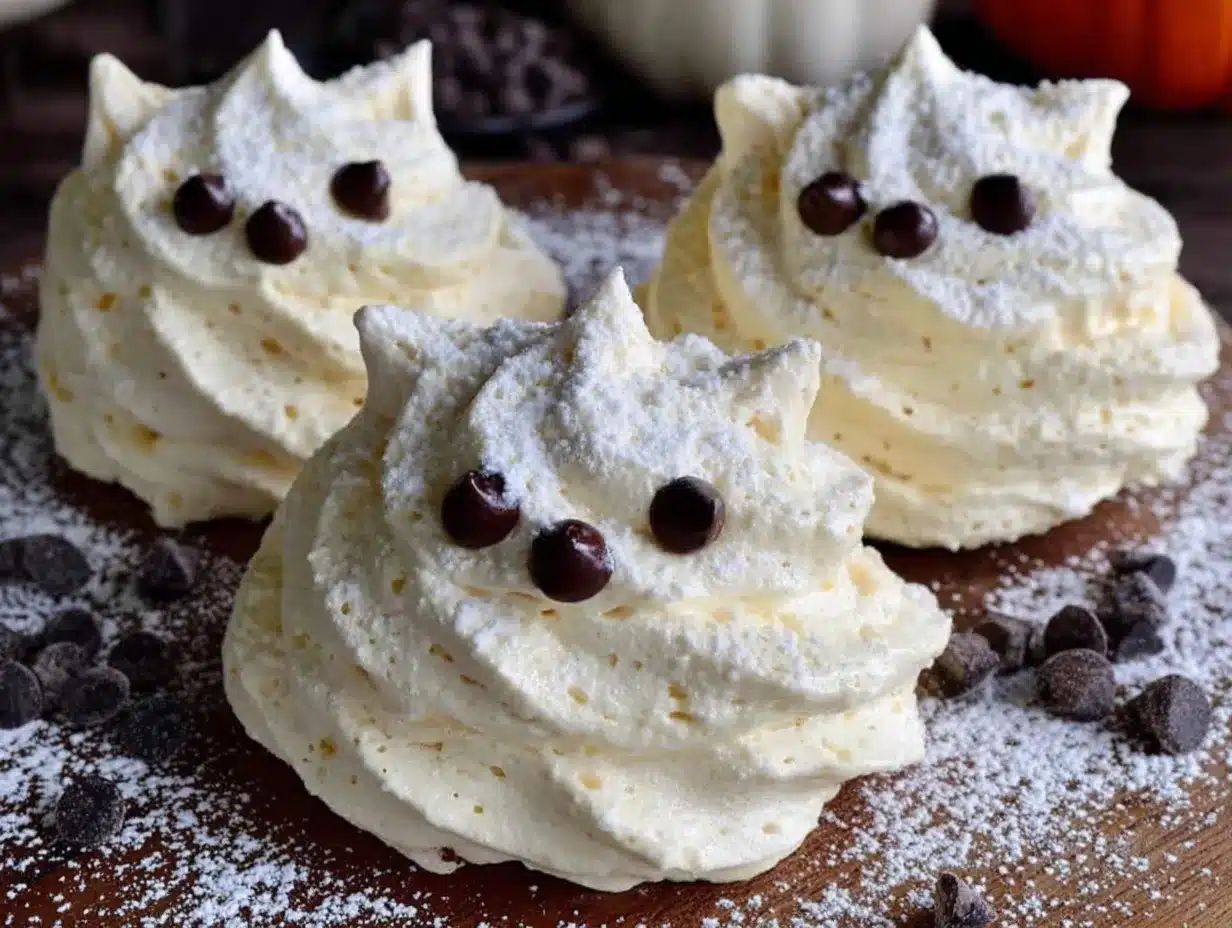
Let’s walk through this step by step. Trust the process, and you’ll have perfect ghost meringues in no time.
Step 1: Prep your workspace (5 minutes)
Preheat your oven to 200°F (95°C). Line two baking sheets with parchment paper. Now here’s the trick my garden friend taught me: dip a paper towel in white vinegar and wipe down your mixing bowl, whisk attachment, and any spatulas you’ll use. This removes any trace of grease that could prevent your egg whites from reaching stiff peaks. Let everything air dry for a minute while you separate your eggs.
Step 2: Separate the eggs (5 minutes)
Carefully separate your 4 eggs while they’re cold—cold yolks are firmer and less likely to break. Crack each egg on a flat surface (not the edge of the bowl) to avoid pushing shell fragments into the whites. Separate the white into a small bowl first, then transfer to your large mixing bowl. This way, if one yolk breaks, you haven’t contaminated the whole batch. I always keep a spare bowl nearby for exactly this reason.
Step 3: Start whipping (8-10 minutes)
Add the cream of tartar to your egg whites. Begin whipping on medium speed until the mixture becomes frothy and bubbly, about 1-2 minutes. The bubbles should be small and uniform. Now increase the speed to medium-high and start adding the sugar, one tablespoon at a time. I know it’s tempting to dump it all in at once, but slow and steady really does make a difference here. Each addition should be fully incorporated before you add the next. This whole process takes about 6-8 minutes.
Step 4: Check for stiff peaks (2 minutes)
Once all the sugar is added, add the vanilla extract and continue whipping on high speed. You’re looking for stiff, glossy peaks that hold their shape when you lift the whisk. The mixture should look like marshmallow fluff—smooth, shiny, and thick. To test, stop the mixer and lift the whisk straight up. The peak should stand straight without drooping. If it flops over, keep whipping for another minute and check again. Be careful not to over-whip, though—if the mixture looks grainy or curdled, you’ve gone too far. Unfortunately, there’s no fixing over-whipped meringue, so stop as soon as you see stiff peaks.
Step 5: Pipe the ghosts (10 minutes)
Transfer the meringue to your piping bag fitted with a large round tip. Hold the bag perpendicular to the baking sheet, about 1/2 inch above the parchment. Pipe a tall, fat teardrop shape—start with gentle pressure, then lift straight up as you release pressure to create a little peak on top. This forms the ghost’s head. Space them about 2 inches apart; they don’t spread much, but you want room to work. If you’re using a zip-top bag, twist the top tightly to control the flow. Don’t worry if they look uneven—ghosts are supposed to be a little wonky.
Step 6: Add the eyes (5 minutes)
While the meringue is still wet, gently press two mini chocolate chips into each ghost for eyes. Place them close together near the top of the ghost shape. Don’t push too hard or you’ll deflate the meringue. If you want them to look really spooky, angle the chips slightly so they catch the light. You can also add a third chip for a mouth if you’re feeling creative, but I prefer the simple two-eye look.
Step 7: Bake low and slow (2 hours)
Place the baking sheets in the preheated oven and bake for 2 hours. Yes, two hours. I know it sounds like a lot, but meringues need that gentle, prolonged heat to dry out completely. After 2 hours, turn off the oven but leave the cookies inside to cool completely—at least another hour, or overnight if you have time. This gradual cooling prevents cracking and ensures that perfect crunchy texture throughout.
Step 8: The moment of truth
Once completely cool, gently peel a ghost off the parchment. It should release easily and feel light as air. If it sticks or feels soft in the center, return it to the turned-off oven for another 30 minutes. Store them in an airtight container at room temperature—they’ll stay crisp for up to two weeks, though honestly, they never last that long in my house.
Cooking Tips & Techniques
I’ve made these ghost meringues more times than I can count, and I’ve learned a few things the hard way. Let me save you some trouble.
The grease issue is real. I cannot stress this enough. That vinegar wipe-down isn’t optional—it’s the difference between glossy peaks and soupy liquid. One time I forgot, and my meringue never got past the frothy stage. I stood there whipping for fifteen minutes before I realized my mistake. Start fresh with a clean bowl. Your future self will thank you.
Humidity is your enemy. Meringue and moisture don’t mix. If you’re baking on a rainy day, you might notice your cookies take longer to dry out or feel sticky after cooling. Try to make these on a dry day if possible. If you can’t wait, add an extra 30 minutes to the baking time and leave them in the turned-off oven overnight. I’ve done this many times with great results.
Don’t rush the sugar. Adding sugar too quickly is the most common mistake I see. Each grain needs time to dissolve into the egg white structure. If you dump it all at once, you’ll end up with gritty, weeping meringue. Set a timer and add one tablespoon every 30 seconds. It feels slow, but the texture payoff is worth it.
Size matters. For ghost shapes, aim for about 2 inches tall and 1.5 inches wide. Any bigger and they take forever to dry out. Any smaller and they’re too delicate to handle. I’ve made both extremes, and the medium size is the sweet spot for texture and cuteness.
Multitask smartly. While your meringues are baking, you can prep other Halloween treats or clean up your kitchen. The long bake time is actually freeing—set the timer and forget about them. Just don’t open the oven door during baking or cooling. That sudden temperature change can cause cracking.
Variations & Adaptations
One of the best things about this recipe is how easily it adapts. Here are some variations I’ve tried and loved.
Vegan Meringue Ghosts: Swap the egg whites for aquafaba (the liquid from a can of chickpeas). Use 1/2 cup aquafaba for every 4 egg whites. Whip it with cream of tartar just like regular egg whites—it takes a little longer to reach stiff peaks, but the result is remarkably similar. Use dairy-free chocolate chips to keep it fully vegan. I tested this for a friend with egg allergies, and honestly, I couldn’t tell the difference.
Flavor Twists: Add 1/2 teaspoon of peppermint extract for a cool, minty ghost. Or try almond extract for a subtle nutty flavor. I once made a batch with lavender extract and a drop of purple food coloring—they looked like tiny lavender ghosts and tasted like a French patisserie. Just be careful with extracts stronger than vanilla; a little goes a long way.
Colorful Ghosts: Divide the meringue into separate bowls and add gel food coloring for pastel ghosts. Orange and black for Halloween, pink for Valentine’s Day, or green for St. Patrick’s Day. Gel colors work better than liquid because they don’t add extra moisture. Swirl the color in gently for a marbled effect.
Mini Ghosts: Pipe tiny ghosts about 1 inch tall for bite-sized treats. Reduce baking time to about 1.5 hours. These are perfect for party favors or adding to hot chocolate. My kids love fishing them out of their cocoa and watching them dissolve.
Chocolate Drizzle: Once cooled, drizzle melted dark chocolate over the ghosts for an extra layer of flavor. It makes them look even more dramatic and adds a nice contrast to the sweet meringue. Just let the chocolate set completely before storing.
Serving & Storage Suggestions
These ghost meringue cookies are best served at room temperature, right after they’ve cooled completely. The texture is perfectly crisp and airy, with just the right amount of chew from the chocolate chips. Arrange them on a platter with some fake spiderwebs or dry ice for a spooky effect—they photograph beautifully for Halloween parties.
For a fun presentation, stick them upright in a bowl of popcorn or pretzel sticks to look like ghosts rising from a graveyard. Or thread them onto skewers for ghost pops. Kids go crazy for that. I’ve also tucked them into clear cellophane bags tied with orange ribbon for classroom treats—they stay fresh and look adorable.
Storage: Keep your ghost meringues in an airtight container at room temperature. Do not refrigerate—the moisture will make them sticky and soft. They’ll stay crisp for up to 2 weeks, though they rarely last that long. If you live in a humid climate, add a silica gel packet to the container to absorb excess moisture. I learned this trick from a baker in New Orleans, and it works wonders.
Freezing: You can freeze baked meringues for up to 3 months. Place them in a single layer in a freezer-safe container with parchment between layers. Thaw at room temperature for about 30 minutes before serving. The texture might be slightly less crisp after freezing, but they’re still delicious. I usually freeze a batch in early October so I have them ready for last-minute Halloween gatherings.
Flavors actually improve slightly after a day or two—the meringue firms up and the chocolate sets perfectly. So feel free to make these a day ahead. Your future self will appreciate not having to bake on the day of the party.
Nutritional Information & Benefits
Per serving (about 2 ghost cookies): Approximately 60 calories, 1g fat, 12g carbohydrates, 1g protein. These are a lighter alternative to traditional Halloween cookies, which often pack in butter and flour.
The main ingredient, egg whites, are pure protein with zero fat. They’re also a good source of selenium and riboflavin. The sugar content is higher than I’d like, but honestly, these are a treat—not an everyday snack. I remind myself that portion control is easier with meringues because they’re so light and satisfying. You really only need two or three to feel like you’ve indulged.
For those with dietary restrictions, this recipe is naturally gluten-free and nut-free (check your chocolate chip labels). The vegan version using aquafaba is also soy-free and dairy-free. Just be aware that traditional meringue uses raw egg whites that are cooked through the low-temperature baking process—the internal temperature reaches well above 160°F, making it safe for most people. If you’re immunocompromised or pregnant, consider using pasteurized egg whites or the aquafaba version.
Conclusion
These easy ghost meringue cookies with chocolate chip eyes have become more than just a Halloween recipe for me. They’re a reminder of that rainy afternoon in the garden, learning from someone who didn’t need words to teach. Every batch I make carries a little bit of her patience and precision, and I hope they bring you the same joy they’ve brought me.
I encourage you to make these your own. Play with the flavors, experiment with the shapes, and don’t stress about perfection. Some of my favorite ghosts have been the lopsided ones with crooked eyes—they have personality. That’s the beauty of handmade treats. They’re not supposed to be factory-perfect. They’re supposed to be made with love, and that always shows.
If you try this recipe, I’d love to hear how it goes. Drop a comment below and let me know if your ghosts turned out spooky or silly, or if you came up with a brilliant variation I haven’t tried. Share your photos on social media and tag me—I’m always looking for inspiration. And if you’re craving more Halloween baking ideas, check out my spiderweb cupcakes or these pumpkin spice bites for another festive treat. Happy haunting, and happy baking!
Frequently Asked Questions
Can I make these ghost meringues without a piping bag?
Absolutely! Use a sturdy zip-top bag with the corner snipped off, or simply drop spoonfuls of meringue onto the baking sheet and shape them into ghost forms with the back of the spoon. They won’t be as perfectly shaped, but they’ll still taste amazing.
Why did my meringue turn out sticky or chewy?
Sticky meringue usually means they weren’t baked long enough or the humidity was too high. Make sure you bake for the full 2 hours and let them cool completely in the turned-off oven. On humid days, add extra baking time and store with a silica gel packet.
Can I use liquid egg whites from a carton?
Yes, you can use pasteurized liquid egg whites from a carton. Just measure out 1/2 cup (which equals about 4 large egg whites) and make sure they’re at room temperature before whipping. They might take a little longer to reach stiff peaks, but the results are consistent.
How do I prevent my chocolate chips from sinking to the bottom?
Use mini chocolate chips instead of regular-sized ones—they’re lighter and stay suspended in the meringue. Also, gently press them into the surface immediately after piping, while the meringue is still wet. If you wait too long, a skin forms and the chips won’t stick.
Can I double this recipe?
Yes, this recipe doubles beautifully. Just make sure your mixer bowl is large enough to accommodate the increased volume. You may need to bake in batches or use multiple oven racks. If using two racks, rotate the baking sheets halfway through the baking time for even drying.
Pin This Recipe!
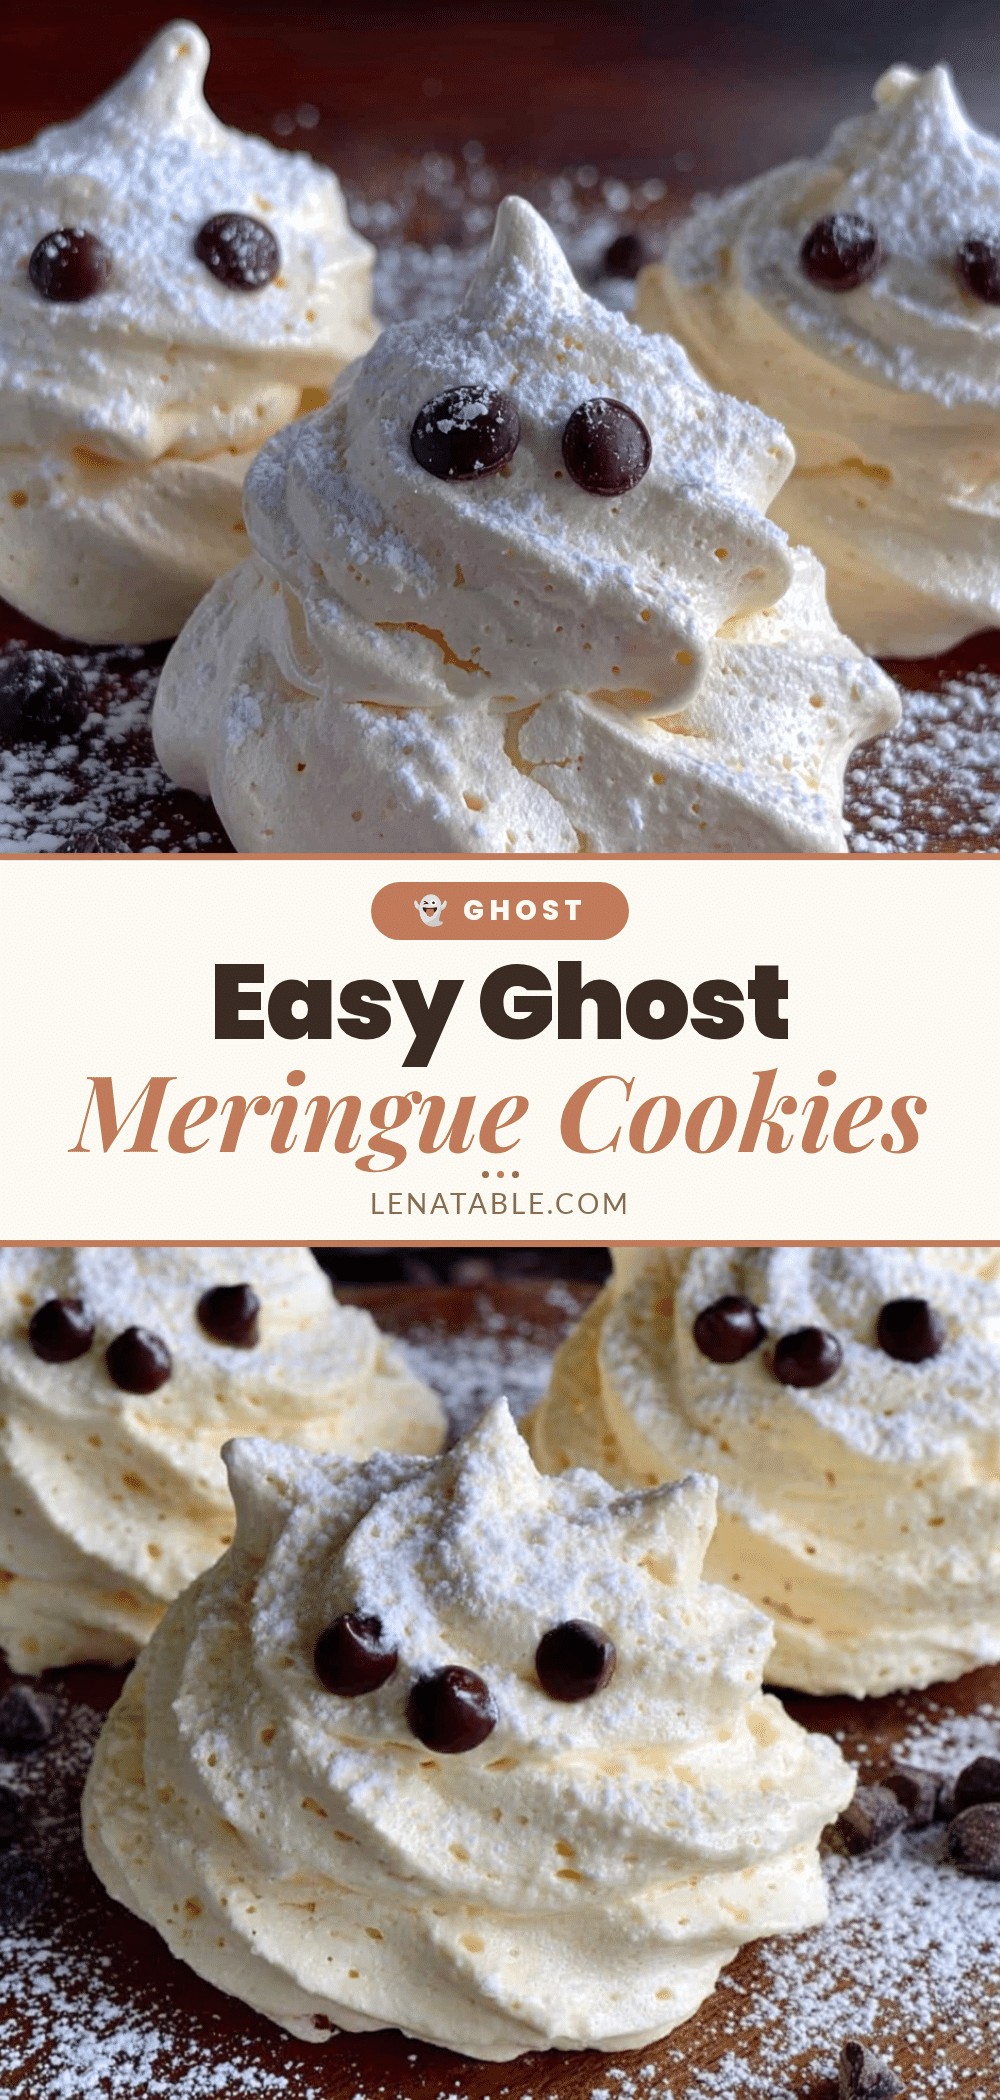
Easy Ghost Meringue Cookies with Chocolate Chip Eyes
These easy ghost meringue cookies with chocolate chip eyes are a spooky, adorable Halloween treat that literally melts in your mouth. Made with simple ingredients and a foolproof technique, they’re perfect for parties and guaranteed to be a crowd-pleaser.
- Prep Time: 30 minutes
- Cook Time: 2 hours
- Total Time: 2 hours 30 minutes (plus cooling time)
- Yield: 24 servings 1x
- Category: Dessert
- Cuisine: American
Ingredients
- 4 large egg whites, room temperature
- 1 cup (200g) granulated sugar
- 1/2 teaspoon cream of tartar
- 1 teaspoon vanilla extract
- 1/4 cup (about 60g) mini chocolate chips
- 1 teaspoon white vinegar (for wiping down bowl)
Instructions
- Preheat oven to 200°F (95°C). Line two baking sheets with parchment paper. Dip a paper towel in white vinegar and wipe down your mixing bowl, whisk attachment, and any spatulas to remove grease. Let air dry.
- Separate 4 cold eggs, placing each white in a small bowl first before transferring to the large mixing bowl to avoid yolk contamination.
- Add cream of tartar to egg whites. Whip on medium speed until frothy and bubbly, about 1-2 minutes. Increase speed to medium-high and add sugar one tablespoon at a time, fully incorporating each addition before adding the next (about 6-8 minutes total).
- Add vanilla extract and continue whipping on high speed until stiff, glossy peaks form. The mixture should look like marshmallow fluff and hold its shape when the whisk is lifted.
- Transfer meringue to a piping bag fitted with a large round tip (or a sturdy zip-top bag with corner snipped). Pipe tall, fat teardrop shapes onto parchment, spacing 2 inches apart. Lift straight up as you release pressure to create a peak on top.
- While meringue is still wet, gently press two mini chocolate chips into each ghost for eyes, placing them close together near the top. Do not push too hard to avoid deflating the meringue.
- Bake for 2 hours. After 2 hours, turn off the oven but leave cookies inside to cool completely, at least 1 hour or overnight.
- Once completely cool, gently peel ghosts off parchment. If they stick or feel soft, return to turned-off oven for another 30 minutes. Store in an airtight container at room temperature.
Notes
Wipe all equipment with vinegar to remove grease for stable meringue. Avoid making on humid days; if necessary, add extra baking time. Do not open oven door during baking or cooling. Use mini chocolate chips to prevent sinking. Store in airtight container at room temperature for up to 2 weeks; do not refrigerate.
Nutrition
- Serving Size: 2 cookies
- Calories: 60
- Sugar: 11
- Sodium: 20
- Fat: 1
- Saturated Fat: 0.5
- Carbohydrates: 12
- Protein: 1
Keywords: ghost meringue cookies, Halloween cookies, meringue cookies, ghost cookies, easy Halloween treats, chocolate chip meringue, spooky cookies


