Love this? Save it for later!
Share the inspiration with your friends
My neighbor Karen wasn’t trying to impress anyone. I’d stopped by to borrow a ladder—mine had mysteriously vanished into the garage abyss—and this sweet-salty-crunchy smell hit me before I even got through her screen door. She was standing at her counter, casually drizzling melted chocolate over a sheet pan covered in pretzels, and she had these little candy eyes scattered everywhere like she was making art or something. “Oh, this?” she said when I asked, not even looking up. “It’s just something I throw together for the kids’ class party.” She said it like it was nothing. Like she hadn’t just created the most addictive snack I’d ever inhaled while standing in her kitchen. I mean, honestly, I ate about six pieces before I even sat down. She didn’t even offer me a plate—just pointed at the pan and kept talking about her garden. That’s the kind of recipe this is. It’s the one you make when you want to show up to a party looking like you spent hours on something, when really, you just melted some chocolate and threw on some eyes. Maybe you’ve been there—you need something quick, something that looks creepy-cute, and something that disappears before you even get a photo. This is that recipe. I’ve been making it every Halloween since, and I still think about Karen’s nonchalant shoulder shrug every single time.
Why You’ll Love This Recipe
Let me tell you why this Halloween pretzel bark has become my secret weapon for every fall gathering. I’ve tested this about a dozen times—okay, maybe more—and I’ve learned exactly what works and what doesn’t. This isn’t just another chocolate-covered pretzel situation. It’s better.
- Incredibly Quick: You can have this ready in under 20 minutes of active time. The hardest part is waiting for the chocolate to set.
- Simple Ingredients: You probably already have pretzels and chocolate in your pantry. The candy eyes are the only special purchase, and they’re everywhere in October.
- Perfect for Halloween Parties: This bark looks like something from a spooky bakery window, but it’s almost embarrassingly easy to make.
- Crowd-Pleaser: I’ve watched adults sneak pieces when they thought no one was looking. Kids go absolutely wild for the candy eyes.
- Unbelievably Delicious: The salty crunch of pretzels against smooth chocolate and that little pop of sugar from the candy eyes—it’s next-level comfort food.
What makes this different from every other Halloween treat out there? It’s the texture. Most bark recipes use plain chocolate, but I’ve found that using a mix of dark and white chocolate creates this beautiful marbled effect that looks professional. Plus, the candy eyes aren’t just for show—they add a subtle sweetness that balances the salt perfectly. This is the kind of recipe that makes you look like a hero at a potluck with almost zero effort. Perfect for impressing guests without stress, or turning a simple snack into something memorable.
What Ingredients You Will Need
This recipe uses simple, everyday ingredients to deliver bold flavor and satisfying crunch without the fuss. Most of these are pantry staples, especially during Halloween season.
- For the Base
- 2 cups mini pretzel twists (about 200g) – I prefer the classic square-shaped mini twists; they lay flat better than the sticks
- 1 cup dark chocolate chips (175g) – I recommend Ghirardelli or Guittard for the smoothest melt
- 1 cup white chocolate chips (175g) – Look for real white chocolate, not candy melts, for the best flavor
- 1 tablespoon coconut oil (15ml) – divided, this helps the chocolate set with a beautiful shine
- For the Spooky Decorations
- 1/2 cup candy eyes (about 75g) – the edible kind you find at craft stores or online; get the mixed sizes for variety
- 2 tablespoons orange sprinkles (optional, for extra color)
- 1 tablespoon black sanding sugar (optional, for a creepy glitter effect)
- For the Finishing Touch
- Flaky sea salt (optional, but highly recommended – it makes the sweet-salty thing sing)
When selecting your pretzels, look for ones that are relatively uniform in size so they lay flat on the baking sheet. I’ve tried this with gluten-free pretzels, and they work fine—just be gentle when breaking the bark later. For the chocolate, avoid using chocolate chips that have stabilizers; they don’t melt as smoothly. If you can find chocolate bars and chop them yourself, that’s even better. The candy eyes can be found at most grocery stores in the baking aisle during October, or you can order them year-round online. Just make sure they’re food-grade and not the craft kind—trust me on that one.
Equipment Needed
You don’t need much for this recipe, which is part of its beauty. Here’s what you’ll want to have on hand:
- A rimmed baking sheet (half-sheet size works perfectly, about 13×18 inches)
- Parchment paper – don’t skip this; it saves you from a sticky mess
- A small saucepan or microwave-safe bowls for melting chocolate
- A rubber spatula for spreading
- A sharp knife for breaking the bark into pieces
If you don’t have a double boiler, you can absolutely use the microwave. I do it all the time—just use 30-second intervals and stir between each. I learned the hard way that rushing this step leads to burnt chocolate, and burnt chocolate is a tragedy. For a budget-friendly option, a glass mixing bowl set over a pot of simmering water works just as well as a fancy double boiler. Also, if you don’t have a rubber spatula, a wooden spoon will do in a pinch—just be gentle so you don’t break the pretzels.
Preparation Method
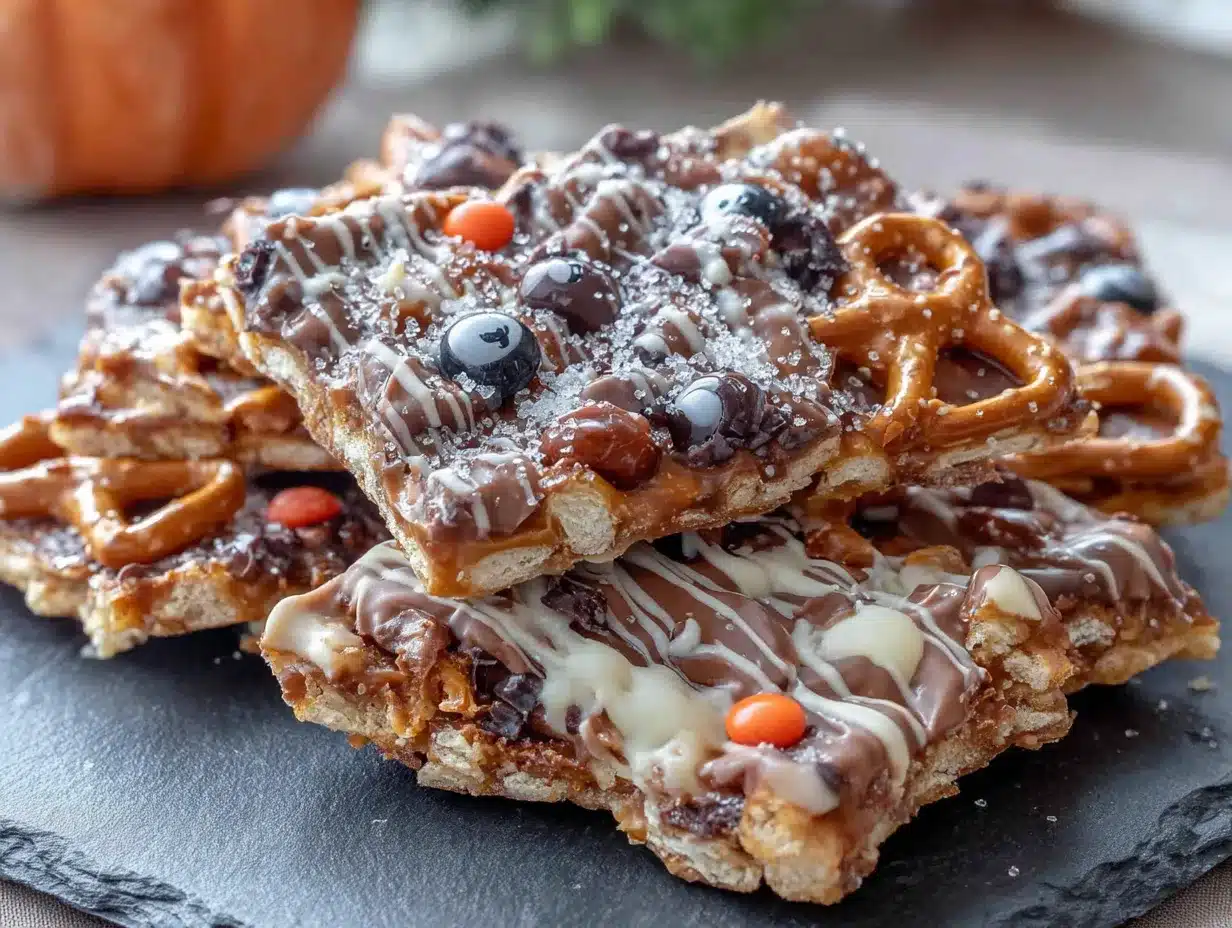
This comes together faster than you’d think. Here’s exactly how I do it:
- Prep your pan: Line your baking sheet with parchment paper. Make sure it overhangs the edges a little—this makes lifting the bark out later so much easier. Spread the mini pretzels in a single layer across the pan. Don’t overlap them too much, but a little overlapping is fine.
- Melt the dark chocolate: In a small saucepan over low heat, or in a microwave-safe bowl, melt 1 cup of dark chocolate chips with 1/2 tablespoon of coconut oil. If using the microwave, heat for 30 seconds, stir, then repeat in 15-second intervals until smooth. Be patient—chocolate burns easily. When it’s smooth and glossy, you’re good.
- Spread the dark chocolate: Drizzle the melted dark chocolate over the pretzels. Use your spatula to spread it gently, making sure most of the pretzels get coated. Don’t worry about perfection—the messiness adds to the bark’s charm. Work quickly so the chocolate doesn’t set before you add the white chocolate.
- Melt the white chocolate: In a separate bowl, melt 1 cup of white chocolate chips with the remaining 1/2 tablespoon of coconut oil. White chocolate is more delicate, so use even lower heat. I’ve ruined a batch by rushing this—the white chocolate seized up and turned grainy. If that happens, add another teaspoon of coconut oil and stir vigorously.
- Create the marbled effect: Dollop spoonfuls of the melted white chocolate over the dark chocolate layer. Use a butter knife or toothpick to swirl them together gently. Don’t over-swirl—you want distinct ribbons of white and dark chocolate. This is where the bark starts looking like something from a fancy bakery.
- Add the decorations: While the chocolate is still wet, press the candy eyes into the surface. Scatter them randomly—some clustered together, some alone. Add the orange sprinkles and black sanding sugar if using. This is the fun part; let your inner kid take over. I like to place the eyes so they’re looking in different directions for maximum creepiness.
- Sprinkle with salt: If you’re using flaky sea salt, now’s the time. Just a light sprinkle over the whole thing. It sounds weird, but trust me—the salt makes the chocolate taste more chocolatey.
- Let it set: Place the baking sheet in the refrigerator for at least 30 minutes, or until the chocolate is completely firm. I usually leave it for an hour to be safe. If you’re in a hurry, the freezer works too—just check it after 15 minutes.
- Break into pieces: Once set, lift the parchment paper out of the pan. Use your hands to break the bark into irregular pieces. Don’t use a knife—the jagged edges are part of the appeal. Aim for pieces that are about 2-3 inches across. You’ll get some smaller shards, which are perfect for snacking while you package the rest.
One thing I learned the hard way: don’t let the chocolate sit out too long before refrigerating. If your kitchen is warm, the candy eyes might sink into the chocolate and disappear. You want them sitting on top, staring at everyone.
Cooking Tips & Techniques
I’ve made this recipe more times than I can count, and I’ve definitely made my share of mistakes. Here’s what I’ve learned:
The chocolate temperature thing is real. I once tried to speed things up by melting the chocolate on high heat in the microwave. Big mistake. The chocolate seized up into a grainy mess, and I had to start over. Low and slow is the way to go. If your chocolate does seize, add a teaspoon of coconut oil and stir like your life depends on it—sometimes it’s salvageable.
Don’t overcrowd the pretzels. I know it’s tempting to cram as many as possible onto the pan, but if they’re too stacked, the bark won’t hold together. A single layer with occasional overlap is perfect. Think of it like a mosaic—each pretzel should be visible.
The swirl technique matters. I used to over-swirl, thinking more was better. But the best-looking bark has distinct dark and white chocolate sections. Just a few figure-eight motions with a toothpick is all you need. Less is more here.
Timing is everything. Have all your decorations ready before you start melting chocolate. Once that chocolate hits the pretzels, you’re on the clock. I learned this the hard way when I was frantically searching for sprinkles while my chocolate was setting up. Not my finest moment.
For consistent results, use a kitchen scale to measure your chocolate. Volume measurements can be inconsistent, and chocolate is expensive enough without guessing.
Variations & Adaptations
This recipe is incredibly forgiving. Here are some ways to make it your own:
Spooky Spider Web Version: After spreading the dark chocolate, drizzle the white chocolate in concentric circles, then drag a toothpick from the center outward to create a web pattern. Add a few candy eyes in the center for a spider effect. I tried this last year and it was a huge hit with the neighborhood kids.
Peanut Butter Pretzel Bark: Melt 1/2 cup of peanut butter with the dark chocolate for a richer flavor. This works best if you’re using milk chocolate instead of dark. Just be aware that peanut butter can make the bark softer, so store it in the fridge.
Vegan-Friendly Version: Use dairy-free dark chocolate and vegan white chocolate chips (they exist, I promise). The coconut oil helps everything set nicely. I made this for a friend with dairy allergies, and she couldn’t tell the difference.
Gluten-Free Option: Simply swap the regular pretzels for gluten-free pretzels. They’re widely available now and work perfectly. Just be gentle when breaking the bark, as gluten-free pretzels can be more fragile.
Extra Crunchy Bark: Add 1/2 cup of crushed toasted almonds or pecans along with the candy eyes. The nuttiness pairs beautifully with the chocolate and pretzels. I tried this on a whim and now I can’t go back.
Color-Themed Variations: For a non-Halloween version, swap the orange sprinkles for red and green at Christmas, or pastels for Easter. The candy eyes can be replaced with themed sprinkles. This recipe is basically a blank canvas.
Serving & Storage Suggestions
This bark is best served at room temperature, straight from the counter. The chocolate has the best snap and the pretzels stay crunchy. If you’ve stored it in the fridge, let it sit out for 10-15 minutes before serving.
For Halloween parties, I like to arrange the pieces on a platter lined with black or orange tissue paper. The contrast makes the candy eyes pop. You can also pile them in a clear glass jar for a spooky centerpiece. Just make sure the jar is completely dry—moisture will ruin the chocolate’s shine.
Presentation tip: Group the pieces by size, with the largest ones in the center and smaller shards around the edges. It looks more intentional that way. I also like to sprinkle a few extra candy eyes around the platter for maximum creepiness.
Storage: Keep the bark in an airtight container at room temperature for up to a week. If your kitchen is warm, store it in the refrigerator—it’ll last up to two weeks. Layer the pieces between sheets of parchment paper to prevent them from sticking together. Do not store in a humid environment; the pretzels will go soft.
Freezing: This bark freezes beautifully. Place the pieces in a single layer on a baking sheet and freeze for an hour, then transfer to a freezer-safe bag. It’ll keep for up to three months. Thaw at room temperature for about 20 minutes before serving. I always make a double batch and stash one in the freezer for unexpected guests.
The flavors actually develop a bit over time—after a day or two, the salt from the pretzels melds with the chocolate in a way that’s even more addictive. Not that it usually lasts that long.
Nutritional Information & Benefits
Let’s be real—this is a treat, not a health food. But here’s what you’re working with per serving (about 2 ounces or 56g):
- Calories: 220
- Total Fat: 12g
- Saturated Fat: 7g
- Carbohydrates: 26g
- Sugar: 18g
- Protein: 3g
- Sodium: 180mg
On the plus side, dark chocolate contains antioxidants and minerals like iron and magnesium. Pretzels are low in fat (before the chocolate, anyway), and the coconut oil provides healthy medium-chain triglycerides. The candy eyes? Pure sugar and joy—no nutritional value, but plenty of fun.
If you’re watching your sugar intake, you can use sugar-free chocolate chips. The taste is slightly different, but the texture holds up well. For a lower-sodium version, look for unsalted pretzels and skip the flaky salt.
As always, this recipe contains dairy and gluten (unless you use the substitutions mentioned above). The candy eyes typically contain gelatin, so they’re not vegetarian-friendly—look for vegan candy eyes if that’s a concern.
Conclusion
This Halloween pretzel bark is the recipe I turn to year after year, and it never lets me down. It’s the one that makes me look like I planned ahead when really, I just remembered the party an hour before it started. It’s the one that gets devoured before the punch bowl is even empty. And it’s the one that always, always prompts someone to ask for the recipe.
I love that this bark is as fun to make as it is to eat. There’s something deeply satisfying about pressing those little candy eyes into the chocolate, knowing the reaction they’ll get. And I love that it’s flexible—you can make it as creepy or as cute as you want.
So go ahead and give it a try. Customize it with your favorite toppings, make it your own, and bring it to your next Halloween gathering. I promise you’ll be the hero of the party. And if someone asks where you got the recipe, just shrug and say, “Oh, it’s nothing.” Like Karen did. Like it’s no big deal.
I’d love to hear how yours turns out! Drop a comment below and let me know what variations you tried, or tag me in your photos. Happy Halloween, and happy snacking!
Frequently Asked Questions
Can I make this Halloween pretzel bark ahead of time?
Absolutely! This bark actually stores really well. Make it up to a week in advance and keep it in an airtight container at room temperature. Just make sure the chocolate is fully set before you store it, and layer the pieces with parchment paper so they don’t stick together.
Can I use milk chocolate instead of dark chocolate?
Of course! Milk chocolate will make the bark sweeter and creamier. I personally prefer the balance of dark chocolate because it offsets the saltiness of the pretzels, but milk chocolate works beautifully too. If you go that route, you might want to skip the flaky sea salt to avoid it being too sweet.
My chocolate seized up and got grainy. Can I fix it?
Don’t panic—this happens to everyone at least once. Try adding a teaspoon of coconut oil or vegetable oil and stirring vigorously over very low heat. Sometimes that’s enough to smooth it out. If it’s really bad, you can use it as a base for chocolate truffles or just eat it with a spoon (no judgment here).
Where do I find candy eyes for this recipe?
Most grocery stores carry them in the baking aisle during October. You can also find them at craft stores like Michael’s or Joann’s, or order them online from Amazon. Just make sure you’re getting edible candy eyes, not the plastic craft ones—they look similar but taste very different!
Can I double this recipe?
Yes, but use two separate baking sheets instead of one big one. If you try to cram everything onto one pan, the chocolate layer will be too thick and the bark won’t set properly. Two pans means more even chocolate distribution and easier breaking later. Plus, you’ll have twice as much to share—or not.
Pin This Recipe!
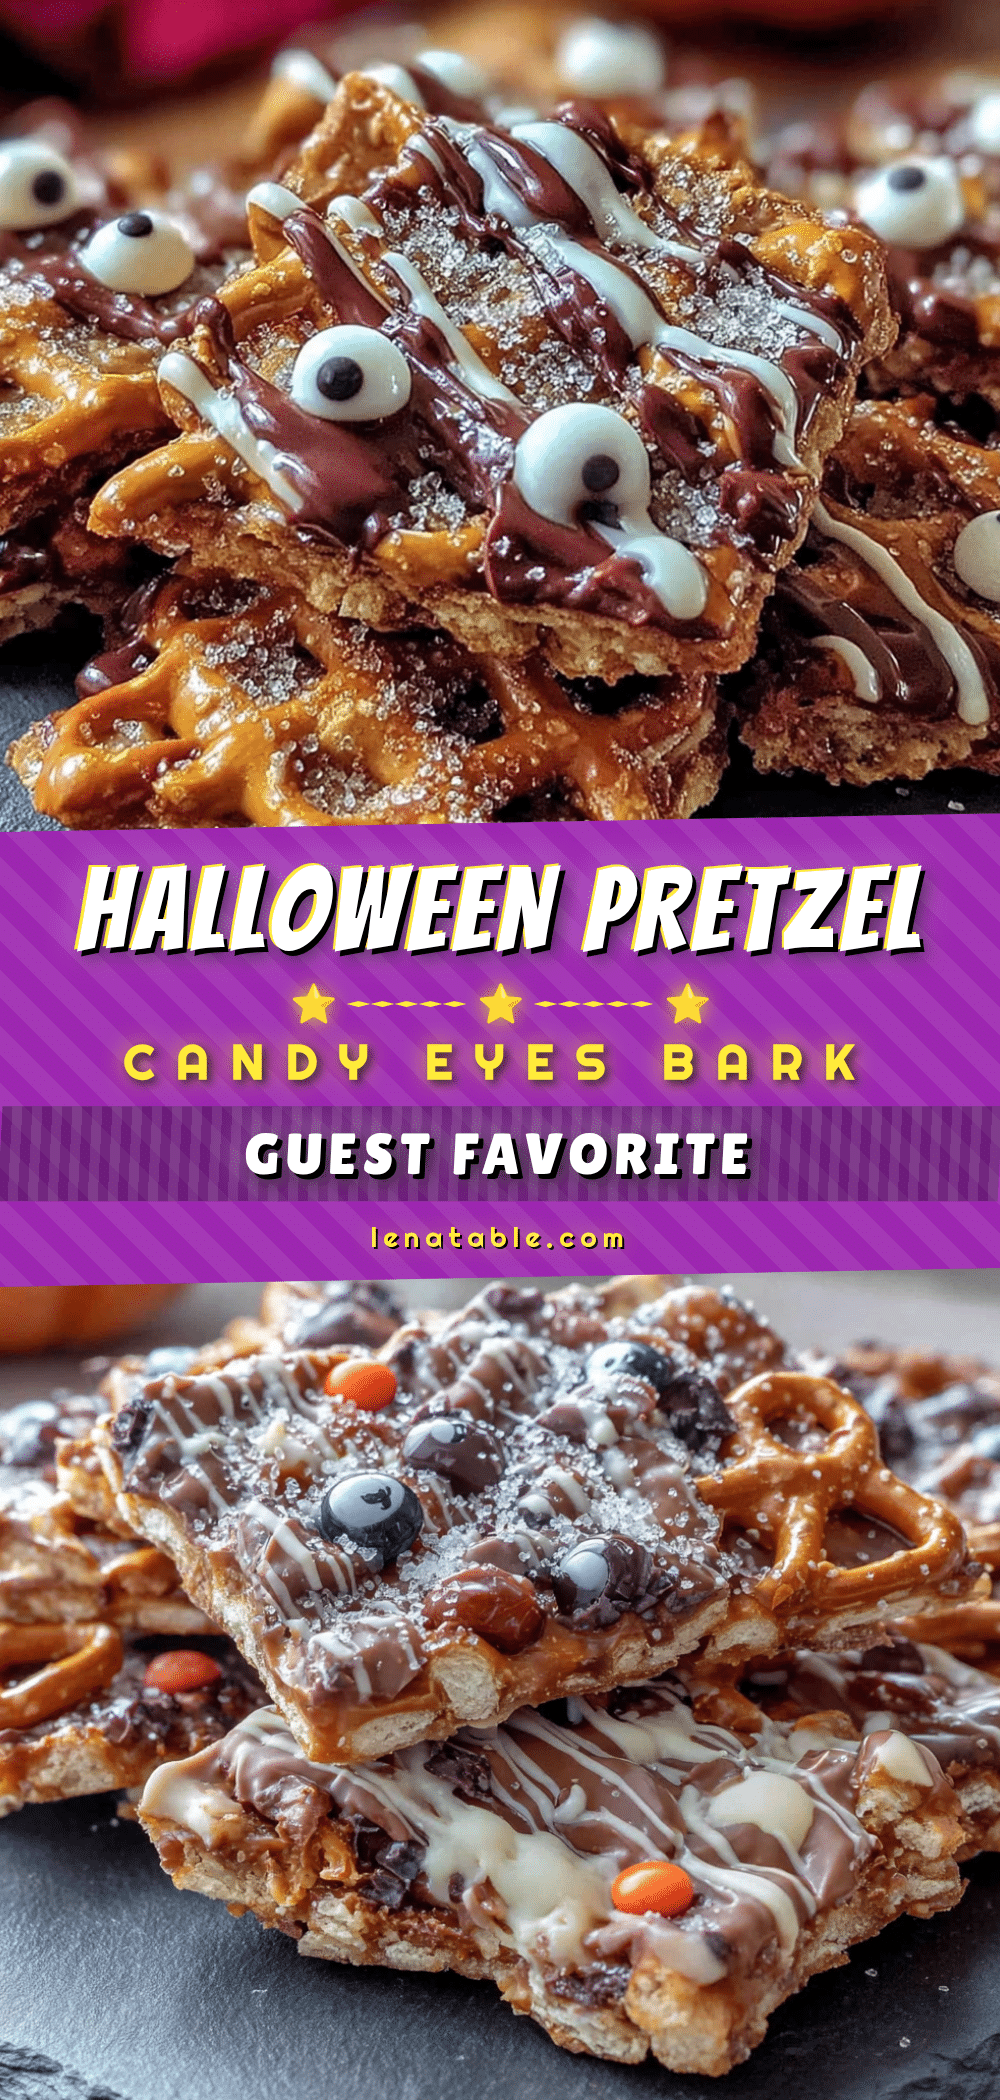
Easy Halloween Pretzel Bark with Candy Eyes
A quick and easy Halloween treat made with pretzels, dark and white chocolate, and candy eyes. This sweet-salty-crunchy bark looks spooky and impressive but comes together in under 20 minutes of active time.
- Prep Time: 15 minutes
- Cook Time: 5 minutes
- Total Time: 50 minutes (including chilling)
- Yield: 12 servings 1x
- Category: Dessert
- Cuisine: American
Ingredients
- 2 cups mini pretzel twists (about 200g)
- 1 cup dark chocolate chips (175g)
- 1 cup white chocolate chips (175g)
- 1 tablespoon coconut oil (15ml), divided
- 1/2 cup candy eyes (about 75g)
- 2 tablespoons orange sprinkles (optional)
- 1 tablespoon black sanding sugar (optional)
- Flaky sea salt (optional)
Instructions
- Line a rimmed baking sheet with parchment paper, letting it overhang the edges. Spread the mini pretzels in a single layer across the pan, allowing some overlap.
- In a small saucepan over low heat or in a microwave-safe bowl, melt 1 cup dark chocolate chips with 1/2 tablespoon coconut oil. If using the microwave, heat for 30 seconds, stir, then repeat in 15-second intervals until smooth.
- Drizzle the melted dark chocolate over the pretzels and use a spatula to spread it gently, coating most of the pretzels.
- In a separate bowl, melt 1 cup white chocolate chips with the remaining 1/2 tablespoon coconut oil over low heat or in the microwave in 15-second intervals, stirring until smooth.
- Dollop spoonfuls of the melted white chocolate over the dark chocolate layer. Use a butter knife or toothpick to swirl them together gently, creating distinct ribbons.
- While the chocolate is still wet, press the candy eyes into the surface. Scatter them randomly. Add orange sprinkles and black sanding sugar if using.
- If using flaky sea salt, lightly sprinkle it over the top.
- Place the baking sheet in the refrigerator for at least 30 minutes, or until the chocolate is completely firm (about 1 hour for best results).
- Once set, lift the parchment paper out of the pan. Use your hands to break the bark into irregular pieces, about 2-3 inches across.
Notes
Use low heat when melting chocolate to avoid seizing. Have all decorations ready before melting chocolate. For best results, use a kitchen scale to measure chocolate. Store in an airtight container at room temperature for up to a week, or in the refrigerator for up to two weeks. Freezes well for up to three months.
Nutrition
- Serving Size: 2 ounces (56g)
- Calories: 220
- Sugar: 18
- Sodium: 180
- Fat: 12
- Saturated Fat: 7
- Carbohydrates: 26
- Fiber: 1
- Protein: 3
Keywords: Halloween, pretzel bark, candy eyes, chocolate bark, easy Halloween treat, spooky snack, sweet and salty


