Love this? Save it for later!
Share the inspiration with your friends
This was supposed to be a fancy layered trifle for a backyard barbecue. I had the glass bowl out, the fresh berries washed, and I was feeling pretty smug about the whole thing. Then my neighbor called to say her blender had died mid-smoothie, and I ran over to help, completely forgetting I had left the cream cheese on the counter. By the time I got back, it was too soft to whip into the stable structure a trifle needs. I stood there, staring at the gloppy mess, already sweating from the July heat, and I just grabbed the nearest mason jars from the pantry. I spooned the filling in, topped it with berries, and shoved them in the fridge to hide my shame. Honestly, I didn’t even want to look at them again.
An hour later, I pulled one out to taste-test my failure, and you know that feeling when something completely unexpected happens? The first bite was cold, creamy, and perfectly sweet against the tart burst of a blueberry. The texture was lighter than any baked cheesecake I had ever made. I brought the jars to the party anyway, figuring I’d just tell people they were “deconstructed desserts.” They disappeared in ten minutes. Someone asked for the recipe, and I had to admit I didn’t really have one — I just threw it together in a panic. So I went home, made them again on purpose, and this time, I paid attention. These red white and blue no-bake cheesecake jars are now my official go-to for every summer celebration. They saved my barbecue that day, and honestly, they might just save yours too.
Why You’ll Love This Recipe
Let’s be real — the Fourth of July is about fun, not slaving over a hot oven. These red white and blue no-bake cheesecake jars are the kind of dessert that makes you look like a hero without any of the stress. I’ve tested this recipe about six times now, tweaking the cream cheese to whipped cream ratio until it was just right, and I can promise you it works every single time.
- No Oven Required: The summer heat is brutal. This recipe keeps your kitchen cool and your sanity intact.
- Quick & Easy: You can have these assembled in about 20 minutes. The hardest part is waiting for them to chill.
- Simple Ingredients: Cream cheese, heavy cream, a little sugar, and some graham crackers. You probably have most of this in your kitchen right now.
- Perfect for the 4th of July: The red, white, and blue layers are a showstopper on any dessert table. They are basically edible fireworks.
- Crowd-Pleaser: I have brought these to block parties, picnics, and family dinners. Kids love them, adults love them, and they are gone before the hot dogs are off the grill.
- Unbelievably Delicious: The filling is so light and fluffy, it almost melts in your mouth. It is comfort food, but make it refreshing.
What makes this version different from the rest? It is the texture. I spent a long time figuring out how to get a no-bake cheesecake that isn’t too dense or too runny. The trick is folding the whipped cream into the cream cheese mixture by hand — it creates an airy, mousse-like consistency that feels luxurious. This isn’t just another layered dessert. It is the best version of itself. It is the kind of sweet treat that makes you close your eyes after the first bite, even if you are sitting on a plastic lawn chair.
What Ingredients You Will Need
This recipe uses simple, wholesome ingredients to build that creamy, dreamy texture and those beautiful festive colors. Most of these are pantry staples, which makes it perfect for a last-minute celebration.
For the Crust
- Graham cracker crumbs — 1 ½ cups (about 12 full sheets, crushed). You can buy them pre-crushed or pulse them in a food processor.
- Unsalted butter — 6 tablespoons, melted. (I use Land O’Lakes for the consistent fat content; it holds the crust together better.)
- Granulated sugar — 2 tablespoons, to add a touch of sweetness to the crust.
For the Cheesecake Filling
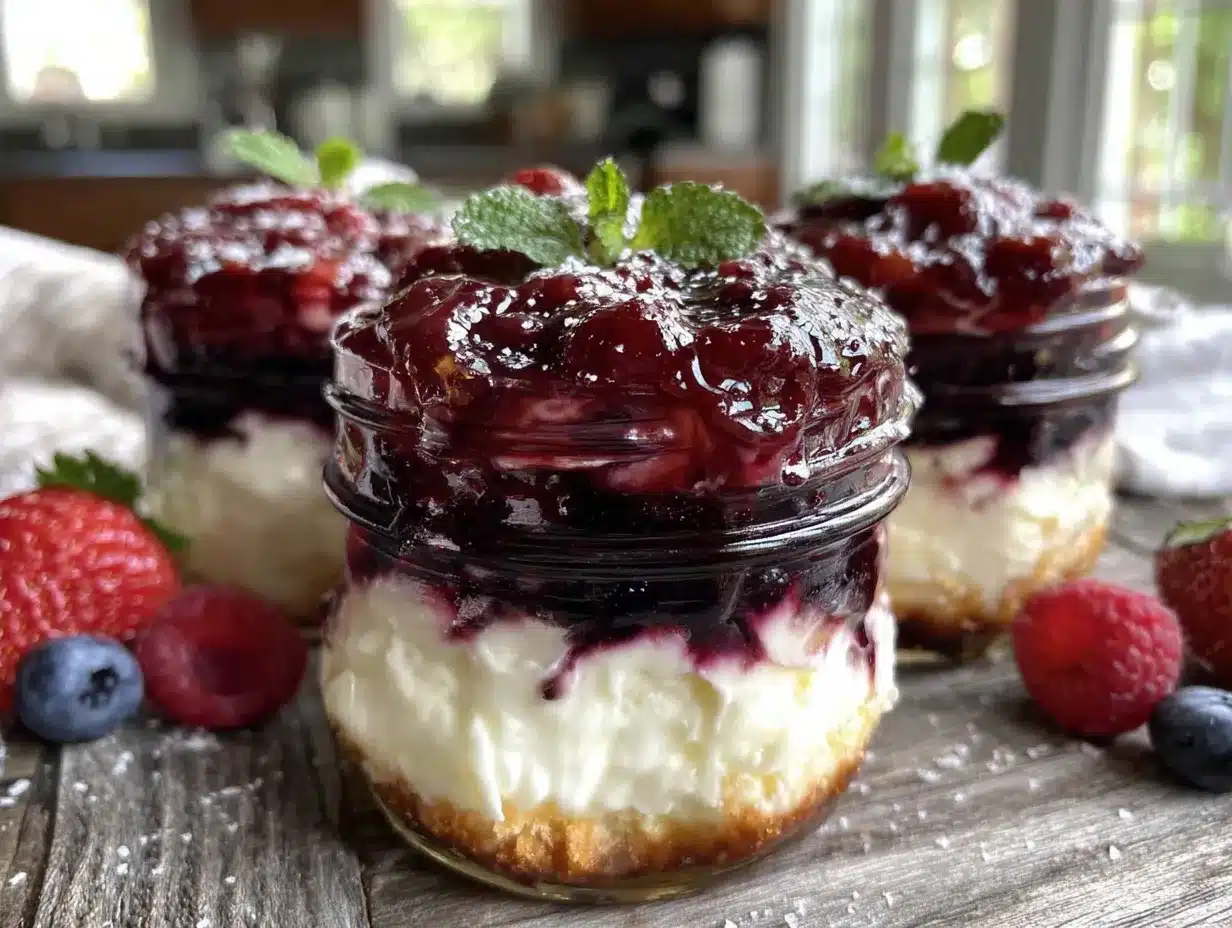
- Full-fat cream cheese — 16 ounces (two 8-ounce blocks), softened to room temperature. Do not use low-fat here; the texture will not be as rich.
- Powdered sugar — ¾ cup, for a smooth, lump-free sweetness.
- Vanilla extract — 1 teaspoon. Pure vanilla makes a difference, but imitation works in a pinch.
- Heavy whipping cream — 1 cup, cold. (Look for cream with at least 36% milk fat for the best volume when whipped.)
- Fresh lemon juice — 1 tablespoon. This brightens the flavor and cuts through the richness. Do not skip it.
For the Toppings & Layers
- Fresh strawberries — 1 cup, hulled and diced small. (In winter, you can use thawed frozen strawberries, but drain them well first so they don’t bleed into the cream.)
- Fresh blueberries — 1 cup. (I prefer the smaller wild blueberries for a more concentrated pop of flavor.)
- Fresh raspberries — ½ cup, for an extra red layer if you want more color contrast.
Optional Garnishes
- Whipped cream — for the top, if you are feeling extra.
- Blue sprinkles or star-shaped sprinkles — for that patriotic flair.
Equipment Needed
You do not need a fancy bakery setup for this one. Here is what I use, and some good alternatives if you are short on tools.
- 8 to 10 small mason jars (8-ounce size) — These are my favorite for portion control and presentation. You can also use small glass bowls, ramekins, or even wide-mouth drinking glasses.
- Electric hand mixer or stand mixer — You need this to whip the cream and beat the cream cheese. A whisk and a strong arm will work, but your arm will get tired. I use my trusty KitchenAid hand mixer.
- Mixing bowls — At least two medium-sized ones. One for the crust, one for the filling.
- Food processor or a zip-top bag and a rolling pin — For crushing the graham crackers. The bag-and-rolling-pin method is oddly satisfying and great for releasing frustration.
- Spatula — A rubber spatula for folding the whipped cream in gently. Do not use a wooden spoon here; you will deflate the mixture.
- Measuring cups and spoons — Standard set. Nothing fancy.
- Small piping bag or a zip-top bag with the corner snipped off — This makes layering the filling so much cleaner. You can also just spoon it in, but it gets messy.
Preparation Method
I am going to walk you through this step-by-step, just like I do it in my own kitchen. Take your time, and do not rush the chilling step — it is where the magic happens.
- Make the crust: In a medium bowl, combine the graham cracker crumbs and the 2 tablespoons of granulated sugar. Pour the 6 tablespoons of melted butter over the top and stir with a fork until every crumb is moistened. It should look like wet sand. Set aside about 2 tablespoons of this mixture for the very top garnish if you want a little crunch.
- Press the crust into the jars: Spoon about 2 tablespoons of the crust mixture into the bottom of each jar. Use the back of a small spoon or a shot glass to press it down firmly. You want a compact, even layer. Pop the jars in the fridge while you make the filling so the crust sets up a bit.
- Whip the cream: In a clean, chilled bowl, pour the 1 cup of cold heavy whipping cream. Beat it on medium-high speed until stiff peaks form. This takes about 3 to 4 minutes. You are looking for peaks that stand up straight when you lift the beaters. Do not over-whip, or you will end up with butter. Set the bowl aside.
- Beat the cream cheese: In a separate large bowl, add the 16 ounces of softened cream cheese. Beat it on medium speed with the hand mixer until it is completely smooth and fluffy — about 2 minutes. Scrape down the sides of the bowl with your spatula halfway through. There should be zero lumps.
- Add the sugar and flavorings: Add the ¾ cup of powdered sugar, the 1 teaspoon of vanilla extract, and the 1 tablespoon of lemon juice to the cream cheese. Beat on low speed until combined, then increase to medium and beat for another minute until the mixture is light and airy. Scrape the bowl again.
- Fold in the whipped cream: This is the most important step. Take about one-third of the whipped cream and stir it into the cream cheese mixture with your spatula. This lightens the batter. Then, gently fold in the remaining whipped cream. Use a slow, sweeping motion — cut through the center, scrape along the side, and fold over. Do not stir vigorously. You want to keep all that air in the mixture. The final filling should be thick, smooth, and cloud-like.
- Prepare the berries: While the filling rests, dice your strawberries into small, even pieces. Pat the blueberries dry with a paper towel if they look wet. Excess moisture is the enemy of a clean layer.
- Assemble the layers: Take the jars out of the fridge. Spoon or pipe a layer of the cheesecake filling over the crust — about 3 tablespoons. Add a layer of diced strawberries. Spoon another layer of filling. Add a layer of blueberries and raspberries. Top with a final dollop of filling. The goal is to have three distinct white layers and two fruit layers, ending with white on top so the fruit on the garnish pops.
- Chill: Place the lids on the jars and refrigerate them for at least 4 hours. Overnight is even better. This allows the filling to set completely and the flavors to meld together. I know it is hard to wait, but trust me — the texture is so much better after a full chill.
- Garnish and serve: Right before serving, top each jar with a few fresh berries and a sprinkle of the reserved graham cracker crumbs. If you want, add a tiny dollop of whipped cream and a star sprinkle. Serve cold.
Cooking Tips & Techniques
I have made this recipe about a dozen times now, and I have messed it up in almost every way possible. Here is what I learned so you do not have to repeat my mistakes.
Soft cream cheese is non-negotiable. The first time I made these, I was in a hurry and used cold cream cheese straight from the fridge. The filling was lumpy, and no amount of beating fixed it. Let your cream cheese sit on the counter for at least 30 minutes. If you forgot, cut it into small cubes and microwave it in 10-second bursts until it is soft to the touch, but not hot.
Do not overwhip the cream. I did this once while I was distracted by my kids arguing over a toy. The cream turned grainy and started to separate. If you see it turning into a thick, butter-like consistency, you have gone too far. Start over with a fresh batch. It is cheap to replace, and the texture of the filling depends on it.
Layer strategically. The berries will release juice over time, especially if you are making these a day ahead. To prevent the layers from bleeding into each other and looking muddy, make sure your berries are as dry as possible. Pat them with a paper towel before adding them. Also, do not put the fresh berries on the very top until you are ready to serve, or they will dry out in the fridge.
Chill time matters. I know it is tempting to eat these after an hour, but the filling will be too soft and will not hold its shape. Four hours is the minimum. The texture firms up beautifully and becomes almost sliceable. It is worth the wait.
Multitasking strategy: While the cream cheese is softening, crush the graham crackers and wash the berries. While the crust is chilling in the fridge, whip the cream. This recipe flows really well if you just think two steps ahead.
Variations & Adaptations
One of the best things about these red white and blue no-bake cheesecake jars is how flexible they are. I have tried a few different twists, and they all turned out great.
Gluten-Free Version: Swap the graham crackers for gluten-free graham crackers or use crushed gluten-free shortbread cookies. The texture is a little different, but the flavor is still fantastic.
Low-Sugar Option: Use a sugar substitute like monk fruit sweetener or erythritol in the filling. For the crust, you can use a sugar-free cookie or just reduce the sugar to 1 tablespoon. The berries provide natural sweetness, so you will not miss it much.
Dairy-Free Adaptation: Use a high-quality dairy-free cream cheese (I like Miyoko’s or Kite Hill) and a coconut cream-based whipping cream. The flavor will be slightly different — more coconut-forward — but it is still creamy and delicious. Make sure the dairy-free cream cheese is softened just like the regular kind.
Different Fruit Combinations: For Memorial Day, I swap the strawberries and blueberries for a mix of raspberries and blackberries. For a general summer party, I use peaches and raspberries. The cream cheese filling is neutral enough to pair with almost any fruit.
Chocolate Twist: Add 2 tablespoons of cocoa powder to the graham cracker crust for a chocolatey base. It pairs surprisingly well with the berries and gives the dessert a little more depth.
Personal Variation: Last Labor Day, I added a thin layer of lemon curd between the crust and the first layer of filling. It added a bright, tangy punch that cut through the richness. My family has not let me make them without it since.
Serving & Storage Suggestions
These jars are best served cold, straight from the fridge. The contrast between the cool, creamy filling and the juicy, tart berries is the whole point. I like to take the lids off and arrange them on a large platter with a few extra berries scattered around for color.
What to serve with them: These are rich enough to stand alone, but they pair beautifully with a light, crisp white wine like a Sauvignon Blanc or a sparkling lemonade for the kids. If you are doing a full barbecue spread, serve them after the burgers and potato salad — they cleanse the palate and feel refreshing.
Storage: Keep the jars covered in the refrigerator for up to 3 days. The crust will soften slightly over time, but the filling stays perfect. I do not recommend freezing these — the cream cheese filling can become grainy and watery when thawed.
Reheating: Do not reheat these. They are meant to be eaten cold. If you left them out on the counter for more than 2 hours, throw them away. Food safety is not worth the risk.
Flavor development: Honestly, these taste even better on day two. The flavors have time to meld, and the filling gets firmer and more sliceable. If you are planning a party, make them the night before. Your future self will thank you.
Nutritional Information & Benefits
Here is an estimated breakdown for one jar, assuming you get 8 servings out of this recipe. These numbers are approximate and will vary based on the exact brands and substitutions you use.
| Nutrient | Amount per Jar |
|---|---|
| Calories | 385 |
| Total Fat | 28g |
| Saturated Fat | 17g |
| Cholesterol | 85mg |
| Sodium | 220mg |
| Total Carbohydrates | 30g |
| Dietary Fiber | 2g |
| Sugars | 22g |
| Protein | 5g |
Health benefits: The berries in this recipe are packed with antioxidants and vitamin C. Blueberries are particularly good for brain health, and strawberries are excellent for heart health. The cream cheese provides a decent amount of calcium and protein, though it is also high in saturated fat, so enjoy these in moderation. If you use the low-sugar variation, you can cut the sugar content by about half.
Dietary considerations: This recipe contains gluten (from the graham crackers) and dairy. It is vegetarian. For a nut-free version, just make sure your graham crackers are processed in a nut-free facility. The allergen info is always worth double-checking if you are serving a crowd.
From a wellness perspective, I believe in balance. These cheesecake jars are a treat, and they are meant to be enjoyed without guilt. The portion control of the jars helps, too — you get a satisfying dessert without overdoing it.
Frequently Asked Questions
Can I use Cool Whip instead of whipping my own cream?
Yes, you can. Use about 2 cups of thawed Cool Whip and fold it into the cream cheese mixture. The texture will be slightly lighter and less rich, but it is a good shortcut if you are in a real hurry.
How far ahead can I make these?
You can assemble them up to 2 days in advance. Keep them covered in the fridge. Add the fresh berry garnish and graham cracker crumb topping right before serving so they stay fresh and crunchy.
My filling came out runny. What did I do wrong?
This usually happens for one of three reasons: the cream cheese was too cold and the mixture never fully combined, the whipped cream was under-whipped, or the filling was not chilled long enough. Make sure your cream is very cold and beat it to stiff peaks, and always chill for at least 4 hours.
Can I use frozen berries?
You can, but you must thaw them first and drain them very well. Pat them dry with paper towels. Frozen berries release a lot of liquid, and that moisture can make the cheesecake layers soggy and turn the filling pink.
Do I have to use mason jars?
Not at all. Any small glass or plastic container works. I have used small dessert bowls, clear plastic cups for parties, and even wine glasses for a fancier look. The key is that they are clear so the layers show.
Conclusion
These red white and blue no-bake cheesecake jars are more than just a pretty dessert. They are the kind of recipe that proves you do not need a complicated technique or a hot oven to make something absolutely delicious. They are forgiving, they are fast, and they honestly taste like summer in a jar. I have made them for quiet family dinners and for loud, crowded block parties, and they have never let me down.
I hope you give them a try, and I hope you make them your own. Maybe you will add a little lemon zest like I do, or maybe you will swap the berries for whatever is in season. That is the beauty of a simple recipe — it leaves room for you. If you make these, I would love to hear about it. Drop a comment below and tell me how they turned out, or share a photo of your jars. There is something so satisfying about seeing a recipe come to life in someone else’s kitchen. Happy Fourth of July, and happy cooking!
Pin This Recipe!
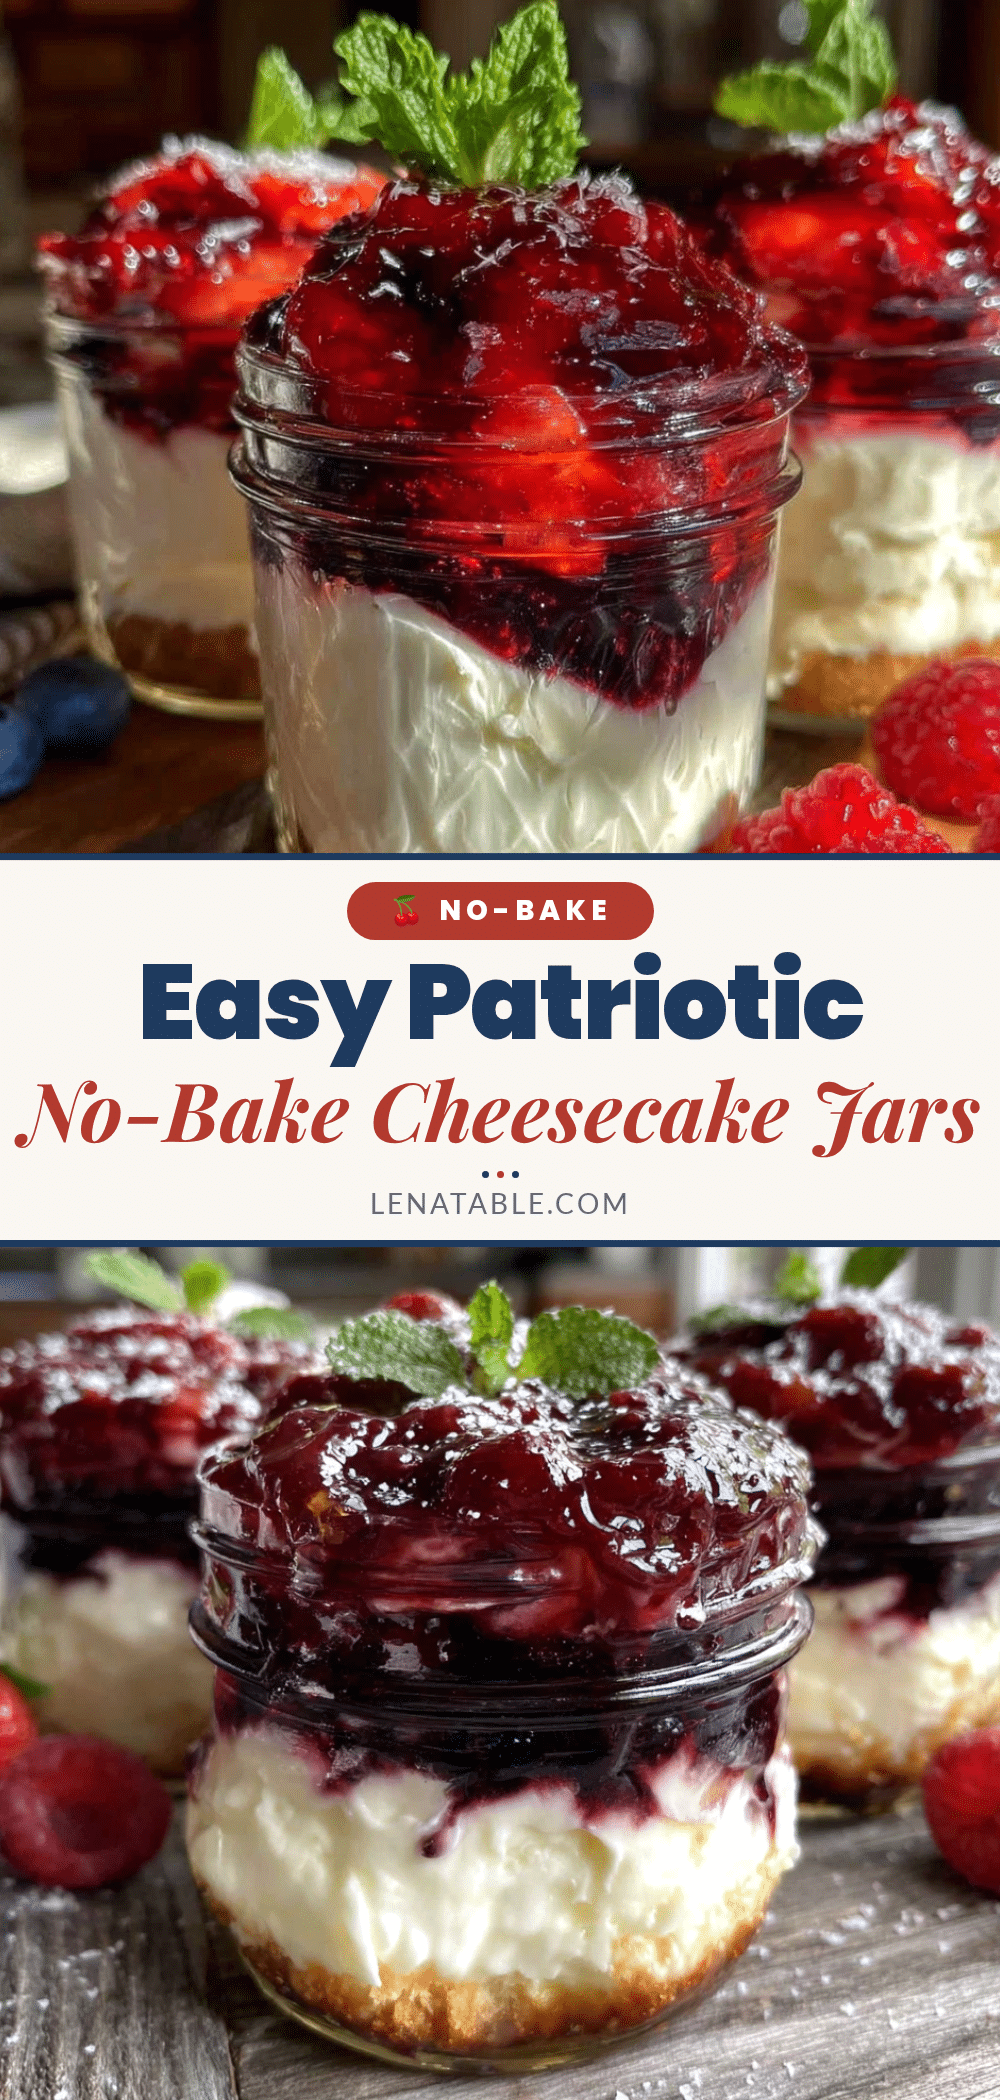
Easy Red White and Blue No-Bake Cheesecake Jars: Best 4th of July Dessert
These no-bake cheesecake jars are the perfect 4th of July dessert. They are quick, easy, and made with simple ingredients, featuring a light and fluffy cheesecake filling layered with fresh berries in a mason jar.
- Prep Time: 20 minutes
- Cook Time: 0 minutes
- Total Time: 4 hours 20 minutes (includes chilling time)
- Yield: 8 servings 1x
- Category: Dessert
- Cuisine: American
Ingredients
- 1 ½ cups graham cracker crumbs (about 12 full sheets, crushed)
- 6 tablespoons unsalted butter, melted
- 2 tablespoons granulated sugar
- 16 ounces full-fat cream cheese, softened to room temperature
- ¾ cup powdered sugar
- 1 teaspoon vanilla extract
- 1 cup heavy whipping cream, cold
- 1 tablespoon fresh lemon juice
- 1 cup fresh strawberries, hulled and diced small
- 1 cup fresh blueberries
- ½ cup fresh raspberries (optional, for extra color)
- Whipped cream for garnish (optional)
- Blue sprinkles or star-shaped sprinkles for garnish (optional)
Instructions
- Make the crust: In a medium bowl, combine the graham cracker crumbs and 2 tablespoons of granulated sugar. Pour the 6 tablespoons of melted butter over the top and stir with a fork until every crumb is moistened. It should look like wet sand. Set aside about 2 tablespoons of this mixture for the very top garnish if you want a little crunch.
- Press the crust into the jars: Spoon about 2 tablespoons of the crust mixture into the bottom of each jar. Use the back of a small spoon or a shot glass to press it down firmly. You want a compact, even layer. Pop the jars in the fridge while you make the filling so the crust sets up a bit.
- Whip the cream: In a clean, chilled bowl, pour the 1 cup of cold heavy whipping cream. Beat it on medium-high speed until stiff peaks form. This takes about 3 to 4 minutes. You are looking for peaks that stand up straight when you lift the beaters. Do not over-whip, or you will end up with butter. Set the bowl aside.
- Beat the cream cheese: In a separate large bowl, add the 16 ounces of softened cream cheese. Beat it on medium speed with the hand mixer until it is completely smooth and fluffy — about 2 minutes. Scrape down the sides of the bowl with your spatula halfway through. There should be zero lumps.
- Add the sugar and flavorings: Add the ¾ cup of powdered sugar, the 1 teaspoon of vanilla extract, and the 1 tablespoon of lemon juice to the cream cheese. Beat on low speed until combined, then increase to medium and beat for another minute until the mixture is light and airy. Scrape the bowl again.
- Fold in the whipped cream: This is the most important step. Take about one-third of the whipped cream and stir it into the cream cheese mixture with your spatula. This lightens the batter. Then, gently fold in the remaining whipped cream. Use a slow, sweeping motion — cut through the center, scrape along the side, and fold over. Do not stir vigorously. You want to keep all that air in the mixture. The final filling should be thick, smooth, and cloud-like.
- Prepare the berries: While the filling rests, dice your strawberries into small, even pieces. Pat the blueberries dry with a paper towel if they look wet. Excess moisture is the enemy of a clean layer.
- Assemble the layers: Take the jars out of the fridge. Spoon or pipe a layer of the cheesecake filling over the crust — about 3 tablespoons. Add a layer of diced strawberries. Spoon another layer of filling. Add a layer of blueberries and raspberries. Top with a final dollop of filling. The goal is to have three distinct white layers and two fruit layers, ending with white on top so the fruit on the garnish pops.
- Chill: Place the lids on the jars and refrigerate them for at least 4 hours. Overnight is even better. This allows the filling to set completely and the flavors to meld together. I know it is hard to wait, but trust me — the texture is so much better after a full chill.
- Garnish and serve: Right before serving, top each jar with a few fresh berries and a sprinkle of the reserved graham cracker crumbs. If you want, add a tiny dollop of whipped cream and a star sprinkle. Serve cold.
Notes
Soft cream cheese is non-negotiable. Let it sit on the counter for at least 30 minutes. Do not overwhip the cream. Layer strategically: pat berries dry to prevent bleeding. Chill for at least 4 hours, preferably overnight. These taste even better on day two.
Nutrition
- Serving Size: 1 jar
- Calories: 385
- Sugar: 22
- Sodium: 220
- Fat: 28
- Saturated Fat: 17
- Carbohydrates: 30
- Fiber: 2
- Protein: 5
Keywords: no-bake cheesecake, 4th of July dessert, red white and blue, mason jar dessert, summer dessert, easy cheesecake, patriotic dessert


