Love this? Save it for later!
Share the inspiration with your friends
My neighbor watched me fumbling with a pack of graham crackers and chocolate bars, trying to figure out the best way to make s’mores indoors. She didn’t say anything at first, just smiled and handed me her old cast iron skillet. “Try this,” she said, “but add a little twist.” That was the day I discovered the magic of the Gooey S’mores Brownie Skillet with Toasted Marshmallows. Honestly, I wasn’t expecting much—I mean, how could a skillet brownie live up to the campfire classic? But as the warm aroma filled my kitchen, and the marshmallows toasted to a perfect golden brown right on top, I knew this wasn’t just any dessert.
Let me tell you, this recipe came to me in the middle of a hectic Wednesday evening, when the power flickered and my plans for a quick dessert seemed doomed. I forgot to grab a pan from the dishwasher, spilled cocoa powder on the counter, and my dog nearly snatched a marshmallow off the counter. Maybe you’ve been there—the kind of night when you just want something comforting, simple, and a little messy. That’s exactly what this skillet delivers. It’s got that warm, gooey texture you crave, the crunch of graham crackers, and the sweetness of toasted marshmallows melting right into brownies. This recipe has stuck with me ever since because it turns a quick kitchen moment into a cozy treat, no campfire needed.
Why You’ll Love This Recipe
Let me break down why this Gooey S’mores Brownie Skillet with Toasted Marshmallows will quickly become your go-to dessert:
- Quick & Easy: Ready in under 40 minutes, it’s perfect for when the sweet tooth strikes unexpectedly.
- Simple Ingredients: No fancy gadgets or rare ingredients—just pantry staples you probably already have.
- Perfect for Cozy Nights: Whether you’re winding down solo or sharing with friends, it’s a warm hug in dessert form.
- Crowd-Pleaser: Kids and adults alike rave about the melty marshmallows and rich brownie base.
- Unbelievably Delicious: The combination of fudgy brownie, crunchy grahams, and toasted marshmallows is insanely satisfying.
This isn’t just another brownie recipe—it’s the skillet method that keeps the edges crisp while the center stays gooey, plus the marshmallows get that perfect golden top without burning. I’ve tried a bunch of brownie recipes before, and this one holds a special place because it’s just as fun to make as it is to eat. Honestly, it’s the kind of dessert that makes you close your eyes after the first bite, savoring every chewy, chocolatey moment. If you ever want a quick dessert that feels like a mini celebration, this skillet is your answer.
What Ingredients You Will Need
This Gooey S’mores Brownie Skillet with Toasted Marshmallows uses simple ingredients that work together to create a rich, indulgent treat. Most are pantry staples, and a few tips on what to look for will help you get the best results.
- For the Brownie Base:
- Unsalted butter, 1/2 cup (113g), melted (adds richness and moisture)
- Granulated sugar, 1 cup (200g)
- Brown sugar, 1/2 cup (100g) (adds chewiness and depth)
- Large eggs, 2, room temperature
- Vanilla extract, 2 teaspoons (for warmth and aroma)
- All-purpose flour, 3/4 cup (95g)
- Unsweetened cocoa powder, 1/2 cup (50g) (I recommend Ghirardelli for best texture)
- Salt, 1/4 teaspoon (balances sweetness)
- Baking powder, 1/4 teaspoon (just enough to lift but keep it dense)
- For the S’mores Topping:
- Graham crackers, 1 cup, roughly crushed (provides that classic crunch)
- Mini marshmallows, 1 1/2 cups (fresh, not stale for best toasting)
- Milk chocolate chips, 1/2 cup (optional, for extra melty chocolate pockets)
If you prefer a dairy-free option, swap the butter for coconut oil, and use dairy-free chocolate chips. For gluten-free, almond flour works well but expect a slightly different texture. When I first made this, I grabbed marshmallows from the local market on a Friday night, and their freshness really made a difference in the toasting step. You’ll want to avoid mini marshmallows that are hard or dry for that perfect gooey top.
Equipment Needed
To make this Gooey S’mores Brownie Skillet with Toasted Marshmallows, you’ll need a few trusty kitchen tools. Most of these are probably already in your kitchen, so nothing fancy required:
- Cast iron skillet, 8-inch: This is the heart of the recipe, giving the brownies a crisp edge and even cooking. If you don’t have cast iron, an oven-safe nonstick skillet or a round baking dish (8-inch) works fine.
- Mixing bowls: One large for batter, one small for marshmallow topping.
- Whisk or spoon: For mixing the brownie batter.
- Measuring cups and spoons: Accuracy is key for baking.
- Spatula: For scraping batter into the skillet.
- Oven mitts: Definitely needed—this skillet gets hot!
I’ve tried using silicone skillets before, but they don’t hold heat quite like cast iron, and you lose that lovely crust. If you’re on a budget, a simple metal pie pan can work, but watch the baking time closely. Also, keeping your cast iron well-seasoned makes cleanup a breeze and prevents sticking—just a little oil wipe after each use does the trick.
Preparation Method
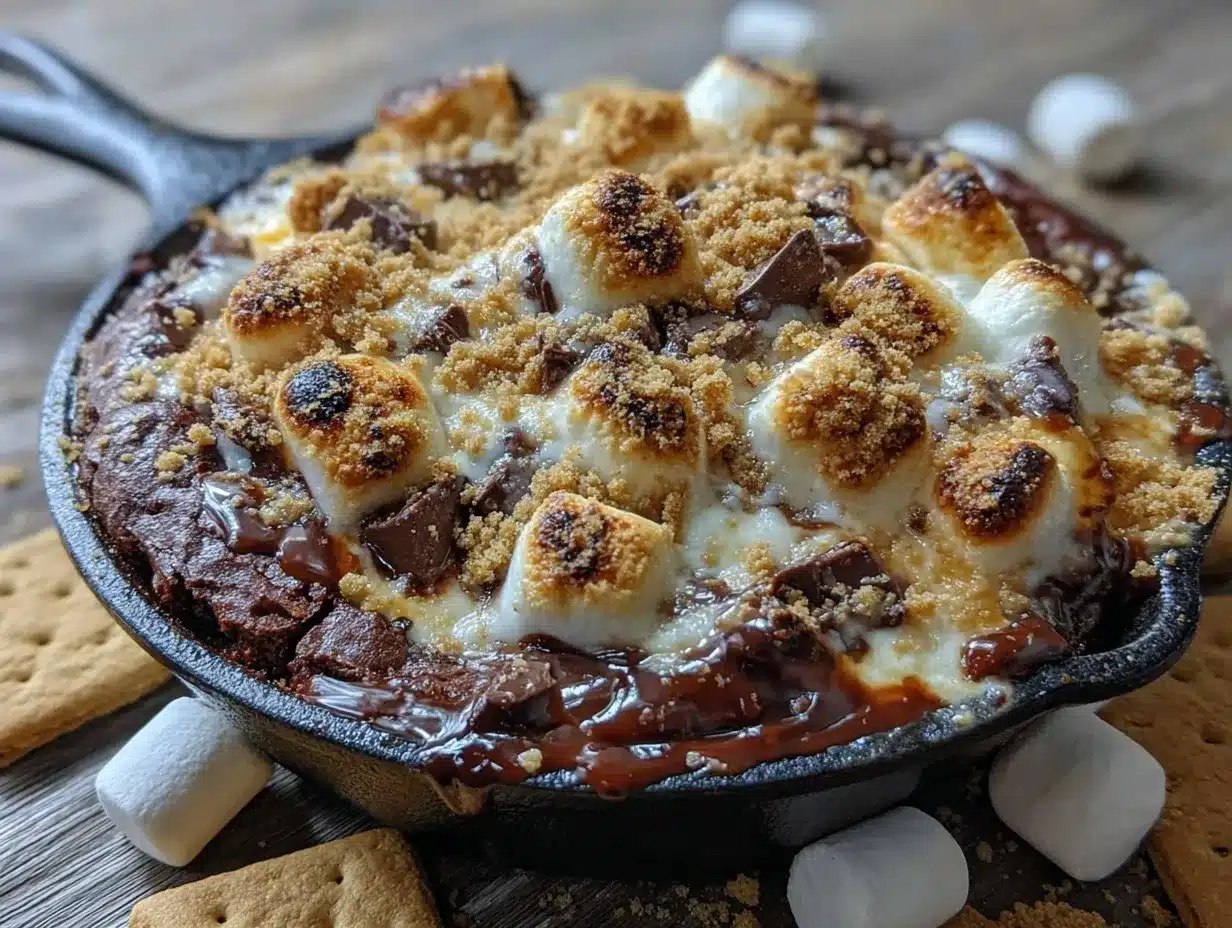
- Preheat your oven to 350°F (175°C). This ensures the skillet is ready for even baking. While it heats, lightly grease your 8-inch cast iron skillet with butter or nonstick spray.
- Mix the melted butter and sugars. In a large bowl, whisk together 1/2 cup melted unsalted butter, 1 cup granulated sugar, and 1/2 cup brown sugar until smooth and slightly glossy. This usually takes about 2 minutes.
- Add eggs and vanilla. Beat in 2 large eggs, one at a time, then stir in 2 teaspoons vanilla extract. The batter should look thick and creamy now.
- Combine dry ingredients separately. In a medium bowl, sift together 3/4 cup all-purpose flour, 1/2 cup unsweetened cocoa powder, 1/4 teaspoon salt, and 1/4 teaspoon baking powder. This step helps avoid clumps and ensures even distribution.
- Fold dry into wet. Gradually add the dry mixture to the wet ingredients, folding gently with a spatula until just combined. Don’t overmix—you want the batter to stay light but fudgy.
- Pour batter into the skillet. Scrape the batter evenly into the prepared skillet, smoothing the top with your spatula. The raw batter should be thick and rich, about 1-inch deep in the skillet.
- Sprinkle graham crackers and chocolate chips. Evenly scatter 1 cup of crushed graham crackers and 1/2 cup milk chocolate chips over the top of the batter. This adds that signature s’mores crunch and extra melty chocolate pockets.
- Bake for 20 minutes. Place the skillet in the oven and bake until the brownie edges start to pull away slightly, but the center still jiggles a bit—this usually takes about 20 minutes. If you leave it longer, the brownie will be more cakey than gooey.
- Add marshmallows and toast. Remove the skillet from the oven and quickly sprinkle 1 1/2 cups mini marshmallows evenly over the top. Pop the skillet back in the oven for 3-5 minutes, or until marshmallows are golden and toasted. Watch closely—marshmallows can burn fast!
- Cool slightly before serving. Let the skillet rest for 5 minutes before digging in. This helps the gooey brownie settle, making it easier to scoop.
Pro tip: If you want that perfectly toasted marshmallow top without the risk of burning, you can use a kitchen torch instead of the oven broiler. Just go slow and keep the flame moving.
Cooking Tips & Techniques
Making gooey brownies can be a little tricky, but these tips will help you nail it every time:
- Don’t overbake: The key to gooey brownies is to pull them out when the center is still slightly underdone. The residual heat finishes the job while cooling.
- Room temperature eggs: They mix more evenly and help create a smooth batter.
- Evenly crush graham crackers: Not too fine or powdery—small chunks add texture and crunch but won’t weigh down the batter.
- Use fresh mini marshmallows: Stale marshmallows won’t toast properly and can get rubbery.
- Watch the marshmallows closely: They can go from perfectly toasted to burnt in seconds under the broiler. Keep the oven door slightly open and stay nearby.
- Cast iron skillet seasoning matters: A well-seasoned skillet prevents sticking and creates a crispy crust.
- Multitasking idea: While the brownie bakes, crush your graham crackers and prep marshmallows to save time.
I learned the hard way that skipping the brown sugar made the brownies less chewy, so don’t omit it! Also, when I first tried broiling the marshmallows, I got distracted and ended up with a blackened topping—lesson learned: stay focused or use a torch.
Variations & Adaptations
- Peanut Butter Swirl: Before baking, dollop peanut butter over the batter and swirl with a knife. The salty contrast is irresistible.
- Berry Boost: Add fresh raspberries or sliced strawberries on top before baking for a fruity twist that cuts through the sweetness.
- Vegan Version: Use dairy-free butter and egg replacer (like flax eggs), plus vegan marshmallows and chocolate chips to keep it animal-friendly.
- Gluten-Free: Swap all-purpose flour for a 1:1 gluten-free baking blend. The texture will be slightly different but still delicious.
- Campfire Style: After baking, top with larger marshmallows and toast with a kitchen torch for that authentic campfire feel.
Personally, I love adding a pinch of cinnamon to the batter for warmth, especially in colder months. One time, I tried using dark chocolate chunks instead of chips, and it gave a richer, slightly bitter edge that balanced the sweetness perfectly. Feel free to mix and match to find your favorite version!
Serving & Storage Suggestions
This skillet dessert is best served warm, straight from the oven, with a spoon or spatula to scoop out gooey portions. The contrast between the toasted marshmallows and fudgy brownie is absolute bliss when eaten right away.
Pair it with a scoop of vanilla ice cream or a drizzle of caramel sauce for an extra treat. It also goes wonderfully with a cup of coffee or a cold glass of milk—classic combo, you know?
If you have leftovers, cover the skillet tightly with foil or transfer to an airtight container. Store in the refrigerator for up to 3 days. When ready to eat, reheat in the oven at 325°F (160°C) for 10-12 minutes to bring back that gooey texture. Avoid microwaving if possible, as it can make the marshmallows tough.
Over time, the flavors meld beautifully, and the brownie becomes even richer. Just remember to toast fresh marshmallows on top if you want to recreate that signature gooey finish after reheating.
Nutritional Information & Benefits
This Gooey S’mores Brownie Skillet is definitely a treat, but it also offers some nutritional perks thanks to its wholesome ingredients. Here’s an estimate per serving (recipe serves 6):
| Calories | 380 kcal |
|---|---|
| Fat | 20g |
| Carbohydrates | 45g |
| Protein | 5g |
| Sugar | 30g |
The cocoa powder is rich in antioxidants and adds a deep chocolate flavor without excess sugar. Using unsalted butter lets you control sodium, and the eggs provide some protein and binding power. Of course, marshmallows and chocolate chips are indulgent components, so this dessert is best enjoyed in moderation.
For dietary needs, you can make this gluten-free or vegan with simple swaps, making it accessible for different lifestyles. I like knowing there’s a bit of chocolate and nostalgia in every bite that also satisfies my sweet cravings without fuss.
Conclusion
The Gooey S’mores Brownie Skillet with Toasted Marshmallows is one of those recipes that feels like a little celebration every time you make it. It’s easy, quick, and hits that perfect balance of crunchy, chewy, and melty that we all secretly crave. Whether you’re cooking for yourself after a long day or surprising friends with a cozy dessert, this skillet won’t disappoint.
Don’t hesitate to play around with the toppings or mix-ins to make it your own. I love how flexible it is, and honestly, it’s become a staple for those nights when I just want something warm, sweet, and a bit nostalgic. If you try this recipe, I’d love to hear how you customize it—drop a comment or share your twist!
So grab your skillet, gather those ingredients, and treat yourself to this warm hug of a dessert—you won’t regret it.
FAQs
Can I use a regular baking pan instead of a skillet?
Yes, a round 8-inch baking pan or even a square 8×8 inch pan works fine. Just watch the baking time—it may vary slightly, and the edges won’t be quite as crisp.
How do I prevent marshmallows from burning?
Keep a close eye under the broiler or use a kitchen torch for more control. Toast in short bursts and move the skillet if some areas brown faster.
Can I make this dessert ahead of time?
You can prepare the brownie base, bake it, and add marshmallows just before serving. Store leftovers in the fridge and reheat in the oven, adding fresh marshmallows on top if desired.
Is there a dairy-free version of this recipe?
Absolutely! Use coconut oil or a dairy-free butter alternative, vegan chocolate chips, and vegan marshmallows to keep it dairy-free and delicious.
How can I make the brownies more fudgy?
Reduce the flour slightly and avoid overmixing the batter. Also, don’t overbake—pull them out when the center still jiggles a bit for maximum gooeyness.
Pin This Recipe!
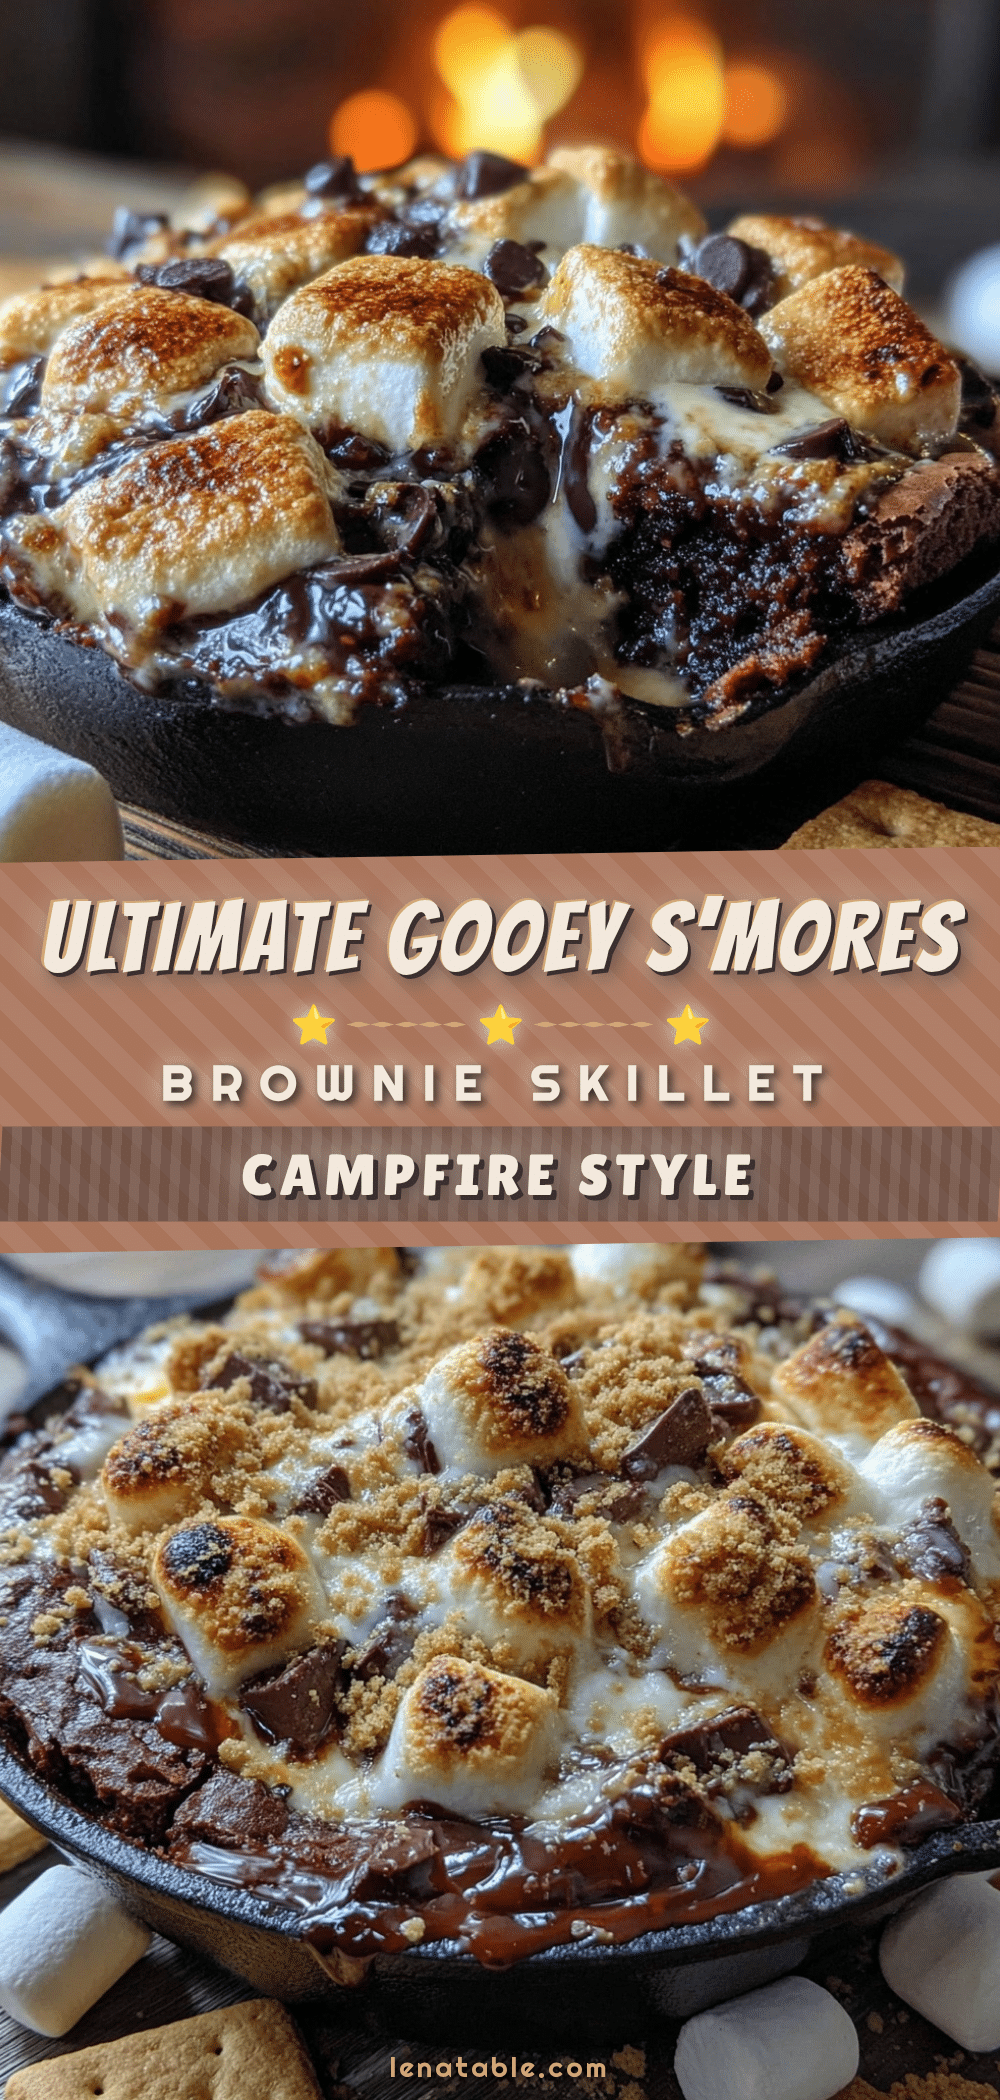
Gooey S’mores Brownie Skillet Recipe Easy Homemade Dessert with Toasted Marshmallows
A warm, gooey skillet brownie topped with crunchy graham crackers and toasted marshmallows, perfect for cozy nights and quick desserts.
- Prep Time: 10 minutes
- Cook Time: 25 minutes
- Total Time: 35 minutes
- Yield: 6 servings 1x
- Category: Dessert
- Cuisine: American
Ingredients
- 1/2 cup (113g) unsalted butter, melted
- 1 cup (200g) granulated sugar
- 1/2 cup (100g) brown sugar
- 2 large eggs, room temperature
- 2 teaspoons vanilla extract
- 3/4 cup (95g) all-purpose flour
- 1/2 cup (50g) unsweetened cocoa powder
- 1/4 teaspoon salt
- 1/4 teaspoon baking powder
- 1 cup graham crackers, roughly crushed
- 1 1/2 cups mini marshmallows
- 1/2 cup milk chocolate chips (optional)
Instructions
- Preheat your oven to 350°F (175°C). Lightly grease your 8-inch cast iron skillet with butter or nonstick spray.
- In a large bowl, whisk together melted butter, granulated sugar, and brown sugar until smooth and slightly glossy, about 2 minutes.
- Beat in eggs one at a time, then stir in vanilla extract until the batter is thick and creamy.
- In a separate bowl, sift together flour, cocoa powder, salt, and baking powder.
- Gradually fold the dry ingredients into the wet ingredients with a spatula until just combined; do not overmix.
- Pour the batter evenly into the prepared skillet, smoothing the top.
- Sprinkle crushed graham crackers and milk chocolate chips evenly over the batter.
- Bake for 20 minutes until edges start to pull away and center jiggles slightly.
- Remove skillet from oven and sprinkle mini marshmallows evenly on top.
- Return skillet to oven and bake for an additional 3-5 minutes until marshmallows are golden and toasted. Watch closely to avoid burning.
- Let the skillet cool for 5 minutes before serving to allow the brownie to set.
Notes
Do not overbake to keep brownies gooey. Use fresh mini marshmallows for best toasting results. A kitchen torch can be used to toast marshmallows for better control. For dairy-free, substitute butter with coconut oil and use vegan chocolate chips and marshmallows. For gluten-free, substitute flour with a gluten-free baking blend.
Nutrition
- Serving Size: 1/6 of skillet
- Calories: 380
- Sugar: 30
- Fat: 20
- Carbohydrates: 45
- Protein: 5
Keywords: s'mores, brownie skillet, toasted marshmallows, easy dessert, gooey brownies, cast iron skillet dessert


