Love this? Save it for later!
Share the inspiration with your friends
I was standing in the spice aisle at my local grocery store last November when the smell of cinnamon hit me — and suddenly I was seven years old, huddled under a wool blanket at my Aunt Jo’s kitchen table, watching her crush cloves with the bottom of a mason jar. She wasn’t a fancy cook. She measured things by feel and taste, not by cups or spoons. That afternoon, she had a pot of something dark and bubbling on the stove, and the whole house smelled like winter and warmth. I remember asking what it was, and she just said, “This is what keeps us well, sweetheart.” I didn’t think much of it then. I just wanted to drink it because it smelled like Christmas.
Fast forward a few decades, and here I am, standing in that same aisle, holding a bag of dried elderberries like they’re gold. Honestly, I had forgotten about that afternoon until the cinnamon scent unlocked it. I bought the berries, went home, and spent the next hour trying to recreate that memory. My first batch was too sweet. The second one had way too much ginger — I mean, it was basically spicy water. But the third try? That was the one. It tasted like Aunt Jo’s kitchen felt.
This homemade spiced elderberry syrup immune booster is more than just a recipe to me now. It’s the thing I make every fall without fail. It’s the jar I grab when I feel that first tickle in my throat or when the kids come home with runny noses. Maybe you’ve been there — standing in the cold and flu aisle, staring at shelves of neon bottles, wondering if any of it actually works. I get it. That’s why I keep making this. It’s simple, it’s honest, and it tastes like someone cares.
Why You’ll Love This Recipe
Let me tell you why this homemade spiced elderberry syrup immune booster has earned a permanent spot in my kitchen. I’ve tested this recipe more times than I can count — through cold seasons, through travel, through years of “is this going to work?” moments. And every time, it delivers.
- Quick & Easy: This comes together in under 45 minutes, most of which is hands-off simmering time. Perfect for a Sunday afternoon or a weeknight when you realize flu season is here.
- Simple Ingredients: No weird additives or hard-to-find extracts. You can find everything at a regular grocery store or online. I promise, no scavenger hunts.
- Perfect for Cold Season: This isn’t just a syrup — it’s a ritual. A spoonful a day keeps the sniffles away, and it’s gentle enough for the whole family (over age one, of course).
- Crowd-Pleaser: I’ve given jars of this to neighbors, teachers, and my mom’s bridge group. Everyone asks for the recipe. It’s that good.
- Unbelievably Delicious: Most immune syrups taste like medicine. This one tastes like spiced tea. The elderberries bring a deep, jammy fruitiness, and the cinnamon and ginger make it feel cozy, not medicinal.
What makes this recipe different from the rest? It’s the balance. I spent time figuring out the perfect ratio of berries to spices so you get immune support without that harsh, bitter flavor. Plus, I add a touch of raw honey at the end — not just for sweetness, but because honey has its own immune-boosting properties. It’s a double win.
This recipe is the kind that makes you close your eyes after the first spoonful. It’s comfort in a jar — healthier, faster, and with the same soul-soothing satisfaction as a warm cup of tea on a rainy day.
What Ingredients You Will Need
This recipe uses simple, wholesome ingredients to deliver bold flavor and immune support without any fuss. Most of these are pantry staples or easy to find at any grocery store. Here’s what you’ll need, plus a few tips I’ve learned along the way.
- Dried elderberries (1 cup): These are the star of the show. I recommend buying organic dried elderberries from a trusted brand like Starwest Botanicals or Frontier Co-op. Look for deep purple, almost black berries that smell slightly sweet. Avoid any that look dusty or faded — they’re past their prime.
- Whole cinnamon sticks (2-3 sticks): Don’t use ground cinnamon here, or you’ll end up with a murky, gritty syrup. The whole sticks infuse flavor without the mess. I prefer Ceylon cinnamon for its milder, sweeter taste, but Cassia works fine too.
- Fresh ginger (2-inch piece, sliced): Fresh ginger adds warmth and a little zing. Don’t bother peeling it — just slice it into coins. The skin has good stuff in it too, and you’ll strain everything out later anyway.
- Whole cloves (1 teaspoon): Cloves are potent, so a little goes a long way. They add that deep, almost peppery warmth that makes this syrup feel like a hug in a spoon.
- Whole star anise (2-3 pods): This is optional, but I love the subtle licorice note it adds. If you’re not a fan of anise, skip it — no hard feelings.
- Raw honey (1 cup, or to taste): This is added after the syrup cools to preserve its enzymes and immune benefits. Use a good quality raw honey — local if you can find it. Manuka honey works beautifully here too, but it’s pricey.
- Filtered water (4 cups): Tap water can have chlorine or minerals that affect the taste. Filtered water gives you a cleaner, purer syrup.
- Optional: Orange peel (from 1 orange): I add this when I want a citrusy lift. It brightens up the spices beautifully. Just make sure to wash the orange well and avoid the white pith — it’s bitter.
Equipment Needed
You don’t need a fancy kitchen for this recipe. Here’s what I use, along with a few alternatives if you’re working with what you’ve got.
- Medium saucepan (2-3 quart): A heavy-bottomed pot works best for even simmering. I use my old stainless steel pot, but enameled cast iron is great too.
- Fine-mesh strainer or cheesecloth: You need something to catch all the berries and spices. A fine-mesh strainer works perfectly. If you don’t have one, line a colander with a clean kitchen towel or cheesecloth.
- Glass jar or bottle for storage: A 16-ounce Mason jar works great. Make sure it’s sterilized — I run mine through the dishwasher or boil it for 5 minutes.
- Wooden spoon or spatula: For stirring. Nothing fancy needed.
- Measuring cups and spoons: Standard set will do. I use my trusty stainless steel ones.
- Optional: Funnel: Makes pouring into a jar way less messy. I have a small canning funnel that I use for everything.
One tip: don’t use a nonstick pot for this. The high heat and constant stirring can damage the coating over time. Stick with stainless steel or enameled cast iron.
Preparation Method
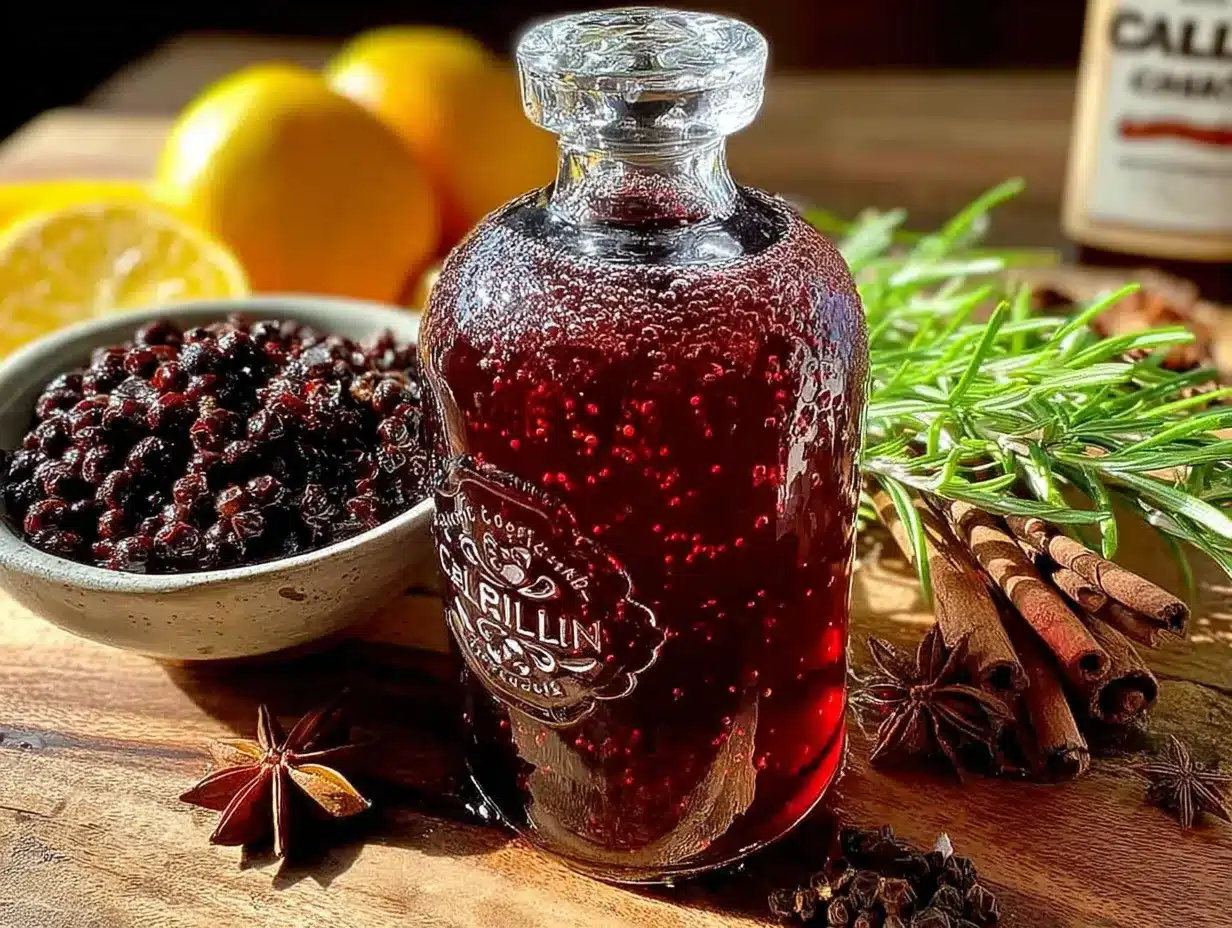
Alright, let’s get cooking. This recipe is straightforward, but I’ll walk you through each step with the little details that make a difference.
- Combine the berries and water (5 minutes): Add 1 cup dried elderberries and 4 cups filtered water to your saucepan. Give it a quick stir. The berries will float at first — that’s normal. Don’t worry, they’ll sink as they rehydrate.
- Add the spices (2 minutes): Toss in 2-3 cinnamon sticks, the sliced ginger, 1 teaspoon whole cloves, and 2-3 star anise pods (if using). If you’re adding orange peel, throw that in now too. Give everything a gentle stir to combine.
- Bring to a boil (5-7 minutes): Turn the heat to medium-high and bring the mixture to a rolling boil. You’ll see bubbles breaking the surface. Watch it carefully — don’t walk away too long or it might boil over. Trust me, I’ve cleaned that mess off the stove before.
- Reduce to a simmer (25-30 minutes): Once it’s boiling, lower the heat to medium-low so the liquid is just barely bubbling. You want a gentle simmer, not a violent boil. Let it go for 25-30 minutes. The liquid will reduce by about half, and the kitchen will smell incredible. The berries will look plump and almost mushy when they’re done.
- Strain the mixture (5 minutes): Place your fine-mesh strainer over a large bowl or measuring cup. Carefully pour the hot liquid through the strainer. Use the back of a wooden spoon to press down on the berries and extract as much liquid as possible. Don’t rush this step — you want all that goodness out. Discard the solids (or compost them).
- Cool the liquid (15-20 minutes): Let the strained liquid cool to room temperature. You can speed this up by placing the bowl in the fridge, but don’t add the honey until it’s completely cool. Heat destroys honey’s beneficial enzymes, and we want all those immune-boosting properties intact.
- Add the honey (2 minutes): Once the liquid is cool, stir in 1 cup raw honey. Start with less if you prefer a less sweet syrup. Whisk until the honey is fully dissolved. Taste it — adjust if needed. I sometimes add an extra tablespoon of honey if the batch feels too tart.
- Bottle and store (5 minutes): Pour the finished syrup into your sterilized glass jar using a funnel. Seal it tightly. Pop it in the fridge. That’s it — you’re done!
Cooking Tips & Techniques
I’ve made this recipe more times than I can count, and I’ve definitely learned a few things the hard way. Here are my best tips so you don’t make the same mistakes I did.
Don’t boil the honey. This is the biggest one. I ruined my very first batch by adding honey while the liquid was still hot. The honey just dissolved and lost all its good properties. Let the liquid cool completely — I mean completely — before you add it. Patience pays off here.
Watch the simmer. A vigorous boil will break down the elderberries too much and make the syrup bitter. You want a gentle simmer where tiny bubbles rise to the surface. If you see big, rolling bubbles, turn the heat down. I once got distracted and ended up with a syrup that tasted like burnt berries and regret.
Strain while hot. Straining is way easier when the liquid is still warm. If you let it cool completely, the berries turn into a thick, sticky mush that clogs your strainer. Strain it right after it’s done simmering, while it’s still hot enough to flow easily.
Double strain for clarity. If you want a crystal-clear syrup (which looks gorgeous in a jar), strain it twice. First through a fine-mesh strainer, then through a cheesecloth-lined strainer. It’s an extra step, but it makes a difference if you’re gifting jars.
Adjust the sweetness. Different honeys have different sweetness levels. A light wildflower honey is milder, while a dark buckwheat honey is more intense. Taste your syrup after adding honey and adjust. Some batches need a little more, some need less.
Timing is everything. I like to make this on a Sunday afternoon when I’m already puttering around the kitchen. The simmering time is perfect for folding laundry or reading a chapter of a book. Just set a timer so you don’t forget about it.
Variations & Adaptations
One of the best things about this recipe is how flexible it is. Here are some ways I’ve tweaked it over the years.
Low-Sugar Version: If you’re watching your sugar intake, you can cut the honey in half or replace it with a few drops of stevia. Just know that honey acts as a natural preservative, so a low-sugar syrup won’t last as long in the fridge — use it within two weeks.
Spice It Up (or Down): My husband loves extra ginger, so sometimes I double the ginger and add a pinch of cayenne pepper for a real kick. If you’re making this for kids, go easy on the cloves and star anise — they can be strong for little palates. I’ve made a “kid-friendly” version with just cinnamon and a tiny bit of ginger, and it was a hit.
Herbal Additions: I’ve experimented with adding a few sprigs of fresh thyme or a handful of dried rose hips. Thyme adds an earthy, slightly floral note that pairs beautifully with the elderberries. Rose hips boost the vitamin C content even more. Just add them with the spices and strain as usual.
Alcohol-Based Tincture: If you want a shelf-stable version, you can skip the honey and replace the water with vodka or brandy. This turns it into a tincture rather than a syrup. It’s stronger in flavor and lasts for months at room temperature. I keep a small bottle in my medicine cabinet for emergencies.
Slow Cooker Method: Yes, you can make this in a slow cooker! Combine everything except the honey in the slow cooker and cook on low for 4-6 hours. Strain, cool, and add honey. It’s even more hands-off than the stovetop method — perfect for busy days.
Serving & Storage Suggestions
This syrup is incredibly versatile. Here’s how I use it and how to keep it fresh.
Serving: I take 1 tablespoon daily during cold season, straight from a spoon. It’s also delicious stirred into hot tea or warm water — almost like a spiced tea concentrate. My kids love it drizzled over pancakes or yogurt. You can even add a splash to sparkling water for a fancy mocktail.
Storage: Keep your syrup in a tightly sealed glass jar in the refrigerator. It will stay good for up to 3 months. The honey acts as a natural preservative, so it lasts longer than you’d think. I’ve kept batches for 4 months with no issues, but if you see any mold or off smells, toss it.
Freezing: This syrup freezes beautifully. Pour it into ice cube trays and freeze. Once solid, pop the cubes into a freezer bag. Each cube is about 1 tablespoon — perfect for popping into tea on a cold morning. They’ll keep for up to 6 months.
Reheating: Don’t microwave the syrup directly — it can create hot spots that ruin the honey’s enzymes. Instead, scoop out a spoonful and stir it into hot tea or warm water. The residual heat will warm it up perfectly.
Flavor Development: The flavors actually deepen after a few days in the fridge. The spices continue to infuse, and the honey mellows out. I always think the syrup tastes even better on day three than it does fresh. So don’t worry if it seems a little strong at first — it will settle.
Nutritional Information & Benefits
Here’s the good stuff — why this syrup is more than just a tasty treat.
| Nutrient | Amount per 1 tbsp serving |
|---|---|
| Calories | 45 |
| Carbohydrates | 12g |
| Sugars (natural) | 11g |
| Vitamin C | 4mg (from elderberries and optional orange peel) |
| Antioxidants | High (from elderberries, cinnamon, and cloves) |
Elderberries are packed with antioxidants called anthocyanins, which help support your immune system. Cinnamon has anti-inflammatory properties, and ginger is known for soothing digestion and fighting nausea. Raw honey contains enzymes and probiotics that are great for gut health. Combined, this syrup is a powerhouse of natural immune support.
One note: this syrup is not a substitute for medical treatment. It’s a wonderful addition to a healthy lifestyle, but if you’re feeling seriously unwell, please see a doctor. I’m a home cook, not a medical professional.
This recipe is naturally gluten-free, dairy-free, and vegan (if you swap honey for agave or maple syrup). It contains no artificial anything — just real food, doing what real food does best.
Conclusion
This homemade spiced elderberry syrup immune booster is the kind of recipe that becomes a tradition. It’s the jar I pull out every fall, the gift I give to friends who are feeling run down, the thing I make when I want to feel like I’m taking care of my family in the most honest way possible. It’s not fancy. It’s not complicated. But it works, and it tastes like home.
I hope you give it a try. Customize it to your taste — add more ginger if you like heat, skip the star anise if it’s not your thing, double the batch so you have extra to share. That’s the beauty of a simple recipe like this. It’s yours to make your own.
If you make this syrup, I’d love to hear about it. Drop a comment below and tell me how it turned out, or share your own twist on it. And if you’re looking for another cozy, immune-supporting recipe, you might enjoy my golden turmeric latte mix — it’s another cold-weather favorite in my kitchen.
Stay well, friends. And remember — sometimes the best medicine comes from a pot on the stove.
Frequently Asked Questions
Can I use fresh elderberries instead of dried?
I don’t recommend it. Fresh elderberries are quite tart and contain compounds that can cause stomach upset if not cooked properly. Dried elderberries are more concentrated, safer, and easier to work with. Stick with dried for this recipe.
How much should I take daily?
For adults, 1 tablespoon per day is a good maintenance dose. If you feel a cold coming on, you can take 1 tablespoon three times a day for a few days. For children over age one, start with 1 teaspoon per day. Always consult your pediatrician before giving any herbal remedy to kids.
Can I use ground spices instead of whole?
Technically yes, but I don’t recommend it. Ground spices will make your syrup cloudy and gritty. They’re also harder to strain out. Whole spices infuse flavor cleanly and are easy to remove. If you only have ground spices, tie them in a cheesecloth bundle before adding them to the pot.
Why did my syrup turn out bitter?
This usually happens from over-simmering or boiling too vigorously. Elderberries can become bitter if cooked too long or at too high a heat. Next time, keep the heat low and stick to the 25-30 minute simmer. Also, check your cloves — too many can make the syrup taste medicinal. Stick to 1 teaspoon.
Can I make this without honey for a sugar-free version?
You can, but it won’t be a syrup — it will be more like a strong tea. Honey gives it body and acts as a natural preservative. Without it, the liquid is thinner and won’t last as long in the fridge (use within 5-7 days). You can sweeten it with stevia or monk fruit, but the texture will be different. I prefer the honey version for both taste and shelf life.
PrintHomemade Spiced Elderberry Syrup: The Best Immune Booster
This homemade spiced elderberry syrup immune booster is a comforting, immune-supporting syrup made with dried elderberries, warm spices, and raw honey. It’s quick to prepare, uses simple ingredients, and tastes like spiced tea rather than medicine.
- Prep Time: 15 minutes
- Cook Time: 30 minutes
- Total Time: 45 minutes
- Yield: 4 servings 1x
- Category: Condiment
- Cuisine: American
Ingredients
- 1 cup dried elderberries
- 2–3 whole cinnamon sticks
- 2-inch piece fresh ginger, sliced
- 1 teaspoon whole cloves
- 2–3 whole star anise pods (optional)
- 1 cup raw honey (or to taste)
- 4 cups filtered water
- Optional: orange peel from 1 orange
Instructions
- Combine the berries and water: Add 1 cup dried elderberries and 4 cups filtered water to a medium saucepan. Stir briefly.
- Add the spices: Add 2-3 cinnamon sticks, sliced ginger, 1 teaspoon whole cloves, and 2-3 star anise pods (if using). Add orange peel if desired. Stir gently.
- Bring to a boil: Heat over medium-high heat until the mixture reaches a rolling boil, about 5-7 minutes.
- Reduce to a simmer: Lower the heat to medium-low so the liquid is just barely bubbling. Simmer gently for 25-30 minutes, until the liquid reduces by about half and the berries are plump.
- Strain the mixture: Place a fine-mesh strainer over a large bowl or measuring cup. Carefully pour the hot liquid through the strainer. Press down on the berries with the back of a wooden spoon to extract as much liquid as possible. Discard the solids.
- Cool the liquid: Let the strained liquid cool to room temperature, about 15-20 minutes. Do not add honey until completely cool.
- Add the honey: Once cool, stir in 1 cup raw honey until fully dissolved. Taste and adjust sweetness if needed.
- Bottle and store: Pour the syrup into a sterilized glass jar using a funnel. Seal tightly and refrigerate.
Notes
Do not add honey while the liquid is hot to preserve its enzymes. Strain while hot for easier handling. For a clearer syrup, strain twice. The syrup can be frozen in ice cube trays for up to 6 months. This recipe is not a substitute for medical treatment.
Nutrition
- Serving Size: 1 tablespoon
- Calories: 45
- Sugar: 11
- Carbohydrates: 12
Keywords: elderberry syrup, immune booster, spiced syrup, homemade syrup, cold season remedy, elderberry recipe


