Love this? Save it for later!
Share the inspiration with your friends
I was standing in the middle of the party supply aisle last September, holding a bag of plastic spider rings in one hand and a tube of black frosting in the other, when that familiar pang hit me — and suddenly I was seven years old at my Aunt Maggie’s kitchen table, watching her turn a block of cheddar into a ghost with nothing but a cookie cutter and a look of pure concentration.
The fluorescent lights of the big box store faded, and I could smell her kitchen again: popcorn butter, apple cider, and the faint waxy scent of the candy corn she’d pour into a ceramic pumpkin every single year. She’d let me help arrange everything on a big wooden cutting board — cheese ghosts lined up like they were marching somewhere important, grapes clustered to look like eyeballs, and those little pretzel sticks standing in for witch fingers. I remember dropping a ghost on the floor and her just laughing, picking it up, brushing it off, and saying, “That one’s got character now.”
She passed away a few years ago, and honestly, I haven’t been able to make a Halloween snack board without thinking about her crooked smile and the way she’d sneak an extra candy corn when she thought I wasn’t looking. So last week, when my own kids started begging for a Halloween party snack, I knew exactly what I had to do. But I needed it to be simpler, faster, and — let’s be real — affordable enough to feed a whole classroom of little goblins without breaking the grocery budget.
That’s how this Kid-Friendly Halloween Charcuterie Board with Candy Corn and Cheese Ghosts was born. It’s my version of Aunt Maggie’s tradition, tweaked for real life with busy parents, picky eaters, and a sensible grocery list. And honestly? It’s the most fun I’ve had in the kitchen all year. Maybe you’ve been there — staring at a Pinterest-perfect charcuterie board that costs fifty bucks and takes three hours to assemble, thinking, “Yeah, that’s not happening on a Tuesday.” This is the opposite of that. This is the board you can actually pull off.
Why You’ll Love This Recipe
I’ve tested this board about six times now — three times with my own kids as the official taste-testers, once for my neighbor’s Halloween block party, and twice just to make sure the cheese ghosts hold their shape after an hour on the counter. They do, by the way. Here’s why this one’s different.
- Quick & Easy: You can put this whole board together in under 20 minutes. No cooking, no baking, no complicated steps. Just slicing, arranging, and maybe a little creative ghost-making.
- Simple Ingredients: Everything on this board comes from a regular grocery store. No fancy cheese shops, no specialty markets, no ingredients you have to order online. I promise.
- Perfect for Halloween Parties: Classroom celebrations, pumpkin carving nights, or just a fun Friday night movie with the kids — this board fits every spooky occasion.
- Crowd-Pleaser: My kids fought over the cheese ghosts. The neighbor kids asked for seconds. Even my husband, who claims he’s “not a charcuterie person,” ate half the board standing up at the counter.
- Unbelievably Delicious: The combination of salty cheese, sweet candy corn, crunchy pretzels, and fresh fruit is honestly addictive. It’s that perfect sweet-and-salty thing that makes you keep reaching for just one more piece.
What makes this board different from the hundreds of Halloween snack boards you’ll see online is the cheese ghosts. I spent three test runs figuring out the best cheese to use (block cheddar, not pre-sliced, not the soft stuff) and the perfect cutting technique so the ghosts don’t crumble or stick. Plus, I’ll show you how to arrange everything so it looks impressive without needing any special skills. This isn’t just another version — it’s the one that actually works for real families.
What Ingredients You Will Need
This recipe uses simple, everyday ingredients that come together to create something that feels special without the stress. Most of these are pantry staples or easy finds at any grocery store. I’ve organized them by category so you can shop and prep with ease.
For the Cheese Ghosts
- Block cheddar cheese, 8 ounces (yellow or white — I prefer yellow for the classic ghost look, but white works too)
- Ghost-shaped cookie cutter (about 2 inches wide — any size works, but smaller ghosts are easier to handle)
- Black sesame seeds or poppy seeds (for the ghost eyes — about 1 teaspoon)
For the Board
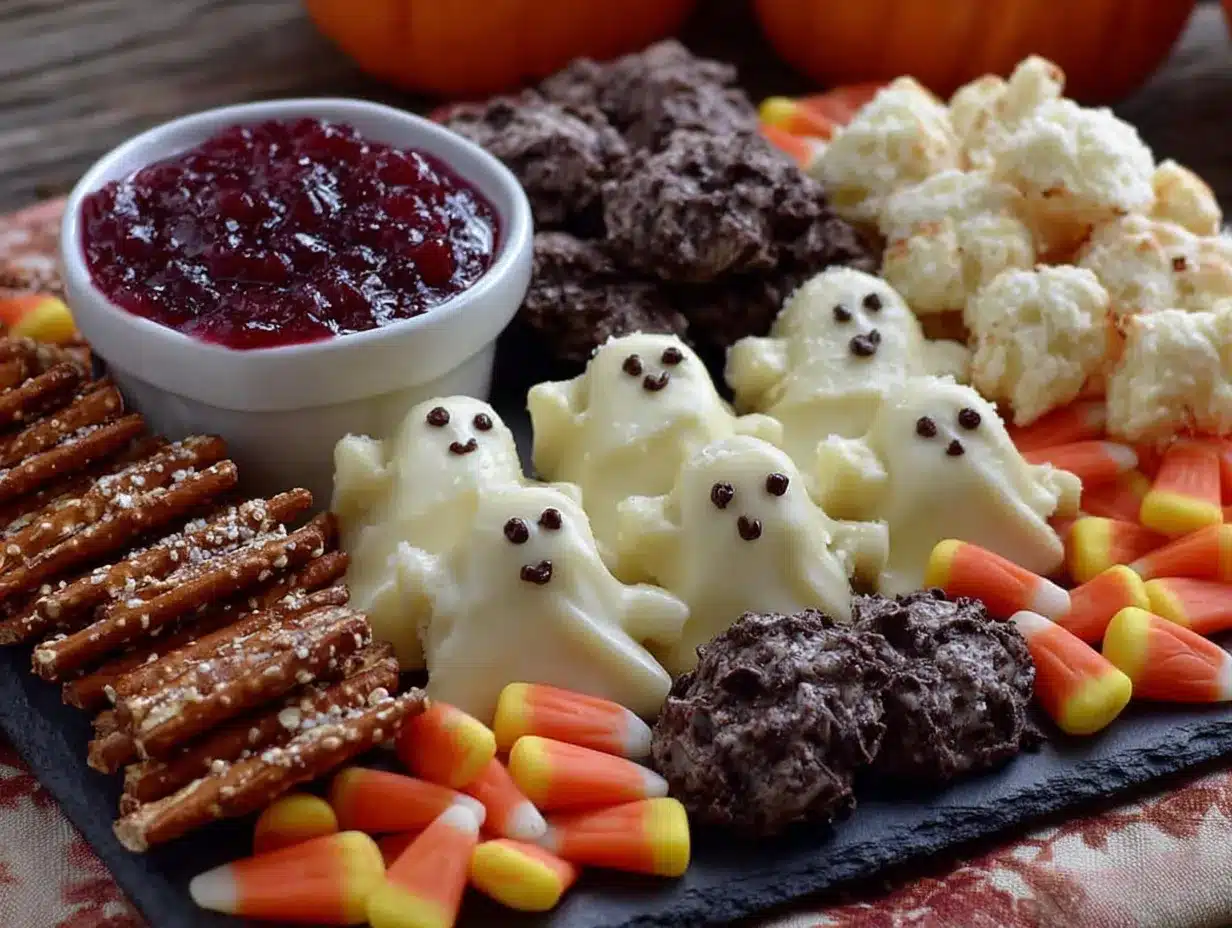
- Candy corn, 1 cup (the classic Halloween staple — I use Brach’s, but any brand works)
- Pretzel sticks, 1 cup (adds crunch and looks like little witch fingers)
- Red and green grapes, 1 cup each (eyeball vibes — wash and dry thoroughly)
- Baby carrots, 1 cup (jack-o-lantern teeth or just a healthy crunch)
- Mini mozzarella balls, 1 cup (ghost bodies or just creamy bites — drain well)
- Crackers, about 2 cups (I use Ritz or butter crackers for the buttery flavor)
- Apple slices, 1 apple (toss in lemon water to prevent browning)
- Halloween-themed sprinkles, optional (for a festive touch on the board)
For the Dip (Optional but Recommended)
- Greek yogurt, 1/2 cup (plain or vanilla — I use plain for versatility)
- Honey, 1 tablespoon (for sweetness)
- Pumpkin pie spice, 1/4 teaspoon (adds that fall flavor — trust me on this)
I recommend using Tillamook or Cabot block cheddar for the ghosts — they slice cleanly and hold their shape better than softer cheeses. If you can’t find a ghost cookie cutter, a small bone-shaped or bat-shaped cutter works just as well. For the candy corn, look for fresh bags — stale candy corn is chewy and not as fun to eat. In the fall, you can swap the grapes for clementine wedges or pomegranate seeds for a seasonal twist. If someone in your family has a dairy allergy, use vegan cheddar blocks for the ghosts and skip the mozzarella balls — the board still works beautifully.
Equipment Needed
You don’t need much for this board, and I’ve found that using what you already have is totally fine. Here’s what I use:
- Large cutting board or serving platter (any size works — I use a 12×16 inch wooden board, but a baking sheet lined with parchment paper is a great budget-friendly alternative)
- Ghost-shaped cookie cutter (available at most craft stores or online for under $5 — if you don’t have one, you can freehand cut the cheese with a paring knife, though it takes a little longer)
- Sharp knife (for slicing cheese and fruit — a serrated knife works best for apple slices)
- Small bowls (for the dip and any loose items like candy corn or sprinkles)
- Paper towels (for drying grapes and mozzarella balls — wet ingredients make the board soggy)
- Toothpicks or small skewers (for easy grabbing, especially for little hands)
I’ve made this board with a cheap plastic cutting board from the dollar store, and it worked just fine. The cookie cutter is the only “special” item, and honestly, you can use it for sandwiches and cookies all year round. If you’re on a tight budget, skip the cookie cutter and use a small knife to cut the cheese into ghost shapes — I’ve done it, and the ghosts look charmingly imperfect.
Preparation Method
Let’s get to the fun part. I’ve broken this down into simple steps so you can follow along without any stress. The whole process takes about 15 to 20 minutes, depending on how fancy you want to get with the arrangement.
Step 1: Make the Cheese Ghosts (5 minutes)
Take your block of cheddar cheese and slice it into pieces about 1/4 inch thick. You want them thin enough to cut easily but thick enough that the ghosts don’t fall apart. Press the ghost cookie cutter firmly into the cheese slice — you might need to wiggle it a little to get a clean cut. Gently push the ghost out of the cutter with your finger. Repeat until you’ve used all the cheese. You should get about 10 to 12 ghosts from an 8-ounce block, depending on the size of your cutter. Place the ghosts on a small plate and use a toothpick to dot two eyes on each ghost with black sesame seeds or poppy seeds. Press gently so they stick. If the seeds don’t stay, dab a tiny bit of honey on the cheese first. Set the ghosts aside.
Step 2: Prep the Fruit and Veggies (5 minutes)
Wash the grapes thoroughly and pat them dry with paper towels — wet grapes make the board soggy and can cause the crackers to get soft. Slice the apple into thin wedges and toss them in a bowl with a little lemon juice and water to prevent browning. Drain the mini mozzarella balls and pat them dry. If you’re using baby carrots, give them a quick rinse. Set everything in separate bowls or piles on your counter so you can grab them easily when you’re assembling the board.
Step 3: Make the Dip (2 minutes)
In a small bowl, mix the Greek yogurt, honey, and pumpkin pie spice together until smooth. Taste it and adjust the sweetness if you want — sometimes I add an extra drizzle of honey if I’m feeling indulgent. Pour the dip into a small serving bowl and set it aside. This dip is optional, but honestly, it ties the whole board together and gives the kids something fun to dunk their pretzels and apple slices into.
Step 4: Assemble the Board (5 to 8 minutes)
Place your large cutting board or platter on a flat surface. Start by putting the bowl of dip in the center or slightly off to one side — this gives the board a focal point. Arrange the cheese ghosts in a little cluster near the dip, like they’re gathering around it. Fill in the rest of the board with the remaining ingredients, grouping them by color and texture. Place the candy corn in one corner, the pretzel sticks in another, and the grapes in small clusters around the board. Scatter the baby carrots and apple slices in between the other items. Add the crackers in a few small piles so there’s always one within reach. Finally, sprinkle the Halloween-themed sprinkles (if using) over the board for a festive touch. Step back and admire your work — it should look full and colorful, with little pockets of empty space between the ingredients.
Step 5: Serve Immediately or Refrigerate
This board is best served within an hour of assembling. If you need to make it ahead of time, prepare all the ingredients separately and store them in airtight containers in the refrigerator. Assemble the board no more than 30 minutes before serving to keep the crackers crunchy and the fruit fresh. The cheese ghosts can be made a day in advance — just store them in a single layer in an airtight container with wax paper between the layers so they don’t stick together.
Cooking Tips & Techniques
I’ve learned a few things the hard way so you don’t have to. Here are my best tips for making this board look and taste amazing.
Use cold cheese for cleaner cuts. If your cheese is room temperature, it will be too soft and the ghosts will crumble. Pop the block in the fridge for 10 minutes before slicing — it makes a huge difference. I learned this after my first batch of ghosts looked more like blobs than boos.
Dry everything thoroughly. This is the number one mistake people make with charcuterie boards. Wet grapes, wet mozzarella, wet anything — it all makes the crackers and pretzels soggy within minutes. Take the extra 30 seconds to pat everything dry with paper towels. Your board will thank you.
Don’t overcrowd the board. It’s tempting to pile everything on, but leaving a little space between ingredients makes the board look more intentional and professional. Plus, it gives little hands room to grab things without knocking over a cheese ghost.
Make extra cheese ghosts. Trust me on this. Kids love them, and they’ll disappear fast. I usually make double the recipe and hide a few in the fridge for snacking later. The ghosts also make great lunchbox surprises the next day.
Use a variety of textures. The best boards have a mix of crunchy (pretzels, crackers), creamy (cheese, mozzarella), fresh (grapes, apples), and sweet (candy corn). This keeps everyone interested and makes the board feel like a real meal, not just a snack.
Let the kids help. I let my kids arrange the candy corn and place the ghost eyes. It takes a little longer, and the board doesn’t look as “perfect,” but they’re so proud of their work. Plus, they’re more likely to eat something they helped create. That’s a win in my book.
Variations & Adaptations
One of the best things about this board is how easy it is to adapt. Here are some of my favorite variations.
For a healthier version: Swap the candy corn for dried apricots or apple chips, and use whole-grain crackers instead of butter crackers. The cheese ghosts stay the same — they’re already a good source of protein and calcium. I’ve made this version for my kids’ school Halloween party, and it was a hit with both the kids and the teachers.
For a dairy-free version: Use vegan cheddar blocks for the ghosts (Daiya and Violife both work well) and skip the mozzarella balls. Add extra fruit or veggie sticks to fill the space. The dip can be made with coconut yogurt instead of Greek yogurt — just add a little extra honey to balance the tang.
For a nut-free version: This board is naturally nut-free if you avoid any nut-based crackers or pretzels. Check the labels on your crackers and pretzels to be safe. If you’re serving this at a school event, it’s always a good idea to double-check for any nut-containing ingredients.
For a savory twist: Add some salami or pepperoni slices to the board for extra protein. I’ve done this for Halloween parties where the adults were hovering around the board as much as the kids. The salty meat pairs surprisingly well with the candy corn — don’t knock it until you’ve tried it.
For a spooky presentation: Use a black or dark-colored serving board to make the colors pop. Add some plastic spider rings or fake eyeballs to the board for extra Halloween flair. I found a pack of plastic spiders at the dollar store, and my kids thought they were the best part of the whole setup.
Serving & Storage Suggestions
This board is best served at room temperature, so take it out of the refrigerator about 15 minutes before you’re ready to eat. The cheese ghosts will be easier to pick up and the flavors will be more pronounced. I like to arrange the board on a large wooden cutting board and place it in the center of the table so everyone can reach it easily.
For presentation, I recommend grouping the ingredients by color — put the orange candy corn and carrots together, the green grapes in their own cluster, and the white cheese ghosts and mozzarella balls near each other. This creates a visually appealing board that looks like it took way more effort than it actually did. If you’re feeling extra festive, add a few small pumpkins or fall leaves around the edges of the board.
For storage, any leftovers can be stored in separate airtight containers in the refrigerator. The cheese ghosts will keep for up to 3 days, but the fruit and crackers are best eaten within 24 hours. The candy corn will last for weeks if stored in a cool, dry place. I don’t recommend freezing this board — the texture of the fruit and cheese will suffer.
For reheating, there’s nothing to reheat here! But if you’ve made the dip ahead of time, just give it a quick stir before serving. The flavors actually develop and get better after a day in the fridge — the pumpkin pie spice melds with the honey and yogurt in a really lovely way.
Nutritional Information & Benefits
This board is designed to be a fun, festive snack that also offers some nutritional value. Here’s an approximate breakdown per serving (based on 6 servings):
- Calories: 320-380 per serving
- Protein: 12-15 grams (from cheese, yogurt, and mozzarella)
- Carbohydrates: 35-40 grams (from fruit, crackers, and candy corn)
- Fat: 16-20 grams (mostly from cheese and crackers)
- Fiber: 3-4 grams (from grapes, apples, and carrots)
- Calcium: 20-25% of daily value (from cheese and yogurt)
The cheese ghosts provide a good source of calcium and protein, which helps keep kids full and satisfied. The grapes and apple slices offer vitamin C and antioxidants, while the carrots add beta-carotene for eye health. The Greek yogurt dip adds probiotics for gut health. Of course, the candy corn is the treat part — and that’s okay. It’s Halloween, after all. The key is balance: a little bit of everything makes this a snack that feels indulgent but still has some nutritional merit.
This board is naturally vegetarian and can easily be made gluten-free by using gluten-free crackers and pretzels. It contains dairy, so it’s not suitable for vegans or those with dairy allergies without the substitutions mentioned above. The candy corn is typically gluten-free, but always check the label to be safe.
Conclusion
This Kid-Friendly Halloween Charcuterie Board with Candy Corn and Cheese Ghosts is the kind of recipe that makes me love being a mom in the kitchen. It’s simple enough to throw together on a busy school night, but special enough to make the kids feel like Halloween has truly arrived. Every time I make it, I think of Aunt Maggie and her crooked smile, and I hope she’d approve of my version — ghosts with character and all.
I’d love to hear how your board turns out. Did your kids help make the ghosts? Did you add any fun variations? Drop a comment below and let me know — I read every single one, and I love seeing your creations. And if you’re looking for more easy, family-friendly recipes, don’t forget to share this post with your friends. Happy Halloween, and happy snacking!
Frequently Asked Questions
Can I make the cheese ghosts ahead of time?
Yes! You can make the cheese ghosts up to 2 days in advance. Store them in a single layer in an airtight container with wax paper between the layers to prevent sticking. Add the sesame seed eyes just before serving so they don’t fall off.
What if I can’t find a ghost-shaped cookie cutter?
No problem! You can use any Halloween-shaped cookie cutter — bats, pumpkins, or even a small bone shape work great. If you don’t have any cookie cutters, use a small paring knife to cut the cheese into simple ghost shapes. They don’t have to be perfect; imperfect ghosts have more personality.
How long will this board stay fresh at a party?
The board is best enjoyed within 2 hours of assembly. After that, the crackers can get soft and the fruit may start to wilt. If you’re serving it at a longer party, keep the crackers and pretzels separate and add them to the board just before serving.
Can I add meat to this board for more protein?
Absolutely! Salami, pepperoni, or even small slices of turkey or ham work well with the other flavors. Just keep the meat separate from the fruit to avoid any cross-contamination. I recommend adding the meat just before serving to keep it fresh.
What’s the best way to transport this board to a party?
Assemble the board on a large, flat platter or baking sheet with raised edges. Cover it tightly with plastic wrap and transport it carefully. Alternatively, pack all the ingredients separately and assemble the board at the party — this is the easiest method and ensures everything stays fresh and crunchy.
Pin This Recipe!
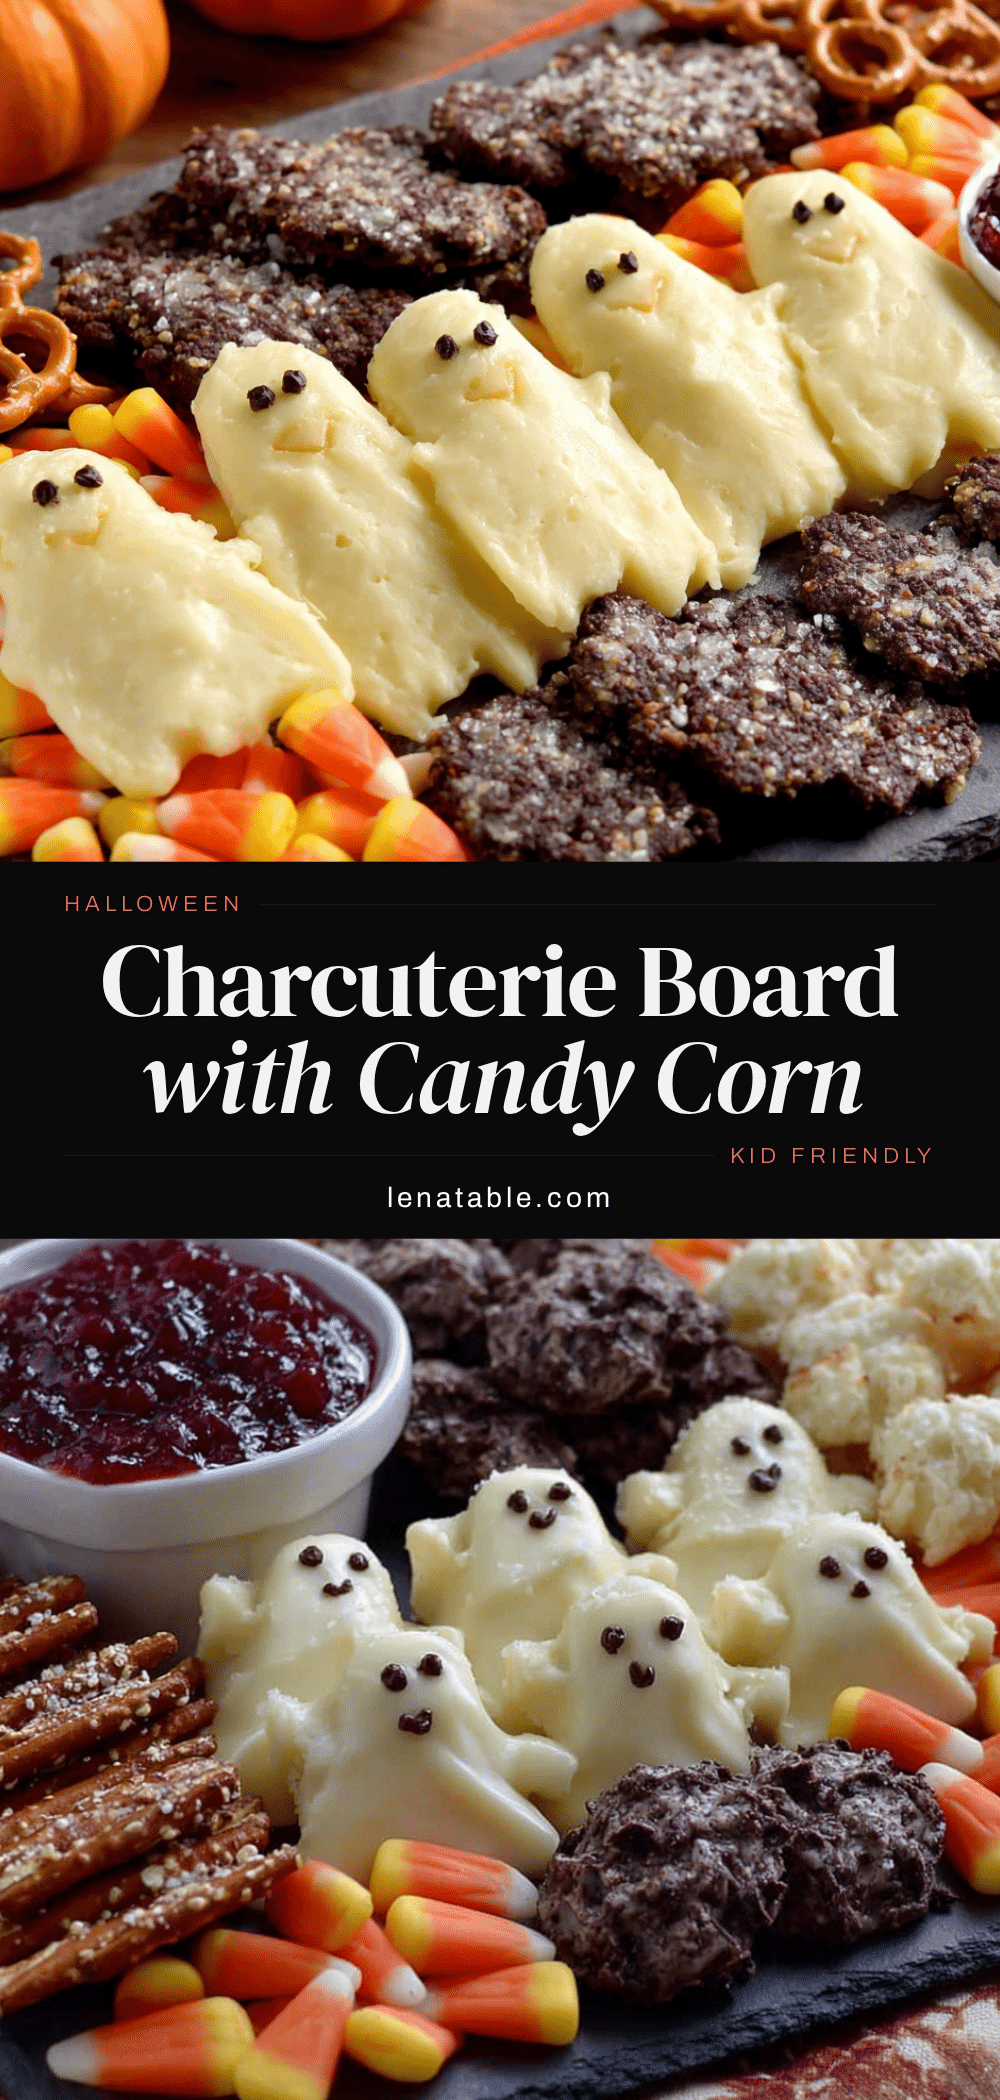
Kid-Friendly Halloween Charcuterie Board with Candy Corn Cheese Ghosts
A quick and easy Halloween snack board featuring adorable cheddar cheese ghosts, candy corn, pretzels, and fresh fruit. Perfect for classroom parties, pumpkin carving nights, or a fun family movie night.
- Prep Time: 15 minutes
- Cook Time: 0 minutes
- Total Time: 15 minutes
- Yield: 6 servings 1x
- Category: Appetizer
- Cuisine: American
Ingredients
- 8 ounces block cheddar cheese (yellow or white)
- 1 teaspoon black sesame seeds or poppy seeds (for ghost eyes)
- 1 cup candy corn
- 1 cup pretzel sticks
- 1 cup red grapes
- 1 cup green grapes
- 1 cup baby carrots
- 1 cup mini mozzarella balls
- 2 cups crackers (such as Ritz or butter crackers)
- 1 apple, sliced (tossed in lemon water to prevent browning)
- Halloween-themed sprinkles (optional)
- 1/2 cup Greek yogurt (plain or vanilla)
- 1 tablespoon honey
- 1/4 teaspoon pumpkin pie spice
Instructions
- Make the cheese ghosts: Slice the block cheddar into 1/4-inch thick pieces. Use a ghost-shaped cookie cutter to cut out ghosts from the cheese slices. You should get about 10-12 ghosts. Use a toothpick to dot two eyes on each ghost with black sesame seeds or poppy seeds. Press gently so they stick. Set aside.
- Prep the fruit and veggies: Wash and thoroughly dry the grapes. Slice the apple into thin wedges and toss in lemon water to prevent browning. Drain and pat dry the mini mozzarella balls. Rinse the baby carrots. Set everything aside.
- Make the dip: In a small bowl, mix the Greek yogurt, honey, and pumpkin pie spice until smooth. Adjust sweetness to taste. Pour into a small serving bowl.
- Assemble the board: Place the large cutting board or platter on a flat surface. Put the bowl of dip in the center or slightly off to one side. Arrange the cheese ghosts in a cluster near the dip. Fill the rest of the board with the remaining ingredients, grouping by color and texture: candy corn in one corner, pretzel sticks in another, grapes in small clusters, and scattered baby carrots and apple slices. Add crackers in small piles. Sprinkle Halloween-themed sprinkles over the board if using.
- Serve immediately or refrigerate: Best served within an hour of assembly. If making ahead, prepare all ingredients separately and assemble no more than 30 minutes before serving. Cheese ghosts can be made a day in advance and stored in a single layer in an airtight container with wax paper between layers.
Notes
Use cold cheese for cleaner cuts. Dry all fruit and mozzarella thoroughly to prevent sogginess. Don’t overcrowd the board; leave space between ingredients. Make extra cheese ghosts as they disappear fast. Let kids help arrange the board for added fun. For a dairy-free version, use vegan cheddar and coconut yogurt. For a gluten-free version, use gluten-free crackers and pretzels.
Nutrition
- Serving Size: 1 serving (about 1/6
- Calories: 350
- Sugar: 22
- Sodium: 450
- Fat: 18
- Saturated Fat: 10
- Carbohydrates: 38
- Fiber: 3
- Protein: 14
Keywords: Halloween charcuterie board, kid-friendly snack, cheese ghosts, candy corn, Halloween party food, easy appetizer


