Love this? Save it for later!
Share the inspiration with your friends
This was supposed to be a perfectly respectable batch of classic chocolate chip cookies. I had the butter softening on the counter, the eggs at room temperature, and my grandmother’s recipe card propped up against the salt pig. But then my toddler decided to “help” by turning the stove burner on under the butter I’d just put in a saucepan to melt gently. By the time I smelled it, the butter had gone from melted to deeply golden, with little brown specks floating in it and a nutty aroma filling the kitchen. I honestly thought I’d ruined everything. I mean, that was a whole stick of good butter, and I was already running late for a playdate.
But instead of dumping it out and starting over, I figured, what the heck. Let’s see what happens. I poured that brown butter into the mixing bowl, still warm and smelling like toasted hazelnuts, and proceeded with the recipe as if nothing had gone wrong. The dough looked a little different, felt a little softer, and I was half-convinced the cookies would spread into greasy puddles. Maybe you’ve been there, standing over a batch of dough that seems doomed, wondering if you should just scrap the whole thing and order takeout.
Well, let me tell you, those cookies came out of the oven looking like golden discs of pure magic. The edges were crisp and lacy, the centers were chewy and tender, and the flavor had this deep, almost butterscotch-like complexity that my grandmother’s original recipe never had. I stood there eating one right off the baking sheet, burning my tongue, and realized I had accidentally stumbled onto something incredible. That happy accident turned into my go-to cookie recipe, the one I make for every bake sale, every holiday party, and every Tuesday that feels like it needs a little extra sweetness. These Perfect Brown Butter Chocolate Chip Cookies with Flaky Sea Salt are proof that sometimes the best things happen when you stop panicking and just roll with it.
Why You’ll Love This Recipe
Let me be real with you for a second. I’ve tested a lot of chocolate chip cookie recipes over the years. Like, a lot. Some were too cakey, some spread into thin crisps, and some just tasted flat no matter how much vanilla I added. But this one? This one is different. It’s the kind of cookie that makes people close their eyes after the first bite, and honestly, that never gets old.
- Deep, Nutty Flavor: Browning the butter is a game-changer. It adds a toasty, caramel-like richness that you just can’t get from regular melted butter. It’s like the cookie version of upgrading from instant coffee to a pour-over.
- Perfect Texture: These cookies have crispy, golden edges and soft, chewy centers. No more debating which part of the cookie is better, because both are amazing.
- Simple Ingredients: You probably have everything you need in your pantry right now. Butter, sugar, eggs, flour, vanilla, chocolate chips, and salt. No weird specialty ingredients or trips to three different stores.
- Crowd-Pleaser: I’ve brought these to potlucks, family gatherings, and office parties, and they disappear every single time. Kids love them, adults love them, and people always ask for the recipe.
- That Flaky Salt Finish: A sprinkle of flaky sea salt right when they come out of the oven takes these cookies from great to unforgettable. The salt cuts through the sweetness and makes the chocolate taste even more intense.
This isn’t just another chocolate chip cookie recipe. It’s the one I turn to when I want to impress someone, or when I need a little comfort, or when I just want to make my kitchen smell amazing. It’s comfort food reimagined, with the same soul-soothing satisfaction but a depth of flavor that feels special without being fussy. Perfect for a cozy weekend baking session, a last-minute dessert for dinner guests, or a Tuesday afternoon that needs a little pick-me-up.
What Ingredients You Will Need
This recipe uses simple, wholesome ingredients, but each one plays a specific role in creating that perfect cookie texture and flavor. Here’s what you’ll need, along with a few tips I’ve picked up from making these cookies more times than I can count.
For the Cookie Dough
- 1 cup (2 sticks / 226g) unsalted butter: This is the star of the show. I use unsalted so I can control the salt level. European-style butter like Plugra or Kerrygold has a higher fat content and gives an even richer flavor, but any good unsalted butter works.
- 1 ¼ cups (250g) packed light brown sugar: Brown sugar adds moisture and that subtle molasses flavor that pairs beautifully with the brown butter. I prefer light brown sugar for a milder flavor, but dark brown sugar works too if you want a deeper molasses taste.
- ½ cup (100g) granulated sugar: White sugar helps create those crispy edges. The combination of brown and white sugar is key for the perfect texture.
- 2 large eggs, at room temperature: Room temperature eggs incorporate more easily into the brown butter, creating a smoother dough. If you forget to take them out early, place them in a bowl of warm water for 5 minutes.
- 2 teaspoons vanilla extract: Use pure vanilla extract if you can. It makes a noticeable difference in the final flavor. I’m partial to Nielsen-Massey, but any good brand works.
- 2 ¼ cups (280g) all-purpose flour: Spoon and level your flour for the most accurate measurement. Scooping directly from the bag can pack in too much flour, leading to dry cookies.
- 1 teaspoon baking soda: This helps the cookies spread just the right amount and gives them a nice lift.
- 1 teaspoon kosher salt: Don’t skip the salt in the dough. It balances the sweetness and enhances the chocolate flavor.
- 2 cups (340g) semi-sweet chocolate chips or chunks: I like to use a mix of chips and roughly chopped chocolate bars for varied texture. Ghirardelli chips are my go-to, but use whatever you love. Dark chocolate, milk chocolate, or even white chocolate all work here.
For the Finish
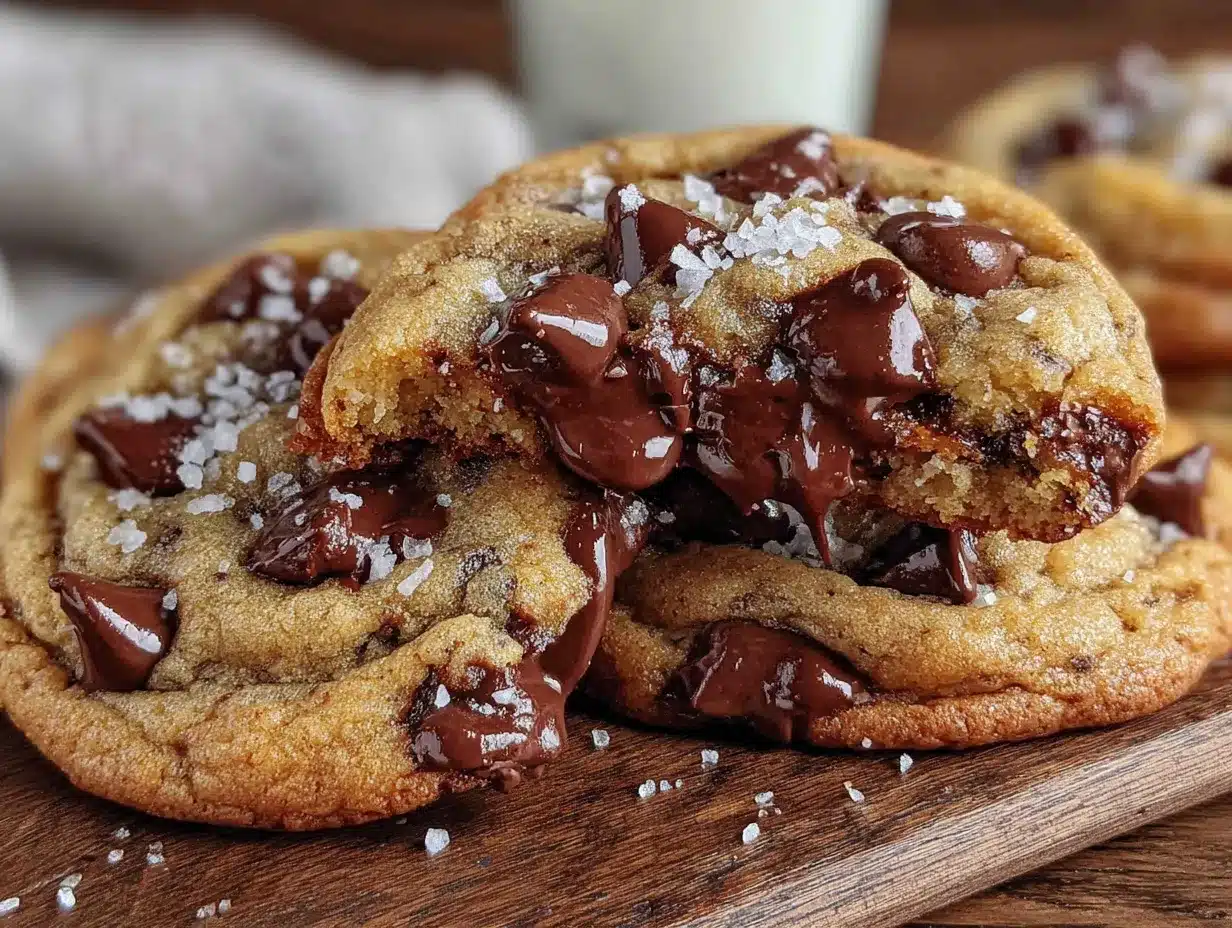
- Flaky sea salt, like Maldon or Jacobsen: This is non-negotiable for me. The delicate, crunchy flakes of salt on top of the warm cookies are what make them truly special. Don’t substitute with regular table salt, it will be too intense and won’t have the same texture.
Equipment Needed
You don’t need a ton of fancy equipment to make these cookies, which is part of why I love this recipe so much. Here’s what you’ll need.
- Large skillet or saucepan: For browning the butter. A light-colored pan is helpful because you can see the butter solids turn golden more easily. I use my trusty stainless steel skillet, but a non-stick pan works too.
- Mixing bowls: One large bowl for the wet ingredients and dry ingredients, and one small bowl for the flour mixture. I prefer glass or stainless steel bowls.
- Whisk and rubber spatula: A whisk for combining the sugars and eggs, and a spatula for folding in the chocolate chips and scraping down the sides of the bowl.
- Electric mixer (hand or stand): You can definitely cream the butter and sugars by hand with a wooden spoon, but an electric mixer makes it easier and faster. If you use a stand mixer, use the paddle attachment.
- Baking sheets: I use rimmed baking sheets lined with parchment paper or silicone baking mats. Parchment paper is my preference because it helps the cookies spread evenly and makes cleanup a breeze.
- Cookie scoop: A 1.5-tablespoon cookie scoop ensures uniform cookies that bake evenly. If you don’t have one, you can use two spoons to portion the dough.
- Cooling rack: Essential for letting the cookies cool properly so they don’t continue cooking on the hot baking sheet.
Preparation Method
Alright, let’s get to the good part. Follow these steps, and you’ll have a batch of the best brown butter chocolate chip cookies you’ve ever tasted.
- Brown the butter: Place the butter in a large skillet or saucepan over medium heat. Swirl the pan occasionally as the butter melts. It will start to foam and crackle, then the foam will subside and you’ll see little brown specks forming on the bottom of the pan. This whole process takes about 5-8 minutes. Watch it carefully, because it can go from perfectly browned to burnt in seconds. When it smells nutty and the solids are a deep amber color, remove it from the heat immediately. Pour the brown butter into a large mixing bowl, scraping all those delicious brown bits into the bowl. Let it cool for 10-15 minutes. It should be warm but not hot to the touch.
- Mix the sugars and butter: Add the brown sugar and granulated sugar to the warm browned butter. Whisk vigorously for about 30 seconds until the mixture looks like wet sand and is well combined. It won’t be fluffy like creamed butter and sugar, and that’s okay.
- Add the eggs and vanilla: Add the eggs one at a time, whisking well after each addition. Then add the vanilla extract and whisk until the mixture is smooth, glossy, and slightly thickened. This should take about a minute.
- Combine the dry ingredients: In a separate bowl, whisk together the flour, baking soda, and kosher salt. This ensures the leavening and salt are evenly distributed.
- Mix the dough: Add the dry ingredients to the wet ingredients. Use a rubber spatula to fold everything together until just combined. A few streaks of flour are okay. Do not overmix, or your cookies will be tough.
- Fold in the chocolate: Add the chocolate chips or chunks and fold them in with the spatula until they’re evenly distributed throughout the dough. The dough will be thick and slightly sticky.
- Chill the dough (optional but recommended): For the absolute best texture and flavor, cover the bowl with plastic wrap and refrigerate the dough for at least 30 minutes, or up to 72 hours. Chilling the dough prevents the cookies from spreading too much and allows the flavors to meld together. If you’re in a hurry, you can skip this step, but your cookies will spread a bit more.
- Preheat the oven: When you’re ready to bake, preheat your oven to 375°F (190°C). Line two baking sheets with parchment paper.
- Portion the dough: Use a 1.5-tablespoon cookie scoop to portion the dough into balls. Place them on the prepared baking sheets, spacing them about 2 inches apart. You should get about 24 cookies.
- Bake: Bake one sheet at a time for 10-12 minutes, or until the edges are golden brown and the centers are just set and still look slightly soft and puffy. The cookies will continue to bake on the hot sheet after you take them out of the oven. For softer, chewier cookies, bake on the lower end of the time range.
- Finish with salt: As soon as the cookies come out of the oven, sprinkle them with a pinch of flaky sea salt. This is your moment, don’t skip it.
- Cool: Let the cookies cool on the baking sheet for 5 minutes. This allows them to set up properly. Then transfer them to a wire rack to cool completely, if you can wait that long.
Cooking Tips & Techniques
I’ve made this recipe more times than I can count, and I’ve learned a few things along the way. Here are my best tips for cookie success.
- Don’t walk away from the browning butter: Seriously. I learned this the hard way. The butter goes from golden to burnt in about 30 seconds. Keep your eyes on it and trust your nose. When it smells like toasted nuts, it’s done.
- Cool the butter properly: If you add the sugars to butter that’s too hot, it will melt the sugar and your cookies will spread into flat puddles. If you add it when it’s too cool, it won’t incorporate properly. Warm, but not hot, is the sweet spot.
- Use a cookie scoop for uniform cookies: This is the easiest way to ensure all your cookies bake evenly. No more tiny ones that burn and giant ones that are raw in the middle.
- Chill the dough if you have time: I know it’s tempting to skip this step, but chilling the dough really does make a difference. It deepens the flavor, prevents excessive spreading, and gives you a chewier texture. I often make the dough a day ahead and bake it the next day.
- Underbake slightly: Take the cookies out of the oven when the centers still look a little underdone. They’ll continue to bake on the hot sheet. This guarantees soft, chewy centers.
- Use good chocolate: Since chocolate is a main flavor here, use a brand you enjoy eating on its own. I love using a combination of semi-sweet chips and chopped dark chocolate bars for pools of melted chocolate in every bite.
Variations & Adaptations
This recipe is wonderfully versatile. Here are a few ways to make it your own.
- Gluten-Free Option: Substitute the all-purpose flour with a good 1:1 gluten-free baking flour blend, like the one from King Arthur Flour or Bob’s Red Mill. The texture will be slightly different, but they’ll still be delicious.
- Nutty Addition: Add 1 cup of toasted, chopped pecans or walnuts along with the chocolate chips. The nuts add a lovely crunch and pair perfectly with the brown butter flavor. I do this all the time for holiday cookie boxes.
- Dark Chocolate Lovers: Use all dark chocolate chips or chunks (60-70% cacao) for a more intense, less sweet cookie. This is my personal favorite variation.
- Sea Salt Caramel Swirl: After scooping the dough onto the baking sheet, press a small piece of soft caramel into the center of each dough ball. Bake as directed, and you’ll get gooey caramel pockets in every cookie. Just be careful, they get very hot.
- Different Extracts: Swap the vanilla extract for almond extract or maple extract for a completely different flavor profile. Use just 1 teaspoon of almond extract, as it’s very potent.
- Milk Chocolate & Toffee: Use milk chocolate chips and add ½ cup of chopped toffee bits. It’s like a chocolate toffee cookie bar in cookie form.
Serving & Storage Suggestions
These cookies are best enjoyed warm, right out of the oven, when the chocolate is still melty and the flaky salt is at its most crunchy. But they’re also fantastic at room temperature the next day, if they last that long.
- Serving: Serve them on a pretty plate with a glass of cold milk, a cup of hot coffee, or a scoop of vanilla ice cream for an indulgent dessert. They’re also perfect for packing in lunchboxes or taking to a party.
- Storage: Store baked cookies in an airtight container at room temperature for up to 5 days. To keep them soft, add a slice of bread to the container. The cookies will absorb the moisture from the bread and stay chewy. Replace the bread slice every day or two.
- Freezing Baked Cookies: You can freeze the baked cookies in a single layer on a baking sheet, then transfer them to a freezer-safe bag or container for up to 3 months. Thaw at room temperature or warm them in a 300°F oven for 5 minutes.
- Freezing Cookie Dough: This is my favorite make-ahead trick. Scoop the dough into balls, place them on a baking sheet, and freeze until solid. Then transfer the frozen dough balls to a freezer bag. You can bake them straight from frozen, just add 2-3 minutes to the baking time.
- Flavor Development: Honestly, the cookies taste even better on day two. The flavors have a chance to meld together, and the texture becomes perfectly chewy. So don’t feel bad if you have leftovers, they’re a gift that keeps on giving.
Nutritional Information & Benefits
Let’s be real, these are cookies, not a health food. But knowing what’s in them can help you enjoy them mindfully. Here’s the approximate nutritional breakdown for one cookie (based on 24 cookies).
- Calories: 220
- Fat: 12g
- Carbohydrates: 28g
- Protein: 3g
- Sugar: 18g
- Sodium: 150mg (including the flaky salt finish)
While these aren’t low-calorie, they are made with real, recognizable ingredients. The butter provides a source of vitamin A, and the dark chocolate contains antioxidants. Plus, the flaky sea salt adds trace minerals. I like to think of them as a treat to be savored, not something to feel guilty about. One cookie with a cup of tea is a perfectly lovely way to end a day.
Frequently Asked Questions
Can I use salted butter instead of unsalted?
You can, but you’ll want to reduce or omit the added kosher salt in the dough. The flaky salt finish is still a good idea, as it adds a different texture. If you use salted butter, use about ½ teaspoon of kosher salt in the dough instead of a full teaspoon.
Why did my cookies spread too much?
This usually happens for one of three reasons. The butter was too warm when you mixed the dough, you didn’t chill the dough, or your baking soda is old. Make sure your brown butter has cooled to warm, not hot, and try chilling the dough for at least 30 minutes next time.
Can I make these cookies dairy-free?
Yes, you can substitute the butter with a high-quality vegan butter stick, like the one from Miyoko’s or Earth Balance. The browning process will be slightly different, but it still works. Use dairy-free chocolate chips as well.
How do I get the cookies to be perfectly round?
Right after the cookies come out of the oven, use a round cookie cutter or a large glass that’s slightly larger than the cookies to gently scoot the edges into a perfect circle. Do this while the cookies are still hot and soft on the baking sheet.
Can I use a different type of sugar?
You can experiment, but the combination of brown and white sugar is key for the texture. Using all brown sugar will give you a softer, chewier cookie. Using all white sugar will give you a crisper, thinner cookie. For a deeper flavor, you can substitute ¼ cup of the granulated sugar with coconut sugar.
Conclusion
These Perfect Brown Butter Chocolate Chip Cookies with Flaky Sea Salt are more than just a recipe to me. They’re a reminder that sometimes the best things in life come from happy accidents, from not giving up when things go wrong, and from being willing to try something new. The nutty depth of the brown butter, the sweetness of the chocolate, and the little crunch of salt on top create something truly special.
I really hope you give these a try. Don’t be afraid to make them your own, whether that means adding nuts, using a different chocolate, or sneaking a piece of dough before it hits the oven (I won’t tell). When you make them, I’d love to hear how they turn out. Leave a comment below or tag me in your photos. Happy baking, and remember, the best cookies are the ones you share.
Pin This Recipe!
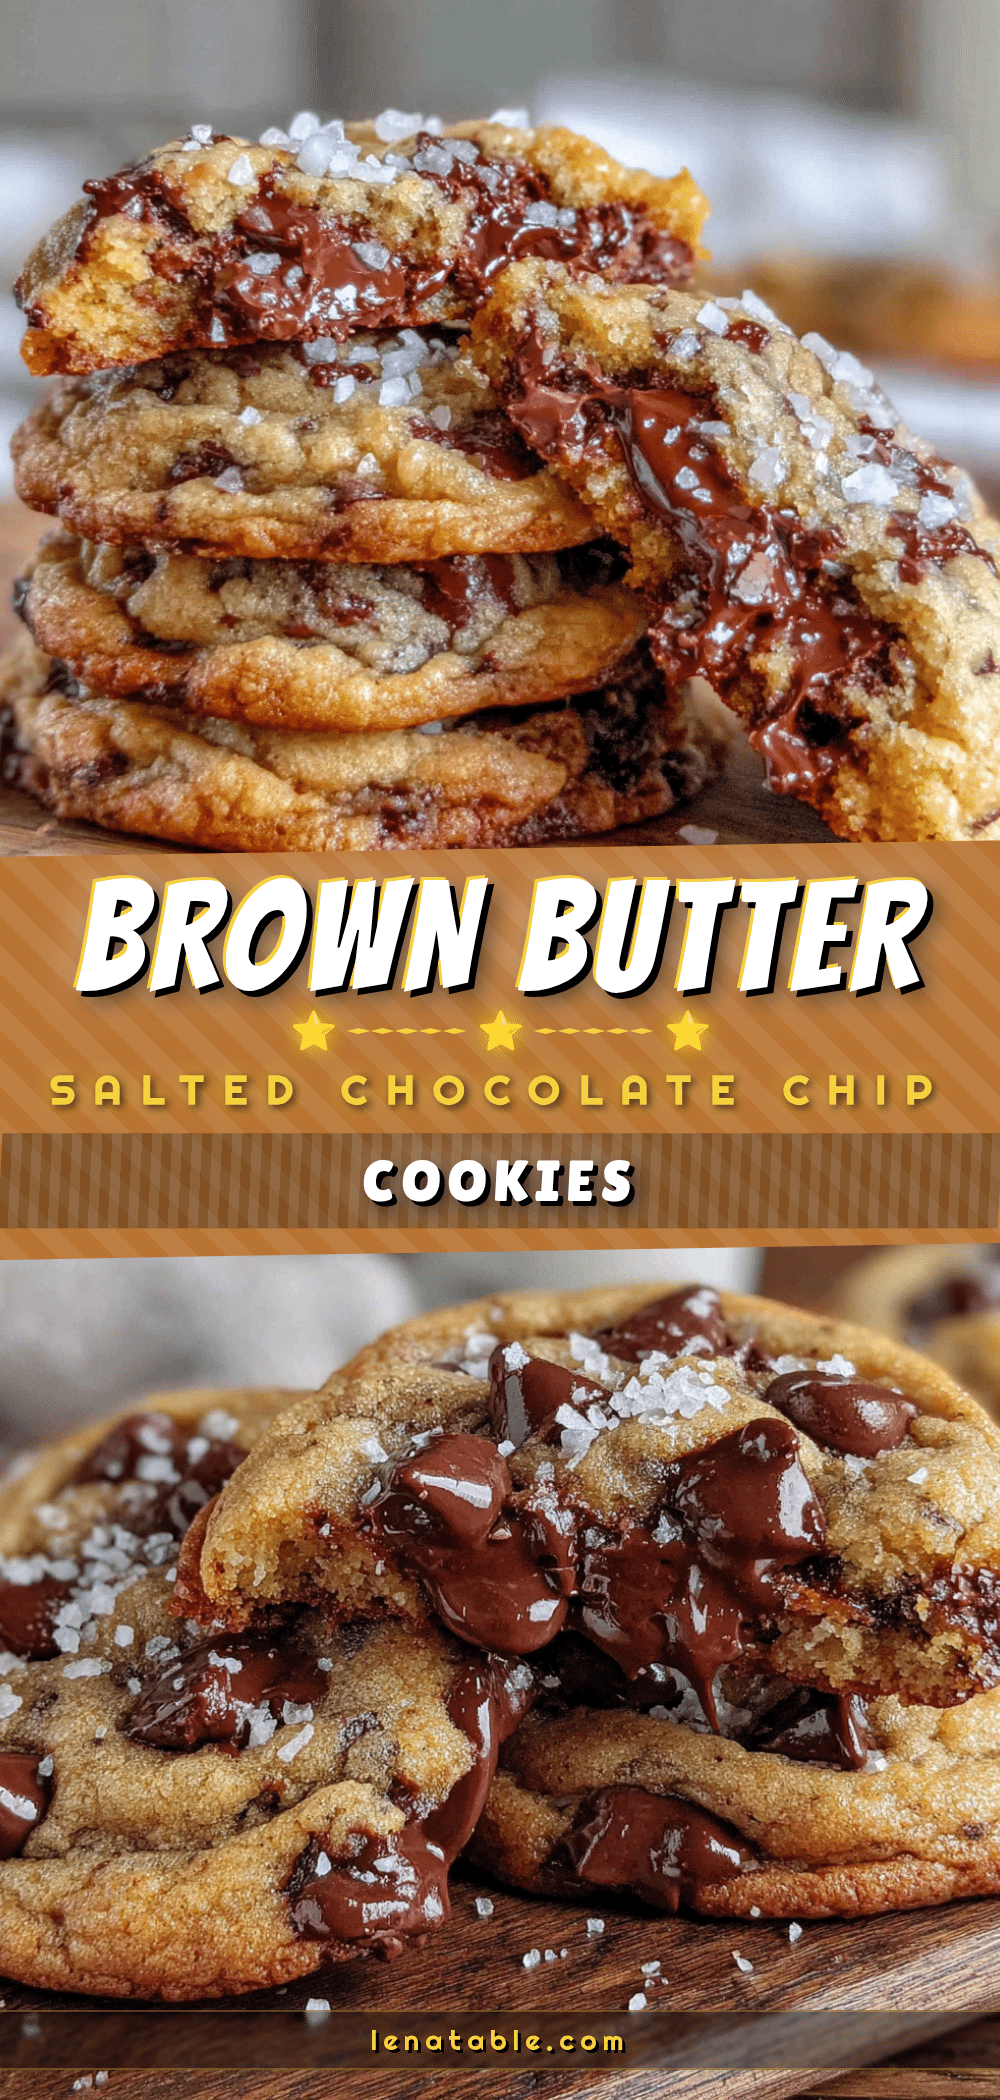
Perfect Brown Butter Chocolate Chip Cookies with Sea Salt
These brown butter chocolate chip cookies have crispy edges, chewy centers, and a deep, nutty flavor from browned butter. Topped with flaky sea salt, they’re an irresistible treat that turns a happy accident into a go-to recipe.
- Prep Time: 15 minutes
- Cook Time: 12 minutes
- Total Time: 27 minutes (plus optional chilling time)
- Yield: 24 cookies 1x
- Category: Dessert
- Cuisine: American
Ingredients
- 1 cup (2 sticks / 226g) unsalted butter
- 1 ¼ cups (250g) packed light brown sugar
- ½ cup (100g) granulated sugar
- 2 large eggs, at room temperature
- 2 teaspoons vanilla extract
- 2 ¼ cups (280g) all-purpose flour
- 1 teaspoon baking soda
- 1 teaspoon kosher salt
- 2 cups (340g) semi-sweet chocolate chips or chunks
- Flaky sea salt (e.g., Maldon or Jacobsen) for finishing
Instructions
- Brown the butter: Place the butter in a large skillet or saucepan over medium heat. Swirl occasionally as it melts. It will foam and crackle, then the foam subsides and brown specks form. When it smells nutty and the solids are deep amber (5-8 minutes), remove from heat immediately. Pour into a large mixing bowl, scraping all brown bits. Let cool 10-15 minutes until warm but not hot.
- Mix the sugars and butter: Add brown sugar and granulated sugar to the warm browned butter. Whisk vigorously for about 30 seconds until it looks like wet sand and is well combined.
- Add the eggs and vanilla: Add eggs one at a time, whisking well after each. Add vanilla extract and whisk until smooth, glossy, and slightly thickened (about 1 minute).
- Combine the dry ingredients: In a separate bowl, whisk together flour, baking soda, and kosher salt.
- Mix the dough: Add dry ingredients to wet ingredients. Fold with a rubber spatula until just combined (a few streaks of flour are okay). Do not overmix.
- Fold in the chocolate: Add chocolate chips or chunks and fold until evenly distributed. Dough will be thick and slightly sticky.
- Chill the dough (optional but recommended): Cover bowl with plastic wrap and refrigerate for at least 30 minutes, up to 72 hours.
- Preheat the oven: When ready to bake, preheat oven to 375°F (190°C). Line two baking sheets with parchment paper.
- Portion the dough: Use a 1.5-tablespoon cookie scoop to portion dough into balls. Place on prepared baking sheets, spacing 2 inches apart (about 24 cookies).
- Bake: Bake one sheet at a time for 10-12 minutes, until edges are golden brown and centers are just set and still slightly soft and puffy.
- Finish with salt: As soon as cookies come out of the oven, sprinkle with a pinch of flaky sea salt.
- Cool: Let cookies cool on baking sheet for 5 minutes, then transfer to a wire rack to cool completely.
Notes
For best results, chill the dough for at least 30 minutes to prevent spreading and deepen flavor. Underbake slightly for chewy centers. Use good-quality chocolate. Flaky sea salt is non-negotiable for the finish.
Nutrition
- Serving Size: 1 cookie
- Calories: 220
- Sugar: 18
- Sodium: 150
- Fat: 12
- Saturated Fat: 7
- Carbohydrates: 28
- Fiber: 1
- Protein: 3
Keywords: brown butter chocolate chip cookies, sea salt cookies, chewy chocolate chip cookies, easy cookie recipe, homemade cookies


