Love this? Save it for later!
Share the inspiration with your friends
I wasn’t expecting dessert advice from a hardware store cashier, but there I was, buying a new paintbrush for a half-finished fence project, listening to a woman named Deb explain exactly how to make a red, white, and blue berry trifle. She was ringing up my supplies and barely looked up from the register, just started talking about how she’d been making this for her block party for fifteen years. “The trick,” she said, handing me my receipt, “is not to overthink the layers. Just let them be messy.” I smiled, thanked her, and walked out thinking I’d never actually make it. But something about the way she said it stuck with me. It was so simple. No fuss. Just berries, cream, and cake. I mean, honestly, that’s the kind of recipe you remember.
That was two summers ago, and I’ve made this perfect red white and blue berry trifle at least a dozen times since. The first time I tried it, I used store-bought pound cake and way too much sugar in the cream. It was good, but it wasn’t Deb-level good. The second time, I forgot to chill the bowl for the whipped cream and ended up with something closer to soup than a fluffy topping. You know that feeling when you’re staring at a bowl of liquid cream and wondering if you can just serve it anyway? Yeah, that was me. But I learned. And now, this trifle is my go-to for every summer celebration. It’s the kind of dessert that looks like you spent hours on it, but really, you just stacked things in a pretty glass bowl. Let me tell you, that’s my favorite kind of recipe.
This perfect red white and blue berry trifle is more than just a dessert—it’s a showstopper. The bright red strawberries, deep blueberries, and fluffy white cream create a stunning visual that screams “America” without trying too hard. It’s the kind of thing you bring to a barbecue and watch people hover around, taking photos before they even grab a spoon. And the best part? It tastes even better than it looks. The berries get a little syrupy, the cake soaks up all that goodness, and the cream ties everything together. Honestly, I keep making it because it never fails. It’s forgiving, flexible, and always gets that happy sigh from the first bite.
Why You’ll Love This Recipe
This isn’t just another trifle recipe. I’ve tested this one in my own kitchen more times than I care to admit, tweaking the cream-to-cake ratio, experimenting with different berries, and even trying it with a gluten-free cake option. What I landed on is a version that’s reliable, delicious, and surprisingly easy to pull off. You don’t need to be a pastry chef to make this work. Trust me, if I can figure it out after that whipped cream disaster, anyone can.
- Quick & Easy: This comes together in about 20 minutes of active prep time. The hardest part is slicing strawberries, and that’s not even hard. Perfect for a busy holiday morning or a last-minute potluck.
- Simple Ingredients: You likely already have most of what you need in your kitchen. No fancy extracts, no obscure spices—just cake, cream, and fresh berries. It’s the kind of shopping list that takes two minutes to grab at the store.
- Perfect for the 4th of July: Let’s be real, this dessert was made for patriotic holidays. The red, white, and blue layers are a natural fit for Independence Day, Memorial Day, or any summer gathering. It’s festive without being kitschy.
- Crowd-Pleaser: I’ve served this to kids, grandparents, and everyone in between. It’s universally loved. The sweetness is balanced by the tartness of the berries, so it never feels cloying. People always go back for seconds.
- Unbelievably Delicious: The texture is what gets me every time. The soft cake, the juicy berries, the light and airy cream—it’s comfort food in a glass. There’s something about eating a layered dessert that just feels special.
What makes this recipe different from the rest is the cream. Instead of using a complicated pastry cream or instant pudding, I use a simple stabilized whipped cream that holds its shape for days. It’s a trick I learned from a baker friend, and it makes all the difference. The cream stays fluffy, doesn’t weep, and supports the layers without collapsing. Plus, I add a tiny splash of vanilla and a pinch of salt to enhance the flavor without making it overly sweet. It’s subtle, but you’ll notice it.
This recipe isn’t just good—it’s the kind that makes you close your eyes after the first bite. It’s comfort food reimagined: lighter, fresher, and perfect for warm-weather celebrations. Whether you’re hosting a big barbecue or just want to make a Tuesday night feel special, this trifle delivers. It’s the dessert equivalent of a hug from someone you love.
What Ingredients You Will Need
This recipe uses simple, wholesome ingredients to deliver bold flavor and satisfying texture without the fuss. Most of these are pantry staples or easy to find at any grocery store. The key is using fresh, ripe berries for the best flavor, but frozen berries can work in a pinch if you thaw and drain them first.
- For the Cake Layer:
- 1 store-bought pound cake (about 10-12 ounces), cut into 1-inch cubes (I prefer Sara Lee or a bakery-fresh option for the best texture)
- 1/4 cup simple syrup or honey (optional, for moistening the cake; use if your cake is a bit dry)
- For the Cream Layer:
- 2 cups heavy whipping cream (cold, straight from the fridge)
- 1/4 cup powdered sugar (adds sweetness without grittiness)
- 1 teaspoon vanilla extract (pure, not imitation)
- 1/4 cup mascarpone cheese or cream cheese, softened (this stabilizes the cream and adds richness)
- Pinch of salt (balances the sweetness)
- For the Berry Layer:
- 2 cups fresh strawberries, hulled and sliced (look for bright red, firm berries)
- 2 cups fresh blueberries (small, firm berries are best; avoid any that are mushy)
- 1 cup fresh raspberries (optional, adds extra color and tartness)
- 2 tablespoons granulated sugar (optional, for macerating the berries if they’re not sweet enough)
- 1 tablespoon lemon juice (fresh squeezed, brightens the berry flavor)
- For Garnish:
- Fresh mint leaves (optional, adds a pop of green)
- Extra berries for the top layer
- Shredded coconut or white chocolate shavings (optional, for a decorative touch)
When selecting your berries, look for ones that are vibrant in color and free of mold. If strawberries are out of season, you can use frozen berries, but thaw them completely and drain off any excess liquid to avoid a soggy trifle. I recommend using a good-quality pound cake from the bakery section rather than the shelf-stable version—it’s softer and absorbs the cream better. For the cream, don’t skimp on the heavy cream. Light cream or half-and-half won’t whip properly and will leave you with a runny mess. Trust me on this one.
Equipment Needed
You don’t need a lot of fancy equipment for this perfect red white and blue berry trifle, which is part of why I love it. Here’s what you’ll need:
- A Large Glass Trifle Bowl or Clear Glass Dish: The whole point of a trifle is the visual layers, so a clear bowl is essential. A 3-4 quart bowl works perfectly. If you don’t have a trifle bowl, a large glass mixing bowl or even a wide-mouth mason jar for individual servings works great.
- Electric Mixer or Stand Mixer: Whipping cream by hand is possible, but it takes forever and your arm will hate you. A hand mixer or stand mixer with a whisk attachment makes the job quick and easy. I’ve used both, and honestly, a $20 hand mixer works just as well as a fancy stand mixer.
- Large Mixing Bowl: You’ll need a bowl for whipping the cream. Make sure it’s completely clean and dry—any trace of grease will prevent the cream from whipping properly. Chilling the bowl for 10 minutes beforehand helps too.
- Sharp Knife and Cutting Board: For slicing the strawberries and cubing the pound cake. A serrated knife works best for the cake to avoid crushing it.
- Rubber Spatula: For folding the cream and mascarpone together, and for scraping every last bit of cream out of the bowl. Don’t waste a drop.
- Measuring Cups and Spoons: Precise measurements matter for the cream, but the berries can be eyeballed. I use a 1-cup measure for the berries and a set of spoons for the vanilla and lemon juice.
- Small Bowl: For macerating the berries with sugar and lemon juice if you choose to do that step. It’s optional but recommended for extra flavor.
If you don’t have a trifle bowl, don’t stress. I’ve made this in a large glass casserole dish before, and it looked beautiful. You can also layer it in individual clear cups or mason jars for a fun, portable option. The key is transparency—you want those red, white, and blue layers to shine.
Preparation Method
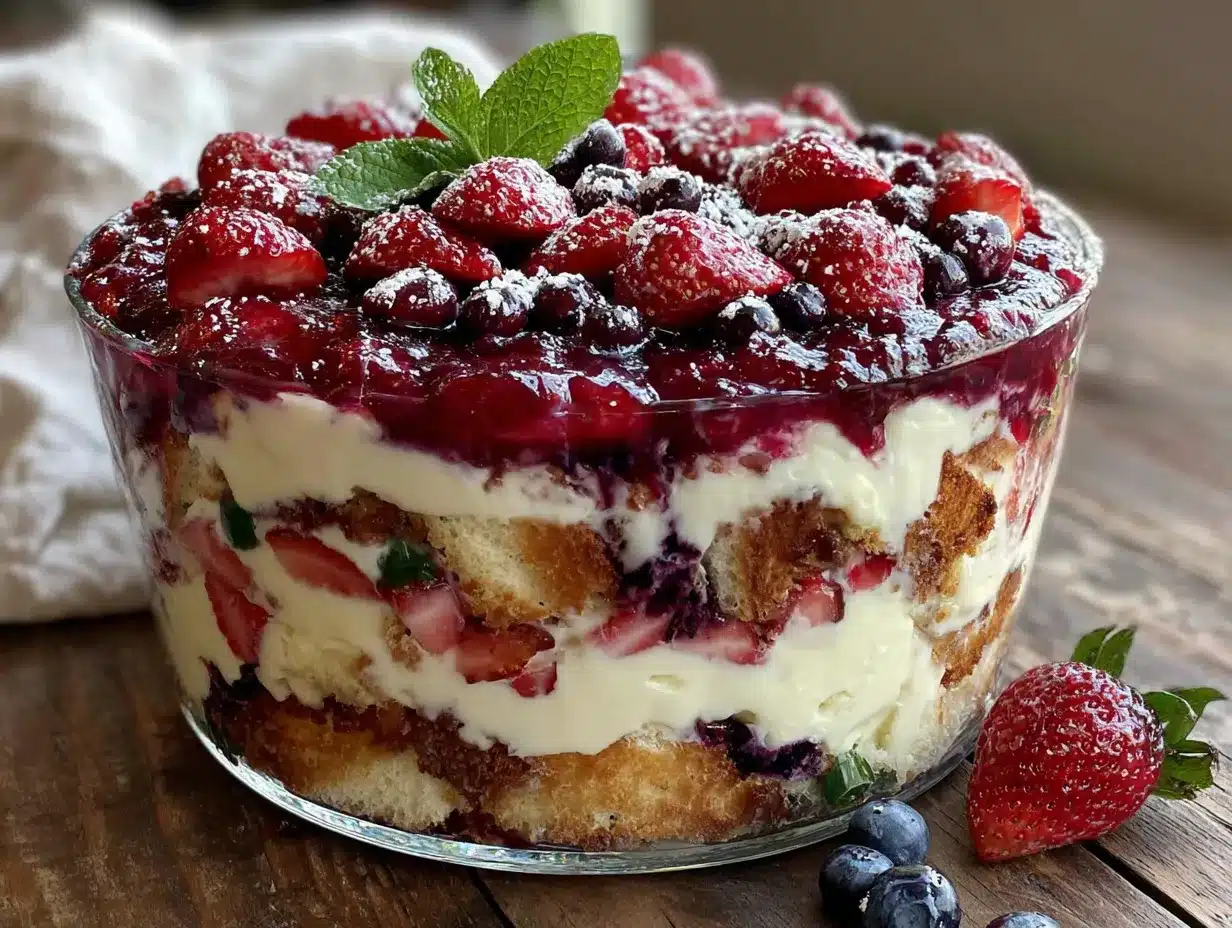
Let’s get to the fun part. This perfect red white and blue berry trifle comes together in layers, and each step is simple. Take your time, and don’t worry about perfection. Remember what Deb said—messy layers are fine. Here’s how to do it:
- Prepare the Berries (5 minutes): Start by washing and drying your berries thoroughly. Wet berries will make the cream watery, so pat them dry with a paper towel. Hull the strawberries and slice them into even pieces, about 1/4-inch thick. If your berries are a bit tart, toss them in a small bowl with 2 tablespoons of sugar and 1 tablespoon of lemon juice. Let them sit for 10 minutes to macerate. This draws out their natural juices and creates a light syrup that soaks into the cake. If your berries are already sweet and ripe, you can skip this step.
- Cube the Pound Cake (5 minutes): Take your pound cake and cut it into 1-inch cubes. I like to remove the dark outer crust because it can be a bit tough, but that’s totally optional. If you’re using a bakery cake, the crust is usually softer and fine to leave on. Place the cubes in a single layer on a baking sheet if you want to toast them lightly—5 minutes in a 350°F oven gives them a nice crunch that holds up better against the cream. But again, optional. I’ve done it both ways, and both are delicious.
- Make the Stabilized Whipped Cream (10 minutes): In a large mixing bowl, combine the softened mascarpone or cream cheese, powdered sugar, vanilla extract, and a pinch of salt. Beat with an electric mixer on medium speed until smooth and creamy, about 1 minute. In a separate bowl (or the same bowl if you’re lazy like me), pour in the cold heavy cream. Start mixing on low speed to avoid splashing, then gradually increase to high speed. Whip until soft peaks form—this takes about 2-3 minutes. You’ll know it’s ready when the cream holds its shape but is still soft and pillowy. Be careful not to overwhip, or you’ll end up with butter. Yes, I’ve done that. It’s tragic.
- Fold the Cream (2 minutes): Gently fold the mascarpone mixture into the whipped cream using a rubber spatula. Use a gentle, sweeping motion to combine them without deflating the cream. You want it to stay light and airy. This step gives the cream extra stability and a richer flavor. It’s the secret to a trifle that holds up for days.
- Layer the Trifle (10 minutes): Now the fun part. Start with a layer of cake cubes at the bottom of your trifle bowl. Use about one-third of the cake. If you’re using simple syrup, lightly brush or drizzle it over the cake cubes now. Next, add a layer of strawberries—use about one-third of the sliced berries. Spread them evenly over the cake. Then, add a layer of blueberries and raspberries if using. Top with a generous layer of whipped cream, using about one-third of the cream. Spread it gently to the edges, making sure it covers the berries completely. Repeat the layers: cake, strawberries, blueberries, cream. Finish with a final layer of cake, then the remaining berries, and top with the last of the cream.
- Garnish and Chill (2 minutes + 2 hours): For the top layer, arrange a few beautiful berries in a pattern—maybe a ring of blueberries around the edge and strawberry slices in the center. Add a sprig of fresh mint for color. Cover the trifle loosely with plastic wrap and refrigerate for at least 2 hours, or overnight. This chilling time is crucial. It allows the flavors to meld together and the cake to absorb the berry juices and cream. The texture becomes almost pudding-like, and the layers set beautifully. Don’t skip this step, or you’ll have a messy, runny trifle.
When you’re ready to serve, scoop from the bottom to get all the layers in each serving. A large spoon works best. The first scoop might look a bit messy, but that’s the charm of a trifle. It’s meant to be rustic and inviting. The way the colors blend together is part of the beauty.
Cooking Tips & Techniques
Over the years, I’ve learned a few things that make this perfect red white and blue berry trifle even better. Here are my top tips, earned through trial and error—mostly error.
- Don’t Overmix the Cream: This is the most common mistake. When you’re whipping the cream, stop as soon as it holds soft peaks. If you keep going, it will turn grainy and eventually separate into butter and buttermilk. I’ve ruined more than one batch this way. If you’re unsure, err on the side of under-whipped. You can always whip it a little more, but you can’t un-whip it.
- Chill Everything: Cold cream whips better. Cold bowl whips better. Cold beaters whip better. Put your mixing bowl and beaters in the freezer for 10 minutes before you start. It makes a noticeable difference in how quickly the cream whips and how stable it stays.
- Layer in Order: Always start with cake on the bottom. It creates a stable base and absorbs the juices from the berries above it. If you start with berries, the cake on top will be dry and the bottom will be a soupy mess. Trust the order: cake, berries, cream. Repeat.
- Use a Serrated Knife for the Cake: A serrated knife cuts through the soft cake without crushing it. If you use a chef’s knife, you’ll end up with squished, uneven cubes. Also, try to make the cubes roughly the same size for even layering.
- Maceration is Your Friend: If your berries are even slightly tart, macerating them with sugar and lemon juice transforms them. The sugar draws out the natural juices, creating a sweet syrup that soaks into the cake. It’s a game-changer. Even with sweet berries, a quick maceration adds depth of flavor.
- Don’t Overfill the Bowl: Leave about an inch of space at the top of your trifle bowl. When you cover it with plastic wrap, the cream can get smushed against the wrap and create a mess. Plus, it looks nicer if the top layer is visible above the rim.
- Make It Ahead: This trifle actually tastes better the next day. The flavors meld, the cake gets perfectly soft, and the cream sets into a luscious texture. So don’t stress about making it the day of your party. Make it the night before and let it chill overnight. Your future self will thank you.
One time, I made this for a Fourth of July barbecue and forgot to buy strawberries. I had to send my husband to the store at the last minute, and he came back with frozen strawberries that were basically a block of ice. I thawed them in the microwave, and they turned into a mushy, watery mess. The trifle still tasted good, but the texture was off. Lesson learned: always double-check your ingredient list before you start.
Variations & Adaptations
This perfect red white and blue berry trifle is incredibly versatile. Here are some ways to change it up based on what you have on hand or dietary needs:
- Gluten-Free Version: Swap the pound cake for a gluten-free pound cake or use gluten-free vanilla cake cubes. You can also use gluten-free angel food cake, which is naturally light and works beautifully. I’ve tried it with a store-bought gluten-free lemon cake, and it was fantastic.
- Dairy-Free Version: Use a dairy-free whipped topping like coconut whipped cream or a plant-based heavy cream alternative. For the stabilization, use a dairy-free cream cheese or skip it altogether and just whip the coconut cream with powdered sugar. The texture will be slightly different, but still delicious.
- Seasonal Fruit Swap: This recipe works with any combination of berries. In the summer, try blackberries, raspberries, or sliced peaches. In the fall, use diced apples or pears with a sprinkle of cinnamon. For a winter version, use frozen mixed berries and a touch of orange zest.
- Different Cake Base: Instead of pound cake, try using angel food cake, lemon cake, or even vanilla sponge cake. Each brings a different flavor and texture. Angel food cake is lighter and absorbs more cream, while lemon cake adds a bright, citrusy note that pairs beautifully with berries.
- Add a Boozy Kick: For an adult version, brush the cake cubes with a mixture of simple syrup and a splash of Grand Marnier, limoncello, or even a light rum. The alcohol adds depth and complexity. Just go easy—you want a hint of flavor, not a hangover.
- Individual Servings: Layer the trifle in small mason jars or clear plastic cups for a portable, party-friendly option. This is great for picnics or barbecues where you don’t want to deal with serving spoons. Plus, they look adorable.
I once made a version with a chocolate pound cake and raspberries, and it was incredible. The chocolate and raspberry combination is classic, and the red and white layers still looked festive. It’s a fun twist if you want to mix things up. Don’t be afraid to experiment—that’s half the fun of cooking.
Serving & Storage Suggestions
This perfect red white and blue berry trifle is best served cold, straight from the fridge. The chilled cream and juicy berries are incredibly refreshing on a hot summer day. Here’s how to serve and store it:
- Serving Temperature: Serve the trifle chilled, but not ice-cold. Let it sit at room temperature for about 10 minutes before serving to take the chill off. This allows the flavors to open up and the cream to soften slightly.
- Presentation: Use a large spoon to scoop from the bottom of the bowl, ensuring each serving gets all the layers. Place the trifle on a decorative plate or cake stand to show off the beautiful layers. Garnish with fresh mint leaves and extra berries on top for a pop of color.
- Complementary Dishes: This trifle pairs perfectly with grilled meats, especially burgers, hot dogs, and barbecue chicken. It’s also great alongside a fruit salad or a light green salad. For drinks, iced tea, lemonade, or a crisp white wine like Sauvignon Blanc works beautifully.
- Storage: Cover the trifle bowl tightly with plastic wrap or a lid and store it in the refrigerator. It will keep for up to 3 days. The texture actually improves after the first day as the flavors meld together. After 3 days, the cake can become too soft and the berries may start to release too much liquid.
- Freezing: I don’t recommend freezing this trifle. The cream will separate and become grainy when thawed, and the berries will turn mushy. If you have leftovers, it’s better to enjoy them within a few days or share them with neighbors.
- Reheating: This is a cold dessert, so no reheating needed. If you’ve stored it and the cream seems a bit firm, let it sit at room temperature for 15 minutes before serving. The texture will soften beautifully.
One thing I love about this trifle is how the flavors develop over time. The first day, it’s fresh and bright. The second day, the cake has absorbed all the berry juices and cream, creating a almost pudding-like texture. It’s like two different desserts in one. I usually make it the day before I plan to serve it, just for that reason.
Nutritional Information & Benefits
This perfect red white and blue berry trifle is a treat, but it also has some redeeming qualities. Here’s a rough breakdown per serving (based on 8 servings):
| Nutrient | Amount per Serving |
|---|---|
| Calories | 320-380 |
| Total Fat | 18-22g |
| Saturated Fat | 11-14g |
| Cholesterol | 80-100mg |
| Sodium | 180-220mg |
| Total Carbohydrates | 38-44g |
| Dietary Fiber | 3-4g |
| Sugars | 28-34g |
| Protein | 4-6g |
While this is definitely a dessert, it does offer some nutritional benefits. Berries are packed with antioxidants, vitamins C and K, and fiber. Strawberries are great for heart health, and blueberries are known for their brain-boosting properties. The cream provides calcium and vitamin D, though it’s also high in saturated fat, so enjoy in moderation. If you’re looking to lighten it up, you can use a low-fat whipped topping and reduce the sugar in the cream. But honestly, this is a celebration dessert. I say enjoy it as is and balance it out with healthy meals the rest of the day.
For those with dietary concerns, this recipe contains dairy (cream, mascarpone), gluten (pound cake), and eggs (pound cake). For a gluten-free version, use a gluten-free cake. For a dairy-free version, use coconut whipped cream and a dairy-free cake. The berries themselves are naturally vegan and gluten-free, so the main allergens come from the other components. Always check labels if you’re serving someone with allergies.
Conclusion
This perfect red white and blue berry trifle is the kind of dessert that makes summer celebrations feel special. It’s simple enough for a weekday treat but stunning enough for a holiday spread. The layers of creamy, fruity, cakey goodness are guaranteed to impress, and the best part is how forgiving the recipe is. You can’t really mess it up—even my first attempt, with the soupy cream and frozen strawberries, was still devoured by my family. That’s the magic of a trifle.
I encourage you to make this your own. Swap in your favorite berries, use a different cake, or add a splash of your favorite liqueur. The recipe is a starting point, not a rulebook. The more you make it, the more you’ll find your own rhythm. And honestly, that’s what cooking is all about—finding what works for you and sharing it with the people you love.
I’d love to hear how your trifle turns out! Leave a comment below and let me know what variations you tried, or tag me in your photos on social media. Did you use a different berry combination? Did you make it for a specific occasion? I read every comment, and your stories inspire me to keep experimenting in the kitchen. Until next time, happy cooking—and don’t forget to save a spoon for yourself!
Frequently Asked Questions
Can I use frozen berries for this trifle?
Yes, you can use frozen berries, but thaw them completely and drain off any excess liquid before layering. Frozen berries tend to release more juice than fresh, which can make the trifle soggy. Pat them dry with a paper towel to remove as much moisture as possible. I prefer fresh berries for the best texture and flavor, but frozen work in a pinch.
How far in advance can I make this trifle?
You can make this trifle up to 2 days in advance. In fact, it tastes better the next day as the flavors meld together. Just cover it tightly with plastic wrap and store it in the refrigerator. If you’re making it more than 2 days ahead, I recommend waiting to add the top layer of cream and berries until the day you serve it for the freshest appearance.
Why did my cream turn watery?
Watery cream is usually caused by overwhiping or using cream that isn’t cold enough. Make sure your heavy cream is very cold (straight from the fridge) and your mixing bowl and beaters are chilled. Also, avoid whipping the cream too long—stop as soon as it holds soft peaks. If you’re using frozen berries, make sure they’re thoroughly drained and patted dry before adding them to the trifle, as excess moisture can also cause the cream to break down.
Can I use a different type of cake?
Absolutely! Angel food cake, lemon cake, vanilla sponge cake, or even a gluten-free pound cake all work beautifully. Each brings a different flavor and texture. Angel food cake is lighter and absorbs more cream, while lemon cake adds a bright citrus note. I’ve even used leftover vanilla cupcakes in a pinch—just crumble them up and layer them in. The options are endless.
How do I prevent the trifle from looking messy when I serve it?
The first scoop will always look a bit messy—that’s part of the charm of a trifle. To get cleaner layers, use a large spoon and scoop from the bottom of the bowl, pulling straight up. This ensures each serving gets all the layers. If you want picture-perfect layers, consider making individual trifles in clear cups or mason jars. That way, every serving is a perfect cross-section of the layers.
Pin This Recipe!
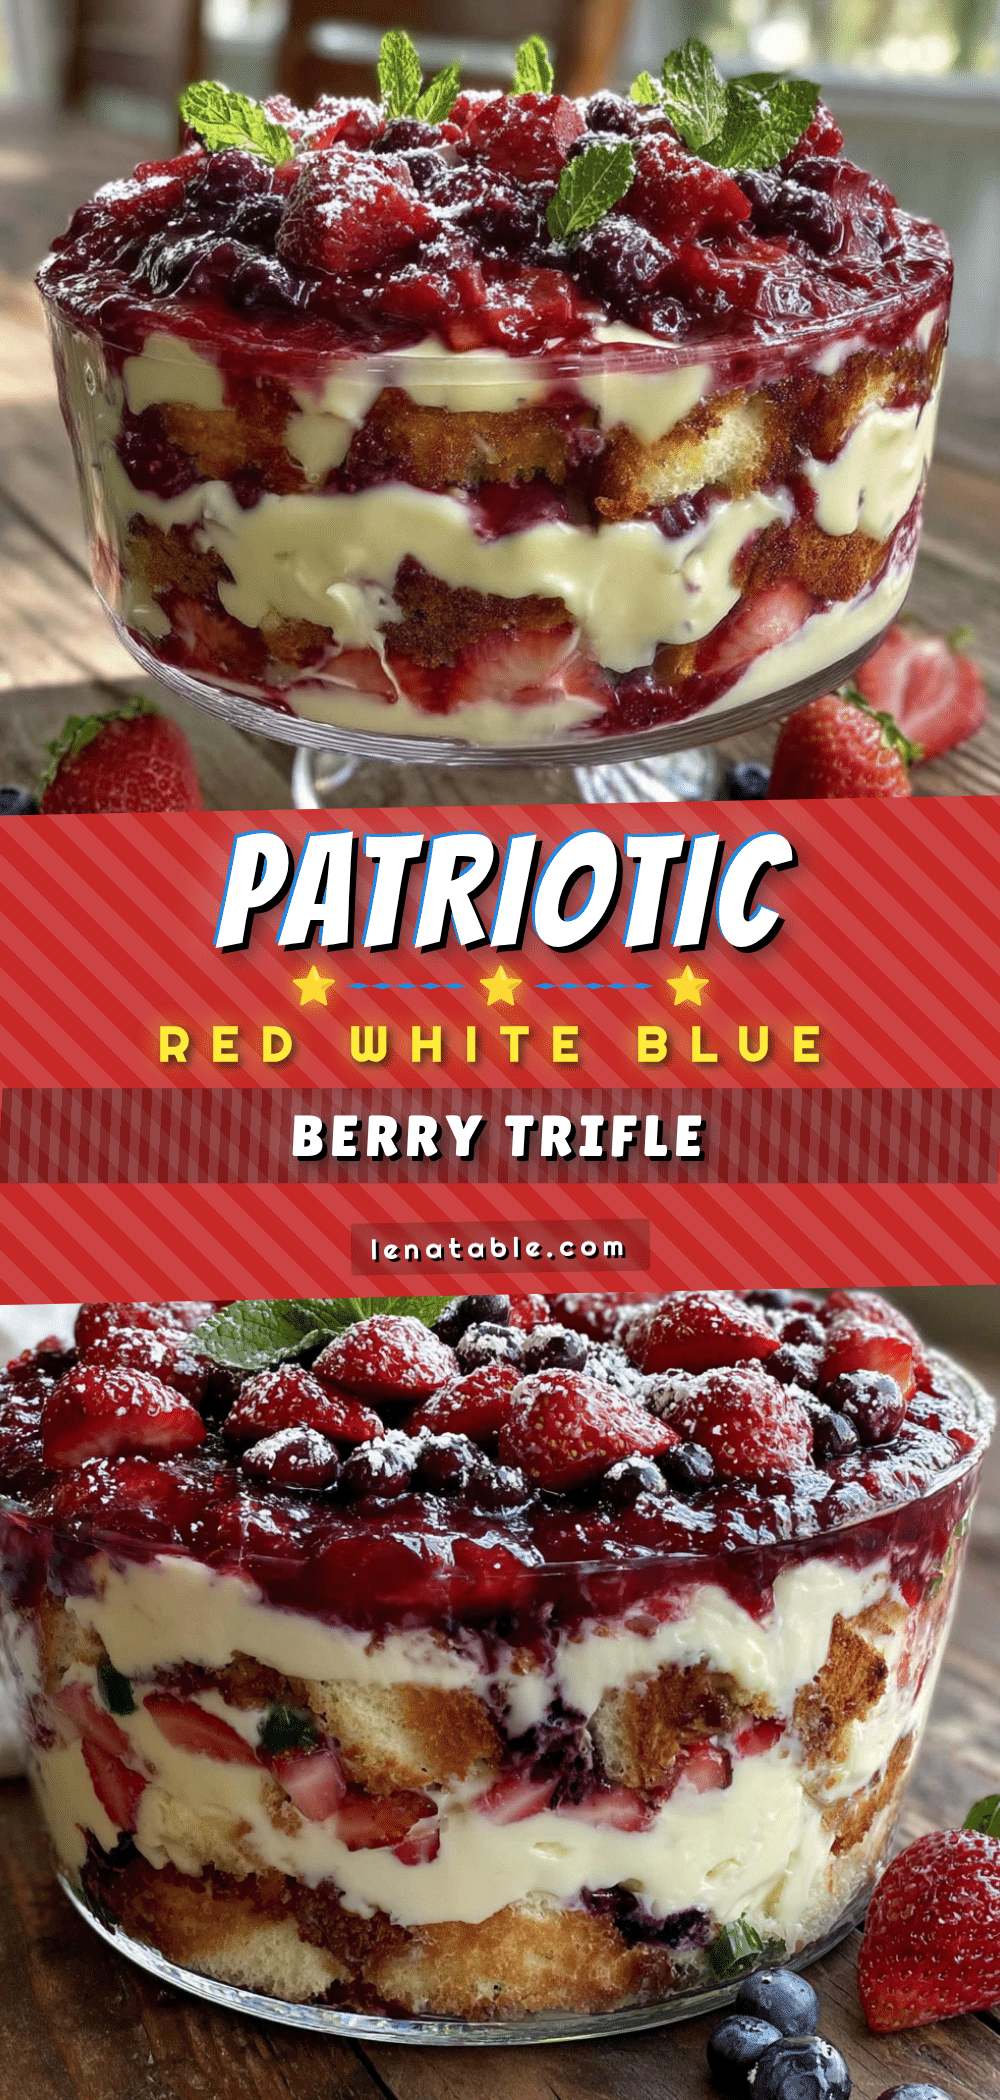
Perfect Red White and Blue Berry Trifle: Easy 4th of July Dessert
A stunning and easy no-bake dessert featuring layers of fresh berries, fluffy stabilized whipped cream, and pound cake. Perfect for patriotic holidays like the 4th of July, this showstopper comes together in just 20 minutes of active prep.
- Prep Time: 20 minutes
- Cook Time: 0 minutes
- Total Time: 2 hours 20 minutes (includes chilling)
- Yield: 8 servings 1x
- Category: Dessert
- Cuisine: American
Ingredients
- 1 store-bought pound cake (about 10–12 ounces), cut into 1-inch cubes
- 1/4 cup simple syrup or honey (optional, for moistening the cake)
- 2 cups heavy whipping cream (cold)
- 1/4 cup powdered sugar
- 1 teaspoon vanilla extract (pure)
- 1/4 cup mascarpone cheese or cream cheese, softened
- Pinch of salt
- 2 cups fresh strawberries, hulled and sliced
- 2 cups fresh blueberries
- 1 cup fresh raspberries (optional)
- 2 tablespoons granulated sugar (optional, for macerating berries)
- 1 tablespoon lemon juice (fresh squeezed)
- Fresh mint leaves (optional, for garnish)
- Extra berries for the top layer
- Shredded coconut or white chocolate shavings (optional, for garnish)
Instructions
- Prepare the berries: Wash and dry berries thoroughly. Hull strawberries and slice into 1/4-inch thick pieces. If berries are tart, toss with 2 tablespoons sugar and 1 tablespoon lemon juice; let sit 10 minutes to macerate.
- Cube the pound cake: Cut pound cake into 1-inch cubes. Optionally remove dark outer crust. For extra crunch, toast cubes on a baking sheet at 350°F for 5 minutes.
- Make the stabilized whipped cream: In a large bowl, beat softened mascarpone/cream cheese, powdered sugar, vanilla, and salt until smooth. In a separate bowl (or same bowl), whip cold heavy cream on low then high speed until soft peaks form (2-3 minutes). Gently fold mascarpone mixture into whipped cream with a rubber spatula until combined.
- Layer the trifle: In a large glass trifle bowl, start with a layer of cake cubes (about 1/3). If using simple syrup, lightly brush or drizzle over cake. Add a layer of strawberries (about 1/3), then blueberries and raspberries if using. Top with a generous layer of whipped cream (about 1/3), spreading to edges. Repeat layers: cake, strawberries, blueberries, cream. Finish with final layer of cake, remaining berries, and remaining cream.
- Garnish and chill: Arrange a few beautiful berries on top and add mint sprigs. Cover loosely with plastic wrap and refrigerate for at least 2 hours, or overnight, to allow flavors to meld and cake to absorb juices.
- Serve: Scoop from the bottom to get all layers in each serving. Serve chilled.
Notes
Chill the mixing bowl and beaters for 10 minutes before whipping cream for best results. Don’t overmix the cream—stop at soft peaks. The trifle tastes even better the next day. For gluten-free, use gluten-free pound cake. For dairy-free, use coconut whipped cream and dairy-free cream cheese. Frozen berries can be used but must be thawed and drained well.
Nutrition
- Serving Size: 1 serving (about 1/8
- Calories: 350
- Sugar: 31
- Sodium: 200
- Fat: 20
- Saturated Fat: 12
- Carbohydrates: 41
- Fiber: 3
- Protein: 5
Keywords: berry trifle, 4th of July dessert, red white and blue dessert, no-bake dessert, summer dessert, patriotic dessert, easy trifle recipe


