Love this? Save it for later!
Share the inspiration with your friends
My neighbor, Mrs. Gable, wasn’t trying to impress anyone. I’d stopped by to borrow a whisk—mine had mysteriously vanished into the kitchen drawer abyss—and the smell of warm pastry and berries hit me before I even got past her screen door. It was late October, and her kitchen looked like a flour bomb had gone off. She was standing there, rolling out dough with flour on her nose, wrapping little pastry figures in strips like she was making the world’s smallest, coziest blankets. “Oh, these?” she said when I asked, barely looking up. “Just something for the grandkids.” She handed me one, still warm, and honestly? I stood in her messy kitchen and ate three before I even said yes to borrowing the whisk. That’s the thing about these Spooky Cute Mummy Hand Pies with Berry Filling—they look like you spent hours crafting something elaborate, but the person making them was completely nonchalant. The casualness is the whole point. Mrs. Gable made them like it was nothing. And now, every October, I make them like it’s everything.
Why You’ll Love This Recipe
Let me tell you, I’ve tested this recipe more times than I care to admit. The first batch? The mummies looked more like sad ghosts with bandage issues. But after a few trials (and a lot of berry-stained fingers), I nailed it. Here’s why these hand pies are going to be your new fall obsession:
- Quick & Easy: From start to finish, you’re looking at about 45 minutes. That’s faster than deciding what to watch on Netflix.
- Simple Ingredients: You probably already have most of this in your pantry. No weird specialty items that you’ll use once and forget about.
- Perfect for Halloween: Whether it’s a school party, a potluck, or just a cozy night in, these little guys steal the show.
- Crowd-Pleaser: Kids love the cute factor. Adults love the “I can’t believe you made these” factor.
- Unbelievably Delicious: That flaky crust with the burst of berry filling? It’s comfort food that makes you close your eyes after the first bite.
What makes these different from every other Halloween treat out there? It’s the balance. They’re spooky enough to be fun but cute enough that nobody’s scared to take a bite. Plus, the berry filling is homemade—no canned stuff here—and it’s so simple you’ll wonder why you ever bought the pre-made version.
What Ingredients You Will Need
This recipe uses simple, wholesome ingredients to deliver that perfect flaky-meets-fruity experience. Nothing fancy, I promise. Most of these are pantry staples, which means you can whip these up on a whim—no emergency grocery run required.
For the Pastry Dough
- 2 ½ cups all-purpose flour (plus extra for dusting)
- 1 cup unsalted butter, cold and cut into small cubes (I prefer Land O’Lakes for consistent results)
- 1 teaspoon salt
- 1 tablespoon granulated sugar
- 6-8 tablespoons ice water (you might not use all of it)
For the Berry Filling
- 2 cups mixed berries (fresh or frozen—I use a mix of raspberries and blackberries)
- ⅓ cup granulated sugar (adjust based on how sweet your berries are)
- 1 tablespoon lemon juice (fresh squeezed is best)
- 2 tablespoons cornstarch mixed with 2 tablespoons cold water (this is your thickening agent)
- 1 teaspoon vanilla extract
For Assembly and Decoration
- 1 egg, beaten (for the egg wash)
- 2 tablespoons milk (for the egg wash)
- Candy eyes (the little white and black ones you find at any baking supply store)
- Extra flour for dusting your work surface
A quick note on berries: if you’re using frozen, don’t thaw them first. Just toss them in the pan frozen—it actually helps the filling stay thick because the cornstarch has more time to activate. I learned this the hard way after my first batch turned into berry soup. Trust me on this one.
Equipment Needed
You don’t need a fancy kitchen for these. Here’s what you’ll need:
- Large mixing bowl (for the dough)
- Pastry cutter or two forks (for cutting butter into flour)
- Rolling pin (a wine bottle works in a pinch—I’ve been there)
- Baking sheet lined with parchment paper
- Small saucepan (for the berry filling)
- Pastry brush (for the egg wash)
- Sharp knife or pizza cutter (for cutting dough strips)
- Round cookie cutter or a glass (about 3-4 inches in diameter)
- Cooling rack
If you don’t have a pastry cutter, honestly, two forks work just fine. It takes a little longer, but it’s a great arm workout. My grandma used her hands—she said the warmth helped the butter incorporate. She was wrong, but I loved her confidence.
Preparation Method
Alright, let’s get rolling. Literally.
Step 1: Make the Berry Filling (About 10 minutes)
In a small saucepan, combine the berries, sugar, and lemon juice. Cook over medium heat, stirring occasionally, until the berries start to break down—about 5 minutes. You’ll see the mixture get all bubbly and fragrant. In a small bowl, whisk together the cornstarch and cold water until smooth. Pour this into the berry mixture and stir constantly. The filling will thicken up fast—like, within 30 seconds. Remove from heat, stir in the vanilla, and let it cool completely. I usually make this first so it has time to cool while I deal with the dough.
Step 2: Make the Pastry Dough (About 15 minutes)
In a large bowl, whisk together the flour, salt, and sugar. Add the cold butter cubes. Using a pastry cutter or two forks, cut the butter into the flour until it looks like coarse meal with some pea-sized butter chunks remaining. This is important—those little butter bits are what make the crust flaky. Drizzle in 6 tablespoons of ice water and mix with a fork until the dough just comes together. If it seems dry, add the remaining water, one tablespoon at a time. Turn the dough out onto a floured surface, bring it together with your hands, and divide it in half. Flatten each half into a disc, wrap in plastic wrap, and refrigerate for at least 30 minutes. I know, waiting is hard. But cold dough is happy dough.
Step 3: Roll and Cut (About 10 minutes)
Preheat your oven to 375°F (190°C). Line a baking sheet with parchment paper. On a floured surface, roll out one disc of dough to about ⅛-inch thickness. Use your round cutter or glass to cut out circles. You should get about 6-8 circles per disc, depending on the size. Re-roll the scraps once—after that, the dough gets tough, so don’t push it.
Step 4: Assemble the Mummies (About 15 minutes)
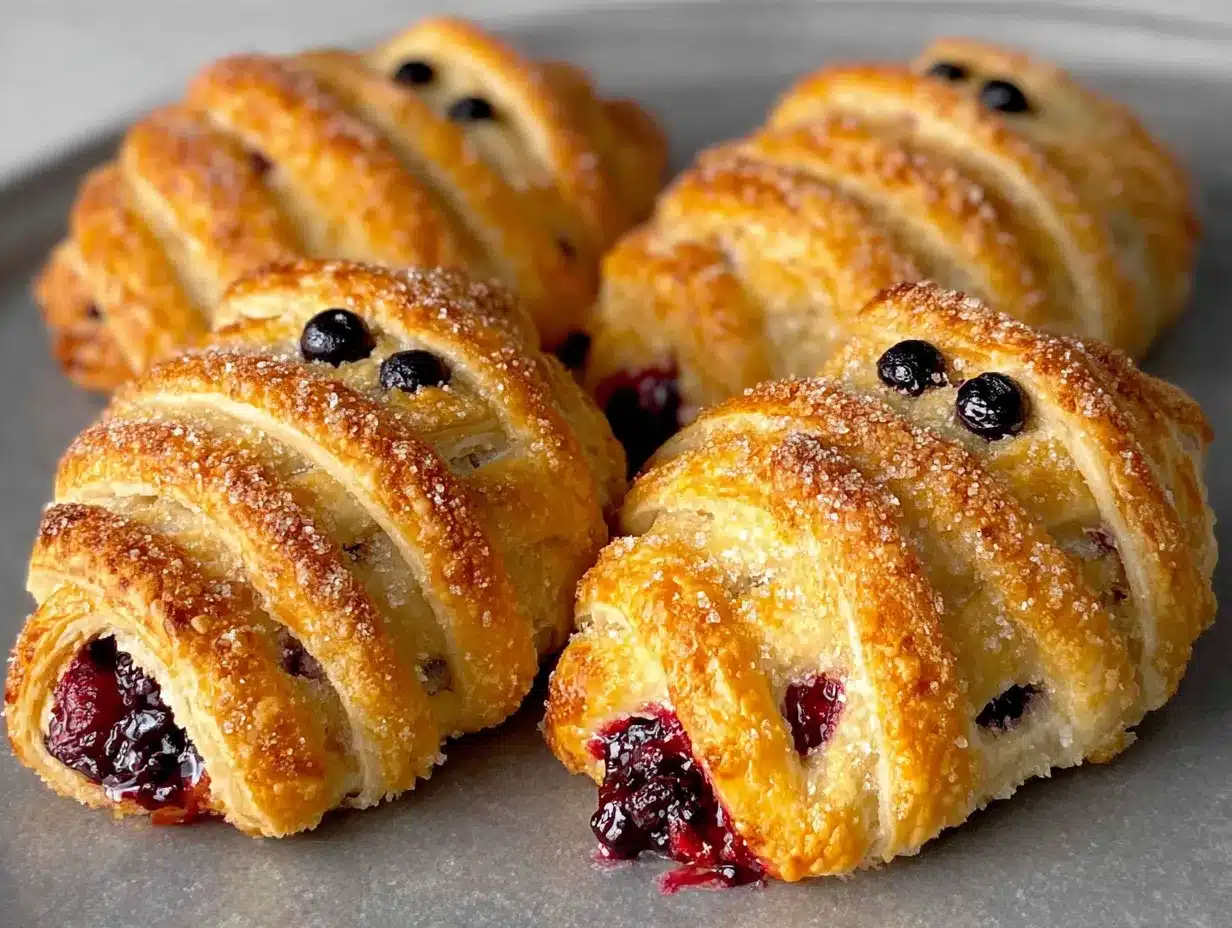
Place half of your dough circles on the prepared baking sheet, spacing them about 2 inches apart. Spoon about 1 tablespoon of the cooled berry filling into the center of each circle, leaving a small border around the edge. Don’t overfill—I know it’s tempting, but trust me, you’ll end up with berry explosions. Take the remaining dough circles and use a sharp knife or pizza cutter to cut them into thin strips, about ½-inch wide. These are your mummy bandages. Place the strips over the filling, crisscrossing them to look like mummy wrappings. Leave a small gap for the eyes. Press the edges gently to seal.
Step 5: Egg Wash and Bake (About 20 minutes)
In a small bowl, whisk together the beaten egg and milk. Brush this mixture over the dough strips—this gives them that beautiful golden color. Bake for 18-22 minutes, or until the pastry is golden brown and the filling is bubbling. Let them cool on the baking sheet for 5 minutes, then transfer to a cooling rack.
Step 6: Add the Eyes (2 minutes)
Once the pies are cool enough to handle but still slightly warm, press the candy eyes into the gaps you left. The warmth helps them stick. If you wait until they’re completely cool, you might need a tiny dab of icing or honey as glue.
Cooking Tips & Techniques
I’ve made these more times than I care to count, and I’ve made every mistake in the book. Here’s what I’ve learned:
Keep everything cold. The butter, the water, even your hands if you can manage it. Warm dough is sticky dough, and sticky dough makes sad mummies. If your dough starts feeling soft at any point, pop it back in the fridge for 10 minutes.
Don’t skip the cooling step for the filling. I once tried to speed things up and used warm filling. The dough turned into a soggy mess, and my mummies looked like they’d been through a berry apocalypse. Let the filling cool completely—it thickens up and stays put.
Seal the edges well. Use your fingers or a fork to press the edges of the dough strips down. If they’re not sealed, the filling will leak out during baking. And while berry juice is delicious, it’s not so fun when it burns on your baking sheet.
Work in batches. Don’t try to put all the pies on one baking sheet. They need space to breathe and get crispy. I learned this after my first batch came out pale and sad because they were too crowded.
Variations & Adaptations
One of the best things about these hand pies is how flexible they are. Here are some ways to make them your own:
Dietary Swaps: For a gluten-free version, use a 1:1 gluten-free flour blend. The texture will be slightly different—a bit more crumbly—but still delicious. For a dairy-free option, substitute the butter with cold coconut oil or a plant-based butter stick.
Flavor Twists: Not a berry fan? Try using diced apples with cinnamon and brown sugar for a fall twist. Or go savory with a pumpkin and sage filling for a grown-up Halloween party. My personal favorite variation? Peach filling in the summer—it’s like a mini pie that screams sunshine.
Different Cooking Methods: If you’re short on time, you can use store-bought pie crust. Just roll it out and follow the same assembly steps. No judgment here—I’ve done it plenty of times. You can also air fry these at 350°F (175°C) for about 12-15 minutes. They come out extra crispy.
Make It a Party Activity: Set up a “mummy-making station” with pre-cut dough strips, bowls of filling, and candy eyes. Kids love assembling their own mummies. Just be prepared for some very creative interpretations of “mummy.”
Serving & Storage Suggestions
These hand pies are best served warm, when the filling is still a little gooey and the crust is at its flakiest. I like to dust them with a little powdered sugar before serving—it makes them look even more like cute little ghosts. Pair them with a glass of cold milk for the kids or a warm cup of apple cider for the adults. They’re also fantastic with a scoop of vanilla ice cream, if you’re feeling extra indulgent.
For storage, keep them in an airtight container at room temperature for up to 2 days. After that, the crust starts to soften. If you want to keep them longer, pop them in the fridge—they’ll last about 5 days. Just reheat them in a 350°F (175°C) oven for 5 minutes to bring back that flaky texture. The microwave works in a pinch, but the crust gets a bit chewy.
You can also freeze these little guys. Arrange them on a baking sheet and freeze until solid, then transfer to a freezer bag. They’ll keep for up to 3 months. To reheat, bake from frozen at 375°F (190°C) for 20-25 minutes. The filling stays perfect, and the crust comes out just as flaky.
Nutritional Information & Benefits
Per serving (one hand pie), here’s the breakdown:
- Calories: 280
- Total Fat: 16g
- Saturated Fat: 10g
- Carbohydrates: 32g
- Sugar: 14g
- Fiber: 2g
- Protein: 4g
These are a treat, so I’m not going to pretend they’re health food. But there are some bright spots. The berries are packed with antioxidants and vitamin C—especially if you use a mix of raspberries and blackberries. The butter provides some vitamin A, and hey, you’re getting a little bit of fiber. Plus, making them at home means you control the sugar content. Store-bought versions often have double the sugar and preservatives you can’t pronounce.
If you’re watching your sugar intake, you can reduce the sugar in the filling to ¼ cup. The berries are sweet enough on their own, especially if they’re in season. For a lower-fat option, use a mix of butter and Greek yogurt in the dough. It won’t be as flaky, but it’ll still be delicious.
Conclusion
These Spooky Cute Mummy Hand Pies with Berry Filling are the kind of recipe that makes you look like a kitchen wizard without actually having to be one. They’re fun, they’re delicious, and they bring a little bit of Halloween magic to your table. I love how they make people smile—every time I serve them, someone says “Wait, you made these?” and I get to shrug and say “Yeah, they’re actually pretty easy.”
I’d love to see your mummy creations! Tag me in your photos or leave a comment below telling me how they turned out. Did you try a different filling? Did your kids help with the assembly? I read every comment, and honestly, the variations you guys come up with are often better than my original ideas. So go ahead—get a little flour on your nose, make a mess, and enjoy every single bite.
Frequently Asked Questions
Can I use pre-made pie crust for these hand pies?
Absolutely. Store-bought pie crust works perfectly if you’re short on time. Just roll it out slightly thinner than it comes, and you’re good to go. No one will know the difference.
How do I prevent the filling from leaking out?
Make sure your filling is completely cool before assembling. Warm filling makes the dough soft and increases the chance of leaks. Also, don’t overfill—about a tablespoon per pie is plenty. Seal the edges well with a fork or your fingers.
Can I make these ahead of time?
Yes! You can assemble the pies completely (without the egg wash) and refrigerate them for up to 24 hours. When you’re ready to bake, just add the egg wash and pop them in the oven. You can also freeze the unbaked pies for up to 3 months.
What if I can’t find candy eyes?
No problem! You can make eyes using icing—just pipe two small white dots and add a tiny black dot in the center. Or skip the eyes altogether and call them “blind mummies.” They’ll still taste great.
Can I use a different fruit for the filling?
Definitely. This recipe works with almost any fruit. Try diced apples with cinnamon, sliced peaches, or even cherry pie filling. Just adjust the sugar based on how sweet your fruit is. Stone fruits and apples might need a little extra cooking time to soften.
Pin This Recipe!

Spooky Cute Mummy Hand Pies with Easy Berry Filling

These adorable mummy hand pies feature a flaky pastry crust filled with a homemade berry filling, perfect for Halloween. Quick and easy to make, they’re a crowd-pleaser that looks impressive but is surprisingly simple.
- Prep Time: 25 minutes
- Cook Time: 20 minutes
- Total Time: 45 minutes
- Yield: 12 servings 1x
- Category: Dessert
- Cuisine: American
Ingredients
- 2 ½ cups all-purpose flour (plus extra for dusting)
- 1 cup unsalted butter, cold and cut into small cubes
- 1 teaspoon salt
- 1 tablespoon granulated sugar
- 6–8 tablespoons ice water
- 2 cups mixed berries (fresh or frozen, such as raspberries and blackberries)
- ⅓ cup granulated sugar (adjust based on sweetness of berries)
- 1 tablespoon lemon juice (fresh squeezed)
- 2 tablespoons cornstarch mixed with 2 tablespoons cold water
- 1 teaspoon vanilla extract
- 1 egg, beaten (for egg wash)
- 2 tablespoons milk (for egg wash)
- Candy eyes (for decoration)
Instructions
- Make the berry filling: In a small saucepan, combine berries, sugar, and lemon juice. Cook over medium heat, stirring occasionally, until berries break down (about 5 minutes). Whisk cornstarch and cold water together, then pour into berry mixture and stir constantly until thickened (about 30 seconds). Remove from heat, stir in vanilla, and let cool completely.
- Make the pastry dough: In a large bowl, whisk together flour, salt, and sugar. Add cold butter cubes and cut into flour using a pastry cutter or two forks until mixture resembles coarse meal with pea-sized butter chunks. Drizzle in 6 tablespoons ice water and mix with a fork until dough comes together. Add more water if needed. Turn dough onto a floured surface, bring together, divide in half, flatten into discs, wrap in plastic wrap, and refrigerate for at least 30 minutes.
- Preheat oven to 375°F (190°C). Line a baking sheet with parchment paper. On a floured surface, roll out one disc of dough to about ⅛-inch thickness. Use a round cutter or glass (3-4 inches in diameter) to cut out circles. You should get 6-8 circles per disc. Re-roll scraps once.
- Place half of the dough circles on the prepared baking sheet, spacing 2 inches apart. Spoon about 1 tablespoon of cooled berry filling into the center of each circle, leaving a small border. Cut remaining dough circles into thin strips (about ½-inch wide) using a sharp knife or pizza cutter. Place strips over the filling, crisscrossing to look like mummy wrappings, leaving a small gap for eyes. Press edges gently to seal.
- In a small bowl, whisk together beaten egg and milk. Brush this mixture over the dough strips. Bake for 18-22 minutes, until pastry is golden brown and filling is bubbling. Let cool on baking sheet for 5 minutes, then transfer to a cooling rack.
- Once pies are cool enough to handle but still slightly warm, press candy eyes into the gaps left for eyes. Serve warm.
Notes
Keep all ingredients cold for flaky dough. Let berry filling cool completely before assembling to prevent soggy crust. Seal edges well to prevent leaking. Work in batches on baking sheet for even browning. For gluten-free, use 1:1 gluten-free flour blend. For dairy-free, substitute butter with cold coconut oil or plant-based butter. Store in airtight container at room temperature for up to 2 days, or refrigerate for up to 5 days. Freeze unbaked pies for up to 3 months.
Nutrition
- Serving Size: 1 hand pie
- Calories: 280
- Sugar: 14
- Sodium: 200
- Fat: 16
- Saturated Fat: 10
- Carbohydrates: 32
- Fiber: 2
- Protein: 4
Keywords: Halloween, hand pies, mummy pies, berry filling, easy dessert, fall recipe, spooky treats


