Love this? Save it for later!
Share the inspiration with your friends
It was 11:47 PM on a random Wednesday in early October, and I had a sudden, undeniable craving for deviled eggs. Not just any deviled eggs, mind you — I wanted the ones my Aunt Carol used to bring to every family gathering, the ones with the perfect paprika dusting and a hint of pickle relish. The problem? I didn’t have any paprika in the house. I’d used the last of it on a batch of roasted potatoes three nights ago and forgot to restock. But I did have a jar of black olives sitting in the fridge, a tube of wasabi paste I’d bought on a whim, and this ridiculous idea that maybe, just maybe, I could make the deviled eggs look like little spiders for Halloween. I mean, it was almost midnight, the house was quiet, and my brain was clearly operating on a different frequency at that hour. So I grabbed the eggs, boiled them up, and started experimenting. The result was so much better than I expected — honestly, it was the kind of kitchen accident that makes you believe in happy little mistakes. Let me tell you, there’s something about the witching hour that brings out the weirdest, most wonderful ideas. And these Spooky Spider Halloween Deviled Eggs? They’re now my go-to for every Halloween party, potluck, or just a random October night when I want to feel a little festive. You know that feeling when a recipe just clicks? This one clicked so hard it practically screamed “trick or treat!”
Why You’ll Love This Recipe
Let me be real with you — I’ve tested this recipe about seven times now, tweaking the filling ratios and the spider placement until I got it just right. And here’s what I’ve learned: these Spooky Spider Halloween Deviled Eggs are the perfect balance of creepy and delicious. They’re the kind of appetizer that makes people do a double-take before grabbing one, and then they can’t stop eating them.
- Quick & Easy: Comes together in under 10 minutes of active prep time (plus egg boiling and cooling). Perfect for last-minute Halloween party planning.
- Simple Ingredients: You probably already have everything in your kitchen — eggs, mayo, mustard, and black olives. No fancy grocery trips needed.
- Perfect for Halloween: Great for spooky parties, classroom treats, or just making your October dinner table a little more festive.
- Crowd-Pleaser: Kids love the spider design, and adults appreciate the classic deviled egg flavor. It’s a win-win.
- Unbelievably Delicious: The creamy, tangy filling paired with the salty olive spiders is next-level comfort food.
What makes this recipe different from all the other deviled egg recipes out there? It’s the attention to detail. I spent a whole afternoon figuring out the best way to slice the olives so the spiders actually look like spiders — not sad little blobs. And the filling? I added a tiny pinch of smoked paprika (when I finally bought more) that gives it this subtle warmth that pairs perfectly with the briny olives. This isn’t just another deviled egg recipe — it’s my best version, tested and approved by my skeptical neighbor, my picky nephew, and a group of friends who promised to be brutally honest.
This recipe is the kind that makes you close your eyes after the first bite. It’s comfort food reimagined — festive, fun, but with the same soul-soothing satisfaction of a classic deviled egg. Perfect for impressing guests without stress, or turning a simple snack into something memorable.
What Ingredients You Will Need
This recipe uses simple, wholesome ingredients to deliver bold flavor and satisfying texture without the fuss. Most of these are pantry staples, so you probably won’t need to make a special trip to the store.
- 6 large eggs (hard-boiled and peeled — use eggs that are at least a week old for easier peeling)
- 3 tablespoons mayonnaise (I prefer Hellmann’s or Duke’s for the creamiest texture)
- 1 teaspoon yellow mustard (or Dijon if you want a sharper flavor)
- 1 teaspoon white vinegar (adds brightness and helps the filling hold together)
- ¼ teaspoon salt (plus more to taste)
- ⅛ teaspoon black pepper (freshly ground if possible)
- ¼ teaspoon smoked paprika (plus extra for dusting — this is where the magic happens)
- 1 can (6 ounces) black olives (whole, pitted — look for large olives for easier spider assembly)
- Optional: 1 tablespoon pickle relish (for that classic deviled egg sweetness — I use sweet relish)
- Optional: ¼ teaspoon garlic powder (if you want a little extra savory depth)
For the olive spiders, you’ll want to look for large, firm black olives. I’ve found that store-brand olives work just fine, but if you can get your hands on California Ripe Olives, they tend to be meatier and easier to slice. For the mayonnaise, I really recommend using full-fat — the low-fat versions tend to make the filling runny, and nobody wants sad, watery deviled eggs.
If you’re making these for a party and want to double the recipe, just scale everything up. The filling recipe is very forgiving. And if you’re out of yellow mustard, Dijon works beautifully — it adds a slightly different tang that I actually prefer sometimes.
Equipment Needed
You don’t need much for this recipe, which is part of its charm. Here’s what you’ll need:
- Medium saucepan (for boiling the eggs — any size works, as long as the eggs fit in a single layer)
- Sharp knife (for slicing the olives and cutting the eggs in half — a paring knife works great)
- Cutting board (preferably one with a groove to catch any olive juice)
- Small mixing bowl (for the filling)
- Fork (for mashing the yolks — a potato masher also works in a pinch)
- Spoon or piping bag (for filling the egg whites — a zip-top bag with the corner snipped off works perfectly if you don’t have a piping bag)
- Serving platter (something with a bit of a rim to keep the eggs from sliding around)
I’ve made these eggs with just a butter knife and a fork before, and they turned out fine. The piping bag makes them look prettier, but honestly, a spoon works just as well. If you’re using a zip-top bag, just be careful not to overfill it — I learned that one the hard way when I squeezed too hard and got filling all over my counter. Budget-friendly tip: skip the fancy piping tips and just snip a small corner off the bag. It gives you more control anyway.
Preparation Method
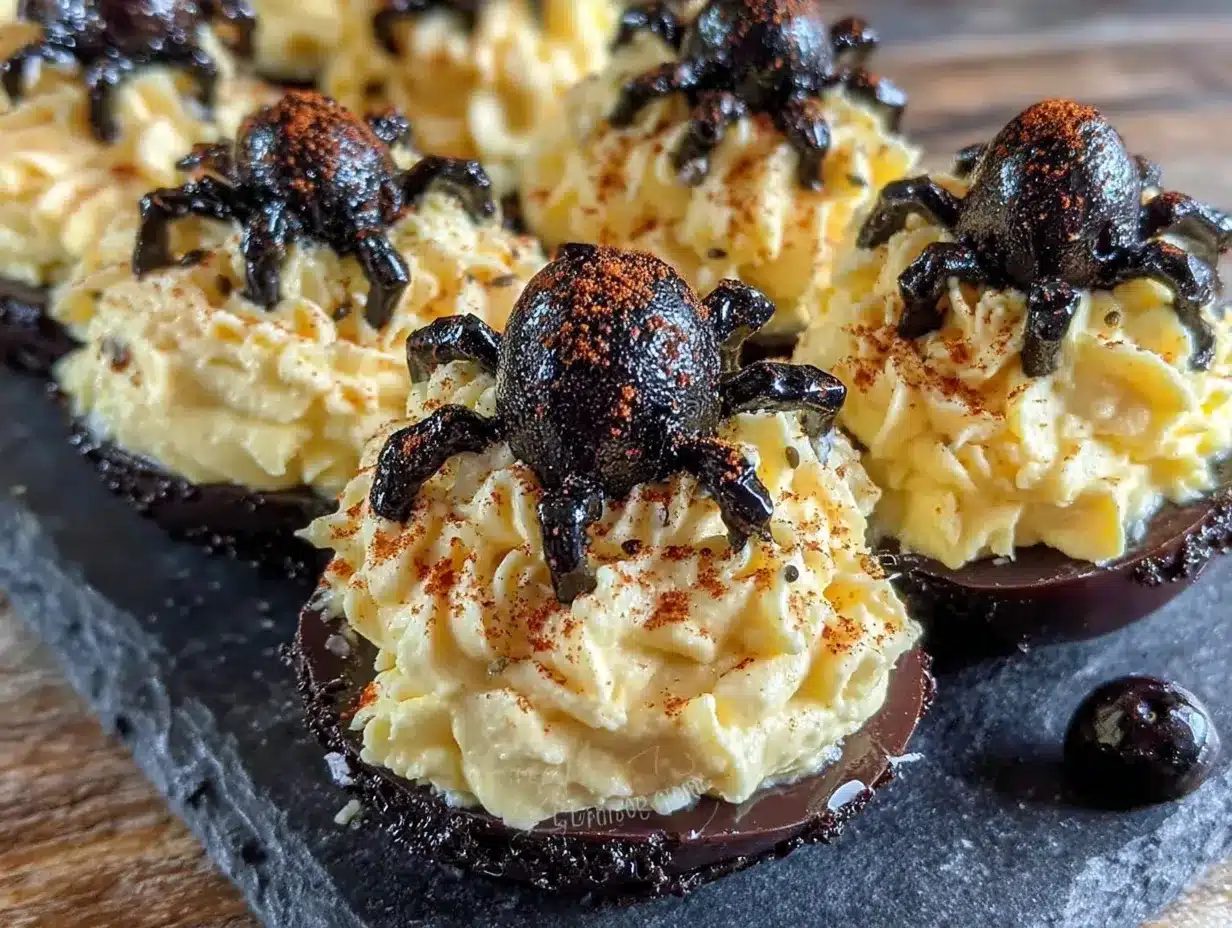
Alright, let’s get into the nitty-gritty. Here’s how to make these Spooky Spider Halloween Deviled Eggs step by step.
- Hard-boil the eggs. Place the eggs in a single layer in your saucepan and cover them with cold water by about an inch. Bring the water to a rolling boil over high heat, then cover the pot, turn off the heat, and let the eggs sit for exactly 10 minutes. (I set a timer because I always forget.) After 10 minutes, drain the hot water and transfer the eggs to an ice bath — a bowl filled with cold water and ice cubes. Let them sit for at least 5 minutes. This stops the cooking process and makes the eggs easier to peel.
- Peel the eggs. Gently tap each egg on the counter to crack the shell, then roll it between your palms to loosen the shell. Start peeling from the wider end — there’s usually an air pocket there that makes it easier. Rinse the peeled eggs under cold water to remove any tiny shell fragments. (Pro tip: if the shell is sticking, try peeling under running water. It helps the shell slip right off.)
- Cut the eggs in half. Using your sharp knife, slice each egg lengthwise. Wipe the knife clean between cuts for the cleanest slices. Gently pop the yolks out into your small mixing bowl. Arrange the egg white halves on your serving platter, cut side up.
- Make the filling. Add the mayonnaise, yellow mustard, white vinegar, salt, black pepper, and smoked paprika to the bowl with the egg yolks. If you’re using the pickle relish and garlic powder, add those too. Mash everything together with your fork until it’s smooth and creamy. Taste it and adjust the seasoning — I always end up adding a pinch more salt and another dash of paprika. The filling should be thick enough to hold its shape but spreadable.
- Fill the egg whites. Spoon the filling into your piping bag or zip-top bag, or just use a small spoon. Pipe or spoon the filling into each egg white half, mounding it slightly in the center. You want a nice, generous amount — not too flat, not too tall. If you’re using a piping bag, twist the top and squeeze gently. Go slow — you can always add more, but you can’t take it away.
- Make the spider bodies. Take your black olives and pat them dry with a paper towel. For each spider, you’ll need one whole olive for the body and one olive sliced into thin rings for the legs. Slice the second olive crosswise into 4-6 thin rings, then cut each ring in half to create little leg pieces. (I know it sounds fiddly, but trust me, it’s worth it.)
- Assemble the spiders. Place one whole olive on top of each filled egg white, positioning it slightly off-center toward the front. Arrange 4-6 leg pieces on each side of the olive, pressing them gently into the filling so they stay put. The legs should look like they’re crawling — slightly curved and spread out.
- Finish with paprika. Lightly dust the entire platter with a pinch of smoked paprika. This gives the eggs a beautiful color and adds a subtle smoky flavor. Plus, it makes the spiders pop against the yellow filling.
- Chill before serving. Pop the platter in the fridge for at least 15 minutes before serving. This helps the filling firm up and the spiders stay in place. If you’re making them ahead of time, cover the platter with plastic wrap and refrigerate for up to 24 hours.
Cooking Tips & Techniques
I’ve made these eggs enough times to know where things can go wrong. Here are my hard-earned lessons.
Perfect hard-boiled eggs every time. The key is the ice bath. I cannot stress this enough. If you skip the ice bath, the yolks will keep cooking and develop that unappealing green ring around the outside. Nobody wants that. Also, use eggs that are at least a week old — fresh eggs are a nightmare to peel. I learned this the hard way when I tried to peel farm-fresh eggs and ended up with mangled egg whites that looked more like Frankenstein than spiders.
Don’t overmix the filling. I know it’s tempting to keep mashing until it’s perfectly smooth, but you actually want a little bit of texture. Overmixed filling can become gluey and weird. Stop when it’s creamy but still has a tiny bit of body.
Olive placement matters. If you put the olive body right in the center of the egg, the spider looks like it’s sitting still. If you place it slightly toward one end, it looks like it’s crawling — much more dynamic and spooky. Also, make sure the leg pieces are thin enough to look like actual spider legs. I made the mistake of cutting them too thick once, and they looked more like spider arms. Not the vibe.
Multitasking is your friend. While the eggs are boiling and then cooling in the ice bath, you can slice your olives and set up your serving platter. This saves you about 10 minutes of active time. I usually prep the olives while the eggs are in the ice bath — it keeps my hands busy and the timing works out perfectly.
Temperature matters. These eggs taste best when they’re cold, straight from the fridge. If you leave them out for more than an hour, the filling can get a little soft and the spiders might slide around. For parties, I set the platter on a bed of ice to keep everything chilled.
Variations & Adaptations
One of the best things about this recipe is how easily you can adapt it. Here are some variations I’ve tried and loved.
Spicy Spider Eggs. Add ½ teaspoon of sriracha or hot sauce to the filling for a spicy kick. The heat pairs surprisingly well with the briny olives. I made these for a Halloween party last year, and they disappeared faster than the regular ones.
Avocado Deviled Spider Eggs. Swap half the mayonnaise for mashed avocado. The filling turns a beautiful pale green, which makes the black spiders stand out even more. Just be aware that the filling will brown slightly if you make them too far ahead — add a squeeze of lemon juice to slow that down.
Bacon Spider Eggs. Crumble a strip of crispy bacon over each spider before serving. The smoky, salty crunch is incredible. I tried this once on a whim, and now I can’t go back. Just make sure the bacon is fully cooled before you sprinkle it on, or the filling will get greasy.
Gluten-Free Option. This recipe is naturally gluten-free, so no changes needed. Just double-check your mustard and mayonnaise labels to be safe — some brands add gluten-containing ingredients.
Dairy-Free Adaptation. Use a vegan mayonnaise like Follow Your Heart or Just Mayo. The filling will be slightly tangier, but it still works beautifully. I tested this for a friend with a dairy allergy, and honestly, I couldn’t tell the difference.
Mini Spider Bites. If you’re serving these as appetizers for a crowd, try using quail eggs instead of chicken eggs. They’re tiny and adorable, and the spiders look even more realistic on the smaller scale. Just reduce the boiling time to about 4 minutes.
Serving & Storage Suggestions
These Spooky Spider Halloween Deviled Eggs are best served cold, straight from the fridge. Arrange them on a black or dark-colored platter to really make the spiders pop — I use a slate board I picked up at a home goods store, and the contrast is gorgeous. For a Halloween party, I like to scatter a few fake spider webs around the platter and add some plastic spiders for extra creepiness.
These eggs pair beautifully with other Halloween snacks like mummy hot dogs, pumpkin-shaped cheese balls, or witch’s finger cookies. For drinks, a crisp white wine or a dark beer complements the creamy, tangy filling perfectly. If you’re serving kids, apple cider or sparkling water with a splash of pomegranate juice works great.
Storage: Store any leftover deviled eggs in an airtight container in the refrigerator for up to 2 days. The filling might soften slightly, but they’ll still taste great. I don’t recommend freezing them — the texture gets weird and watery when thawed.
Reheating: Honestly, you don’t want to reheat deviled eggs. They’re meant to be served cold. If you’ve stored them in the fridge, just let them sit at room temperature for about 10 minutes before serving to take the chill off.
One thing I love about these eggs is that the flavors actually get better after a few hours in the fridge. The filling absorbs the smoky paprika and the olive brine, creating this complex, savory taste that’s even more delicious the next day. So if you’re making them for a party, feel free to prepare them a day ahead — they’ll be even better.
Nutritional Information & Benefits
Here’s the approximate nutritional breakdown for one spider deviled egg (based on the recipe as written):
| Nutrient | Amount per egg |
|---|---|
| Calories | 85 |
| Protein | 6g |
| Fat | 6g |
| Saturated Fat | 1.5g |
| Carbohydrates | 1g |
| Fiber | 0g |
| Sugar | 0.5g |
| Sodium | 180mg |
Eggs are a fantastic source of high-quality protein, choline (great for brain health), and vitamin D. The black olives add healthy monounsaturated fats and a touch of iron. This recipe is naturally low-carb and keto-friendly, making it a great option for anyone watching their carb intake. It’s also gluten-free and can be made dairy-free with the right substitutions.
From a wellness perspective, I love that these deviled eggs are a protein-packed snack that actually satisfies you. They’re perfect for parties because they’re rich enough to feel indulgent, but they won’t weigh you down. Plus, the portion control is built right in — one or two eggs is plenty, and you don’t feel guilty about going back for more.
As always, if you have specific dietary concerns or allergies, please check the labels on your ingredients. Some mayonnaise brands use eggs from hens fed soy, and some mustards contain gluten. But for most people, this recipe is a healthy, delicious addition to any Halloween spread.
Conclusion
These Spooky Spider Halloween Deviled Eggs are everything I love about holiday cooking — they’re fun, festive, and genuinely delicious. They don’t require any fancy techniques or hard-to-find ingredients, and they come together in just 10 minutes of active prep. Whether you’re hosting a Halloween party, bringing a dish to a potluck, or just want to make your October dinner table a little more magical, these eggs deliver every time.
I love how customizable they are — you can make them spicy, add bacon, or even swap in avocado for a different twist. And the best part? They always get a reaction. People see the spiders and smile, then they take a bite and their eyes light up. That’s the kind of recipe I keep coming back to.
Now I want to hear from you! Have you tried making these Spooky Spider Halloween Deviled Eggs? Did you come up with any fun variations? Drop a comment below and let me know — I read every single one, and I love seeing your photos. And if you enjoyed this recipe, please share it with your friends and family. Happy Halloween, and happy cooking!
Frequently Asked Questions
Can I make these deviled eggs the night before?
Absolutely! In fact, I recommend it. The flavors meld together beautifully overnight. Just assemble the spiders on top right before serving so the olives don’t dry out. Store the filled eggs in an airtight container in the fridge, and add the olive spiders when you’re ready to serve.
How do I keep the olive spiders from falling off?
Press the leg pieces gently into the filling — the filling acts like glue. If your filling is too stiff, add a tiny bit more mayonnaise to soften it. You can also chill the assembled eggs for 15 minutes before serving to help everything set.
Can I use different types of olives?
Sure! Kalamata olives work well, though they’re softer and a bit harder to slice. Green olives stuffed with pimentos are also fun — they add a pop of color. Just keep in mind that the flavor will change slightly, so taste your filling and adjust the salt accordingly.
How long do these deviled eggs last in the fridge?
They’ll stay fresh for up to 2 days in an airtight container. After that, the filling can start to get watery and the olives might lose their texture. I always recommend making them no more than 24 hours ahead for the best results.
Can I freeze deviled eggs?
I don’t recommend it. Freezing changes the texture of the egg whites — they become rubbery and watery when thawed. The filling also separates and gets grainy. Stick to making them fresh or a day ahead for the best texture and flavor.
Pin This Recipe!
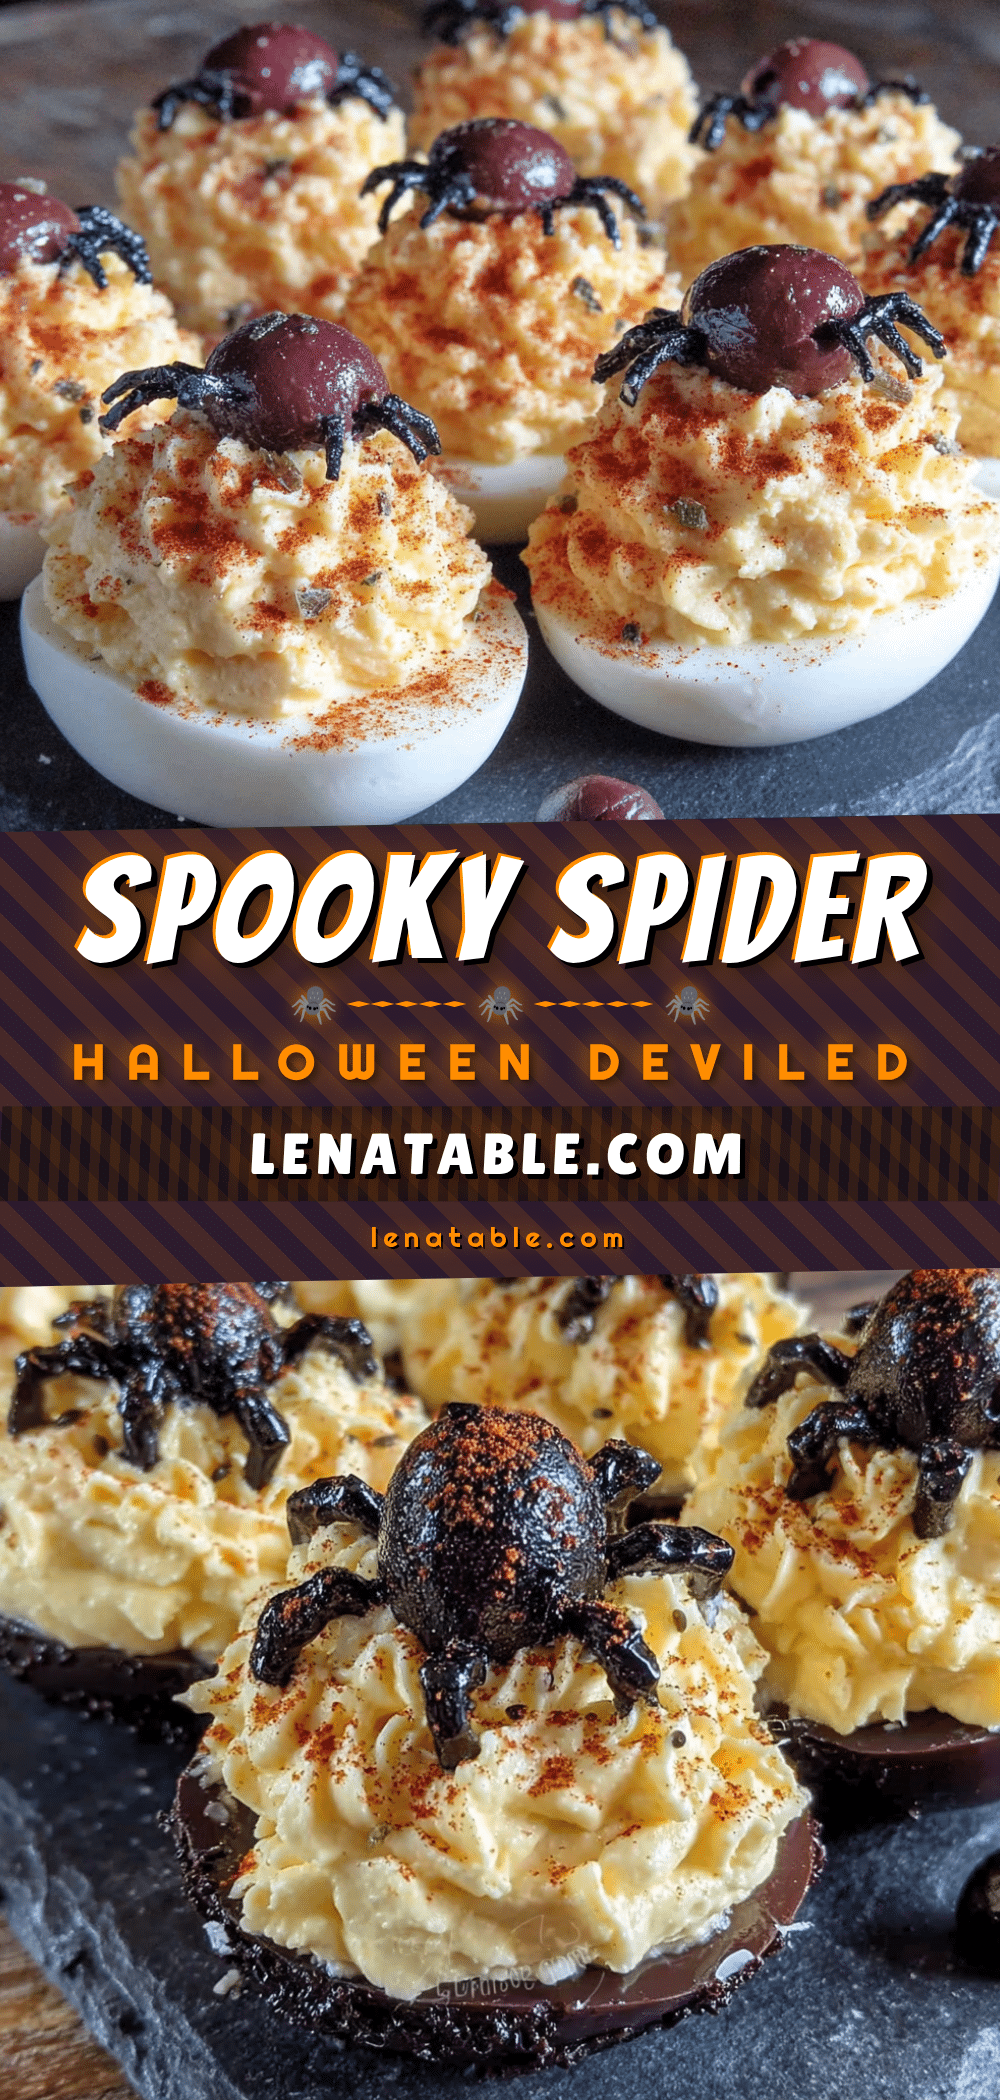
Spooky Spider Halloween Deviled Eggs
These Spooky Spider Halloween Deviled Eggs are the perfect balance of creepy and delicious. They’re quick, easy, and made with simple ingredients, making them a crowd-pleaser for any Halloween party.
- Prep Time: 10 minutes
- Cook Time: 10 minutes
- Total Time: 25 minutes
- Yield: 12 servings 1x
- Category: Appetizer
- Cuisine: American
Ingredients
- 6 large eggs
- 3 tablespoons mayonnaise
- 1 teaspoon yellow mustard
- 1 teaspoon white vinegar
- ¼ teaspoon salt
- ⅛ teaspoon black pepper
- ¼ teaspoon smoked paprika
- 1 can (6 ounces) black olives (whole, pitted)
- Optional: 1 tablespoon pickle relish
- Optional: ¼ teaspoon garlic powder
Instructions
- Hard-boil the eggs: Place eggs in a single layer in a saucepan, cover with cold water by an inch. Bring to a rolling boil over high heat, cover, turn off heat, and let sit for exactly 10 minutes. Transfer to an ice bath for at least 5 minutes.
- Peel the eggs: Tap each egg to crack the shell, roll between palms, and peel starting from the wider end. Rinse under cold water.
- Cut the eggs in half lengthwise. Remove yolks to a small bowl. Arrange egg white halves on a serving platter.
- Make the filling: Add mayonnaise, yellow mustard, white vinegar, salt, black pepper, smoked paprika, and optional relish and garlic powder to the yolks. Mash until smooth and creamy. Adjust seasoning to taste.
- Fill the egg whites: Spoon filling into a piping bag or zip-top bag (snip a corner) or use a spoon. Pipe or spoon filling into each egg white half, mounding slightly.
- Make the spider bodies: Pat olives dry. For each spider, use one whole olive for the body. Slice another olive crosswise into 4-6 thin rings, then cut each ring in half for legs.
- Assemble the spiders: Place one whole olive on each filled egg white, slightly off-center toward the front. Arrange 4-6 leg pieces on each side, pressing gently into the filling.
- Finish with paprika: Lightly dust the platter with smoked paprika.
- Chill before serving: Refrigerate for at least 15 minutes before serving. Can be made up to 24 hours ahead.
Notes
Use eggs at least a week old for easier peeling. Don’t overmix the filling. For best results, chill assembled eggs for 15 minutes before serving. The flavors improve after a few hours in the fridge.
Nutrition
- Serving Size: 1 spider deviled egg
- Calories: 85
- Sugar: 0.5
- Sodium: 180
- Fat: 6
- Saturated Fat: 1.5
- Carbohydrates: 1
- Protein: 6
Keywords: Halloween deviled eggs, spider deviled eggs, spooky appetizer, easy Halloween recipe, deviled eggs with olives


