Love this? Save it for later!
Share the inspiration with your friends
I used to think you needed a campfire for proper s’mores. Honestly, I was pretty stubborn about it. The graham cracker had to be slightly burnt, the chocolate had to be melting in that specific gooey way, and the marshmallow had to be torched to a golden brown. That was the rule. Then my neighbor, an older woman named Clara who grows tomatoes that would make you weep, watched me struggling to light a charcoal grill in the rain last July. She didn’t say anything at first. She just shook her head, disappeared into her house, and came back ten minutes later with a 9×13 pan covered in foil. “Try this,” she said. “No fire required.”
That pan changed everything. Inside was this incredible cross between a poke cake and a s’more—all the flavors I loved, but in bar form. The cake was soaked in a sweet, creamy mixture that made every bite impossibly moist. There were mini marshmallows toasted on top and little pockets of melted chocolate throughout. I mean, I actually sat there on my porch in the drizzle, eating bar after bar, completely rethinking my entire stance on dessert. Clara just laughed and told me her granddaughter had figured it out for a school bake sale. Smart kid, honestly.
These Ultimate Mini S’mores Poke Cake Bars are now my go-to when I need a dessert that feels impressive but takes almost no real effort. You get that campfire taste—the smoky-sweet thing, the crunch, the melt—without standing in the rain or fighting with wet kindling. Maybe you’ve been there, trying to make s’mores indoors and ending up with a mess? Yeah, this fixes that. They’re the kind of recipe that makes you wonder why you didn’t think of it yourself. I’ve been making them every summer since, and they never last long.
Why You’ll Love This Recipe
Let me tell you why these bars have become my most-requested dessert. I’ve tested this recipe at least six times to get the proportions exactly right—not too sweet, not too dry, just that perfect balance of textures. Here is what makes them special:
- Ready in 30 Minutes: From start to finish, you can have these on the table in half an hour. Perfect for those “I need dessert now” moments that happen more often than I’d like to admit.
- Simple Pantry Ingredients: You probably have everything already. Boxed cake mix, marshmallows, chocolate bars, sweetened condensed milk. No special trips to a fancy grocery store required.
- Perfect for Summer Gatherings: These bars are great for barbecues, pool parties, or just a Tuesday night when you want something fun. They travel well and don’t need to be kept cold.
- Crowd-Pleaser for All Ages: Kids love the marshmallow topping, adults appreciate the nostalgic flavor, and everyone goes back for seconds. I’ve never seen anyone take one bite and stop.
- Unbelievably Moist Texture: The poke cake technique—pouring sweetened condensed milk over the warm cake—creates this incredibly tender crumb that stays soft for days. It’s next-level comfort food.
What makes this different from every other s’mores dessert out there? It’s the combination of textures. You get the soft, soaked cake base, the crunchy graham cracker crust, the gooey melted chocolate, and the toasted marshmallow topping all in one forkful. I’ve tried making s’mores brownies, s’mores cookies, even s’mores dip—and honestly, these bars win every time. They’re comfort food reimagined: easier, faster, but with the same soul-soothing satisfaction that makes you close your eyes after the first bite.
What Ingredients You Will Need
This recipe uses simple, everyday ingredients to create something that tastes way more complicated than it actually is. Most of these are probably in your kitchen right now, which is exactly how I like my desserts to work.
For the Crust:
- 2 cups graham cracker crumbs (about 14 full sheets, crushed finely—I use a food processor or a zip-top bag and a rolling pin)
- 1/2 cup unsalted butter, melted (salted butter works too, just skip the added salt later)
- 1/4 cup granulated sugar (adds sweetness and helps the crust hold together)
For the Cake Base:
- 1 box (15.25 oz) yellow cake mix (I prefer Betty Crocker or Duncan Hines for consistent results)
- 1 cup water
- 1/3 cup vegetable oil
- 3 large eggs, room temperature (cold eggs can make the batter lumpy, so let them sit out for 15 minutes)
- 1 teaspoon vanilla extract (adds warmth and depth to the flavor)
For the Poke Filling:
- 1 can (14 oz) sweetened condensed milk (this is the magic ingredient that makes the cake ultra-moist—don’t substitute with evaporated milk)
- 1/2 cup milk chocolate chips (I like Ghirardelli for smooth melting)
For the Topping:
- 2 cups mini marshmallows (regular size works too, but mini ones distribute more evenly)
- 1 cup semi-sweet chocolate chips (or chopped chocolate bar—use what you have)
- 1/4 cup heavy cream (for the chocolate ganache drizzle, optional but highly recommended)
- Additional graham cracker crumbs for garnish (a nice visual touch)
Ingredient Selection Tips: For the graham cracker crumbs, look for a brand that’s not too sweet—some store brands add extra sugar. I personally prefer Nabisco Original Graham Crackers because they have that classic flavor. If you’re using a gluten-free cake mix, this recipe adapts well; just check the box for any adjustments to liquid ratios. For a dairy-free version, use a dairy-free cake mix and substitute the butter with coconut oil in the crust—though the condensed milk is harder to replace, so keep that in mind.
Equipment Needed
You don’t need fancy equipment for these bars, which is part of why I love them. Here is what you’ll need:
- 9×13-inch baking pan (metal or glass both work, but metal gives a slightly crisper crust)
- Mixing bowls (one large, one medium)
- Wooden spoon or spatula (for mixing the crust and cake batter)
- Measuring cups and spoons
- Food processor or zip-top bag and rolling pin (for crushing graham crackers)
- Parchment paper (for lining the pan—makes lifting the bars out so much easier)
- Wooden skewer or the end of a wooden spoon (for poking holes in the cake)
- Small saucepan (for the ganache, if you’re making it)
- Offset spatula (nice for spreading but a butter knife works in a pinch)
If you don’t have a food processor, honestly, the zip-top bag method is almost as good. Just put the graham crackers in a bag, seal it, and go to town with a rolling pin. It’s oddly satisfying. For the baking pan, I’ve used both metal and glass, and I slightly prefer metal because the crust gets a bit crunchier. Glass works fine though—just add a minute or two to the baking time. And if you don’t have parchment paper, you can grease the pan well with butter or cooking spray, but the bars will be harder to remove cleanly.
Preparation Method
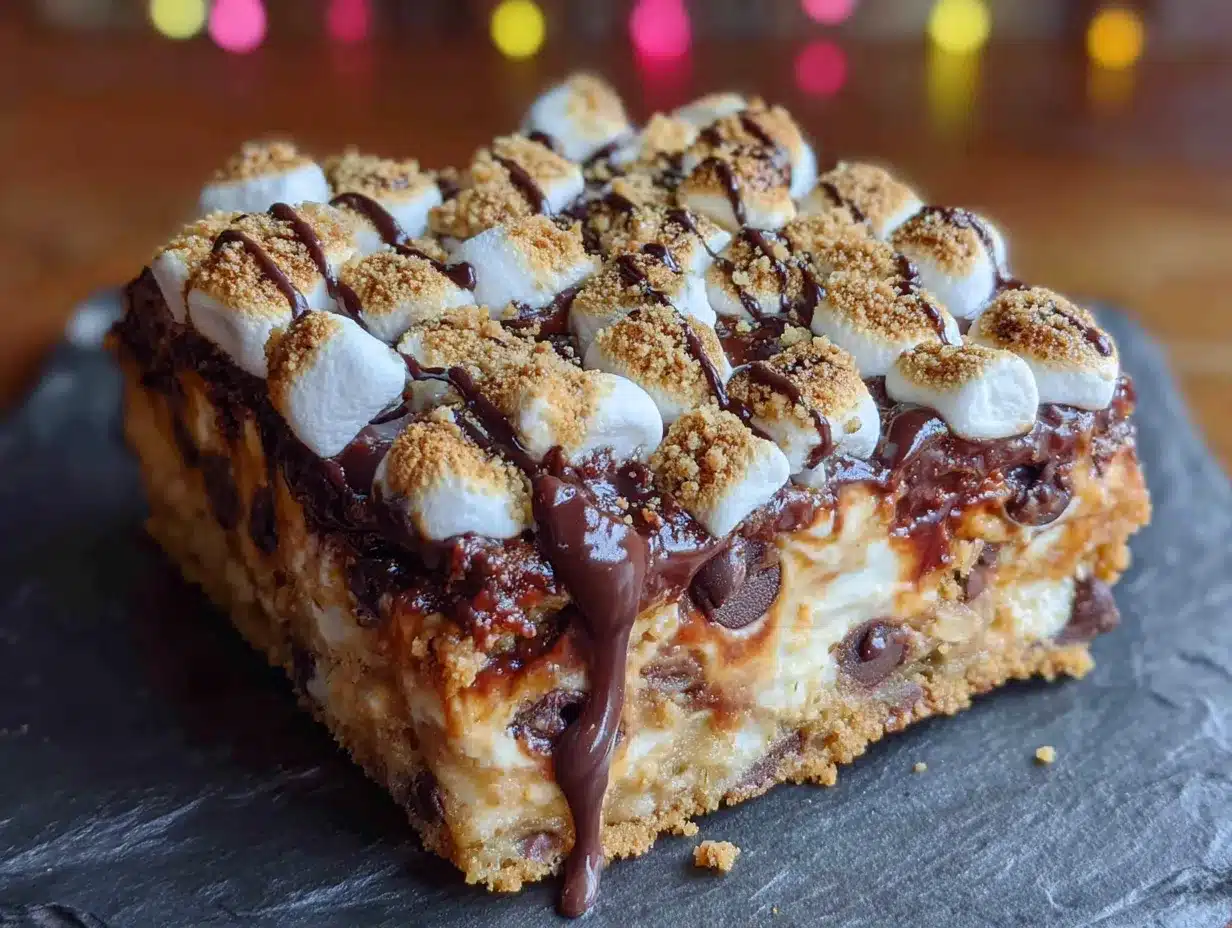
Let’s make these bars. The whole process takes about 30 minutes, and most of that is inactive baking time. Here is how it goes:
Step 1: Preheat and Prep
Preheat your oven to 350°F (175°C). Line your 9×13-inch baking pan with parchment paper, leaving some overhang on the sides. This makes lifting the bars out later a breeze. Lightly spray the parchment with cooking spray for extra insurance.
Step 2: Make the Crust
In a medium bowl, combine the graham cracker crumbs, melted butter, and granulated sugar. Stir until the mixture looks like wet sand and holds together when you squeeze it. Press this mixture firmly into the bottom of your prepared pan. Use the bottom of a measuring cup or a flat glass to really pack it down—this prevents the crust from crumbling when you cut the bars later. Bake the crust for 8 minutes, then set it aside to cool slightly while you make the cake batter.
Step 3: Prepare the Cake Batter
In a large bowl, combine the yellow cake mix, water, vegetable oil, eggs, and vanilla extract. Mix according to the package directions—usually about 2 minutes with a wooden spoon or electric mixer on medium speed. The batter should be smooth with no lumps. Don’t overmix, or the cake will be tough. Pour the batter over the pre-baked crust and spread it evenly with a spatula.
Step 4: Bake the Cake
Bake for 18-22 minutes, or until a toothpick inserted in the center comes out clean or with just a few moist crumbs. The top should be golden brown. Let the cake cool in the pan for 5 minutes—this is important because if you poke it while it’s too hot, it might collapse.
Step 5: Poke the Cake
While the cake is still warm (but not scorching hot), use the end of a wooden spoon or a skewer to poke holes all over the surface. Space the holes about 1 inch apart. Don’t be shy—you want the filling to get everywhere. I usually poke about 30-40 holes. The deeper the holes, the more filling gets absorbed.
Step 6: Add the Poke Filling
In a small microwave-safe bowl, combine the sweetened condensed milk and the milk chocolate chips. Microwave in 20-second intervals, stirring between each, until the chocolate is melted and the mixture is smooth. Pour this mixture evenly over the warm cake, making sure it gets into all the holes. Use a spatula to spread it gently. Let it sit for 5 minutes so the cake absorbs the liquid.
Step 7: Add the Toppings
Sprinkle the mini marshmallows evenly over the top of the cake. Then scatter the semi-sweet chocolate chips over the marshmallows. If you want that toasted marshmallow look, you can use a kitchen torch to lightly brown the marshmallows—just wave the flame over them for a few seconds. Alternatively, you can put the pan under the broiler for 1-2 minutes, but watch it carefully because marshmallows burn fast. I’ve definitely set a few on fire this way, so keep an eye on it.
Step 8: Make the Ganache (Optional)
If you want that extra drizzle on top, heat the heavy cream in a small saucepan until it just starts to simmer. Pour it over the remaining 1/4 cup of semi-sweet chocolate chips in a bowl. Let it sit for 2 minutes, then stir until smooth. Drizzle this over the marshmallows and chocolate chips. Sprinkle with extra graham cracker crumbs for a finished look.
Step 9: Cool and Set
Let the bars cool completely at room temperature—this takes about 30-45 minutes. For cleaner cuts, refrigerate for 1 hour before slicing. Use the parchment overhang to lift the entire block out of the pan, then cut into squares with a sharp knife. Wipe the knife clean between cuts for neat edges.
Cooking Tips & Techniques
After making these bars more times than I can count, I’ve picked up a few tricks that make a real difference. First, don’t skip the crust pre-bake. I tried once to save time and just pressed the crust in without baking it first. The bottom turned out soggy and soft—not the crunchy contrast you want. That 8-minute bake makes all the difference.
Another thing I learned the hard way: let the cake cool for exactly 5 minutes before poking. Too hot, and the cake tears apart. Too cold, and the condensed milk mixture won’t soak in properly. I once got distracted by a phone call and let it cool for 20 minutes—the filling just sat on top and never absorbed. It was still tasty, but not the same texture.
For the marshmallow toasting, a kitchen torch gives you the most control, but the broiler method works in a pinch. Just keep the pan on the middle rack and watch it like a hawk. Marshmallows go from golden to charcoal in about 30 seconds. I’ve had to scrape burnt marshmallows off more than once, and it’s not fun. If you’re nervous about the broiler, just skip the toasting—the marshmallows will soften from the warm cake anyway.
Timing-wise, I like to make the crust while the oven is preheating, then mix the batter while the crust bakes. This keeps things moving and the whole process takes under 30 minutes. Also, if you’re making these for a party, you can prepare them a day ahead. The flavors actually meld together overnight, and the bars are even better the next day. Just keep them covered at room temperature.
Variations & Adaptations
One of the best things about this recipe is how easily you can change it up. Here are some variations I’ve tried and loved:
Peanut Butter S’mores Bars: Add 1/2 cup of creamy peanut butter to the sweetened condensed milk mixture before pouring it over the cake. Swirl in an additional 1/4 cup of peanut butter on top before adding the marshmallows. The salty-sweet combo is incredible—my husband says this version is his favorite.
Dark Chocolate Lover’s Version: Use dark chocolate cake mix instead of yellow, and substitute dark chocolate chips for both the milk and semi-sweet chocolate. The bitterness of the dark chocolate balances the sweetness of the condensed milk perfectly. This is what I make when I want something a little more grown-up.
Berry S’mores Bars: After poking the cake, scatter 1 cup of fresh raspberries or sliced strawberries over the surface before pouring the condensed milk mixture. The tartness of the berries cuts through the sweetness and adds a fresh element. I tried this last summer with raspberries from Clara’s garden, and it was amazing.
Gluten-Free Adaptation: Use a gluten-free yellow cake mix and gluten-free graham crackers for the crust. The texture will be slightly different—a bit more crumbly—but the flavor is still spot-on. I’ve made this for a friend with celiac disease, and she said it was the best s’mores dessert she’d had in years.
Vegan Version: This one takes a bit more work, but it’s possible. Use a vegan cake mix, substitute the eggs with flax eggs (1 tablespoon ground flaxseed + 3 tablespoons water per egg), use coconut oil instead of butter in the crust, and use a dairy-free sweetened condensed milk alternative (like Nature’s Charm). For the topping, use vegan marshmallows and dairy-free chocolate chips. The texture is a little different, but the flavor is still there.
Serving & Storage Suggestions
These bars are best served at room temperature or slightly warm. If you’ve refrigerated them, let them sit out for about 15 minutes before serving—the texture softens up nicely. For presentation, I like to cut them into 12 squares (about 3×3 inches each) and arrange them on a wooden board. A dusting of graham cracker crumbs on top adds a nice finishing touch.
These bars pair beautifully with a cold glass of milk, a scoop of vanilla ice cream, or even a cup of coffee if you’re serving them after dinner. For summer parties, I sometimes serve them alongside fresh fruit to balance the richness. And if you’re feeling extra indulgent, warm a bar in the microwave for 10 seconds and top it with a scoop of salted caramel ice cream—trust me on this one.
For storage, keep the bars in an airtight container at room temperature for up to 3 days. If your kitchen is warm, you can refrigerate them, but let them come to room temperature before serving for the best texture. These bars also freeze beautifully. Wrap individual bars in plastic wrap, then place them in a freezer-safe bag. They’ll keep for up to 3 months. To thaw, just let them sit at room temperature for about 30 minutes, or microwave for 15-20 seconds.
The flavors actually develop over time. On day one, the cake is soft and the toppings are distinct. By day two, the condensed milk has fully soaked through, and the marshmallows have melded into the chocolate. Honestly, I sometimes prefer them on day two—the texture is more cohesive, and every bite is perfectly moist.
Nutritional Information & Benefits
Let’s be real—these are a treat, not a health food. But here’s the estimated nutritional breakdown for one bar (based on 12 servings):
- Calories: Approximately 380-420 per bar
- Fat: 18g
- Carbohydrates: 55g
- Protein: 5g
- Sugar: 38g
- Fiber: 1g
That said, there are a few redeeming qualities. The graham crackers provide a small amount of whole grains, and the dark chocolate chips contain antioxidants. The eggs add protein, and the milk in the condensed milk offers some calcium. But honestly, I make these because they make people happy, not because they’re a health food. If you’re looking to lighten them up, you can reduce the sugar in the crust or use a sugar-free cake mix, but I think they’re best enjoyed as an occasional indulgence.
Potential allergens to note: This recipe contains wheat (graham crackers and cake mix), dairy (butter, condensed milk, cream), and eggs. It can be adapted for gluten-free or vegan diets as mentioned in the variations section.
Conclusion
These Ultimate Mini S’mores Poke Cake Bars are everything I want in a dessert: easy, nostalgic, and absolutely delicious. They capture the spirit of campfire s’mores without the hassle of building a fire or dealing with melted chocolate all over your fingers. The poke cake technique makes them incredibly moist, the toppings add that classic s’mores crunch and gooeyness, and the whole thing comes together in about 30 minutes.
I love that this recipe is flexible enough to adapt to whatever you have on hand. Use dark chocolate if that’s your thing, add peanut butter for a twist, or throw in some berries when they’re in season. The base recipe is solid, but it welcomes your personal touch. That’s what makes it a keeper in my book.
I’d love to hear how these turn out for you! Leave a comment below and let me know if you tried any variations—I’m always looking for new ideas. And if you share a photo on social media, tag me so I can see your creation. These bars are meant to be shared, after all. Happy baking, friends!
Frequently Asked Questions
Can I use a different cake mix flavor?
Absolutely! Chocolate cake mix works wonderfully for a double-chocolate version. White cake mix or even spice cake mix can add interesting flavor twists. Just adjust the toppings to complement the cake flavor you choose.
Do I have to use sweetened condensed milk?
Yes, for this recipe it’s essential. Sweetened condensed milk is what makes the poke cake so moist and creates that signature texture. Evaporated milk won’t work because it’s not sweetened and has a thinner consistency. If you’re looking for a lighter option, you can try a reduced-fat version, but the texture will be slightly different.
Can I make these bars ahead of time?
Definitely! These bars actually taste better the next day after the flavors have melded together. Make them a day ahead, keep them covered at room temperature, and add the marshmallow toasting just before serving if you want that fresh-toasted look.
How do I prevent the marshmallows from burning under the broiler?
Watch them like a hawk! Place the pan on the middle oven rack and keep the oven door slightly open so you can see what’s happening. Marshmallows go from perfectly toasted to burnt in about 30 seconds. If you’re nervous, use a kitchen torch instead—it gives you much more control.
Can I freeze these bars?
Yes, they freeze beautifully. Wrap individual bars in plastic wrap, then place them in a freezer-safe bag or container. They’ll keep for up to 3 months. To thaw, let them sit at room temperature for about 30 minutes, or microwave for 15-20 seconds for that just-baked warmth.
Pin This Recipe!
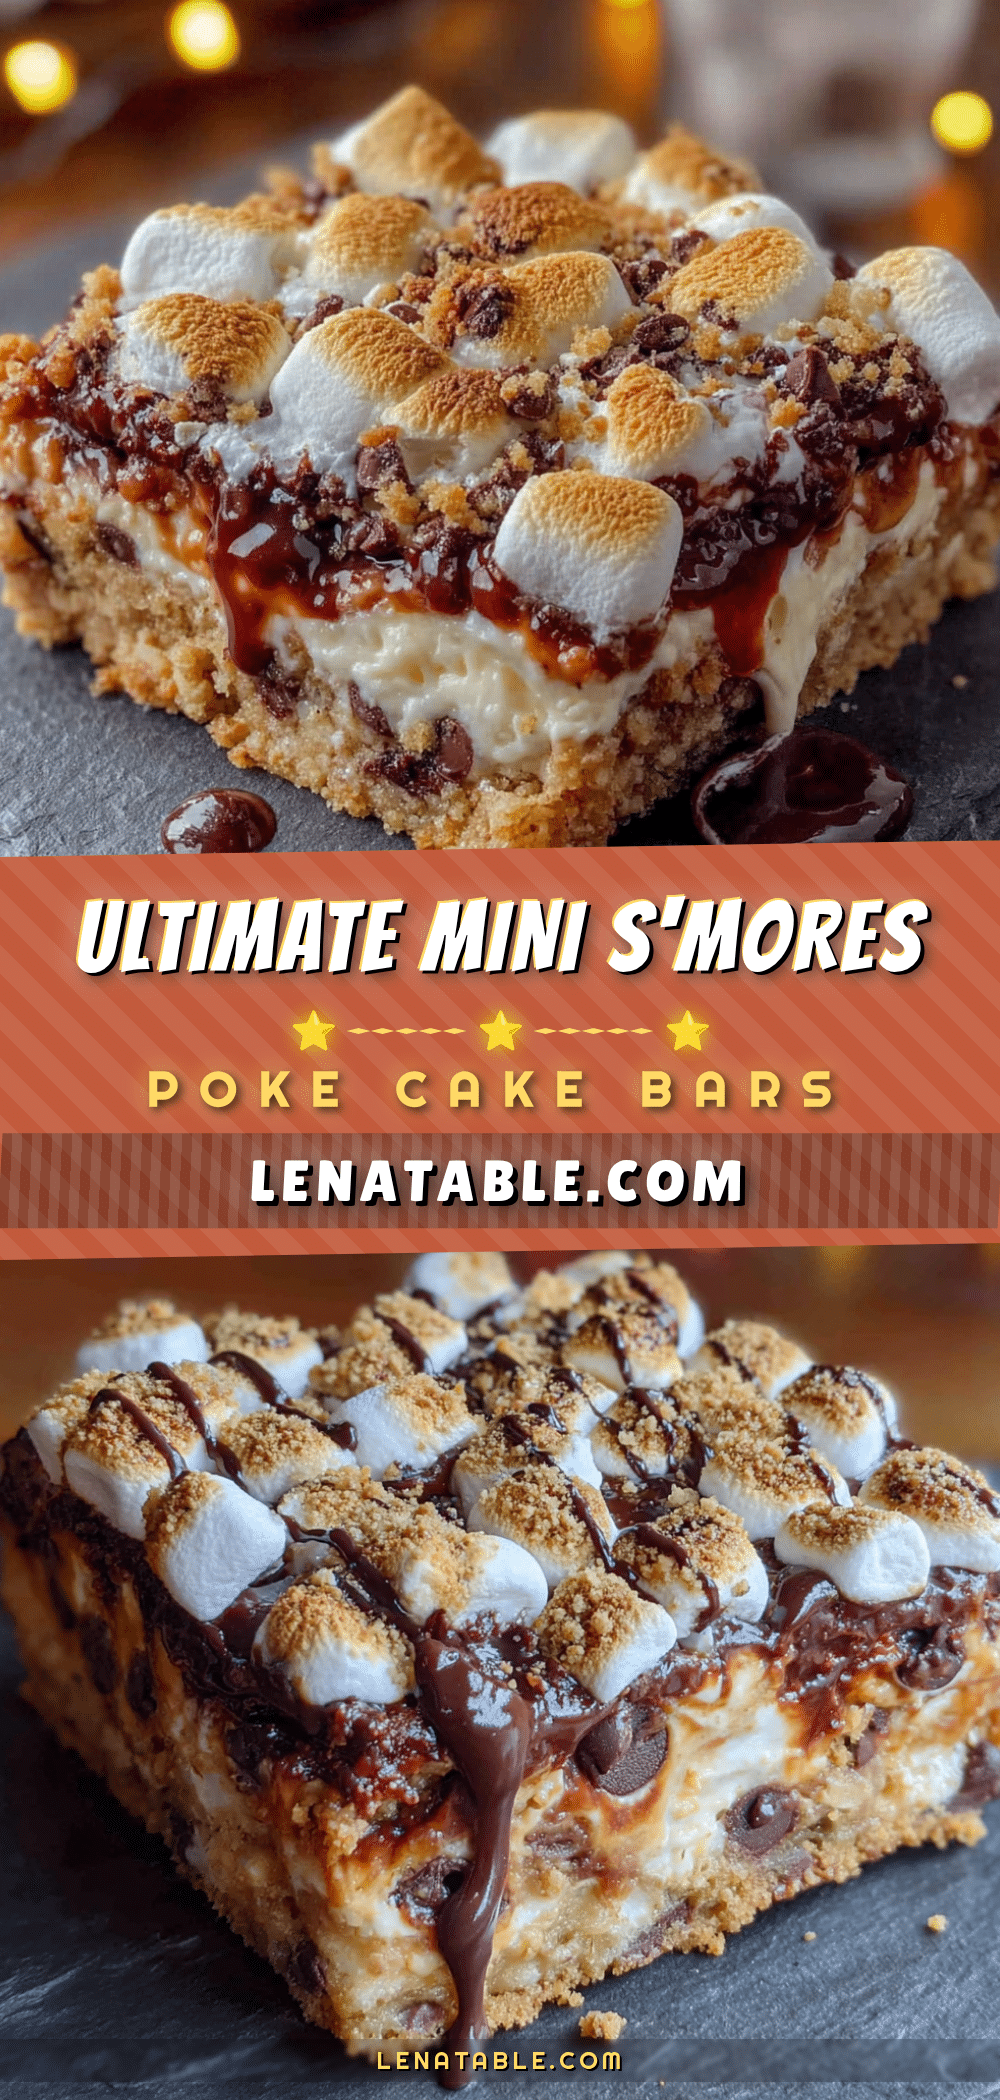
Ultimate Mini Smores Poke Cake Bars: Easy 30-Min Dessert
These Ultimate Mini S’mores Poke Cake Bars capture the campfire flavor of s’mores without the fire. A graham cracker crust, moist yellow cake soaked in sweetened condensed milk, topped with toasted marshmallows and chocolate—ready in 30 minutes.
- Prep Time: 15 minutes
- Cook Time: 18-22 minutes
- Total Time: 30 minutes
- Yield: 12 servings 1x
- Category: Dessert
- Cuisine: American
Ingredients
- 2 cups graham cracker crumbs (about 14 full sheets)
- 1/2 cup unsalted butter, melted
- 1/4 cup granulated sugar
- 1 box (15.25 oz) yellow cake mix
- 1 cup water
- 1/3 cup vegetable oil
- 3 large eggs, room temperature
- 1 teaspoon vanilla extract
- 1 can (14 oz) sweetened condensed milk
- 1/2 cup milk chocolate chips
- 2 cups mini marshmallows
- 1 cup semi-sweet chocolate chips
- 1/4 cup heavy cream (optional, for ganache)
- Additional graham cracker crumbs for garnish
Instructions
- Preheat oven to 350°F (175°C). Line a 9×13-inch baking pan with parchment paper, leaving overhang. Lightly spray with cooking spray.
- In a medium bowl, combine graham cracker crumbs, melted butter, and granulated sugar. Press firmly into the bottom of the prepared pan. Bake for 8 minutes. Set aside to cool slightly.
- In a large bowl, combine yellow cake mix, water, vegetable oil, eggs, and vanilla extract. Mix until smooth (about 2 minutes). Pour over the pre-baked crust and spread evenly.
- Bake for 18-22 minutes, or until a toothpick inserted in the center comes out clean. Let cool in the pan for 5 minutes.
- While still warm, poke holes all over the cake about 1 inch apart using the end of a wooden spoon or a skewer.
- In a small microwave-safe bowl, combine sweetened condensed milk and milk chocolate chips. Microwave in 20-second intervals, stirring until smooth. Pour evenly over the cake, ensuring it fills the holes. Let sit for 5 minutes.
- Sprinkle mini marshmallows and semi-sweet chocolate chips over the top. Optionally, toast marshmallows with a kitchen torch or under the broiler for 1-2 minutes (watch carefully).
- For ganache (optional): Heat heavy cream until simmering, pour over remaining 1/4 cup semi-sweet chocolate chips, let sit 2 minutes, then stir until smooth. Drizzle over the top. Sprinkle with extra graham cracker crumbs.
- Let cool completely at room temperature (30-45 minutes). For cleaner cuts, refrigerate for 1 hour. Lift out using parchment, cut into squares, and serve.
Notes
Don’t skip pre-baking the crust to avoid sogginess. Let cake cool exactly 5 minutes before poking—too hot tears the cake, too cold prevents absorption. For marshmallow toasting, a kitchen torch offers more control than the broiler. Bars taste even better the next day after flavors meld. Store in an airtight container at room temperature for up to 3 days, or freeze for up to 3 months.
Nutrition
- Serving Size: 1 bar (1/12 of recip
- Calories: 400
- Sugar: 38
- Sodium: 320
- Fat: 18
- Saturated Fat: 9
- Carbohydrates: 55
- Fiber: 1
- Protein: 5
Keywords: s'mores, poke cake, bars, easy dessert, 30-minute dessert, summer dessert, graham cracker, marshmallow, chocolate


