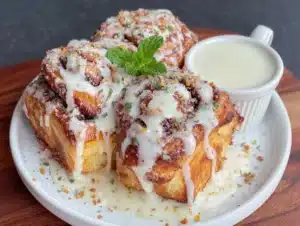
Love this? Save it for later!
Share the inspiration with your friends
I was standing in line at the DMV—a place designed to suck the joy out of any afternoon—when the woman ahead of me turned around and asked if I baked. Not a casual question, either. She had this look, like she was about to share a secret she’d been holding onto for years. Turns out, she was a retired pastry chef who’d worked at a bed-and-breakfast in Vermont, and she was telling me about the eggnog cinnamon rolls she used to make every Christmas morning. “The secret,” she said, lowering her voice like we were trading classified information, “is to use the eggnog in both the dough and the glaze. And don’t you dare skip the nutmeg.” I mean, who expects baking advice at the DMV? Honestly, it was the last place I thought I’d find a recipe that would become my holiday party staple. But there I was, clutching my number ticket, listening to her describe the exact texture of the dough—soft, pillowy, with just a whisper of warm spice. I scribbled notes on the back of an old receipt while she talked.
That conversation changed my holiday baking forever. These eggnog cinnamon rolls aren’t just another sweet breakfast—they’re the kind of thing that makes your guests stop mid-conversation and ask, “Wait, what’s in these?” The eggnog makes the dough impossibly tender, and the nutmeg glaze adds that festive kick that screams Christmas morning. I’ve made them for three holiday parties now, and every single time, someone asks for the recipe. Maybe you’ve been there—you want to bring something impressive to a gathering, but you don’t want to spend all night in the kitchen. Let me tell you, these rolls are the answer. They’re showstoppers without being show-offs. And honestly, they’re the reason I actually look forward to holiday hosting now.
Why You’ll Love This Recipe
These eggnog cinnamon rolls are the kind of recipe that makes you look like a hero at any holiday gathering. I’ve tested this dough at least six times to get it just right—soft, fluffy, and infused with that unmistakable eggnog flavor without being too heavy. Here’s why they’ll become your go-to for every festive occasion:
- Holiday-Perfect Flavor: The eggnog adds richness and moisture to the dough, while the nutmeg glaze delivers that classic Christmas taste. It’s like a hug in pastry form.
- Make-Ahead Friendly: You can prep these the night before and bake them fresh in the morning. Perfect for when you’re hosting and don’t want to be rolling dough at 7 AM.
- Crowd-Sized Recipe: This recipe makes 12 generous rolls—enough to feed a hungry brunch crowd or a dinner party dessert table.
- Simple Ingredients: No weird specialty items here. You probably already have most of what you need, minus the eggnog and maybe fresh nutmeg.
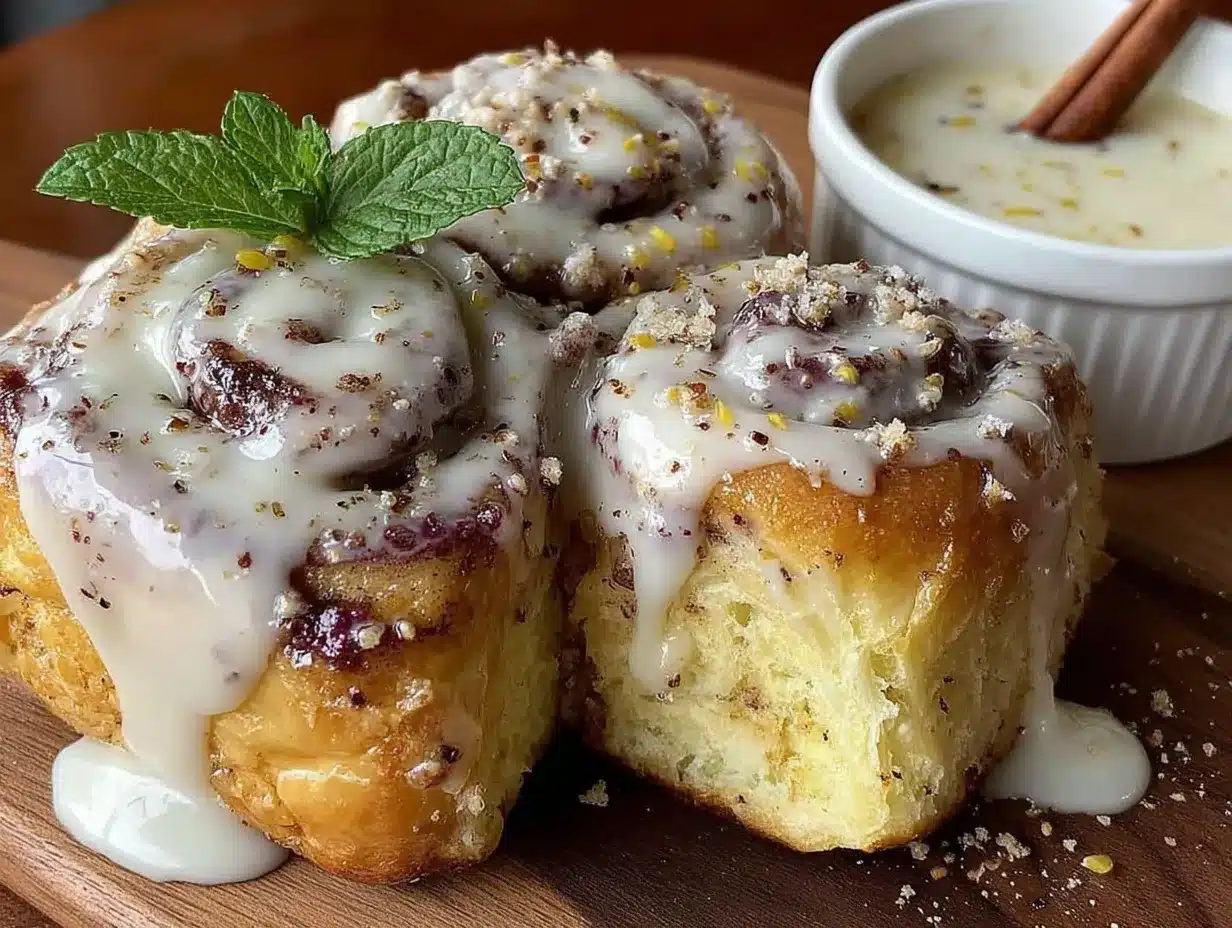
- Impressive Presentation: These rolls look gorgeous on a serving platter, especially with the white glaze drizzled over top and a sprinkle of extra nutmeg.
- Stress-Free Hosting: I’ve designed this recipe so you can focus on your guests, not on complicated techniques. The dough is forgiving, and the glaze comes together in seconds.
What makes these different from other cinnamon roll recipes? It’s the eggnog. Most recipes just add a splash of extract or rely on heavy cream. But using real eggnog in the dough creates a tender crumb that’s subtly spiced, and the glaze—oh, the glaze. It’s made with more eggnog and freshly grated nutmeg, so every bite tastes like the holidays. I’ve had friends tell me these are better than any bakery version they’ve tried. And honestly? I believe them. These rolls are the kind of thing that makes you close your eyes after the first bite. They’re comfort food reimagined—familiar but special, rich but not overwhelming. Perfect for impressing guests without spending all day in the kitchen.
What Ingredients You Will Need
This recipe uses simple, holiday-friendly ingredients to create something truly special. Most of these are pantry staples, but a few are worth seeking out for the best flavor. Here’s everything you’ll need, broken down by component:
For the Dough
- 3 ½ cups all-purpose flour (plus extra for dusting) — I prefer Gold Medal or King Arthur for consistent results
- ¼ cup granulated sugar — just enough to feed the yeast and add a touch of sweetness
- 1 packet (2 ¼ teaspoons) active dry yeast — or instant yeast works too; just skip the proofing step
- ½ teaspoon salt — balances the sweetness and strengthens the dough
- ½ cup whole milk — warmed to about 110°F; this helps activate the yeast
- ½ cup eggnog — use full-fat for the richest flavor; I like Hood or Organic Valley
- ¼ cup unsalted butter — melted and slightly cooled
- 1 large egg — room temperature for better incorporation
- ½ teaspoon vanilla extract — optional but adds warmth
For the Filling
- ½ cup unsalted butter — softened to room temperature for easy spreading
- ¾ cup packed brown sugar — light or dark both work; dark gives deeper flavor
- 1 tablespoon ground cinnamon — I use McCormick for consistent quality
- ½ teaspoon ground nutmeg — freshly grated is best if you have whole nutmeg
- ¼ teaspoon ground cloves — optional but adds that classic holiday spice blend
For the Nutmeg Glaze
- 1 ½ cups powdered sugar — sifted to avoid lumps
- 3 tablespoons eggnog — start with 2 and add more if needed
- ½ teaspoon vanilla extract
- ¼ teaspoon freshly grated nutmeg — plus extra for garnish (this is non-negotiable for the best flavor)
- Pinch of salt — balances the sweetness
A few ingredient notes worth sharing: When choosing eggnog, go for the full-fat version. Low-fat or light eggnog has more water and less cream, which can make the dough less tender. I’ve tested both, and full-fat gives noticeably better results. For the nutmeg, please—I’m begging you—use fresh nutmeg if you can. The pre-ground stuff in a jar loses its punch after a few months. A whole nutmeg keeps for ages, and you can grate it right over the glaze. It makes a real difference. And if you’re dairy-free, you can substitute the milk and butter with plant-based versions, but swap the eggnog for a dairy-free nog like Califia Farms. The texture will be slightly different, but the flavor will still shine through.
Equipment Needed
You don’t need a ton of fancy equipment to pull these off, but a few tools make the process much smoother. Here’s what I use:
- Stand mixer with dough hook — This is my favorite tool for kneading. It does the hard work while you prep other things. If you don’t have one, you can absolutely knead by hand—it just takes about 10 minutes of arm work.
- 9×13-inch baking dish — Glass or ceramic works best. I’ve used metal before, and the rolls brown a bit faster on the bottom. Not a disaster, but worth noting.
- Rolling pin — A standard wooden one is fine. If you don’t have one, a wine bottle works in a pinch (I’ve been there).
- Large mixing bowl — For proofing the dough. Make sure it’s big enough for the dough to double in size.
- Plastic wrap or a clean kitchen towel — For covering the dough while it rises.
- Sharp knife or bench scraper — For cutting the rolls cleanly. Dental floss also works surprisingly well for clean cuts.
- Small saucepan — For warming the milk and eggnog.
- Whisk — For the glaze. A fork works too if you’re in a bind.
I bought my glass baking dish at a thrift store for three dollars, and it’s been my go-to for years. You really don’t need expensive equipment. The most important thing is having a warm spot for the dough to rise—I usually turn my oven on to 200°F for a few minutes, then turn it off and let the dough proof inside with the door slightly open. Works every time.
Preparation Method
Let’s walk through this step by step. I’ve broken it down so you can follow along without any confusion. Trust me—if I can pull these off while juggling holiday chaos, you can too.
Step 1: Activate the Yeast
In a small saucepan, warm the milk and eggnog together until they reach about 110°F—warm to the touch but not hot. If you don’t have a thermometer, test it on your wrist; it should feel like warm bathwater. Pour the warm liquid into the bowl of your stand mixer and sprinkle the yeast and a pinch of sugar on top. Let it sit for 5-7 minutes until it gets foamy. If it doesn’t foam, your yeast might be dead, and you’ll need to start over. I learned that the hard way one Christmas Eve—don’t be me.
Step 2: Make the Dough
Add the remaining sugar, melted butter, egg, vanilla, and salt to the yeast mixture. Mix on low speed with the paddle attachment until combined. Switch to the dough hook and add the flour, one cup at a time, mixing on medium-low. The dough should come together into a shaggy ball. If it’s too sticky, add a tablespoon of flour at a time. If it’s too dry, add a splash of warm milk. Knead for about 6-8 minutes until the dough is smooth and elastic. It should spring back when you poke it. If kneading by hand, it’ll take about 10 minutes—put on some music and enjoy the process.
Step 3: First Rise
Shape the dough into a ball and place it in a lightly greased bowl, turning to coat all sides. Cover with plastic wrap or a clean towel and let it rise in a warm, draft-free spot for 1 to 1 ½ hours, until doubled in size. I usually set my oven to 200°F for 2 minutes, turn it off, and let the dough rise inside with the door cracked. Works like a charm.
Step 4: Prepare the Filling
While the dough rises, mix the brown sugar, cinnamon, nutmeg, and cloves in a small bowl. Make sure the butter is softened to room temperature—microwaving it will make it too runny. Set everything aside.
Step 5: Roll and Fill
Punch down the risen dough and turn it out onto a lightly floured surface. Roll it into a 12×18-inch rectangle—about ¼-inch thick. Try to keep the edges as straight as possible. Spread the softened butter evenly over the dough, leaving a ½-inch border on the long side opposite you. Sprinkle the sugar-spice mixture over the butter, pressing it gently into the butter so it sticks.
Step 6: Roll and Cut
Starting from the long side closest to you, roll the dough tightly into a log. Pinch the seam to seal. Using a sharp knife or bench scraper, cut the log into 12 equal pieces—about 1 ½ inches each. For clean cuts, use a sawing motion rather than pressing straight down. Place the rolls cut-side up in a greased 9×13-inch baking dish, spacing them evenly. They’ll expand as they rise again.
Step 7: Second Rise
Cover the dish with plastic wrap and let the rolls rise for another 30-45 minutes, until they’re puffy and touching each other. This is a great time to preheat your oven to 350°F.
Step 8: Bake
Bake the rolls for 22-28 minutes, until they’re golden brown on top and the centers are cooked through. If the tops are browning too quickly, tent loosely with foil after 15 minutes. The rolls are done when an instant-read thermometer inserted into the center reads 190°F. Let them cool in the pan for about 10 minutes before glazing.
Step 9: Make the Glaze
While the rolls cool slightly, whisk together the powdered sugar, eggnog, vanilla, nutmeg, and salt in a small bowl. The glaze should be thick but pourable—if it’s too thick, add more eggnog a teaspoon at a time. Drizzle the glaze over the warm rolls, letting it seep into all the nooks and crannies. Sprinkle with extra freshly grated nutmeg for that picture-perfect finish.
Cooking Tips & Techniques
Over the years, I’ve made every mistake in the book with cinnamon rolls. Here’s what I’ve learned so you don’t have to repeat my failures:
Don’t rush the yeast. I once tried to speed things up by using water that was too hot, and I killed the yeast. The rolls came out like hockey pucks. Always test the liquid temperature on your wrist—it should feel warm, not hot. If you’re using instant yeast, you can skip the proofing step and mix it directly with the flour, but I still prefer the traditional method for that extra rise.
Use room temperature ingredients. Cold eggs and cold butter don’t incorporate well into the dough, leading to uneven texture. Take them out of the fridge about 30 minutes before you start. If you forget, place the egg in a bowl of warm water for 5 minutes.
Don’t over-flour your surface. It’s tempting to dump a ton of flour on the counter to prevent sticking, but too much flour makes the dough dry and dense. Use just enough to keep it from sticking, and use a bench scraper to lift the dough if needed.
Cut with confidence. When slicing the rolls, use a sharp knife and a clean, sawing motion. Don’t press straight down—that squishes the rolls and makes them uneven. Dental floss works beautifully: slide a piece under the log, cross the ends over the top, and pull. Clean cuts every time.
Watch the bake time. Ovens vary, so start checking at 22 minutes. The rolls should be golden brown on top, and the centers should feel set. If they look done but the center is still doughy, cover with foil and bake another 3-5 minutes. I’ve underbaked these before, and the middle was gummy—not the end of the world, but not ideal for impressing guests.
Glaze while warm. This is key. If you wait until the rolls are completely cool, the glaze won’t soak in as nicely. Aim for the rolls to be warm but not hot—about 10 minutes out of the oven is perfect. The glaze will melt slightly and create that beautiful, glossy finish.
Variations & Adaptations
One of the best things about this recipe is how adaptable it is. Here are some variations I’ve tried and loved:
Make it boozy. Add 1-2 tablespoons of dark rum or bourbon to the glaze for an adult twist. The alcohol cooks off in the oven, but the flavor lingers. I did this for a New Year’s brunch, and it was a hit. Just reduce the eggnog by the same amount so the glaze doesn’t get too thin.
Dairy-free version. Substitute the milk with oat milk, the butter with vegan butter (I like Miyoko’s), and use a dairy-free eggnog like Califia Farms. The texture will be slightly less tender, but the flavor is still fantastic. I tested this for a friend with lactose intolerance, and she couldn’t tell the difference.
Add mix-ins. Sprinkle chopped pecans, walnuts, or dried cranberries over the filling before rolling. The nuts add crunch, and the cranberries give a tart pop that balances the sweetness. I did a batch with candied ginger once, and it was incredible—spicy and sweet.
Change the spice profile. Swap the nutmeg and cloves for cardamom and orange zest for a Scandinavian-inspired version. Or use pumpkin pie spice for a more general holiday flavor. The possibilities are endless.
Overnight method. After placing the rolls in the baking dish, cover tightly with plastic wrap and refrigerate overnight. In the morning, let them sit at room temperature for 30-45 minutes while the oven preheats, then bake as directed. This is a lifesaver for holiday mornings—you get fresh rolls with minimal morning effort.
Mini rolls. Cut the log into 16-18 smaller pieces and bake in a 9×9-inch pan. Reduce the bake time to 18-22 minutes. These are perfect for parties where you want smaller portions.
Serving & Storage Suggestions
These eggnog cinnamon rolls are best served warm, right after the glaze is drizzled on. The combination of the soft, pillowy dough and the creamy, spiced glaze is pure magic. For a holiday brunch, arrange them on a large platter and let guests pull them apart. They’re also gorgeous on a cake stand with a dusting of powdered sugar and extra nutmeg.
For the ultimate holiday spread, serve these alongside:
- A pitcher of hot mulled cider or spiced coffee
- A platter of fresh fruit to balance the richness
- Scrambled eggs or a frittata for a savory counterpoint
- Crispy bacon or sausage links—the salty-sweet combo is irresistible
Storage: Leftover rolls can be stored in an airtight container at room temperature for up to 2 days. The glaze will soften the tops, but they’ll still be delicious. To keep them longer, refrigerate for up to 5 days. Let them come to room temperature before serving, or warm them in the microwave for 15-20 seconds.
Freezing: These freeze beautifully. Bake the rolls without the glaze, let them cool completely, then wrap tightly in plastic wrap and foil. Freeze for up to 3 months. When ready to serve, thaw overnight in the refrigerator, then reheat in a 350°F oven for 10-15 minutes. Make the glaze fresh and drizzle over the warm rolls. I’ve done this for Christmas morning, and nobody knew they weren’t freshly baked.
Reheating: For individual rolls, microwave for 20-30 seconds. For a whole pan, cover with foil and warm in a 300°F oven for 10 minutes. The glaze will get a bit melty, but that’s part of the charm.
One thing I love about these rolls is that the flavors actually deepen overnight. The spices meld together, and the eggnog flavor becomes more pronounced. So if you have leftovers—which is rare in my house—they might taste even better the next day.
Nutritional Information & Benefits
Let’s be real: these are a treat, not a health food. But knowing what’s in them can help you enjoy them mindfully. Here’s the estimated nutritional breakdown per roll (based on 12 servings):
- Calories: Approximately 380-420
- Carbohydrates: 55-60g
- Fat: 15-18g
- Protein: 6-8g
- Sugar: 30-35g
- Fiber: 1-2g
On the bright side, eggnog is a good source of calcium and vitamin D (thanks to the milk and eggs), and cinnamon has anti-inflammatory properties. The nutmeg, in small amounts, can aid digestion. But honestly, I make these because they make people happy. There’s something about sharing warm, homemade cinnamon rolls that brings everyone together. And if you’re hosting a holiday gathering, that’s worth more than any nutritional stat.
If you’re watching your sugar intake, you can reduce the sugar in the filling by a couple of tablespoons or use a sugar substitute in the glaze. But I’ll be honest—this is one recipe where I don’t skimp. The holidays are about indulgence, and these rolls deliver.
Conclusion
These eggnog cinnamon rolls have become my signature holiday dish, all thanks to a chance encounter at the DMV. Who knew that standing in line for a driver’s license renewal would lead to the best cinnamon roll recipe I’ve ever made? Every time I pull a pan of these out of the oven, I think of that retired pastry chef and her Vermont bed-and-breakfast. And every time, without fail, someone asks for the recipe.
I hope you’ll give these a try for your next holiday gathering. Whether you’re hosting a Christmas brunch, a New Year’s Day breakfast, or just want to surprise your family with something special, these rolls deliver. Don’t be afraid to make them your own—add a splash of rum, swap the spices, or go all out with the nutmeg. The recipe is forgiving, and the results are always worth it.
If you make these, I’d love to hear how they turn out! Leave a comment below with your variations, or tag me in your photos on social media. And if you’re looking for more holiday baking inspiration, check out our easy holiday brunch recipes or this classic pumpkin pie recipe that’s always a crowd-pleaser. Happy baking, and here’s to finding recipes in the most unexpected places!
Frequently Asked Questions
Can I use store-bought dough instead of making it from scratch?
You can, but the texture won’t be the same. Homemade dough gives you that soft, pillowy quality that makes these rolls special. If you’re short on time, try the overnight method—it saves morning effort without sacrificing flavor.
Can I use eggnog that’s already been opened?
Absolutely, as long as it’s still fresh. Eggnog typically lasts 5-7 days after opening. Give it a smell test—if it smells fine, it’s good to use. I’ve used leftover eggnog from Christmas parties with great results.
Why did my rolls turn out dry?
This usually happens from over-baking or using too much flour in the dough. Make sure you’re measuring flour correctly (spoon it into the cup and level it off, don’t scoop). Also, check your oven temperature—some ovens run hot. Start checking at 22 minutes.
Can I make these gluten-free?
I haven’t tested a gluten-free version myself, but you can try using a 1:1 gluten-free flour blend. The texture will be denser and less fluffy, but the flavor should still be good. I’d recommend adding an extra tablespoon of eggnog to keep the dough moist.
How far in advance can I make the glaze?
You can make the glaze up to 2 days ahead and store it in the fridge. Let it come to room temperature and whisk it again before drizzling. If it’s too thick, add a splash of eggnog to thin it out. I prefer making it fresh, though, for the best flavor and texture.
Pin This Recipe!
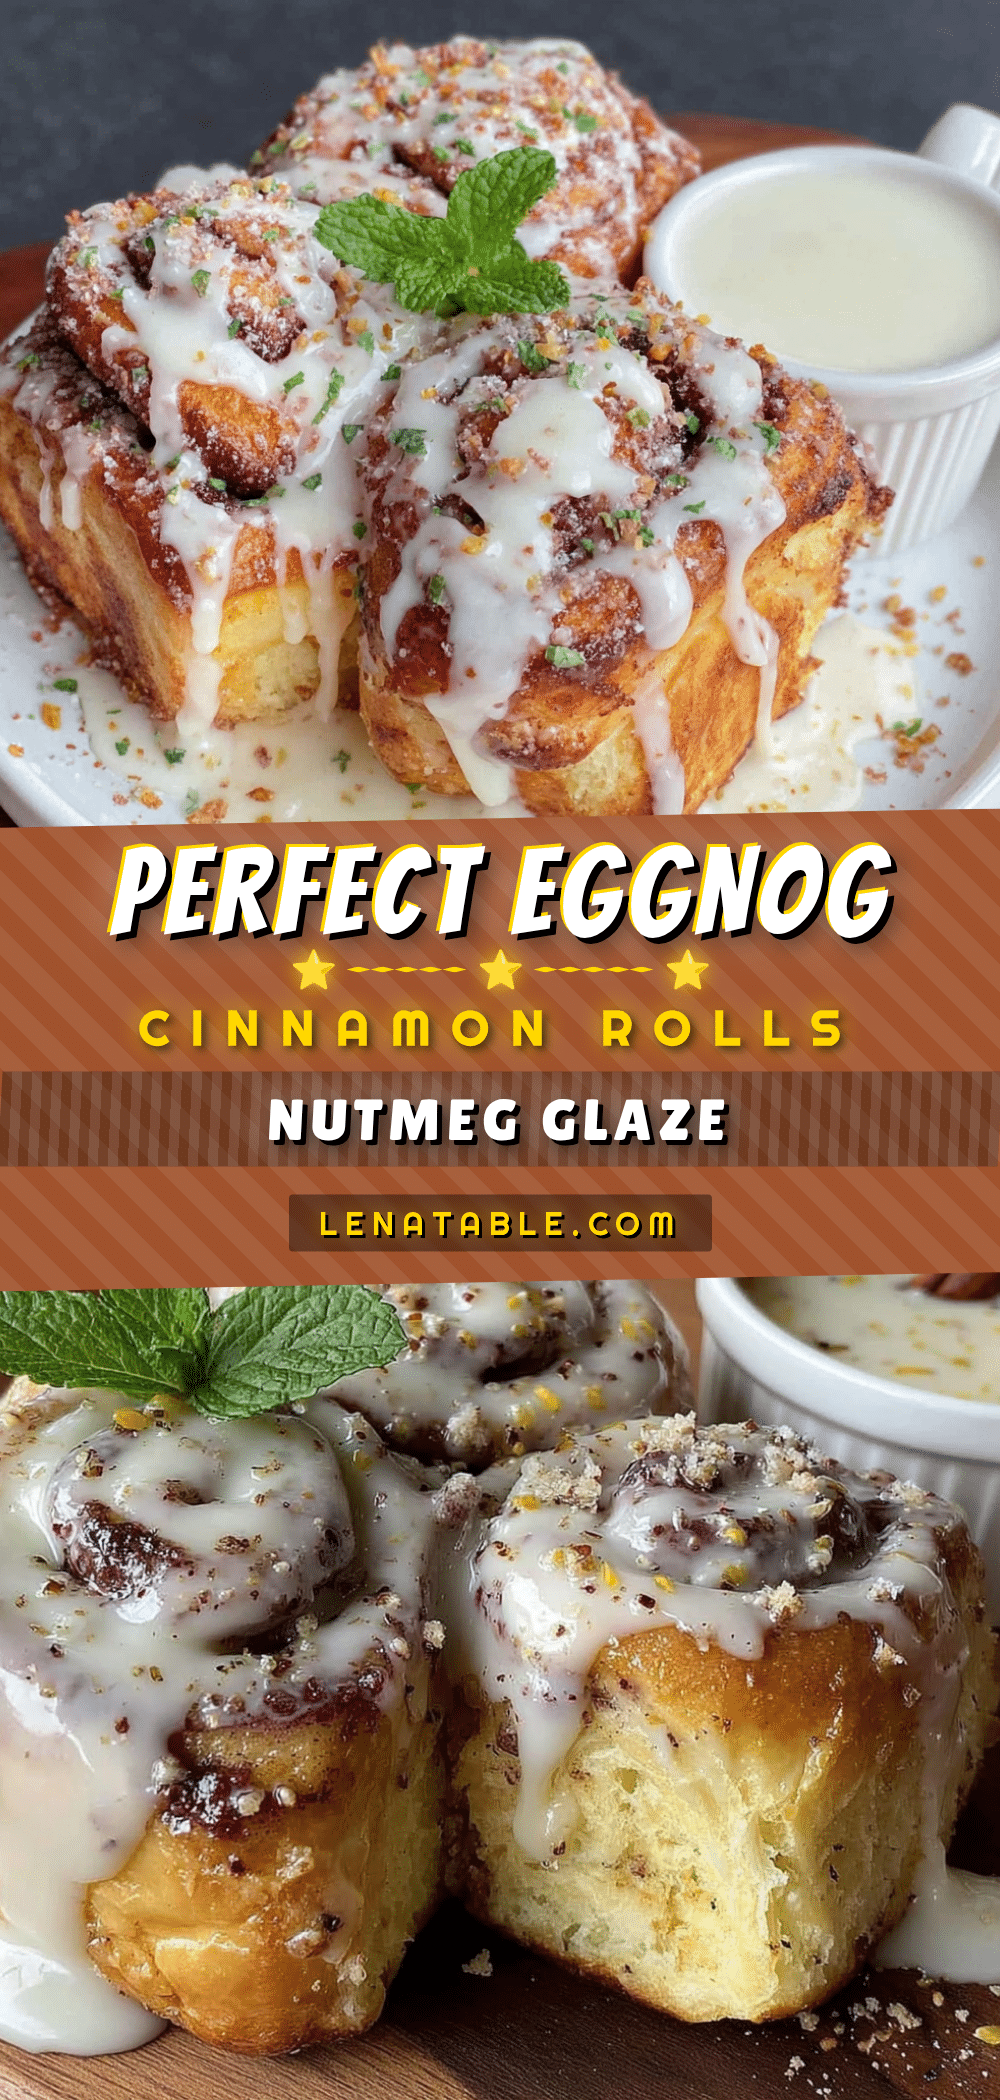
Perfect Eggnog Cinnamon Rolls with Easy Nutmeg Glaze
These eggnog cinnamon rolls feature a tender, pillowy dough infused with real eggnog and a nutmeg glaze that delivers classic Christmas flavor. Perfect for holiday brunches or gatherings, they’re make-ahead friendly and sure to impress.
- Prep Time: 30 minutes
- Cook Time: 25 minutes
- Total Time: 2 hours 30 minutes (including rising time)
- Yield: 12 servings 1x
- Category: Breakfast, Dessert
- Cuisine: American
Ingredients
- 3 ½ cups all-purpose flour (plus extra for dusting)
- ¼ cup granulated sugar
- 1 packet (2 ¼ teaspoons) active dry yeast
- ½ teaspoon salt
- ½ cup whole milk, warmed to 110°F
- ½ cup full-fat eggnog
- ¼ cup unsalted butter, melted and slightly cooled
- 1 large egg, room temperature
- ½ teaspoon vanilla extract
- ½ cup unsalted butter, softened (for filling)
- ¾ cup packed brown sugar (light or dark)
- 1 tablespoon ground cinnamon
- ½ teaspoon ground nutmeg, freshly grated if possible
- ¼ teaspoon ground cloves (optional)
- 1 ½ cups powdered sugar, sifted (for glaze)
- 3 tablespoons eggnog (for glaze, start with 2)
- ½ teaspoon vanilla extract (for glaze)
- ¼ teaspoon freshly grated nutmeg (for glaze, plus extra for garnish)
- Pinch of salt (for glaze)
Instructions
- Activate the yeast: In a small saucepan, warm the milk and eggnog together to about 110°F (warm to the touch, not hot). Pour into the bowl of a stand mixer, sprinkle yeast and a pinch of sugar on top, and let sit for 5-7 minutes until foamy.
- Make the dough: Add remaining sugar, melted butter, egg, vanilla, and salt to the yeast mixture. Mix on low with paddle attachment until combined. Switch to dough hook and add flour one cup at a time, mixing on medium-low until a shaggy ball forms. Knead 6-8 minutes (or 10 minutes by hand) until smooth and elastic.
- First rise: Shape dough into a ball and place in a lightly greased bowl, turning to coat. Cover with plastic wrap or a towel and let rise in a warm, draft-free spot for 1 to 1 ½ hours until doubled in size.
- Prepare filling: In a small bowl, mix brown sugar, cinnamon, nutmeg, and cloves. Ensure butter is softened to room temperature.
- Roll and fill: Punch down dough and turn onto a lightly floured surface. Roll into a 12×18-inch rectangle (about ¼-inch thick). Spread softened butter evenly over dough, leaving a ½-inch border on the long side opposite you. Sprinkle sugar-spice mixture over butter, pressing gently.
- Roll and cut: Starting from the long side closest to you, roll dough tightly into a log and pinch the seam to seal. Cut into 12 equal pieces (about 1 ½ inches each) using a sharp knife or bench scraper. Place cut-side up in a greased 9×13-inch baking dish.
- Second rise: Cover dish with plastic wrap and let rolls rise 30-45 minutes until puffy and touching. Preheat oven to 350°F.
- Bake: Bake rolls for 22-28 minutes until golden brown and centers are cooked through (internal temperature 190°F). If browning too quickly, tent with foil after 15 minutes. Let cool in pan for 10 minutes.
- Make glaze: Whisk together powdered sugar, eggnog, vanilla, nutmeg, and salt until thick but pourable. Drizzle over warm rolls and sprinkle with extra freshly grated nutmeg.
Notes
For best results, use full-fat eggnog and freshly grated nutmeg. The dough can be prepared the night before: after placing rolls in the baking dish, cover and refrigerate overnight. In the morning, let sit at room temperature for 30-45 minutes while oven preheats, then bake as directed. Leftover rolls can be stored in an airtight container at room temperature for up to 2 days, or refrigerated for up to 5 days. Freeze unbaked rolls (without glaze) for up to 3 months.
Nutrition
- Serving Size: 1 roll
- Calories: 400
- Sugar: 33
- Sodium: 220
- Fat: 16
- Saturated Fat: 9
- Carbohydrates: 58
- Fiber: 1.5
- Protein: 7
Keywords: eggnog cinnamon rolls, holiday cinnamon rolls, eggnog breakfast, nutmeg glaze, Christmas brunch, homemade cinnamon rolls