Love this? Save it for later!
Share the inspiration with your friends
This was supposed to be a regular batch of chocolate crinkle cookies for the school bake sale. I had the recipe memorized—the one my grandmother used, the one that never failed. But somewhere between my toddler yanking on my apron strings and the phone ringing (it was the school, again), I grabbed the wrong bottle from the pantry. Instead of the usual vanilla extract, my hand closed around a bottle of red food coloring I’d bought for a long-forgotten cake project. I didn’t even realize it until the “vanilla” had already splashed into the mixing bowl. The dough turned a startling shade of magenta. Honestly, I almost threw it out. I stood there, staring at this mutant cookie dough, thinking about the wasted butter and sugar—things we don’t waste on a sensible budget. My daughter, then four, peeked over the counter. “Pink cookies, Mommy?” she asked, her eyes wide. I sighed, added a bit more cocoa powder to try and save it, and baked them anyway. What came out of the oven was nothing like the plan. They were darker, richer, and had this gorgeous, cracked, snowy top. They were, without a doubt, the best crinkle cookies I’d ever made. The bake sale was a success—these were the first to go. And that’s how a distracted, slightly panicked moment became our family’s most requested treat. Maybe you’ve had one of those days where the kitchen feels like a disaster zone. Let me tell you, sometimes those disasters are the best things that ever happen.
Why You’ll Love This Recipe
These Fudgy Red Velvet Crinkle Cookies aren’t just another pretty face on the dessert table. They’re a true weeknight hero, and here’s why they’ve earned a permanent spot in my recipe box:
- Quick & Easy: From start to finish, you’re looking at about 30 minutes of active time. The dough needs a quick chill, but the hands-on work is minimal. Perfect for those after-school baking emergencies.
- Simple Ingredients: No trips to a specialty baking store. You likely have 90% of these items in your pantry right now. We’re using a boxed cake mix as a shortcut, which keeps the cost down and the process foolproof.
- Kid-Approved & Budget-Friendly: This is the winning combo. The deep chocolate flavor and soft, fudgy texture are a hit with even the pickiest eaters. And because we skip the expensive extracts and fancy decorations, it’s a dessert that feels indulgent without breaking the bank.
- Crowd-Pleaser: I’ve brought these to potlucks, classroom parties, and family gatherings. They vanish. The red color is fun and festive, but the real star is that intense, fudgy chocolate taste.
- Unbelievably Delicious: The texture is the real magic. A slightly crisp, sugary shell gives way to a soft, almost brownie-like center. It’s that perfect contrast that makes you reach for a second (and third) cookie.
This recipe is different because it leans into the “fudgy” promise. We aren’t making a cakey cookie. By using a specific ratio of ingredients and a crucial chilling step, we get that dense, rich, melt-in-your-mouth texture that’s usually reserved for expensive bakery treats. It’s comfort food reimagined for a busy family—faster, cheaper, but with the same soul-soothing satisfaction.
What Ingredients You Will Need
This recipe uses simple, clever shortcuts to deliver big flavor without the fuss. The star is a box of red velvet cake mix, which gives us the color, the flavor, and the structure all in one go.
- 1 box (15.25 oz / 432g) red velvet cake mix: This is our foundation. I prefer the Duncan Hines brand for its consistent color and moist crumb, but any standard brand works. Don’t get the “pudding in the mix” kind unless that’s all you have—it can make the cookies a touch too soft.
- 1/2 cup (120 ml) vegetable oil: This keeps the cookies tender and fudgy. You can use canola or melted coconut oil, but vegetable oil gives the most neutral flavor.
- 2 large eggs: They bind everything together and add richness. Make sure they are at room temperature for the best emulsion.
- 1 teaspoon (5 ml) vanilla extract: Even though the cake mix has flavoring, a little extra vanilla deepens the chocolate notes. It’s a small step that makes a big difference.
- 1/4 cup (30g) unsweetened cocoa powder: This is our secret weapon for the “fudgy” texture. It adds an intense chocolate punch that balances the sweetness of the cake mix. I use Hershey’s Special Dark for a richer flavor, but regular works fine.
- 1/2 cup (100g) powdered sugar (confectioners’ sugar): This is for rolling. The fine, starchy sugar creates that signature crinkled, crackled top as the cookies bake. Do not substitute with granulated sugar—it won’t melt the same way.
Ingredient Substitutions:
- Make it Gluten-Free: Use a gluten-free red velvet cake mix. The rest of the ingredients are naturally gluten-free. Just make sure your cocoa powder is certified gluten-free if needed.
- Dairy-Free: This recipe is naturally dairy-free since we use oil and eggs. Double-check your cake mix label to be sure it doesn’t contain milk solids.
- Egg-Free: You can substitute the two eggs with a “flax egg” (2 tablespoons ground flaxseed mixed with 6 tablespoons water, let sit for 5 minutes) or a commercial egg replacer. The texture will be slightly less fudgy but still delicious.
Equipment Needed
You don’t need a fancy bakery setup for these cookies. A few basic tools will do the job perfectly.
- Large mixing bowl: A standard glass or stainless steel bowl is fine.
- Electric hand mixer or stand mixer: While you can mix by hand with a sturdy spatula, a mixer makes incorporating the oil and eggs into the dry cake mix much easier and faster. I’ve done it both ways, and the mixer gives a more consistent dough.
- Measuring cups and spoons: Accurate measurements are key for the oil and cocoa powder.
- Rubber spatula: For scraping down the sides of the bowl and folding in the last bits of dry mix.
- Small bowls: One for the powdered sugar for rolling.
- Baking sheets: I use two half-sheet pans (18×13 inches). You can bake one batch at a time if you only have one.
- Parchment paper or silicone baking mats: This is non-negotiable for preventing sticking and ensuring even baking. Parchment is more budget-friendly; silicone mats are reusable.
- Cooling rack: For letting the cookies cool completely so the centers can set.
- Cookie scoop (optional but helpful): A 1.5-tablespoon scoop ensures uniform cookies that bake evenly. If you don’t have one, just use a spoon and your hands.
Preparation Method
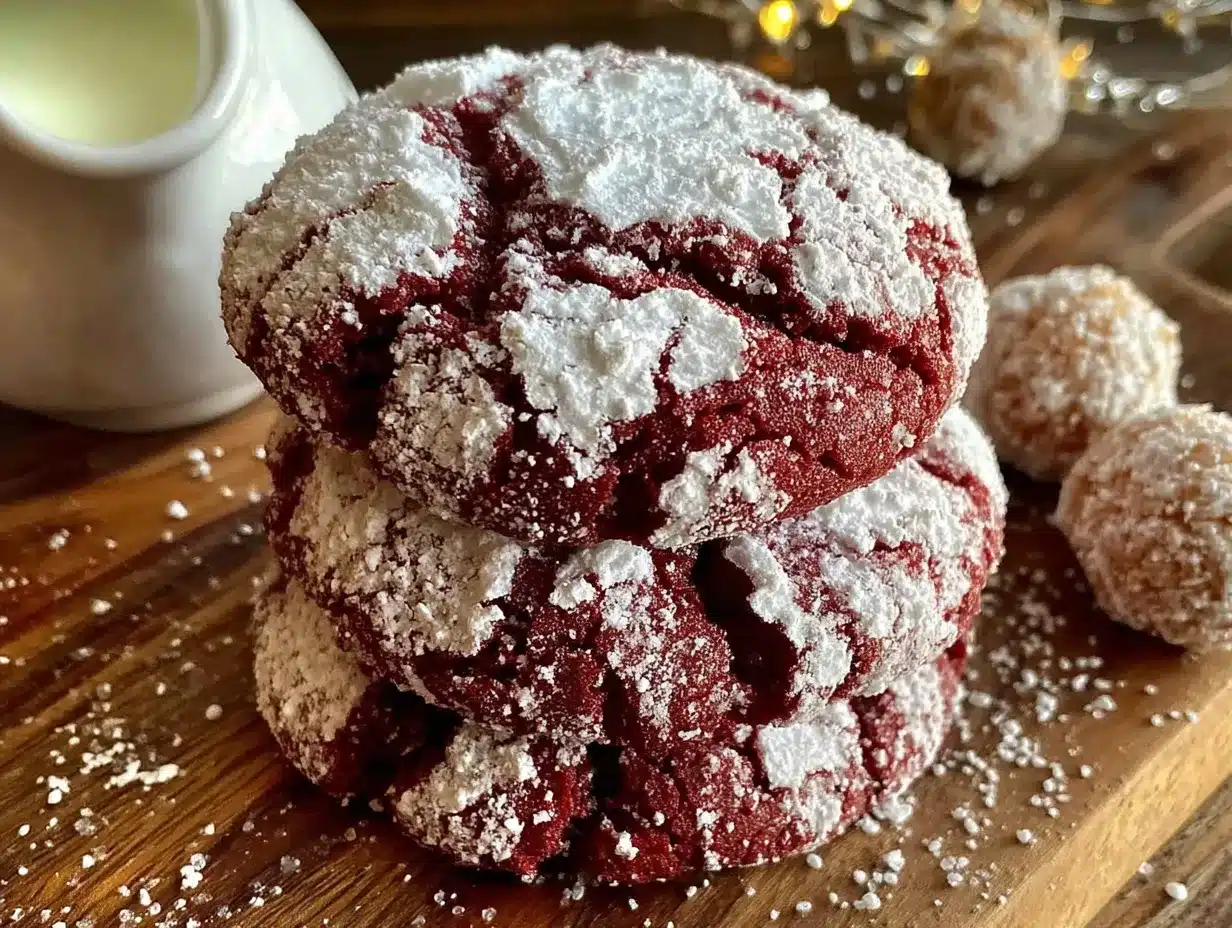
Follow these steps carefully, and you’ll have a batch of perfect, fudgy cookies. The key is not to over-bake them.
- Prepare the Dough: In your large mixing bowl, combine the red velvet cake mix, vegetable oil, eggs, vanilla extract, and unsweetened cocoa powder. Beat with an electric mixer on medium speed for about 2 minutes, until a thick, cohesive dough forms. It will look a bit like a very stiff brownie batter. Scrape down the sides of the bowl with your spatula to make sure everything is incorporated.
- Chill the Dough (Crucial Step!): This is the most important step for achieving that perfect crinkle. Cover the bowl with plastic wrap and refrigerate for at least 30 minutes, or up to 2 hours. Chilling solidifies the fat in the oil, preventing the cookies from spreading too much in the oven. A chilled dough ball will hold its shape and create those beautiful cracks as it bakes. If you skip this, you’ll get flat, puddly cookies. Trust me, I learned this the hard way on a rushed Tuesday afternoon.
- Preheat & Prep: About 10 minutes before you’re ready to bake, preheat your oven to 350°F (175°C). Line your baking sheets with parchment paper or silicone mats. Pour the 1/2 cup of powdered sugar into a small, shallow bowl.
- Shape and Roll: Remove the chilled dough from the fridge. Using a 1.5-tablespoon cookie scoop or your hands, portion out the dough into balls about 1.5 inches in diameter. Roll each ball firmly between your palms to make it smooth. Then, drop the ball into the bowl of powdered sugar and roll it around until it is completely and generously coated. The thicker the sugar coating, the more dramatic the crinkles will be. Place the sugar-coated dough balls on the prepared baking sheet, spacing them about 2 inches apart. They will spread a little, but not too much.
- Bake to Perfection: Bake for 10-12 minutes. The cookies will look puffed and the tops will be cracked and set. The centers will still look slightly soft and underdone—this is exactly what you want. Do not over-bake! The cookies will continue to set on the hot baking sheet as they cool. For a fudgier center, bake for 10 minutes. For a slightly more cake-like texture, go for 12 minutes.
- Cool Completely: Let the cookies cool on the baking sheet for 5 minutes. This allows them to firm up so they don’t fall apart when you move them. After 5 minutes, transfer them to a wire cooling rack to cool completely. The centers will continue to set and become perfectly fudgy. Resist the urge to eat them immediately—they are worth the wait!
Cooking Tips & Techniques
Here are a few hard-earned lessons from my own cookie-making adventures.
- The Chilling is Non-Negotiable: I cannot stress this enough. The first time I made these, I was in a hurry and only chilled the dough for 10 minutes. The cookies spread into thin, crispy discs. They tasted fine, but they looked nothing like the beautiful crinkle cookies I wanted. Give it the full 30 minutes.
- Don’t Over-mix: Once you add the dry ingredients, mix just until combined. Over-mixing develops the gluten in the cake mix, which can make the cookies tough instead of tender and fudgy.
- Use a Cookie Scoop for Uniformity: Using a scoop ensures all your cookies are the same size, so they bake evenly. No one wants one burnt cookie and one raw cookie on the same tray. A small investment in a scoop pays off in consistent results.
- Check Your Oven Temperature: Ovens can be liars. An oven thermometer is a cheap tool that will save you from baking disasters. If your oven runs hot, your cookies will burn on the bottom before the centers are done. I keep one in my oven at all times.
- The “Under-bake” Rule: When in doubt, take them out. The cookies will look slightly puffy and soft in the center when you pull them out. This is the secret to a fudgy texture. If you wait until they look fully set and dry, they will be cakey and hard once cooled.
Variations & Adaptations
This recipe is a fantastic base for creativity. Here are a few ways I’ve adapted it over the years.
- White Chocolate Chunk: After mixing the dough, fold in 1/2 cup of white chocolate chips or chopped white chocolate. The sweetness of the white chocolate is a perfect match for the deep red velvet flavor. My kids go crazy for this version.
- Mint Chocolate Twist: Add 1/2 teaspoon of peppermint extract along with the vanilla. Roll the cookies in a mixture of powdered sugar and a tiny bit of crushed candy cane for a festive holiday cookie. It’s a showstopper.
- Spiced Red Velvet: Add 1 teaspoon of ground cinnamon and 1/4 teaspoon of cayenne pepper (or less, to taste) to the dough. The warmth of the spice adds a surprising and delicious depth that adults will love. It’s my personal favorite for a cozy winter evening.
- Gluten-Free & Vegan: Use a gluten-free red velvet cake mix and a flax egg (2 tbsp flaxseed meal + 6 tbsp water). The texture will be slightly more delicate, but still incredibly delicious and fudgy. Let the dough chill for a full hour for best results.
- Peppermint Patty Surprise: Before rolling the dough in sugar, press a small, unwrapped peppermint patty into the center of each dough ball, then re-roll to enclose it. Bake as directed. You get a fudgy cookie with a molten, minty center. Be warned: these are dangerously good.
Serving & Storage Suggestions
These cookies are wonderful at room temperature, but they have a few other tricks up their sleeve.
- Serving: Serve them slightly warm or at room temperature. For an extra-special treat, sandwich a scoop of vanilla ice cream between two cookies for a red velvet ice cream sandwich. A dusting of extra powdered sugar right before serving makes them look bakery-fresh.
- Storage: Store the cookies in an airtight container at room temperature for up to 5 days. Place a slice of plain bread in the container—it will absorb excess moisture and keep the cookies soft. Replace the bread every day or two.
- Freezing: These cookies freeze beautifully. You can freeze the baked cookies for up to 3 months. Layer them between sheets of parchment paper in a freezer-safe container. To thaw, just leave them on the counter for 15 minutes. You can also freeze the unbaked dough balls. Roll them in powdered sugar, place them on a baking sheet, and freeze until solid. Then transfer them to a freezer bag. Bake from frozen, adding 2-3 minutes to the baking time.
- Flavor Development: Honestly, these cookies taste even better the day after they’re baked. The flavors meld together, and the fudgy texture becomes even more pronounced. So don’t be afraid to bake them a day ahead for a party.
Nutritional Information & Benefits
While these are a treat, it’s good to know what’s in them. This information is an estimate and will vary based on the specific brands you use.
- Estimated per cookie (based on 24 cookies): Calories: 140, Fat: 7g, Saturated Fat: 1.5g, Carbohydrates: 20g, Sugar: 14g, Fiber: 1g, Protein: 2g.
- Health Benefits: The cocoa powder is a source of antioxidants called flavonoids, which are good for heart health. Using oil instead of butter makes this recipe lower in saturated fat than many traditional cookie recipes. It’s a dessert that feels indulgent but is a bit smarter on the nutrition front.
- Dietary Considerations: This recipe is naturally dairy-free and nut-free (check your cake mix label). It can easily be made gluten-free and egg-free with the substitutions listed above. It is not suitable for a low-sugar or keto diet.
- Personal Perspective: I believe in balance. We eat healthy, whole foods most of the time, but a homemade cookie is a joy that shouldn’t be missed. These cookies are a way to share a little happiness without spending a lot of money or time. They’re a small, sweet victory in a busy week.
Conclusion
So there you have it—the story of a happy accident that turned into a family favorite. These Fudgy Red Velvet Crinkle Cookies are proof that you don’t need fancy ingredients or a perfect plan to create something truly special. They are quick, affordable, and, most importantly, absolutely delicious. I hope you give them a try and make them your own. Maybe you’ll add white chocolate chips, or a pinch of cinnamon, or just leave them perfectly plain. Whatever you do, I’d love to hear about it. Leave a comment below and tell me how your batch turned out. Or better yet, share a photo on Pinterest and tag me! Your kitchen disasters might just become your greatest triumphs. Happy baking, friends!
Frequently Asked Questions
Can I use a different flavor of cake mix?
Absolutely! While red velvet is the star here, you can use a chocolate fudge cake mix for an even richer chocolate cookie, or even a white cake mix with red food coloring added. Just follow the same instructions.
Why did my cookies not crinkle?
The most common reason is that the dough wasn’t chilled long enough. The dough needs to be cold so it holds its shape and the sugar coating cracks as it bakes. Also, make sure you are rolling the dough balls generously in powdered sugar.
Can I make the dough ahead of time?
Yes! You can prepare the dough, cover it tightly, and refrigerate it for up to 3 days before baking. You can also freeze the unbaked, sugar-coated dough balls for up to 3 months.
My cookies spread too much. What went wrong?
This usually happens if the dough was too warm or if you used a generic cake mix that has a different fat content. Make sure to chill the dough for the full 30 minutes, and measure your oil accurately. A little extra oil can cause spreading.
How do I get a really intense red color?
Most red velvet cake mixes have a good amount of color, but if you want a brighter red, you can add an extra 1/2 teaspoon of red food coloring gel (not liquid) to the dough. The gel is more concentrated and won’t affect the texture.
Pin This Recipe!

Easy Fudgy Red Velvet Crinkle Cookies Recipe

These Fudgy Red Velvet Crinkle Cookies are a happy accident turned family favorite. They are quick, affordable, and absolutely delicious, with a slightly crisp, sugary shell giving way to a soft, almost brownie-like center.
- Prep Time: 15 minutes
- Cook Time: 12 minutes
- Total Time: 57 minutes
- Yield: 24 servings 1x
- Category: Dessert
- Cuisine: American
Ingredients
- 1 box (15.25 oz / 432g) red velvet cake mix
- 1/2 cup (120 ml) vegetable oil
- 2 large eggs, room temperature
- 1 teaspoon (5 ml) vanilla extract
- 1/4 cup (30g) unsweetened cocoa powder
- 1/2 cup (100g) powdered sugar (for rolling)
Instructions
- In a large mixing bowl, combine the red velvet cake mix, vegetable oil, eggs, vanilla extract, and unsweetened cocoa powder. Beat with an electric mixer on medium speed for about 2 minutes until a thick, cohesive dough forms. Scrape down the sides of the bowl.
- Cover the bowl with plastic wrap and refrigerate for at least 30 minutes, or up to 2 hours.
- Preheat oven to 350°F (175°C). Line baking sheets with parchment paper or silicone mats. Pour powdered sugar into a small shallow bowl.
- Using a 1.5-tablespoon cookie scoop or your hands, portion out the dough into balls about 1.5 inches in diameter. Roll each ball firmly between your palms to make it smooth, then roll in powdered sugar until completely and generously coated.
- Place the sugar-coated dough balls on the prepared baking sheet, spacing them about 2 inches apart.
- Bake for 10-12 minutes. The cookies will look puffed and the tops will be cracked and set, with centers still slightly soft. Do not over-bake.
- Let the cookies cool on the baking sheet for 5 minutes, then transfer to a wire cooling rack to cool completely.
Notes
Chilling the dough is crucial for achieving the perfect crinkle. Do not over-bake; cookies will continue to set as they cool. For a fudgier center, bake for 10 minutes. For a more cake-like texture, bake for 12 minutes. Cookies taste even better the day after baking.
Nutrition
- Serving Size: 1 cookie
- Calories: 140
- Sugar: 14
- Fat: 7
- Saturated Fat: 1.5
- Carbohydrates: 20
- Fiber: 1
- Protein: 2
Keywords: red velvet crinkle cookies, fudgy cookies, easy cookie recipe, red velvet dessert, bake sale cookies, chocolate crinkle cookies