Love this? Save it for later!
Share the inspiration with your friends
There used to be a sports bar on the corner of 3rd and Main that made a chocolate chip cookie the size of a dinner plate. When they closed—suddenly, with a handwritten sign taped to the door—I felt a kind of grief I didn’t expect over a cookie. After twelve tries—some too crispy, others raw in the middle, one that I dropped on the floor and ate anyway—I finally got it.
This isn’t just any cookie, you know. It’s the kind that comes to the table warm, in a cast iron skillet, with a scoop of vanilla ice cream melting into the center. The edges are crisp and caramelized, the middle is soft and gooey, and every bite has that perfect ratio of chocolate to dough. I spent months trying to recreate that specific combination of textures and flavors.
The day I finally nailed it, I honestly cried a little. Maybe that sounds dramatic, but let me tell you—when you’ve been chasing a taste memory for that long, the victory feels huge. My neighbor Mike heard me whoop from two doors down and showed up with two spoons. We stood in my kitchen, eating straight from the skillet, and he said, “This is it. This is the one.”
And now I’m sharing it with you because maybe you’ve been there—missing a dish from a place that no longer exists, wishing you could have just one more bite. This skillet cookie is that bite. It’s game day ready, party perfect, and honestly, it’s the kind of dessert that makes people close their eyes when they take the first forkful.
Why You’ll Love This Recipe
Let me be real with you for a second. I’ve tested this recipe more times than I care to count, and every single time, it delivers. Here’s what makes it stand out from every other chocolate chip cookie recipe you’ve tried.
- Quick & Easy: From mixing bowl to table in under 30 minutes. No chilling the dough, no waiting around. Perfect for when the game is about to start or you need dessert fast.
- Simple Ingredients: You probably have everything in your pantry right now. Butter, sugar, eggs, flour, chocolate chips—nothing fancy, nothing hard to find.
- Perfect for Game Day: This cookie is made for sharing. It comes to the table in the skillet, still bubbling, and everyone digs in with forks or spoons. No plates needed.
- Crowd-Pleaser: I’ve brought this to three Super Bowl parties and two birthdays. It disappears every single time. Kids love it, adults love it, even my friend who “doesn’t like sweets” ate half the skillet.
- Unbelievably Delicious: The texture is what gets me every time. That crispy edge, that soft center, the way the chocolate stays melted and gooey for a good twenty minutes. It’s comfort food at its finest.
What makes this recipe different from the rest? It’s the technique. I use a specific ratio of brown sugar to white sugar that gives the cookie a deeper, almost caramel-like flavor. And I add a splash of vanilla that makes the whole thing taste like a bakery. This isn’t just another cookie recipe—it’s the one I’ve perfected through trial, error, and a whole lot of butter.
This is the kind of dessert that makes you forget about the score of the game. It’s warm, it’s indulgent, and it’s meant to be shared with people you love. Honestly, that’s what makes it so special.
What Ingredients You Will Need
This recipe uses simple, wholesome ingredients to deliver big flavor and that perfect skillet cookie texture. Most of these are pantry staples, so you probably don’t need a special trip to the store.
- Unsalted Butter, ½ cup (1 stick), softened to room temperature. I prefer using unsalted so I can control the salt level. If you only have salted butter, just reduce the added salt by ¼ teaspoon.
- Granulated Sugar, ½ cup. This gives the edges that beautiful golden crispness.
- Light Brown Sugar, ½ cup, packed. This is where the magic happens. Brown sugar adds moisture and that deep, almost molasses-like flavor that makes the cookie taste caramelized. I recommend Domino or C&H brands for consistent results.
- Large Egg, 1, at room temperature. A room temperature egg mixes more evenly into the butter and sugar, creating a smoother dough.
- Vanilla Extract, 1 teaspoon. Use pure vanilla extract if you can—it makes a noticeable difference. I like Nielsen-Massey or simply organic brands.
- All-Purpose Flour, 1 ½ cups. Spoon and level your flour—don’t scoop directly from the bag or you’ll end up with too much and a dry cookie.
- Baking Soda, ½ teaspoon. This helps the cookie spread just enough without becoming a flat pancake.
- Salt, ½ teaspoon. Don’t skip this. Salt balances the sweetness and makes the chocolate taste more chocolatey.
- Semi-Sweet Chocolate Chips, 1 cup. I use Ghirardelli or Guittard for the best melt and flavor. You can also chop up a chocolate bar for those big, uneven puddles of chocolate.
- Flaky Sea Salt, optional but highly recommended, for sprinkling on top right when the skillet comes out of the oven. Maldon is my go-to.
For the best texture, make sure your butter and egg are truly at room temperature. Cold ingredients don’t cream together properly, and you’ll end up with a denser cookie. If you forgot to take them out ahead of time, you can warm the egg in a bowl of warm water for 5 minutes and microwave the butter for about 10 seconds—just don’t melt it.
You can swap the semi-sweet chips for milk chocolate if you prefer a sweeter cookie, or dark chocolate for a more intense flavor. White chocolate and macadamia nuts also work beautifully here. For a gluten-free version, use a 1:1 gluten-free flour blend like King Arthur Measure for Measure.
Equipment Needed
You don’t need much for this recipe, which is part of its beauty. Here’s what you’ll need.
- 10-inch Cast Iron Skillet: This is non-negotiable for the real skillet cookie experience. The cast iron holds heat beautifully and gives you those perfectly crispy edges. I use a Lodge skillet that I’ve had for years—it’s seasoned and gets better with every use.
- Mixing Bowls: One large bowl for the wet ingredients and one medium bowl for the dry ingredients. Any set you have will work.
- Electric Hand Mixer or Stand Mixer: You can cream the butter and sugar by hand with a wooden spoon, but a mixer makes it faster and gives you a lighter texture. I use my KitchenAid stand mixer when I’m feeling fancy, but a hand mixer works just fine.
- Rubber Spatula: For scraping down the bowl and folding in the chocolate chips. A silicone spatula is best because it won’t scratch your bowls.
- Measuring Cups and Spoons: For accurate measurements. I cannot stress this enough—baking is science, and eyeballing ingredients leads to sad cookies.
- Cooling Rack: Optional but helpful if you want to cool the skillet before serving. Honestly, I usually just set the hot skillet on a trivet and dig in.
If you don’t have a cast iron skillet, you can use an 8×8 inch baking dish or a 9-inch cake pan. Just note that the baking time might change slightly, and you won’t get those same crispy edges. I’ve tried it in a ceramic dish before, and while it still tasted good, it wasn’t quite the same experience.
Preparation Method
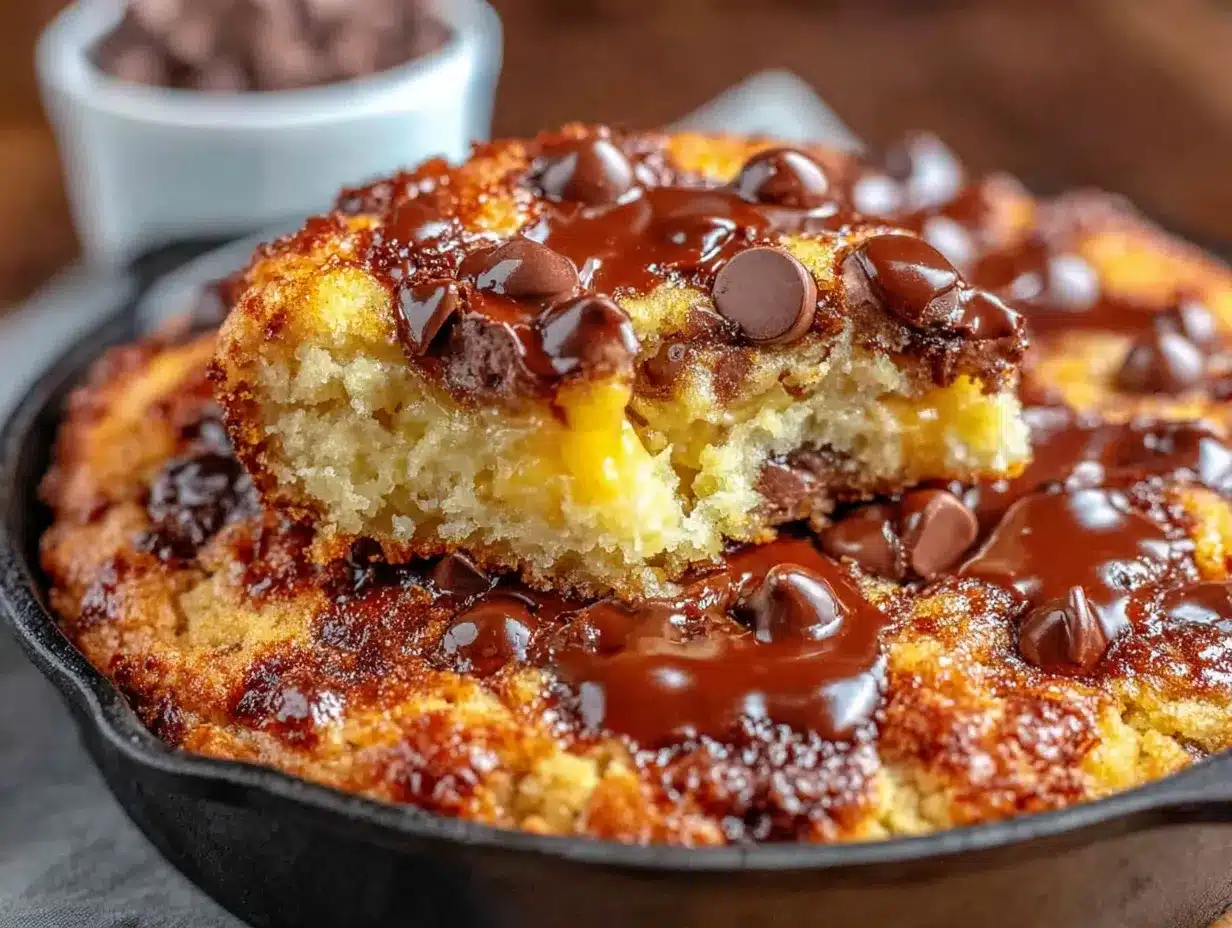
Alright, let’s make this cookie. I’ve broken it down into simple steps so you can follow along without any stress.
- Preheat your oven to 350°F (175°C). Place your cast iron skillet inside the oven while it preheats. This step is important—a hot skillet gives you that immediate sizzle when the dough hits the pan, which helps create those crispy edges.
- Cream the butter and sugars. In a large mixing bowl, combine the softened butter, granulated sugar, and brown sugar. Beat with an electric mixer on medium speed for 2-3 minutes until the mixture is light, fluffy, and pale in color. You’ll notice it looks almost like whipped frosting. Scrape down the sides of the bowl with a spatula.
- Add the egg and vanilla. Crack the egg into the bowl and add the vanilla extract. Beat on medium speed for another 30-60 seconds until everything is well combined and smooth. The mixture might look slightly curdled at this point—that’s totally normal, don’t panic.
- Mix the dry ingredients. In a separate medium bowl, whisk together the flour, baking soda, and salt. Whisking ensures everything is evenly distributed so you don’t end up with a pocket of baking soda in one bite.
- Combine wet and dry ingredients. Gradually add the dry ingredients to the wet mixture, mixing on low speed or folding with a spatula. Mix just until the flour disappears—overmixing will develop too much gluten and make the cookie tough. You want a soft, cohesive dough.
- Fold in the chocolate chips. Add the chocolate chips to the dough and fold them in with a rubber spatula. Make sure they’re evenly distributed throughout the dough. If you want extra chocolate on top, reserve a handful to press into the surface later.
- Press the dough into the skillet. Carefully remove the hot skillet from the oven using oven mitts. Transfer the dough into the skillet and press it into an even layer with your spatula or fingers. The dough will be thick—that’s good. If you reserved some chocolate chips, press them into the top of the dough now.
- Bake the cookie. Place the skillet back in the oven and bake for 18-22 minutes. At 18 minutes, start checking. The edges should be golden brown and set, while the center will still look slightly soft and underdone. That’s exactly what you want—the residual heat from the skillet will continue cooking the center as it cools.
- Cool slightly and serve. Remove the skillet from the oven and place it on a trivet or cooling rack. Sprinkle with flaky sea salt if using. Let it cool for 5-10 minutes—this is important because the cookie needs time to set. Then top with a scoop of vanilla ice cream and serve warm.
A few things to watch for: If your skillet is too hot when you add the dough, the butter will start melting immediately and the dough will spread too much. Let the skillet cool for a minute or two after preheating if that happens. Also, don’t overbake—the center should look slightly underdone when you pull it out. Trust me on this one.
Cooking Tips & Techniques
I’ve made this recipe enough times to know exactly where things can go wrong. Here are my best tips for getting it perfect every time.
Room temperature ingredients matter more than you think. Cold butter doesn’t cream properly with sugar, and cold egg can seize the butter mixture. I learned this the hard way when I made a batch with straight-from-the-fridge butter and ended up with a dense, flat cookie. Set everything out 30 minutes before you start.
Don’t skip the skillet preheat. This is the secret to those amazing crispy edges. When the dough hits the hot cast iron, it immediately starts cooking the outside, creating a caramelized crust while the inside stays soft. I forgot to preheat once and the cookie came out evenly soft all the way through—still tasty, but missing that signature texture.
Use a cookie scoop or your hands for even pressing. If you just dump the dough in the skillet and try to spread it, you’ll end up with an uneven layer. I use my hands (lightly oiled so the dough doesn’t stick) to press it into an even, flat disc. This ensures every bite has the same ratio of edge to center.
Check for doneness with a toothpick. Insert a toothpick into the center of the cookie at the 18-minute mark. If it comes out with wet batter, give it another 2 minutes. If it comes out with a few moist crumbs, it’s done. If it comes out clean, you’ve overbaked it.
Let it rest before serving. I know it’s hard to wait, but those 5-10 minutes of cooling are crucial. The cookie continues to set and the chocolate firms up just enough so you don’t burn your mouth. Plus, the ice cream melts into the warm cookie instead of turning into soup immediately.
Multitask like a pro. While the cookie is baking, scoop your ice cream into individual bowls or get your toppings ready. That way, when the timer goes off, you’re ready to serve immediately. I’ve learned to have everything ready to go before I even start mixing the dough.
Variations & Adaptations
One of the best things about this skillet cookie is how easy it is to customize. Here are some of my favorite variations.
Double Chocolate Skillet Cookie: Replace ¼ cup of the all-purpose flour with ¼ cup of unsweetened cocoa powder. Use dark chocolate chips instead of semi-sweet. The result is a rich, fudgy cookie that tastes like a brownie and a cookie had a baby. I made this for a friend’s birthday and she said it was the best dessert she’d ever had.
Peanut Butter Chocolate Chip: Reduce the butter to ¼ cup and add ¼ cup of creamy peanut butter. Cream it with the butter and sugars as usual. The peanut butter adds a savory note that pairs beautifully with the chocolate. If you’re feeling extra, swirl in some melted peanut butter on top before baking.
Gluten-Free Version: Substitute the all-purpose flour with a 1:1 gluten-free baking flour blend. I’ve tested this with King Arthur Measure for Measure and Bob’s Red Mill, and both work perfectly. The texture is slightly more tender than the original, but still delicious. No one at my gluten-free friend’s party could tell the difference.
Vegan Adaptation: Use vegan butter (I like Miyoko’s or Earth Balance) and a flax egg (1 tablespoon ground flaxseed mixed with 3 tablespoons water, let sit for 5 minutes). Use dairy-free chocolate chips. The cookie won’t be quite as rich, but it’s still incredibly good. I’ve served this to vegan and non-vegan friends alike, and it always gets thumbs up.
Add-In Ideas: Feel free to toss in ½ cup of chopped nuts (walnuts or pecans work great), ¼ cup of shredded coconut, or even ½ cup of dried cherries or cranberries. I once added chopped pretzels for a salty-sweet combo that was absolutely addictive.
Flavor Twist: Add 1 teaspoon of cinnamon or ½ teaspoon of espresso powder to the dry ingredients. The cinnamon gives it a cozy, almost snickerdoodle vibe, while the espresso powder enhances the chocolate flavor without making it taste like coffee.
Serving & Storage Suggestions
This skillet cookie is best served warm, straight from the oven. The ideal serving temperature is when the cookie is still slightly warm to the touch but the chocolate has firmed up just enough to not be runny. That sweet spot is usually about 10 minutes after it comes out of the oven.
For the ultimate presentation, top the warm cookie with a generous scoop of vanilla bean ice cream. The contrast between the warm cookie and cold ice cream is pure magic. Drizzle with chocolate sauce, caramel sauce, or even a sprinkle of extra flaky sea salt. If you’re feeling extra indulgent, add a dollop of whipped cream and a cherry on top.
This cookie pairs beautifully with a cold glass of milk, a hot cup of coffee, or even a dessert wine like a late-harvest Riesling. For game day, I like to serve it alongside a pitcher of cold brew or a round of hot chocolates for the kids.
Storage Instructions: If you have leftovers (which is rare in my house), let the cookie cool completely in the skillet. Cover the skillet tightly with plastic wrap or aluminum foil and store at room temperature for up to 2 days. The texture will soften over time, but it’s still delicious.
Reheating: To bring back that fresh-from-the-oven warmth, place the skillet in a 300°F (150°C) oven for 5-7 minutes. You can also microwave individual portions for 15-20 seconds, but be careful not to overheat or the cookie will become tough.
Freezer Instructions: You can freeze the unbaked dough right in the skillet. Press the dough into the skillet, wrap tightly with plastic wrap and then foil, and freeze for up to 3 months. When you’re ready to bake, let it thaw in the refrigerator overnight, then bake as directed, adding 2-3 minutes to the baking time.
Honestly, the flavors actually get better after the first day. The brown sugar deepens and the chocolate seems to distribute more evenly. I’ve been known to save a slice for breakfast the next morning—don’t judge me until you’ve tried it.
Nutritional Information & Benefits
Let’s be real—this is a dessert, and it’s meant to be enjoyed as a treat. But here’s what you’re working with per serving (based on 8 servings).
| Nutrient | Amount Per Serving |
|---|---|
| Calories | 380 |
| Total Fat | 20g |
| Saturated Fat | 12g |
| Cholesterol | 55mg |
| Sodium | 220mg |
| Total Carbohydrates | 48g |
| Dietary Fiber | 2g |
| Sugars | 32g |
| Protein | 4g |
Now, let’s talk about the good stuff. Dark chocolate (which semi-sweet is closer to than milk chocolate) contains antioxidants called flavonoids that can support heart health. The butter provides vitamin A, and the egg offers a nice dose of protein and B vitamins. The brown sugar gives you a quick energy boost—perfect for halftime when you need a pick-me-up.
This recipe is vegetarian-friendly. For those with dietary restrictions, the gluten-free and vegan variations above work beautifully. Please note that this recipe contains dairy, eggs, and gluten in its standard form.
I’m not a nutritionist, but I believe in balance. This cookie is meant to be shared with people you love on a special occasion. One serving won’t derail your health goals, and the joy it brings is absolutely worth it. Life is too short to skip dessert.
Conclusion
This Best Game Day Chocolate Chip Skillet Cookie is more than just a dessert—it’s an experience. It’s the warm, gooey center of a gathering, the thing everyone reaches for at the same time, the reason people linger at the table long after the game is over. I’ve made it for Super Bowl parties, birthday dinners, and quiet Tuesday nights when I needed a little comfort.
The best part? You can make it your own. Add your favorite mix-ins, experiment with different chocolates, or double the recipe for a bigger crowd. The base recipe is forgiving and flexible, so don’t be afraid to play around. That’s how I discovered the double chocolate version, and honestly, it might be even better than the original.
I’d love to hear how yours turns out. Did you add something unexpected? Did you serve it with a special ice cream flavor? Drop a comment below and let me know. And if you share it on social media, tag me—I want to see your beautiful skillet cookies in all their glory.
Go ahead, preheat that oven and grab your skillet. Your new favorite dessert is waiting. And trust me, once you make this, you’ll understand why I spent twelve tries getting it right. Some things are worth the effort. This cookie is one of them.
Frequently Asked Questions
Can I make this skillet cookie ahead of time?
Absolutely! You can prepare the dough, press it into the skillet, and refrigerate it for up to 24 hours before baking. Just add 2-3 minutes to the baking time since you’re starting with cold dough. You can also freeze the unbaked dough for up to 3 months.
Why is my skillet cookie raw in the middle?
This usually happens when the skillet is too hot or the dough is too thick. Make sure your oven is at the correct temperature (350°F) and that you’ve pressed the dough into an even layer. If the edges are browning too quickly, tent the skillet with foil for the last 5 minutes of baking.
Can I use a different size skillet?
Yes, but you’ll need to adjust the baking time. An 8-inch skillet will give you a thicker cookie that needs 22-25 minutes. A 12-inch skillet will give you a thinner cookie that might be done in 15-18 minutes. Keep an eye on it and use the toothpick test to check for doneness.
What’s the best way to get clean slices?
Let the cookie cool completely before slicing. Use a sharp knife and wipe it clean between cuts. For the warm, gooey experience, just let everyone dig in with forks—that’s the beauty of a skillet cookie. No need for perfect slices when you’re sharing.
Can I double this recipe?
You can, but you’ll need a larger skillet (at least 12 inches) or two separate skillets. Double all the ingredients and bake for 25-30 minutes. The toothpick test is your best friend here—start checking at 25 minutes to avoid overbaking.
Pin This Recipe!
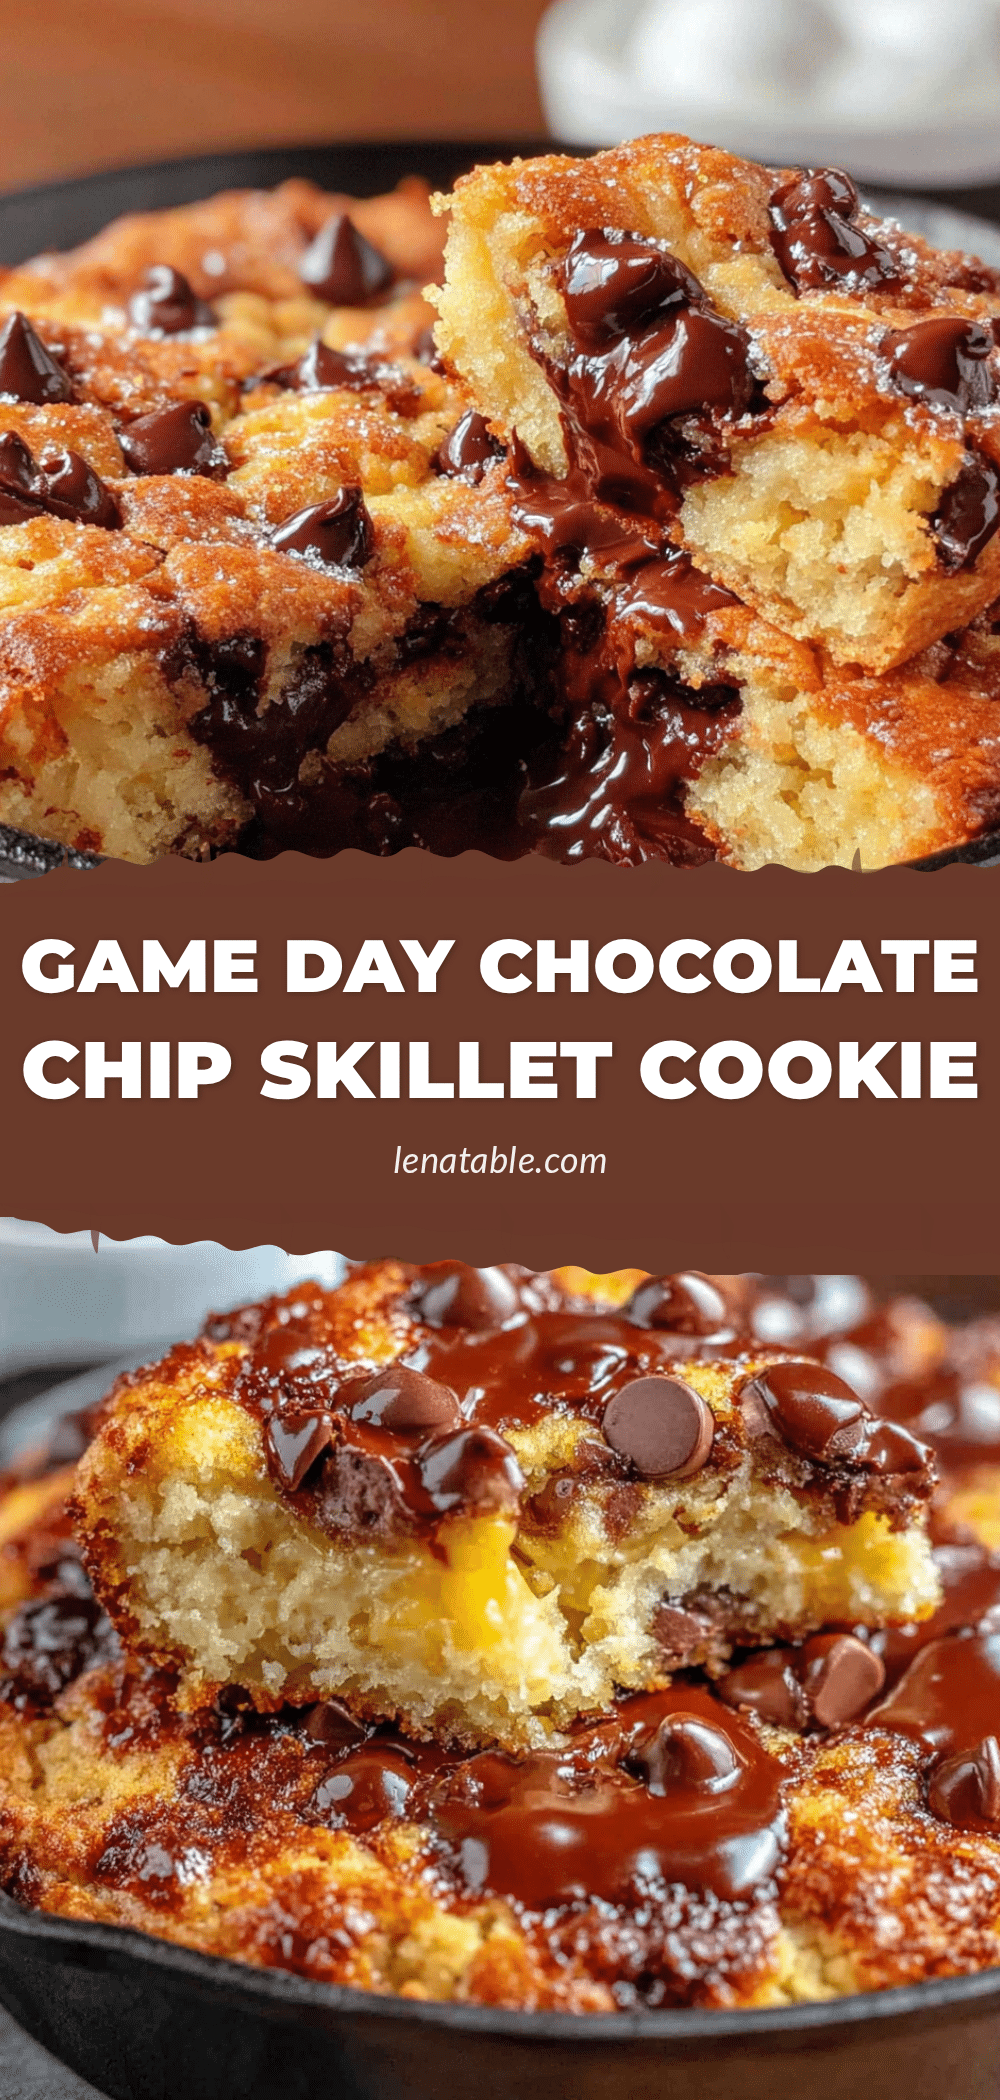
Best Game Day Chocolate Chip Skillet Cookie
A warm, gooey chocolate chip cookie baked in a cast iron skillet with crispy edges and a soft center, topped with vanilla ice cream. Perfect for game day or any gathering.
- Prep Time: 10 minutes
- Cook Time: 20 minutes
- Total Time: 30 minutes
- Yield: 8 servings 1x
- Category: Dessert
- Cuisine: American
Ingredients
- ½ cup (1 stick) unsalted butter, softened to room temperature
- ½ cup granulated sugar
- ½ cup light brown sugar, packed
- 1 large egg, at room temperature
- 1 teaspoon pure vanilla extract
- 1 ½ cups all-purpose flour
- ½ teaspoon baking soda
- ½ teaspoon salt
- 1 cup semi-sweet chocolate chips
- Flaky sea salt (optional, for sprinkling)
Instructions
- Preheat your oven to 350°F (175°C). Place your cast iron skillet inside the oven while it preheats.
- In a large mixing bowl, combine the softened butter, granulated sugar, and brown sugar. Beat with an electric mixer on medium speed for 2-3 minutes until light, fluffy, and pale in color. Scrape down the sides of the bowl.
- Add the egg and vanilla extract. Beat on medium speed for another 30-60 seconds until well combined and smooth.
- In a separate medium bowl, whisk together the flour, baking soda, and salt.
- Gradually add the dry ingredients to the wet mixture, mixing on low speed or folding with a spatula until just combined. Do not overmix.
- Fold in the chocolate chips with a rubber spatula until evenly distributed. Reserve a handful to press into the top if desired.
- Carefully remove the hot skillet from the oven using oven mitts. Transfer the dough into the skillet and press it into an even layer. Press reserved chocolate chips into the top if using.
- Bake for 18-22 minutes, until the edges are golden brown and set, and the center is still slightly soft. Start checking at 18 minutes.
- Remove from the oven and sprinkle with flaky sea salt if using. Let cool for 5-10 minutes before serving. Top with a scoop of vanilla ice cream and serve warm.
Notes
For best results, ensure butter and egg are at room temperature. Preheat the skillet for crispy edges. Do not overbake; the center should look slightly underdone when removed from the oven. Let cool 5-10 minutes before serving.
Nutrition
- Serving Size: 1 serving
- Calories: 380
- Sugar: 32
- Sodium: 220
- Fat: 20
- Saturated Fat: 12
- Carbohydrates: 48
- Fiber: 2
- Protein: 4
Keywords: skillet cookie, chocolate chip cookie, game day dessert, cast iron cookie, easy dessert


