Love this? Save it for later!
Share the inspiration with your friends
Introduction
My husband had sworn off protein balls for three years. Three years of me casually suggesting them during road trips, post-workout crashes, and those 3 PM slumps where he starts staring into the pantry like it holds the secrets to the universe. Every time, the same answer: “They taste like dirt and sadness.” Fair enough, honestly. Most of them do.
Then last Tuesday happened. I was experimenting in the kitchen with a new batch—trying to use up the last of a giant tub of oats—when I heard footsteps. I turned around, and there he was, mid-chew, holding one of the balls I’d left cooling on the counter. He froze like a kid caught stealing cookies. “These are… actually good,” he said, almost annoyed about it. I mean, the look on his face was pure betrayal of his own principles.
That’s the thing about this particular recipe. It’s not pretending to be something it’s not. There’s no chalky aftertaste, no weird texture that makes you question your life choices. It’s just oats, peanut butter, chocolate chips, and a little protein powder that actually blends in instead of fighting for attention. I’d been tweaking the ratio for months—too dry, too sticky, too sweet, not sweet enough—and this version finally hit the sweet spot. You know that feeling when you nail a recipe and immediately think, “I’m never losing this”? That’s this one.
Maybe you’ve been burned by protein balls before. Maybe you’ve got a container of sad, crumbly experiments hiding in your freezer. I get it. But this recipe is different. It’s the one that made a three-year skeptic eat his words—and ask for the recipe.
Why You’ll Love This Recipe
Let me tell you why this recipe has earned a permanent spot in my weekly meal prep rotation. It’s not just another healthy snack—it’s the kind that actually delivers on flavor and texture without making you feel like you’re punishing yourself.
- Ready in 10 Minutes : No oven, no stovetop, no waiting. Mix, roll, and you’re done. Perfect for those days when you need something fast.
- Simple Pantry Ingredients : You probably have everything already. Oats, peanut butter, honey, chocolate chips, protein powder. That’s it. No weird superfood powders or trips to a specialty store.
- Perfect for Meal Prep : Make a batch on Sunday and grab them all week. They’re my go-to for busy mornings, afternoon slumps, and post-workout refueling.
- Kid-Approved and Adult-Approved : My niece calls them “cookie dough balls” and has no idea they’re packed with protein. The ultimate stealth health move.
- Naturally Sweetened : Just a touch of honey or maple syrup keeps them sweet without the sugar crash. You control how much goes in.
What makes this recipe different from the dozens of protein ball recipes out there? It’s all about the texture. I spent months testing ratios until I found the perfect balance—not too dry, not too sticky, with a soft chew that actually satisfies. The trick is letting them rest in the fridge for 15 minutes before rolling, which gives the oats time to absorb the moisture and creates that perfect, cohesive texture. Most recipes skip this step, and you end up with crumbly balls that fall apart in your hands.
This isn’t just a snack. It’s the one that gets you through the 4 PM energy dip without reaching for something processed. It’s the one your kids will actually eat without complaint. It’s comfort food that happens to be good for you—and honestly, isn’t that the best kind?
What Ingredients You Will Need
This recipe uses simple, wholesome ingredients that work together to create a satisfying, energy-packed snack. Most of these are pantry staples, so you can whip up a batch anytime the craving hits.
For the Base
- 1 cup rolled oats (use certified gluten-free if needed; old-fashioned oats work best, not instant)
- 1/2 cup creamy peanut butter (natural, no-stir works great; I prefer the kind with just peanuts and salt listed)
- 1/4 cup honey (or maple syrup for a vegan option; both work beautifully)
- 1/4 cup chocolate protein powder (I recommend Orgain or Garden of Life for clean ingredients and great flavor)
- 1/3 cup mini chocolate chips (dark chocolate chips are my favorite, but milk or semi-sweet work too)
- 1 tablespoon chia seeds (optional, but adds extra fiber and omega-3s)
- 1/2 teaspoon vanilla extract (pure vanilla extract makes a noticeable difference in flavor)
- Pinch of sea salt (enhances all the flavors and balances the sweetness)
Ingredient Tips and Substitutions
- Peanut Butter : Almond butter, cashew butter, or sunflower seed butter all work great. Just make sure it’s well-stirred and not too oily, which can make the mixture too wet.
- Oats : Quick oats will work in a pinch, but they absorb liquid faster and can make the texture a bit mushy. Stick with rolled oats for the best chew.
- Protein Powder : Vanilla or unflavored protein powder works perfectly too. If you use unflavored, you might want to add an extra tablespoon of honey for sweetness. Avoid collagen or bone broth protein—it doesn’t bind well in no-bake recipes.
- Chocolate Chips : Chop up a dark chocolate bar if you don’t have chips on hand. White chocolate or butterscotch chips are fun variations too.
- Honey : Agave nectar or brown rice syrup are good alternatives for different sweetness profiles.
Brand Recommendations
I’ve tested this recipe with several protein powder brands, and my personal favorites are Orgain Simple (clean ingredients, no weird aftertaste) and Garden of Life Raw Protein (great texture, blends seamlessly). For chocolate chips, Guittard or Enjoy Life (dairy-free) are my go-tos. And honestly, any good-quality peanut butter like Justin’s or Teddie works beautifully.
Equipment Needed
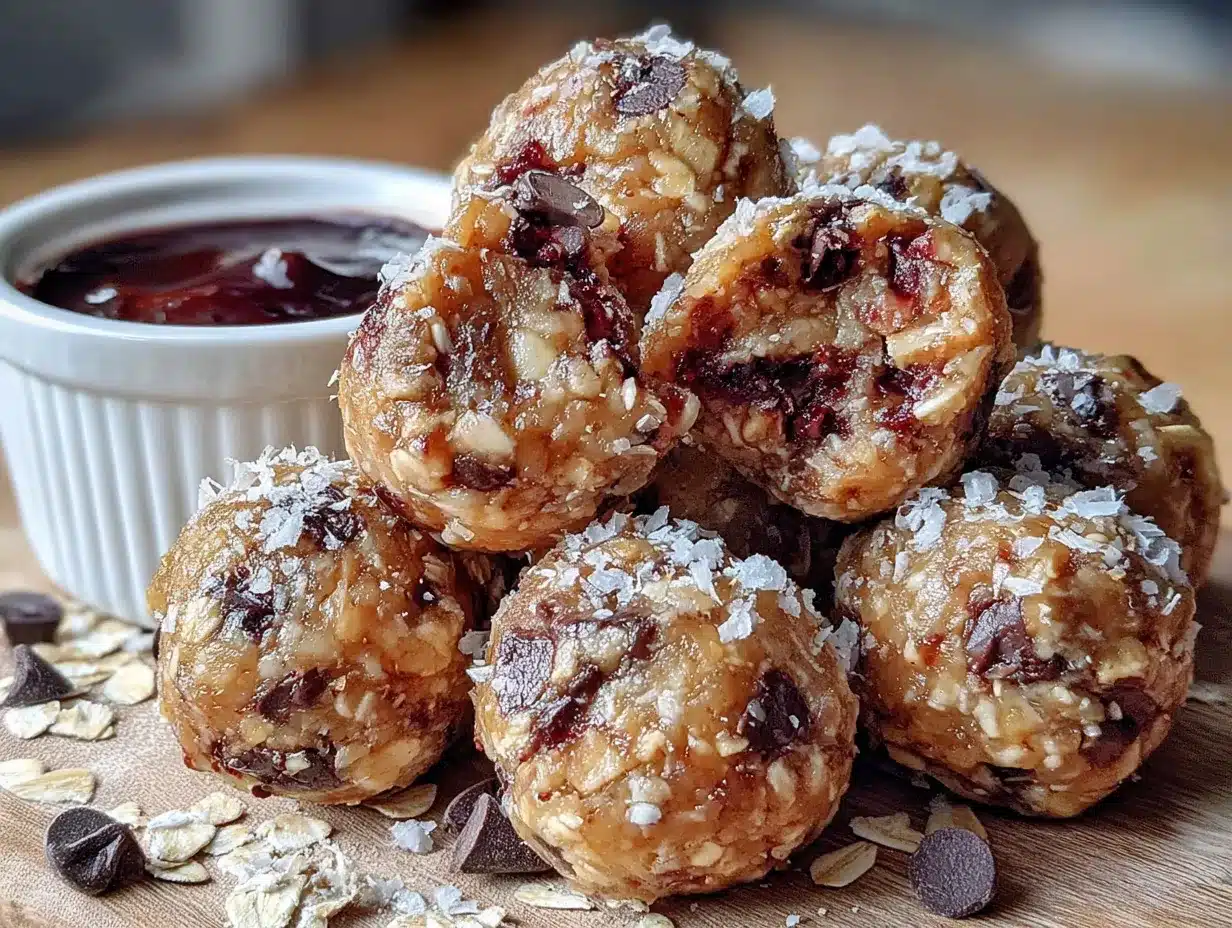
You don’t need fancy equipment for this recipe—it’s one of those beautiful, low-effort situations where a few basic tools do the job perfectly.
- Large Mixing Bowl : Any medium-to-large bowl works. I use my favorite ceramic mixing bowl because it’s wide enough to mix everything without spilling.
- Measuring Cups and Spoons : Standard set for accuracy. I’ve learned the hard way that eyeballing protein powder leads to dry, sad balls.
- Rubber Spatula or Wooden Spoon : A sturdy spatula makes mixing the thick dough much easier than a whisk would.
- Baking Sheet or Large Plate : To hold the rolled balls while they chill. Line it with parchment paper if you want zero sticking.
- Parchment Paper : Not strictly necessary, but makes cleanup a breeze and prevents sticking.
- Small Cookie Scoop : Optional, but it gives you perfectly uniform balls and saves time. A tablespoon works just fine if you don’t have one.
- Refrigerator : For chilling the dough before rolling and for storing the finished balls.
Budget-Friendly Alternatives
Don’t have a cookie scoop? No problem. Just use two spoons to portion the dough, then roll with your hands. No parchment paper? Wax paper or a clean plate works fine. The beauty of no-bake recipes is that they’re forgiving with equipment.
Preparation Method
This recipe comes together in about 10 minutes of active time, plus 15 minutes of chilling. Here’s exactly how to do it, step by step, with all the little details that make the difference between good protein balls and great ones.
Step 1: Combine the Dry Ingredients
In a large mixing bowl, add 1 cup rolled oats, 1/4 cup chocolate protein powder, 1/3 cup mini chocolate chips, 1 tablespoon chia seeds (if using), and a pinch of sea salt. Give everything a quick stir with your spatula to distribute the ingredients evenly. This step ensures the protein powder doesn’t clump when you add the wet ingredients.
Step 2: Add the Wet Ingredients
Add 1/2 cup creamy peanut butter, 1/4 cup honey, and 1/2 teaspoon vanilla extract to the bowl. Start mixing with your spatula, pressing and folding until everything comes together. At first, it will look dry and crumbly—don’t panic. Keep mixing, and it will eventually form a cohesive dough. If it’s still too dry after a minute of mixing, add a teaspoon of water or milk at a time until it holds together when pressed.
Step 3: Let the Dough Rest
Here’s the secret step most recipes skip: cover the bowl and pop it in the fridge for 15 minutes. This allows the oats to absorb some of the moisture from the peanut butter and honey, which makes the dough easier to roll and gives the finished balls a better texture. The dough will feel firm and slightly tacky when it’s ready.
Step 4: Roll into Balls
Line a baking sheet or plate with parchment paper. Using a small cookie scoop or a tablespoon, portion out the dough. Roll each portion between your palms into a smooth ball. If the dough sticks to your hands, lightly wet your palms with water or rub a tiny bit of coconut oil on them. You should get about 14-16 balls, depending on how big you make them.
Step 5: Chill and Set
Place the rolled balls on the prepared baking sheet and refrigerate for at least 30 minutes. This allows them to firm up and hold their shape. If you’re in a hurry, 15 minutes in the freezer works too. They’ll be slightly softer than fridge-chilled ones but still hold together well.
Step 6: Store and Enjoy
Once set, transfer the protein balls to an airtight container. They’ll keep in the fridge for up to two weeks—if they last that long. I usually make a double batch because they disappear fast in my house.
Sensory Cues
The dough should feel like a thick, slightly sticky cookie dough—not dry and crumbly, not wet and sloppy. When you press a small amount between your fingers, it should hold its shape without cracking. The smell is incredible: warm peanut butter, rich chocolate, and a hint of honey. It’s dangerously close to cookie dough, honestly.
Cooking Tips & Techniques
After making these protein balls more times than I can count, I’ve picked up a few tricks that make the process smoother and the results more consistent. Let me share what I’ve learned the hard way so you don’t have to.
The Texture Trap
The biggest mistake people make with protein balls is getting the moisture balance wrong. If your dough is too dry, add a teaspoon of milk or water at a time until it comes together. If it’s too wet (usually from runny peanut butter), add a tablespoon of oats or a teaspoon of coconut flour to absorb the excess. I once added too much honey and ended up with a sticky mess that wouldn’t roll—a few extra tablespoons of oats saved it.
Temperature Matters
Don’t skip the chilling step before rolling. Warm dough is sticky and frustrating to work with. Those 15 minutes in the fridge transform the texture completely. I learned this the hard way when I tried to rush the process and ended up with misshapen balls that looked more like abstract art than snacks.
Protein Powder Choices
Not all protein powders behave the same way. Whey protein tends to make the dough drier, while plant-based proteins can be more absorbent. If you’re using a new brand, start with slightly less than the recipe calls for and add more if needed. I once used a particularly dry plant-based protein and had to add an extra tablespoon of peanut butter to compensate.
Rolling Hack
For perfectly round balls every time, use a cookie scoop to portion the dough first, then roll between your palms. This gives you uniform sizes, which means even chilling and consistent texture. Plus, they look more professional if you’re serving them to guests.
Make Ahead Tip
You can make the dough up to 3 days in advance and keep it covered in the fridge. Roll into balls just before serving for the freshest texture. This is my go-to strategy for busy weeks when I know I’ll need snacks but don’t want to spend time rolling every day.
Variations & Adaptations
One of the best things about this recipe is how adaptable it is. You can change it up based on what you have in your pantry or what you’re craving. Here are some of my favorite variations.
Peanut Butter and Jelly
Swap half the chocolate chips for dried cranberries or chopped freeze-dried strawberries. Add a tablespoon of your favorite jam to the dough for that classic PB&J flavor. My kids go crazy for this version.
Vegan Option
Use maple syrup instead of honey and a plant-based protein powder. Make sure your chocolate chips are dairy-free (most dark chocolate chips are). Everything else is already vegan-friendly. This version is just as delicious and holds together beautifully.
Nut-Free Version
Replace peanut butter with sunflower seed butter or tahini. Add an extra tablespoon of honey to balance the slightly bitter notes of sunflower seed butter. This is perfect for school lunches or nut-free households. I’ve made this for my nephew’s class and got zero complaints.
Double Chocolate
Add an extra tablespoon of cocoa powder to the dry ingredients for an even richer chocolate flavor. Use white chocolate chips instead of regular for a fun contrast. This version tastes dangerously close to brownie batter—in the best possible way.
Spiced Chai
Add 1/2 teaspoon cinnamon, 1/4 teaspoon ginger, and a pinch of cardamom to the dry ingredients. Use vanilla protein powder instead of chocolate. The warm spices pair beautifully with the honey and peanut butter.
My Personal Favorite Variation
I once added a tablespoon of instant espresso powder to the dry ingredients, and it transformed the whole recipe. The coffee doesn’t make it taste like coffee—it just deepens the chocolate flavor and adds a subtle richness. Highly recommend trying this if you’re a fellow coffee lover.
Serving & Storage Suggestions
These protein balls are incredibly versatile when it comes to serving and storing. Here’s everything you need to know to keep them at their best.
Serving Temperature
I prefer these straight from the fridge—they’re firm, chewy, and satisfying. At room temperature, they soften slightly and become more like cookie dough. Both are delicious, but if you’re packing them for a lunchbox or a hike, chilled holds up better. For a special treat, let them sit at room temperature for 10 minutes before serving—the texture becomes extra soft and almost melt-in-your-mouth.
Presentation Ideas
Arrange them on a wooden board with fresh fruit and nuts for a beautiful snack spread. For parties, I like to roll them in shredded coconut or crushed nuts before the final chill—it adds texture and makes them look fancy. A drizzle of melted dark chocolate on top turns them into an elegant dessert.
Storage Instructions
Store in an airtight container in the refrigerator for up to 2 weeks. They also freeze beautifully for up to 3 months. To freeze, arrange them in a single layer on a baking sheet until frozen solid, then transfer to a freezer bag. This prevents them from sticking together. Thaw in the fridge overnight or at room temperature for 15 minutes.
Reheating (If You Want)
These are meant to be eaten cold or at room temperature, but if you want a warm treat, pop one in the microwave for 10-15 seconds. It gets soft and gooey—like warm cookie dough. Just don’t overdo it, or they’ll fall apart.
Flavor Development
Here’s something I discovered by accident: these actually taste better the next day. The flavors meld together overnight, and the texture becomes perfectly uniform. So if you can resist eating them all on day one, you’re in for a treat on day two.
Nutritional Information & Benefits
These protein balls are packed with good-for-you ingredients that actually taste amazing. Here’s what you’re getting in each serving.
Per Ball (based on 16 servings)
- Calories: 145
- Protein: 7g
- Carbohydrates: 16g
- Fiber: 3g
- Sugar: 9g
- Fat: 8g
- Saturated Fat: 2g
- Sodium: 65mg
Health Benefits
- Oats provide sustained energy and keep you full longer thanks to their fiber content.
- Peanut butter offers healthy fats and protein that support muscle recovery.
- Chia seeds add omega-3 fatty acids, which are great for heart and brain health.
- Protein powder helps with muscle repair and keeps you satisfied between meals.
- Dark chocolate chips contain antioxidants that support overall wellness.
Dietary Considerations
This recipe is naturally gluten-free (if using certified gluten-free oats) and can easily be made vegan, nut-free, or dairy-free with simple substitutions. It’s a great option for anyone looking for a clean, whole-food snack that doesn’t sacrifice taste.
My Wellness Perspective
I love that these protein balls give me energy without the crash that comes from processed snacks. They’re my go-to for busy afternoons when I need something quick but don’t want to compromise on nutrition. Plus, knowing exactly what’s in them gives me peace of mind.
Conclusion
These no-bake chocolate chip protein balls are proof that healthy snacks don’t have to be complicated or boring. With just a few simple ingredients and 10 minutes of your time, you can have a batch of delicious, satisfying treats that actually work for your body and your taste buds.
What I love most about this recipe is how forgiving it is. You can tweak it based on what you have in your pantry, adjust the sweetness to your liking, or experiment with different add-ins. It’s the kind of recipe that becomes yours after you make it a few times—you’ll know exactly how much honey you prefer, whether you like extra chocolate chips, or if a pinch of cinnamon makes it sing.
I’d love to hear how these turn out for you. Did you try any variations? Did your family love them as much as mine did? Drop a comment below and let me know—I read every single one and love hearing about your kitchen adventures. And if you share a photo on Pinterest or Instagram, tag me so I can see your beautiful creations!
Here’s to easy, delicious snacks that make life a little better. Happy rolling, friends!
Frequently Asked Questions
Can I make these protein balls without protein powder?
Yes, absolutely! Simply omit the protein powder and add an extra 1/4 cup of oats and an extra tablespoon of peanut butter. The texture will be slightly different—more like traditional energy balls—but still delicious.
Why are my protein balls too dry and crumbly?
This usually happens when the peanut butter is too thick or the oats absorb too much moisture. Try adding a teaspoon of milk or water at a time until the dough holds together. Also, make sure you’re not over-measuring the protein powder—a packed scoop can throw off the moisture balance.
How long do these protein balls last at room temperature?
They’re best kept in the fridge, but they can sit at room temperature for up to 4 hours without issue. If you’re packing them for lunch or a hike, use an ice pack to keep them cool. They won’t spoil quickly, but the texture is much better when chilled.
Can I use quick oats instead of rolled oats?
You can, but the texture will be different. Quick oats absorb liquid faster and more thoroughly, which can make the balls denser and less chewy. If you only have quick oats, reduce the chilling time before rolling to 10 minutes so they don’t get too soft.
Are these protein balls safe for kids?
Yes, they’re perfect for kids! Just be mindful of the chocolate chips—use mini chips or chop regular chips to avoid large chunks. For younger children, you can skip the chia seeds or grind them first. My niece has been eating these since she was two with no issues.
Pin This Recipe!
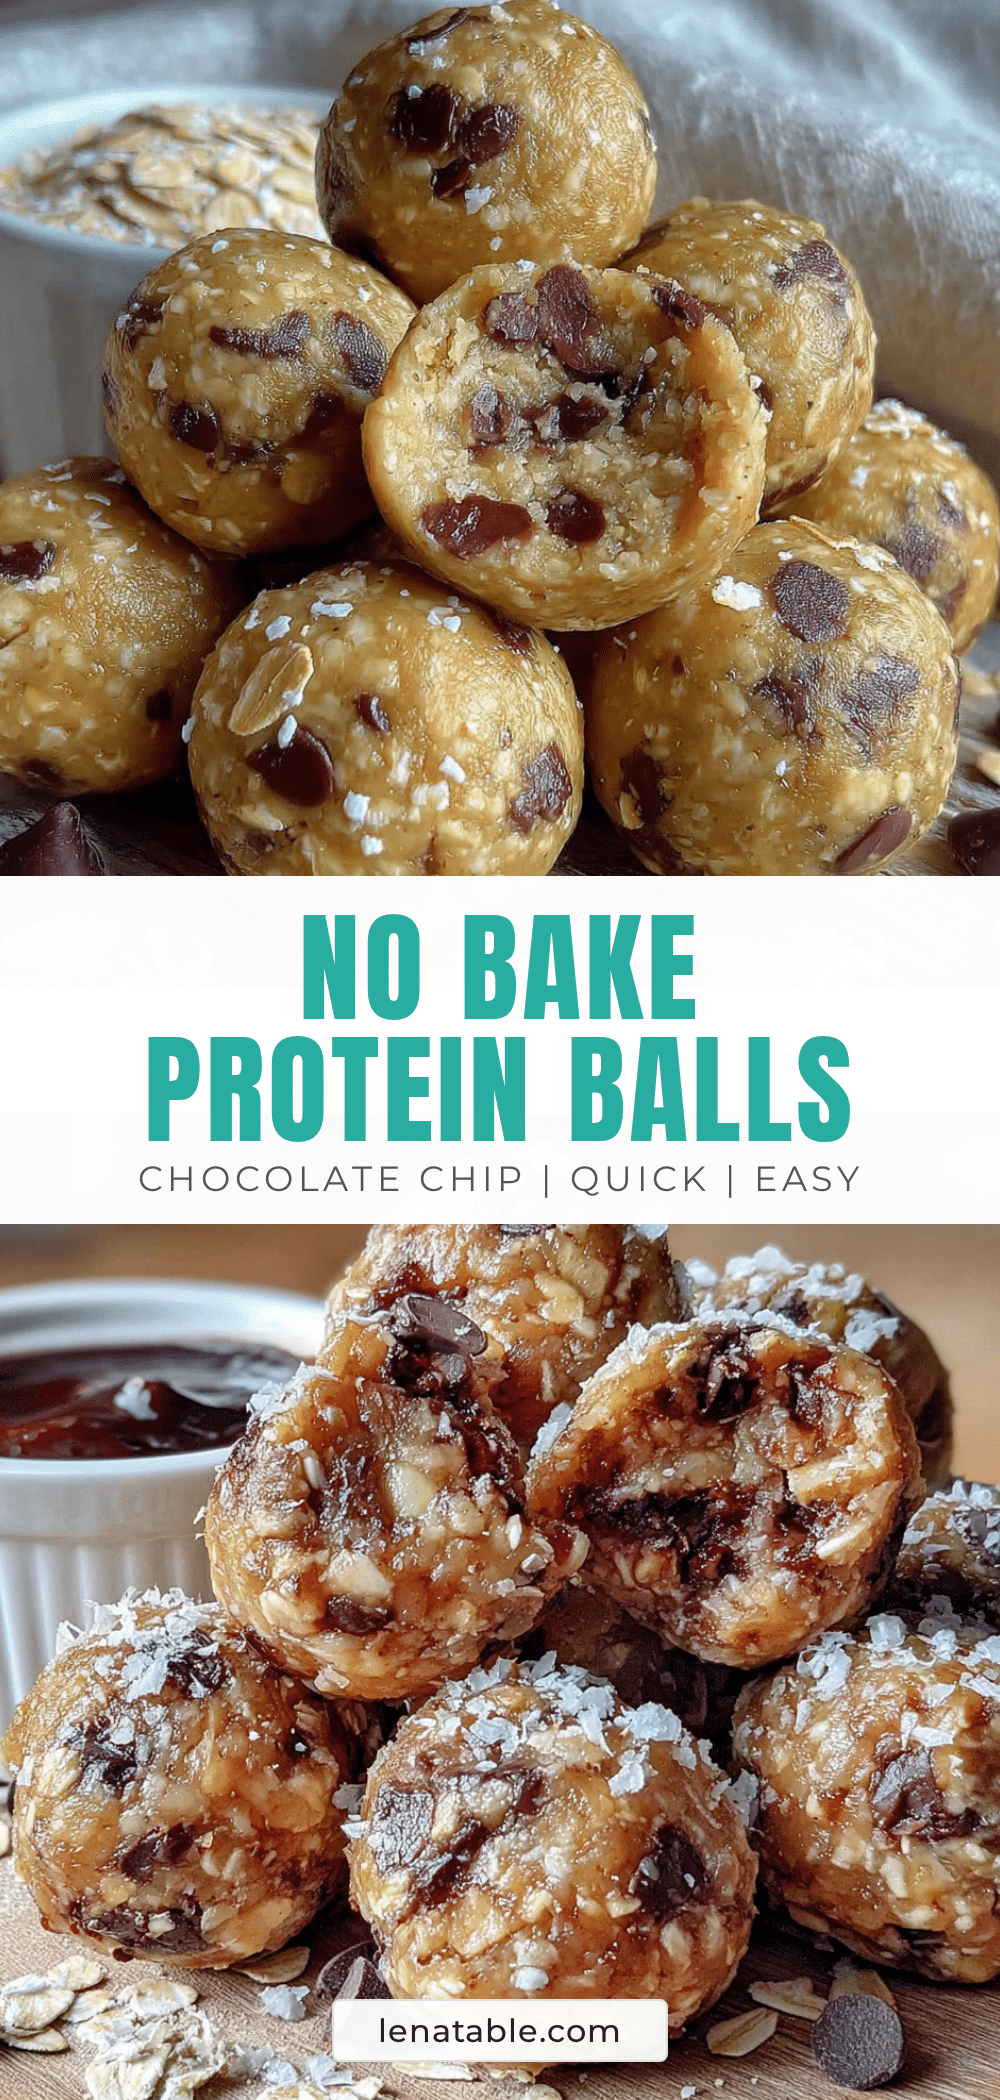
Best No-Bake Chocolate Chip Protein Balls Recipe (Easy & Healthy)

These no-bake chocolate chip protein balls are proof that healthy snacks don’t have to be complicated or boring. With just a few simple ingredients and 10 minutes of your time, you can have a batch of delicious, satisfying treats that actually work for your body and your taste buds.
- Prep Time: 10 minutes
- Cook Time: 0 minutes
- Total Time: 55 minutes
- Yield: 16 servings 1x
- Category: Snack
- Cuisine: American
Ingredients
- 1 cup rolled oats (use certified gluten-free if needed; old-fashioned oats work best, not instant)
- 1/2 cup creamy peanut butter (natural, no-stir works great; I prefer the kind with just peanuts and salt listed)
- 1/4 cup honey (or maple syrup for a vegan option; both work beautifully)
- 1/4 cup chocolate protein powder (I recommend Orgain or Garden of Life for clean ingredients and great flavor)
- 1/3 cup mini chocolate chips (dark chocolate chips are my favorite, but milk or semi-sweet work too)
- 1 tablespoon chia seeds (optional, but adds extra fiber and omega-3s)
- 1/2 teaspoon vanilla extract (pure vanilla extract makes a noticeable difference in flavor)
- Pinch of sea salt (enhances all the flavors and balances the sweetness)
Instructions
- In a large mixing bowl, add 1 cup rolled oats, 1/4 cup chocolate protein powder, 1/3 cup mini chocolate chips, 1 tablespoon chia seeds (if using), and a pinch of sea salt. Give everything a quick stir with your spatula to distribute the ingredients evenly.
- Add 1/2 cup creamy peanut butter, 1/4 cup honey, and 1/2 teaspoon vanilla extract to the bowl. Start mixing with your spatula, pressing and folding until everything comes together. At first, it will look dry and crumbly—don’t panic. Keep mixing, and it will eventually form a cohesive dough. If it’s still too dry after a minute of mixing, add a teaspoon of water or milk at a time until it holds together when pressed.
- Cover the bowl and pop it in the fridge for 15 minutes. This allows the oats to absorb some of the moisture from the peanut butter and honey, which makes the dough easier to roll and gives the finished balls a better texture.
- Line a baking sheet or plate with parchment paper. Using a small cookie scoop or a tablespoon, portion out the dough. Roll each portion between your palms into a smooth ball. If the dough sticks to your hands, lightly wet your palms with water or rub a tiny bit of coconut oil on them. You should get about 14-16 balls, depending on how big you make them.
- Place the rolled balls on the prepared baking sheet and refrigerate for at least 30 minutes. This allows them to firm up and hold their shape. If you’re in a hurry, 15 minutes in the freezer works too.
- Once set, transfer the protein balls to an airtight container. They’ll keep in the fridge for up to two weeks.
Notes
Don’t skip the chilling step before rolling—it transforms the texture. If dough is too dry, add a teaspoon of milk or water at a time. If too wet, add a tablespoon of oats or a teaspoon of coconut flour. For perfectly round balls, use a cookie scoop. These taste even better the next day as flavors meld.
Nutrition
- Serving Size: 1 ball
- Calories: 145
- Sugar: 9
- Sodium: 65
- Fat: 8
- Saturated Fat: 2
- Carbohydrates: 16
- Fiber: 3
- Protein: 7
Keywords: no-bake protein balls, chocolate chip protein balls, healthy snacks, energy balls, gluten-free snacks, meal prep snacks


