Love this? Save it for later!
Share the inspiration with your friends
My neighbor, a retired librarian named Margie, watched me shivering on my front porch, fumbling with my keys as a November wind whipped down the street. She didn’t say anything at first. Then she just came over, pressed a mason jar into my hands, and said, “This will fix that.” Inside was a beautiful, layered thing—dark chocolate powder, snowy white sugar, tiny vanilla specks, and a little bag of mini marshmallows tied to the side with baker’s twine. It wasn’t just the gift that warmed me up, honestly, it was the gesture. The recipe she gave me wasn’t written down on a card. She told it to me right there, leaning against my railing, her hands stuffed in her coat pockets. “Equal parts cocoa and sugar,” she said, “a pinch of salt, and the secret is a little bit of powdered milk so it gets creamy, not watery.” I scribbled it on the back of a junk mail envelope later that night.
I’ve tweaked her version over the years, adding a touch of vanilla bean powder and a whisper of cinnamon because, let’s face it, a little spice makes everything cozier. These DIY hot cocoa mix jars have become my go-to for that exact feeling—the one you get when you’re wrapped in a blanket and the world outside can wait. They are the definition of comfort food in a jar. You know that feeling when you just need something warm and sweet and familiar? This is it. I started making them for holiday gifts, and then I realized I was hoarding them for myself. There is something deeply satisfying about scooping your own mix into a mug, knowing exactly what’s in it, and watching it dissolve into pure, chocolatey warmth.
The magic of this recipe is that it’s not just a drink mix. It is a little ritual. It is a moment of pause in a busy day. And honestly, it is the easiest thing you will make all season. Margie moved away a few years ago, but every time I stir a spoonful of this mix into hot milk, I think of her standing on my porch, sharing something simple that has become a staple in my kitchen. This is why I keep making it—because a good recipe is just a conversation that keeps going.
Why You’ll Love This Recipe
This isn’t just another hot cocoa mix. After countless batches, testing ratios, and a few very gritty failures, I can tell you this version is the one. It’s the result of real kitchen trial and error, and it’s the mix I reach for every single time.
- Quick & Easy : This mix comes together in about 10 minutes. No cooking, no melting, just measuring and shaking. It is perfect for last-minute gift needs or a sudden craving for something cozy.
- Simple Ingredients : You likely have everything in your pantry right now. No fancy grocery trips, no obscure extracts. Just cocoa, sugar, milk powder, and a few secret-weapon spices.
- Perfect for Gifting : These jars are the ultimate hostess gift, teacher appreciation present, or holiday party favor. They show you cared enough to make something from scratch.
- Crowd-Pleaser : Kids love the marshmallows, adults love the rich, not-too-sweet chocolate flavor. It is a guaranteed hit for everyone.
- Unbelievably Delicious : The texture is what sets this apart. The powdered milk makes it luxuriously creamy, not thin or watery. It is next-level comfort in a mug.
What makes this recipe different from the rest? It’s the balance. Many mixes are either too sweet or too bitter. This one hits that perfect sweet spot, and the tiny pinch of cinnamon and vanilla powder adds a warmth that makes people ask, “What’s your secret?” It is comfort food reimagined—simpler, faster, but with the same soul-soothing satisfaction. Perfect for turning a quiet evening into something special, or for giving a little piece of warmth to someone who needs it.
What Ingredients You Will Need
This recipe uses simple, wholesome ingredients to deliver a bold, creamy chocolate flavor without any fuss. Most of these are pantry staples, making this mix incredibly easy to throw together.
For the Cocoa Mix Base
- 2 cups powdered sugar : This dissolves easily and adds sweetness without grittiness. I prefer Domino brand for consistent results.
- 1 ½ cups unsweetened cocoa powder : The star of the show. Use a high-quality brand like Ghirardelli or Valrhona for the richest flavor. Dutch-processed cocoa gives a smoother, more mellow taste.
- 1 cup powdered milk : This is the secret to creaminess. It adds body and richness that water or regular milk alone can’t match. Look for instant powdered milk for best dissolving.
- 1 cup granulated sugar : Adds a bit of texture and sweetness balance. You can use organic cane sugar if you prefer.
- 1 teaspoon vanilla bean powder : This is my special touch. It adds a warm, aromatic vanilla flavor that extract just can’t replicate. You can substitute with 1 tablespoon of vanilla extract added to the milk when preparing, but the powder keeps the mix shelf-stable.
- ½ teaspoon fine sea salt : A crucial ingredient that enhances the chocolate flavor and balances the sweetness. Don’t skip it.
- ¼ teaspoon ground cinnamon : Optional, but highly recommended. It adds a gentle warmth that makes the cocoa taste like a hug.
For the Jars & Toppings
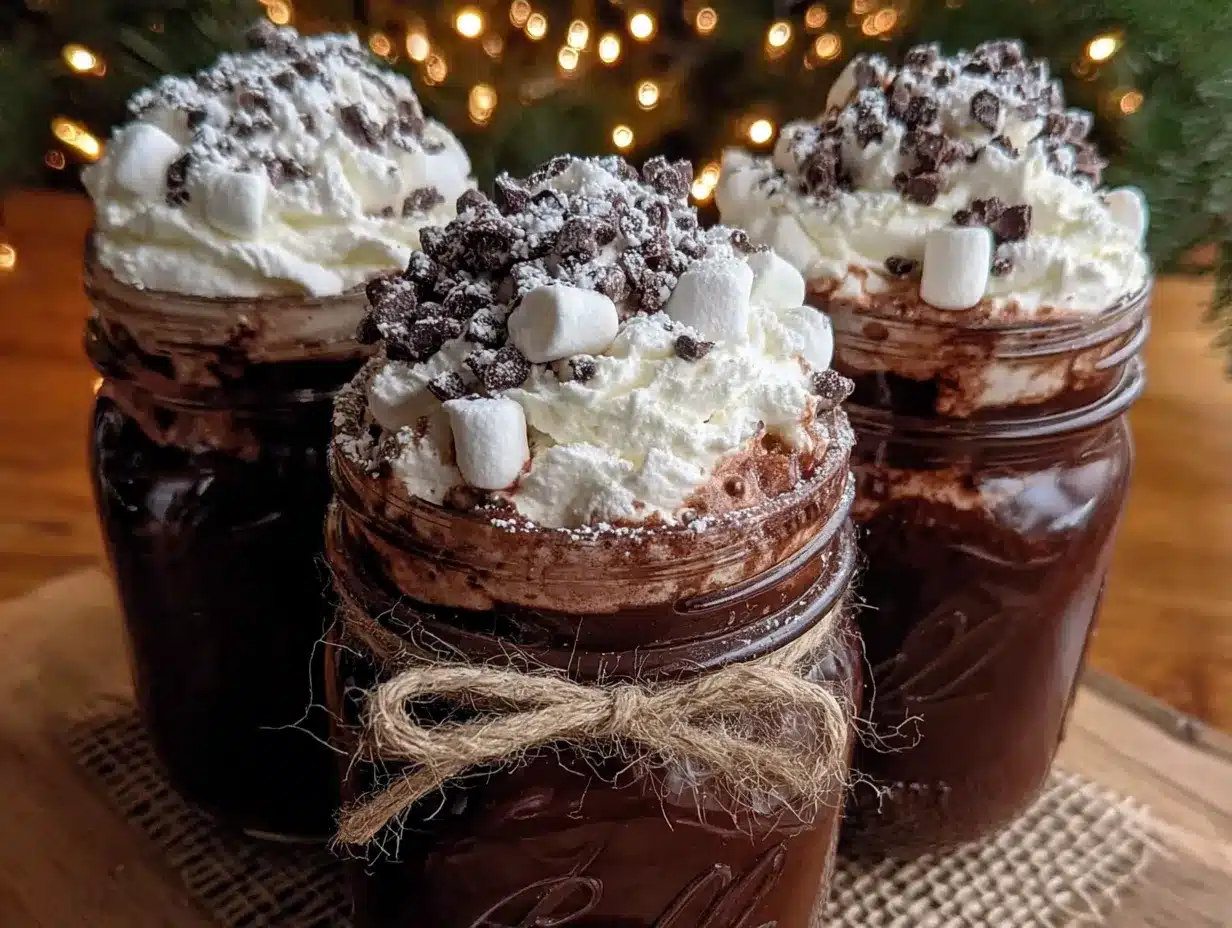
- 1 ½ cups mini marshmallows : For the topping and for stirring in. I use Kraft Jet-Puffed for that classic soft texture.
- 4 pint-sized mason jars (16 oz each) : Wide-mouth jars are easier to fill and layer. You can also use decorative jars with tight-fitting lids.
- Baker’s twine or ribbon : For tying the marshmallow bag to the jar.
- Small cellophane bags or plastic wrap : To hold the marshmallows separately.
Ingredient Selection Tips
When choosing your cocoa powder, look for one that is rich and dark. I’ve found that cheaper cocoa powders can taste flat and chalky. Invest in a good one—it makes a noticeable difference. For the powdered milk, make sure it is instant powdered milk, not non-instant, as it dissolves much more readily in hot liquid. If you are making this for someone who is dairy-free, you can substitute the powdered milk with coconut milk powder or a powdered non-dairy creamer, though the texture will be slightly different.
Equipment Needed
You don’t need much to make these jars, which is part of the charm. Here is what you will need:
- Large mixing bowl : For whisking all the dry ingredients together. A stainless steel or glass bowl works best.
- Whisk : To ensure everything is evenly combined. A balloon whisk is ideal for aerating the mixture.
- Measuring cups and spoons : For accuracy. I use a set of metal measuring cups for dry ingredients.
- Funnel : A small funnel makes filling the jars neat and mess-free. A wide-mouth funnel works best for layers.
- 4 pint-sized mason jars : As mentioned, wide-mouth jars are easiest. You can also use any clean, dry jar with a tight seal.
- Small cellophane bags : For the marshmallows. You can find these at craft stores or online.
- Scissors : For cutting twine or ribbon.
If you don’t have a funnel, you can carefully spoon the mix into the jars. It takes a bit longer but works just fine. I’ve also used a piping bag with a wide tip to fill jars neatly—it’s a trick I learned from a baking friend. For budget-friendly options, repurpose empty pasta sauce jars that you’ve cleaned and dried thoroughly. Just make sure the lids are airtight.
Preparation Method
Making these jars is a straightforward process, but a little care goes a long way in creating beautiful layers and a delicious final product. Here is how to do it.
- Combine the dry ingredients (5 minutes): In your large mixing bowl, add the powdered sugar, unsweetened cocoa powder, powdered milk, granulated sugar, vanilla bean powder, fine sea salt, and ground cinnamon. Whisk them together thoroughly. This is important—you want the vanilla powder and cinnamon to be evenly distributed so every scoop is perfectly flavored. I usually whisk for a good minute to break up any clumps. If you see any lumps, press them against the side of the bowl with the whisk.
- Sift for smoothness (2 minutes): For the smoothest possible cocoa, pour the mixture through a fine-mesh sieve into another bowl. This step removes any stubborn lumps and aerates the mix, making it dissolve even more easily. I know it’s an extra step, but honestly, it makes a huge difference. You will thank yourself later when you take that first sip and there are no chalky bits.
- Prepare the jars (2 minutes): Make sure your mason jars are clean and completely dry. Any moisture will cause the cocoa mix to clump. Using your funnel, start layering the cocoa mix into the jars. You can layer it evenly, or create distinct stripes by adding the mix in thirds, tapping the jar gently on the counter after each addition to settle it. This creates that beautiful, striped look that makes these jars so giftable.
- Portion the marshmallows (2 minutes): Divide the mini marshmallows into four small cellophane bags, about 6 tablespoons per bag. Tie each bag closed with a piece of baker’s twine or ribbon, leaving a long tail. This will be used to attach the bag to the jar.
- Assemble the jars (1 minute per jar): Place the lid on each jar and screw it tight. Then, take the bag of marshmallows and tie it around the neck of the jar using the long tails of the twine. You can also attach a gift tag with the instructions at this point. The jars should look full and inviting.
- Attach preparation instructions (5 minutes): Write or print out the following instructions on small cards or tags: “To make: Heat 1 cup of milk (dairy or non-dairy) until steaming. Stir in 3 heaping tablespoons of cocoa mix until fully dissolved. Top with marshmallows from the attached bag. Enjoy!” Tie these to the jar or the marshmallow bag.
Troubleshooting tip: If your cocoa mix looks clumpy after whisking, it might be because your powdered milk or sugar has absorbed moisture from the air. Make sure your ingredients are fresh and your storage containers are airtight. If you’re making a big batch for yourself, store the mix in an airtight container in a cool, dark place.
Cooking Tips & Techniques
After making dozens of these jars, I’ve learned a few things the hard way. Here are my best tips for perfect results every time.
Don’t skip the salt. I once made a batch without salt because I was in a hurry, and the cocoa tasted flat and one-dimensional. Salt is not just for savory food—it brightens the chocolate flavor and balances the sweetness. Trust me on this one.
Toast your marshmallows. For an extra layer of flavor, you can toast the marshmallows under the broiler for a minute or two before adding them to the cocoa. It gives them that campfire taste that takes the drink to another level. Just watch them closely—they burn fast.
Use hot milk, not water. While you can use hot water, the powdered milk in the mix really shines when combined with actual milk. Whole milk gives the creamiest result, but oat milk or almond milk work beautifully too. Heat the milk on the stovetop or in the microwave until it is steaming but not boiling. Boiling milk can scorch it and alter the flavor.
Whisk, don’t stir. When you’re making your cocoa, use a small whisk to incorporate the mix into the milk. A spoon can leave clumps, but a whisk ensures a smooth, velvety texture. I keep a tiny whisk in my mug drawer just for this purpose.
One big mistake I made: I once tried to make a “low-sugar” version by cutting the sugar in half and using stevia. It was terrible. The texture was off, and the taste was weirdly bitter. If you want to reduce sugar, use a good quality dark cocoa powder and increase the vanilla. It’s a much better compromise.
Multitasking tip: While you are whisking the dry ingredients, you can have your jars washing and drying. Or, make the mix one evening and assemble the jars the next day. The mix itself keeps for months in an airtight container.
Variations & Adaptations
This recipe is a fantastic base for creativity. Here are some of my favorite ways to change it up.
Spicy Mexican Hot Cocoa
Add ½ teaspoon of chili powder and a pinch of cayenne pepper to the dry mix. The heat pairs beautifully with the rich chocolate. I made this for a winter party once, and it was gone in twenty minutes. It adds a lovely warmth that lingers.
Peppermint Hot Cocoa
Crush a few peppermint candies and add them to the marshmallow bag. You can also add ¼ teaspoon of peppermint extract to the milk when preparing the drink. This is my go-to for the holiday season—it just tastes like Christmas in a mug.
Vegan & Dairy-Free Version
Substitute the powdered milk with coconut milk powder or a powdered oat milk creamer. Use dairy-free marshmallows (Dandies brand works great). The coconut version adds a subtle tropical note that is surprisingly good with chocolate. I tested this for a friend who is vegan, and she said it was the best cocoa she had ever had.
Dark Chocolate Lover’s Mix
Use a high-quality dark cocoa powder like black cocoa or Dutch-processed. Reduce the granulated sugar to ¾ cup and add an extra tablespoon of cocoa powder. This version is intensely chocolatey and not too sweet. It’s my personal favorite for late-night sipping.
Salted Caramel Hot Cocoa
Add 2 tablespoons of caramel powder (available at specialty baking stores) to the mix. When preparing the drink, drizzle a little caramel sauce into the mug before adding the milk. The salt in the mix will balance the sweetness perfectly.
Serving & Storage Suggestions
These jars are designed to be both a gift and a pantry staple. Here is how to get the most out of them.
Serving temperature: Serve the cocoa steaming hot, but not boiling. The ideal temperature is around 160°F, where the flavors are most pronounced. Let it cool for a minute after mixing so you don’t burn your tongue.
Presentation: For a cozy presentation, serve the cocoa in a thick ceramic mug. Top with a generous pile of the marshmallows from the attached bag. You can also add a cinnamon stick for stirring or a dollop of whipped cream for extra indulgence. A drizzle of chocolate syrup on the rim of the mug makes it look like it came from a fancy café.
Complementary dishes: This cocoa pairs beautifully with a buttery shortbread cookie, a slice of gingerbread, or a warm chocolate chip cookie. For a full cozy experience, serve it alongside a bowl of popcorn or a slice of banana bread. It is the perfect companion for a movie night or a quiet afternoon with a book.
Storage instructions: The cocoa mix itself, stored in an airtight jar in a cool, dark pantry, will last for up to 6 months. The marshmallows should be kept separate and consumed within 2 months, as they can become stale or hard. If you are gifting the jars, remind the recipient to use the marshmallows first. I once forgot to do this, and the marshmallows turned into little rocks after three months.
Reheating tips: If your cocoa gets cold, you can reheat it gently on the stovetop or in the microwave. Add a splash of milk to restore the creamy texture. I find that the flavors actually deepen and meld together after sitting for a few hours, so leftover cocoa is a treat in itself.
Nutritional Information & Benefits
While this is a treat, it does offer some surprising benefits. Here is a general estimate per serving (made with 1 cup of whole milk).
- Calories: Approximately 350-400 per serving (depending on milk type)
- Fat: 12-15g (from cocoa butter and milk)
- Carbohydrates: 55-65g (mostly from sugars)
- Protein: 10-12g (thanks to the milk and powdered milk)
- Fiber: 3-4g (from the cocoa powder)
- Calcium: 30% of the daily recommended intake (from milk)
- Iron: 15% of the daily recommended intake (from cocoa)
Health benefits of key ingredients: Cocoa powder is rich in antioxidants called flavonoids, which can help improve heart health and reduce inflammation. It also contains magnesium, which is great for muscle relaxation and stress relief—perfect for a cozy evening. The milk provides calcium and vitamin D for bone health. While this is not a health food, it is a wholesome treat made from real ingredients. I feel much better giving this to my family than a packet of processed mix from the store.
Dietary considerations: This recipe contains dairy and sugar. For a lower-sugar version, use a sugar substitute like monk fruit sweetener in the mix (though the texture will be slightly different). It is naturally vegetarian and can be made gluten-free by ensuring your cocoa powder is certified gluten-free. The main allergens are milk and potentially soy if your powdered milk contains soy lecithin.
Conclusion
These cozy DIY hot cocoa mix jars are more than just a recipe—they are a little piece of warmth you can hold in your hands. They are the kind of thing that makes a cold day feel manageable, a quiet evening feel special, and a simple gift feel deeply personal. I love making them because they remind me of Margie and that unexpected moment of kindness on my porch. They remind me that the best recipes are the ones that come with a story.
I encourage you to make these jars your own. Play with the spices, try different marshmallows, or add a drizzle of caramel. Customize them for the people you love. That is the beauty of homemade gifts—they carry a little bit of you in every scoop. So go ahead, pull out your jars, and make a batch. And when you take that first sip, let me know how it goes. Share your photos, your variations, your stories. I would love to hear about the cozy moments these jars create for you. Until then, stay warm and keep stirring.
Frequently Asked Questions
Can I use hot water instead of milk for this mix?
Yes, you can use hot water, but the result will be thinner and less creamy. The powdered milk in the mix helps, but using actual milk gives a much richer texture. If you are using water, I recommend adding a splash of heavy cream or a pat of butter to improve the mouthfeel.
How long does the cocoa mix last in the jar?
Stored in an airtight container in a cool, dark place, the cocoa mix will stay fresh for up to 6 months. The marshmallows should be used within 2 months for the best texture. I always label my jars with the date I made them so I don’t forget.
Can I make this mix without a funnel?
Absolutely. If you don’t have a funnel, you can use a spoon to carefully transfer the mix into the jars. A piping bag with a wide tip also works well for clean layers. Just take your time and tap the jar gently to settle the layers.
Can I use a sugar substitute in this recipe?
You can, but it will change the texture and sweetness. Powdered erythritol or monk fruit sweetener can be substituted for the powdered sugar and granulated sugar. Keep in mind that these substitutes are often less sweet than sugar, so you may need to adjust the amount. The cocoa might also be slightly less smooth.
What is the best way to gift these jars?
I love to attach a small tag with the preparation instructions and a personal note. You can also add a small whisk or a cinnamon stick tied to the jar for an extra touch. Wrap the jar in a piece of festive fabric or place it in a cellophane bag with a ribbon. The presentation is half the fun.
Pin This Recipe!
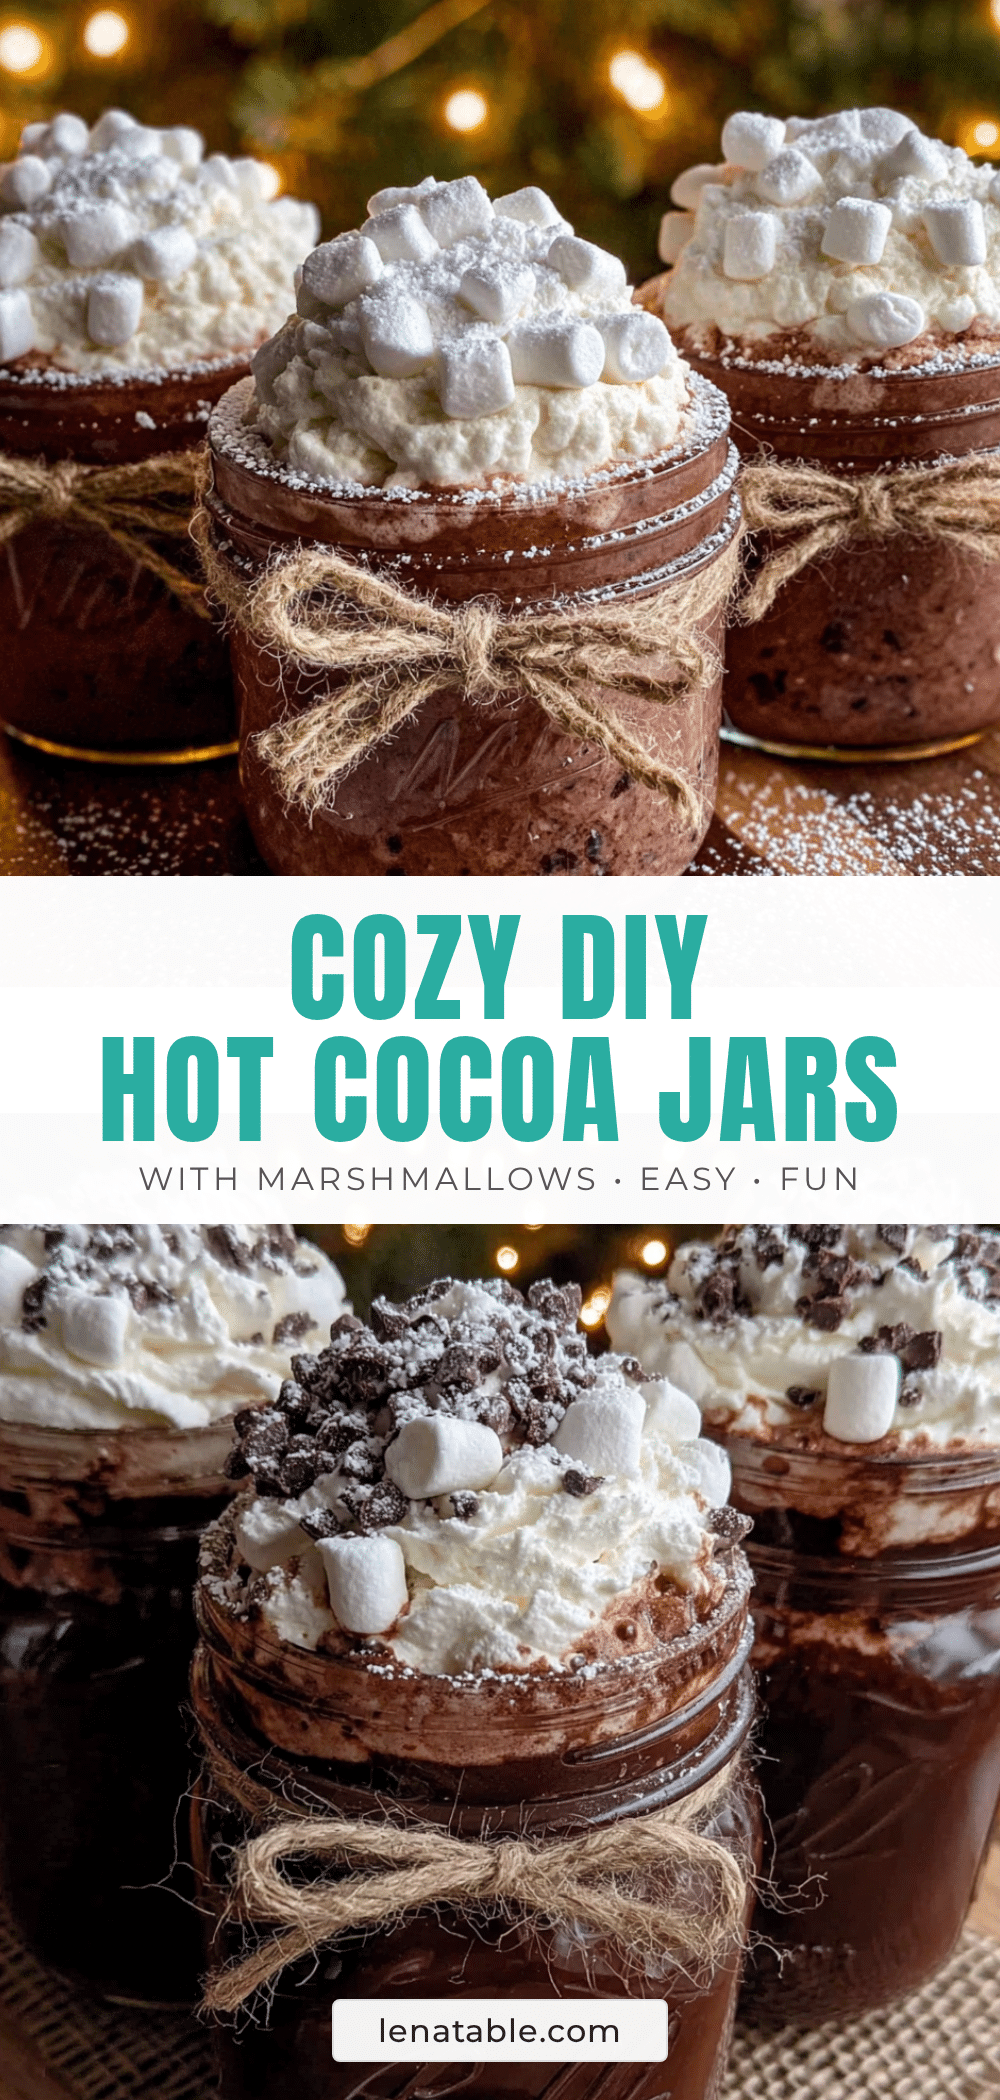
Cozy DIY Hot Cocoa Mix Jars with Marshmallows

These DIY hot cocoa mix jars are the ultimate comfort food in a jar, featuring a perfectly balanced blend of cocoa, sugar, and powdered milk for a luxuriously creamy drink. They make wonderful homemade gifts and are ready in just 10 minutes.
- Prep Time: 10 minutes
- Cook Time: 0 minutes
- Total Time: 10 minutes
- Yield: 4 jars (each serving 1 cup of prepared cocoa) 1x
- Category: Beverage
- Cuisine: American
Ingredients
- 2 cups powdered sugar
- 1 ½ cups unsweetened cocoa powder
- 1 cup powdered milk (instant)
- 1 cup granulated sugar
- 1 teaspoon vanilla bean powder
- ½ teaspoon fine sea salt
- ¼ teaspoon ground cinnamon (optional)
- 1 ½ cups mini marshmallows
- 4 pint-sized mason jars (16 oz each)
- Baker’s twine or ribbon
- Small cellophane bags or plastic wrap
Instructions
- Combine the dry ingredients: In a large mixing bowl, add the powdered sugar, unsweetened cocoa powder, powdered milk, granulated sugar, vanilla bean powder, fine sea salt, and ground cinnamon. Whisk them together thoroughly for about 1 minute to break up any clumps.
- Sift for smoothness: Pour the mixture through a fine-mesh sieve into another bowl to remove any stubborn lumps and aerate the mix.
- Prepare the jars: Ensure mason jars are clean and completely dry. Using a funnel, layer the cocoa mix into the jars. Tap the jar gently on the counter after each addition to create distinct stripes.
- Portion the marshmallows: Divide the mini marshmallows into four small cellophane bags, about 6 tablespoons per bag. Tie each bag closed with baker’s twine or ribbon, leaving a long tail.
- Assemble the jars: Place the lid on each jar and screw it tight. Tie the bag of marshmallows around the neck of the jar using the long tails of the twine.
- Attach preparation instructions: Write or print the following on small cards: ‘To make: Heat 1 cup of milk (dairy or non-dairy) until steaming. Stir in 3 heaping tablespoons of cocoa mix until fully dissolved. Top with marshmallows from the attached bag. Enjoy!’ Tie these to the jar or marshmallow bag.
Notes
For best results, use high-quality cocoa powder like Ghirardelli or Valrhona. Dutch-processed cocoa gives a smoother flavor. Make sure powdered milk is instant for best dissolving. Store mix in airtight container in cool, dark place for up to 6 months. Marshmallows should be used within 2 months. For dairy-free version, substitute powdered milk with coconut milk powder and use dairy-free marshmallows.
Nutrition
- Serving Size: 1 cup prepared cocoa
- Calories: 375
- Sugar: 52
- Sodium: 320
- Fat: 13.5
- Saturated Fat: 8
- Carbohydrates: 60
- Fiber: 3.5
- Protein: 11
Keywords: hot cocoa mix, DIY gift, homemade hot chocolate, mason jar gift, winter drink, cozy recipe, hot chocolate mix