Love this? Save it for later!
Share the inspiration with your friends
I was standing in my kitchen last Tuesday, staring at a bunch of bananas that had gone from speckled to practically black overnight. You know that moment when you feel like the fruit bowl is judging you? The peels were so soft they practically melted when I touched them. And honestly, I was about to toss them in the freezer for some future smoothie I’d probably never make. But then my hand stopped mid-reach. That deep, almost wine-like sweetness hit my nose, and suddenly I wasn’t in my kitchen anymore. I was eight years old, standing on a stepstool in my Aunt Clara’s tiny apartment, watching her mash overripe bananas with a fork while she hummed along to the radio. She wasn’t a fancy cook, not by any stretch. Her measuring cups were chipped, and she always forgot to grease the pan properly. But her banana bread? That was something else. It came out of the oven smelling like patience and warmth, with a crust that crunched just a little before giving way to that impossibly soft, tender crumb. I could never replicate it, and after she moved away, I thought I’d lost that taste forever. But last Tuesday, with those sad, overripe bananas staring back at me, I decided to try again. This time, I wasn’t going to overthink it. No mixer. No fuss. Just a bowl, a fork, and a lot of hope. And you know what? It worked. Maybe you’ve been there too, chasing a flavor from your past that you can almost remember but can’t quite hold onto. This is that bread for me. It’s the one I keep making, not because it’s perfect, but because it feels like coming home.
Why You’ll Love This Recipe
Let me tell you why this easy one-bowl banana bread has earned a permanent spot in my kitchen rotation. I’ve tested this recipe about seven times now, and each batch just confirmed what I suspected from the start. This is the banana bread you actually want to make on a Tuesday night, not just talk about making.
- No Mixer Required: I mean it. You don’t need a stand mixer, a hand mixer, or even a whisk if you’re in a pinch. A fork and a sturdy spoon will do the job. Less cleanup, less noise, less hassle.
- Simple Ingredients: You probably have everything in your pantry right now. No weird extracts, no specialty flours, no hunting down obscure items at three different stores. Just real, honest ingredients.
- Perfect for Busy Mornings: This bread comes together in about 10 minutes of active work. While it bakes, you can shower, answer emails, or just stand there and stare at the oven like I do.
- Crowd-Pleaser: I brought a loaf to my neighbor’s book club last month, and three people asked for the recipe. Two of them texted me photos of their own loaves the next day.
- Unbelievably Moist: The secret is in how you handle the bananas. We’re not just mashing them; we’re letting them work their magic. The texture is so tender it practically melts.
What makes this version different from the dozens of banana bread recipes out there? It’s the technique. Most recipes tell you to cream butter and sugar, or to alternate dry and wet ingredients, or to fold things in a specific order. This one throws all that out the window. You mix the wet ingredients, stir in the dry, and pour. That’s it. But the real magic is in the resting time. Letting the batter sit for ten minutes before baking allows the flour to fully hydrate, which gives you a more tender crumb without any extra effort. It’s a small trick I picked up from a pastry chef friend, and honestly, it changed everything. This isn’t just another banana bread. It’s the one you’ll make when you want comfort without complexity. The one that makes you close your eyes after the first bite, because it tastes exactly like it should.
What Ingredients You Will Need
This recipe uses simple, wholesome ingredients to deliver that classic banana bread flavor and moist texture. Most of these are pantry staples, which is exactly what you want when those bananas start calling your name. Here’s what you’ll need and why each one matters.
For the Batter
- 3 large ripe bananas, mashed (about 1 ½ cups or 340g) — The riper, the better. You want them spotty and soft. The natural sugars in overripe bananas are what make this bread sweet and deeply flavorful without needing a ton of added sugar.
- ⅓ cup (75g) unsalted butter, melted — I prefer unsalted so I can control the salt level. Melted butter gives the bread a rich, tender crumb. If you only have salted butter, just reduce the added salt by ¼ teaspoon.
- ¾ cup (150g) granulated sugar — Regular white sugar works perfectly here. It dissolves easily into the wet ingredients and helps create that golden-brown crust. You can use coconut sugar for a deeper flavor, but the texture will be slightly denser.
- 1 large egg, at room temperature — Room temperature egg mixes more evenly into the batter, creating a smoother texture. If you forgot to take it out of the fridge, place it in a bowl of warm water for 5 minutes.
- 1 teaspoon vanilla extract — Pure vanilla extract adds warmth and depth. Imitation vanilla works in a pinch, but the flavor won’t be as rich. I’ve used both, and honestly, the pure stuff makes a noticeable difference.
- 1 ½ cups (190g) all-purpose flour — Spoon and level your flour for the most accurate measurement. Scooping directly from the bag can pack in too much flour, making the bread dry. If you’re gluten-free, a good 1:1 gluten-free flour blend works beautifully here.
- 1 teaspoon baking soda — This is our only leavening agent. Make sure it’s fresh. To test, drop a little into vinegar — if it fizzes vigorously, you’re good.
- ½ teaspoon salt — Salt balances the sweetness and enhances the banana flavor. Don’t skip it, even if you’re watching your sodium.
- ½ teaspoon ground cinnamon (optional) — I add this about half the time. It’s not traditional, but that warm, spicy note pairs beautifully with banana. If you’re a purist, leave it out.
I recommend using a brand like King Arthur Flour for consistent results, but any all-purpose flour will work. For the butter, I stick with Kerrygold when I can find it on sale. The higher butterfat content gives the bread a richer flavor. And for the vanilla, Nielsen-Massey is my go-to, but again, use what you have. This recipe is forgiving.
Equipment Needed
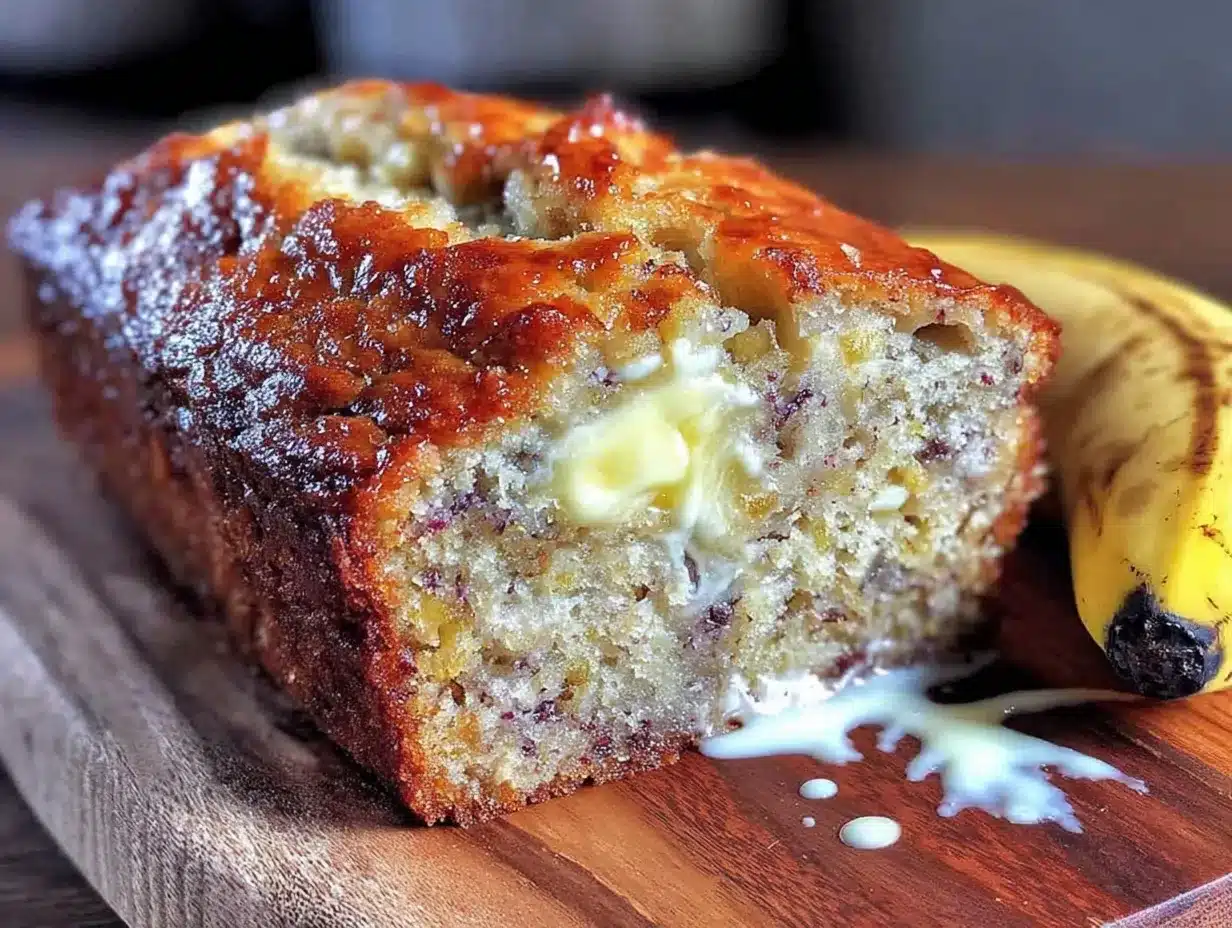
You don’t need a fancy kitchen to make this banana bread. In fact, that’s the whole point. Here’s what you’ll actually use:
- One large mixing bowl — Any bowl will do, but I prefer a wide, shallow one. It makes mashing the bananas and mixing everything together much easier. My favorite is a ceramic nesting bowl I picked up at a thrift store for three dollars.
- A fork — For mashing the bananas. A potato masher works too, but a fork gives you more control over the texture. I like a few small lumps in mine.
- A wooden spoon or rubber spatula — For mixing the batter. A spatula is great for scraping down the sides of the bowl, but a wooden spoon has that satisfying, sturdy feel. Use what feels right.
- A 9×5-inch loaf pan — This is the standard size. If you use an 8×4-inch pan, your bread will be taller and可能需要增加 baking time by 5-10 minutes. If you use a 10×5-inch pan, the bread will be shorter and bake faster.
- Parchment paper — Not strictly necessary, but it makes removing the bread from the pan so much easier. I leave an overhang on two sides to create handles.
- Cooling rack — For letting the bread cool properly. If you let it cool in the pan, the bottom can get soggy from trapped steam.
If you don’t have a loaf pan, you can bake this batter in a 9-inch square pan for about 25-30 minutes. Just keep an eye on it. And if you’re really in a bind, muffin tins work great — bake for 18-22 minutes for banana bread muffins.
Preparation Method
Alright, let’s get to it. This is the easy part. Follow these steps, and you’ll have banana bread that tastes like you spent hours in the kitchen. I promise, it’s simpler than it looks.
- Preheat your oven to 350°F (175°C). Do this first so the oven is hot and ready when your batter is. Position the rack in the center of the oven. While it’s heating, grease your 9×5-inch loaf pan with butter or non-stick spray, or line it with parchment paper. I usually do both because I’m paranoid about sticking.
- Mash the bananas in your mixing bowl. Peel those overripe bananas and toss them into the bowl. Use your fork to mash them until they’re mostly smooth with a few small chunks remaining. You want some texture, not baby food. This should take about a minute. I like to count the lumps — usually around 12 to 15 is perfect.
- Add the melted butter and sugar. Pour the melted butter over the mashed bananas, then add the sugar. Stir with your wooden spoon or spatula until everything is well combined. The mixture will look a bit grainy from the sugar, and that’s fine. Don’t overmix here; just get it incorporated.
- Add the egg and vanilla. Crack the egg into the bowl and add the vanilla extract. Stir gently until the egg is fully incorporated. The batter should look smooth and glossy at this point. If you see streaks of egg, keep stirring, but gently.
- Add the dry ingredients. Sprinkle the flour, baking soda, salt, and cinnamon (if using) over the wet mixture. Use a spoon to lightly stir everything together. Here’s the key: mix only until you no longer see streaks of flour. A few small lumps are perfectly fine. Overmixing develops gluten, which makes the bread tough. We want tender, not tough. I usually count about 12 to 15 stirs after the flour is incorporated.
- Let the batter rest. This is my secret step. Let the batter sit in the bowl for 10 minutes at room temperature. During this time, the flour absorbs the liquid, which helps create a more tender crumb. The batter will also thicken slightly. Use this time to wash your fork and spoon — you’ll thank yourself later.
- Pour the batter into the prepared pan. Scrape every last bit out of the bowl with your spatula. Spread the batter evenly in the pan. Give the pan a gentle tap on the counter to release any air bubbles. If you want, you can sprinkle a little coarse sugar on top for a crunchy crust. I do this about half the time.
- Bake for 50-60 minutes. Place the pan in the preheated oven and bake until the top is golden brown and a toothpick inserted into the center comes out clean or with a few moist crumbs. Start checking at 50 minutes. My oven runs a bit hot, so mine is usually done at 52 minutes. If the top is browning too quickly, tent the pan loosely with aluminum foil for the last 10-15 minutes.
- Cool in the pan for 10 minutes. Remove the pan from the oven and place it on a cooling rack. Let it sit for 10 minutes. This allows the bread to firm up enough to be removed without falling apart.
- Transfer to the cooling rack to cool completely. Use the parchment paper handles to lift the bread out of the pan. Place it directly on the cooling rack. Let it cool completely before slicing, about 1 hour. I know it’s tempting to cut into it warm, but warm banana bread is gummy and falls apart. Trust me on this one. I learned the hard way. If you absolutely must have a warm slice, wait at least 30 minutes.
Cooking Tips & Techniques
I’ve made this banana bread more times than I can count, and I’ve made every mistake in the book. Here’s what I’ve learned so you don’t have to.
The banana ripeness trick. If your bananas aren’t spotty enough, you can speed up the ripening process. Place them on a baking sheet in a 300°F oven for 15-20 minutes until the skins turn black. Let them cool, then use them as usual. The flavor won’t be quite as developed as naturally ripened bananas, but it works in a pinch.
Don’t overmix. This is the number one mistake I see. When you overmix the batter, you develop gluten, which makes the bread tough and dense. Stir just until the flour disappears. A few lumps are your friends. They’ll bake out and leave you with a tender crumb.
The toothpick test. Insert a toothpick or a thin knife into the center of the bread. If it comes out clean, it’s done. If it comes out with wet batter, it needs more time. If it comes out with a few moist crumbs, that’s perfect. The bread will continue to cook from residual heat after you take it out of the oven.
Multitasking strategy. While the batter rests for 10 minutes, wash your dishes and prep your pan. This way, when the bread goes into the oven, your kitchen is already clean. It’s a small thing, but it makes the whole experience feel less chaotic.
Altitude adjustment. If you’re baking at high altitude (over 3,000 feet), reduce the sugar by 2 tablespoons and increase the flour by 2 tablespoons. You may also need to reduce the baking soda to ¾ teaspoon. The bread will bake faster, so start checking at 45 minutes.
My biggest failure. I once forgot the sugar entirely. I was rushing, distracted by a phone call, and I just dumped everything in without thinking. The bread came out of the oven looking beautiful, but it tasted like a dense, sad banana pancake. My kids refused to eat it, and I ended up feeding it to the birds. Lesson learned: double-check your ingredients before you start mixing.
Variations & Adaptations
This recipe is a fantastic base for experimenting. Here are some of my favorite variations that I’ve tested and loved.
- Chocolate Chip Banana Bread: Fold in ½ cup (90g) of semi-sweet or dark chocolate chips after you’ve mixed the batter. I like to toss them in a tablespoon of flour first to prevent them from sinking to the bottom. My kids go crazy for this version.
- Nutty Banana Bread: Add ½ cup (60g) of chopped walnuts or pecans. Toast them in a dry skillet for 3-4 minutes first for extra flavor. My Aunt Clara always added walnuts, so this one feels special to me.
- Blueberry Banana Bread: Gently fold in 1 cup (150g) of fresh or frozen blueberries (don’t thaw them). The burst of tartness against the sweet banana is incredible. I made this last summer with wild blueberries from the farmer’s market, and it was a revelation.
- Vegan Version: Replace the egg with a flax egg (1 tablespoon ground flaxseed mixed with 3 tablespoons water, let sit for 5 minutes). Use coconut oil or a vegan butter substitute instead of regular butter. The texture will be slightly denser, but it’s still delicious.
- Gluten-Free Version: Use a 1:1 gluten-free flour blend that contains xanthan gum. I’ve had great results with Bob’s Red Mill. The bread might be a bit more crumbly, so let it cool completely before slicing.
- Spiced Banana Bread: Add ½ teaspoon of ground nutmeg and ¼ teaspoon of ground ginger along with the cinnamon. This gives the bread a warm, almost holiday-like flavor. I make this version in the fall when the weather turns cool.
Serving & Storage Suggestions
This banana bread is incredibly versatile when it comes to serving. Here’s how I like to enjoy it and how to keep it fresh.
Serving temperature: I prefer it at room temperature, but a warm slice with a pat of butter melting into it is hard to beat. Toast a slice in a skillet with a little butter for about 2 minutes per side for a crispy exterior and soft, warm center. It’s life-changing.
Complementary pairings: A slice of this bread alongside a cup of strong black coffee is my go-to breakfast. For an afternoon treat, try it with a hot cup of chai tea. And if you’re feeling fancy, serve it with a dollop of whipped cream and a drizzle of caramel sauce for dessert.
Storage: Wrap the cooled bread tightly in plastic wrap or aluminum foil and store it at room temperature for up to 4 days. I’ve found that it actually gets better on the second day as the flavors meld together. Do not refrigerate it — the cold air will dry it out and make it stale faster.
Freezing: This bread freezes beautifully. Wrap the cooled loaf (or individual slices) tightly in plastic wrap, then again in aluminum foil, and place it in a freezer-safe bag. It will keep for up to 3 months. To thaw, leave it at room temperature for a few hours or pop a frozen slice in the toaster.
Reheating: For a single slice, the microwave works in about 15 seconds, but it won’t have that crispy edge. For the best texture, reheat slices in a toaster oven or a dry skillet over medium-low heat for 2-3 minutes per side.
Flavor development: I honestly think this bread tastes better on day two. The banana flavor deepens and the texture becomes even more moist. If you can resist eating it all on day one, you’re in for a treat.
Nutritional Information & Benefits
Here’s the estimated nutritional breakdown for one slice (based on 10 slices per loaf). Keep in mind that these are estimates and can vary based on specific ingredients and portion sizes.
| Nutrient | Amount Per Slice |
|---|---|
| Calories | 220 |
| Total Fat | 8g |
| Saturated Fat | 5g |
| Cholesterol | 35mg |
| Sodium | 220mg |
| Total Carbohydrates | 35g |
| Dietary Fiber | 2g |
| Sugars | 18g |
| Protein | 3g |
Health benefits: Bananas are a great source of potassium, which supports heart health and muscle function. They also contain vitamin B6 and vitamin C. The butter and egg provide a small amount of protein and healthy fats. While this isn’t a health food, it’s a wholesome treat made with real ingredients. I feel good about giving this to my family as an occasional breakfast or snack.
Dietary considerations: This recipe contains gluten, dairy, and eggs. For gluten-free and vegan options, see the variations section above. It’s naturally nut-free unless you add nuts.
Conclusion
This easy one-bowl banana bread is the kind of recipe that becomes a staple. It’s simple enough for a beginner, reliable enough for a seasoned baker, and delicious enough to earn a permanent spot in your rotation. No mixer, no fuss, just pure banana bread comfort. I love that I can make it on a whim with ingredients I already have. I love that it fills my kitchen with that warm, nostalgic smell. And I love that every bite reminds me of Aunt Clara’s tiny apartment, even if my version is a little different.
Now it’s your turn. Grab those spotty bananas, pull out a bowl, and give this recipe a try. Don’t be afraid to make it your own — add chocolate chips, throw in some nuts, or leave it plain and simple. I’d love to hear how it turns out. Leave a comment below and tell me about your banana bread adventure. Did you add any fun mix-ins? Did your family love it? Share your photos and tag me on social media. Happy baking, friend. You’ve got this.
Frequently Asked Questions
Can I use frozen bananas for this recipe?
Absolutely. Thaw them completely, then drain off any excess liquid before mashing. The texture will be slightly softer, but the flavor is still great.
Why did my banana bread sink in the middle?
This usually happens if the bread is underbaked or if you opened the oven door too early. Make sure your oven is at the right temperature and resist the urge to peek for the first 40 minutes.
Can I reduce the sugar in this recipe?
You can reduce it to ½ cup (100g) without major issues. The bread will be less sweet and slightly less tender. For a sugar-free option, try using a monk fruit sweetener blend.
How do I know when my bananas are ripe enough?
Look for bananas with plenty of brown spots on the peel. The peel should be mostly yellow with brown patches, and the banana should feel soft when you gently squeeze it. If it’s still firm and yellow, it’s not ready.
Can I make this into muffins instead?
Yes! Divide the batter among 12 lined muffin cups. Bake at 350°F for 18-22 minutes, or until a toothpick comes out clean. Muffins are great for freezing and grabbing on busy mornings.
Pin This Recipe!
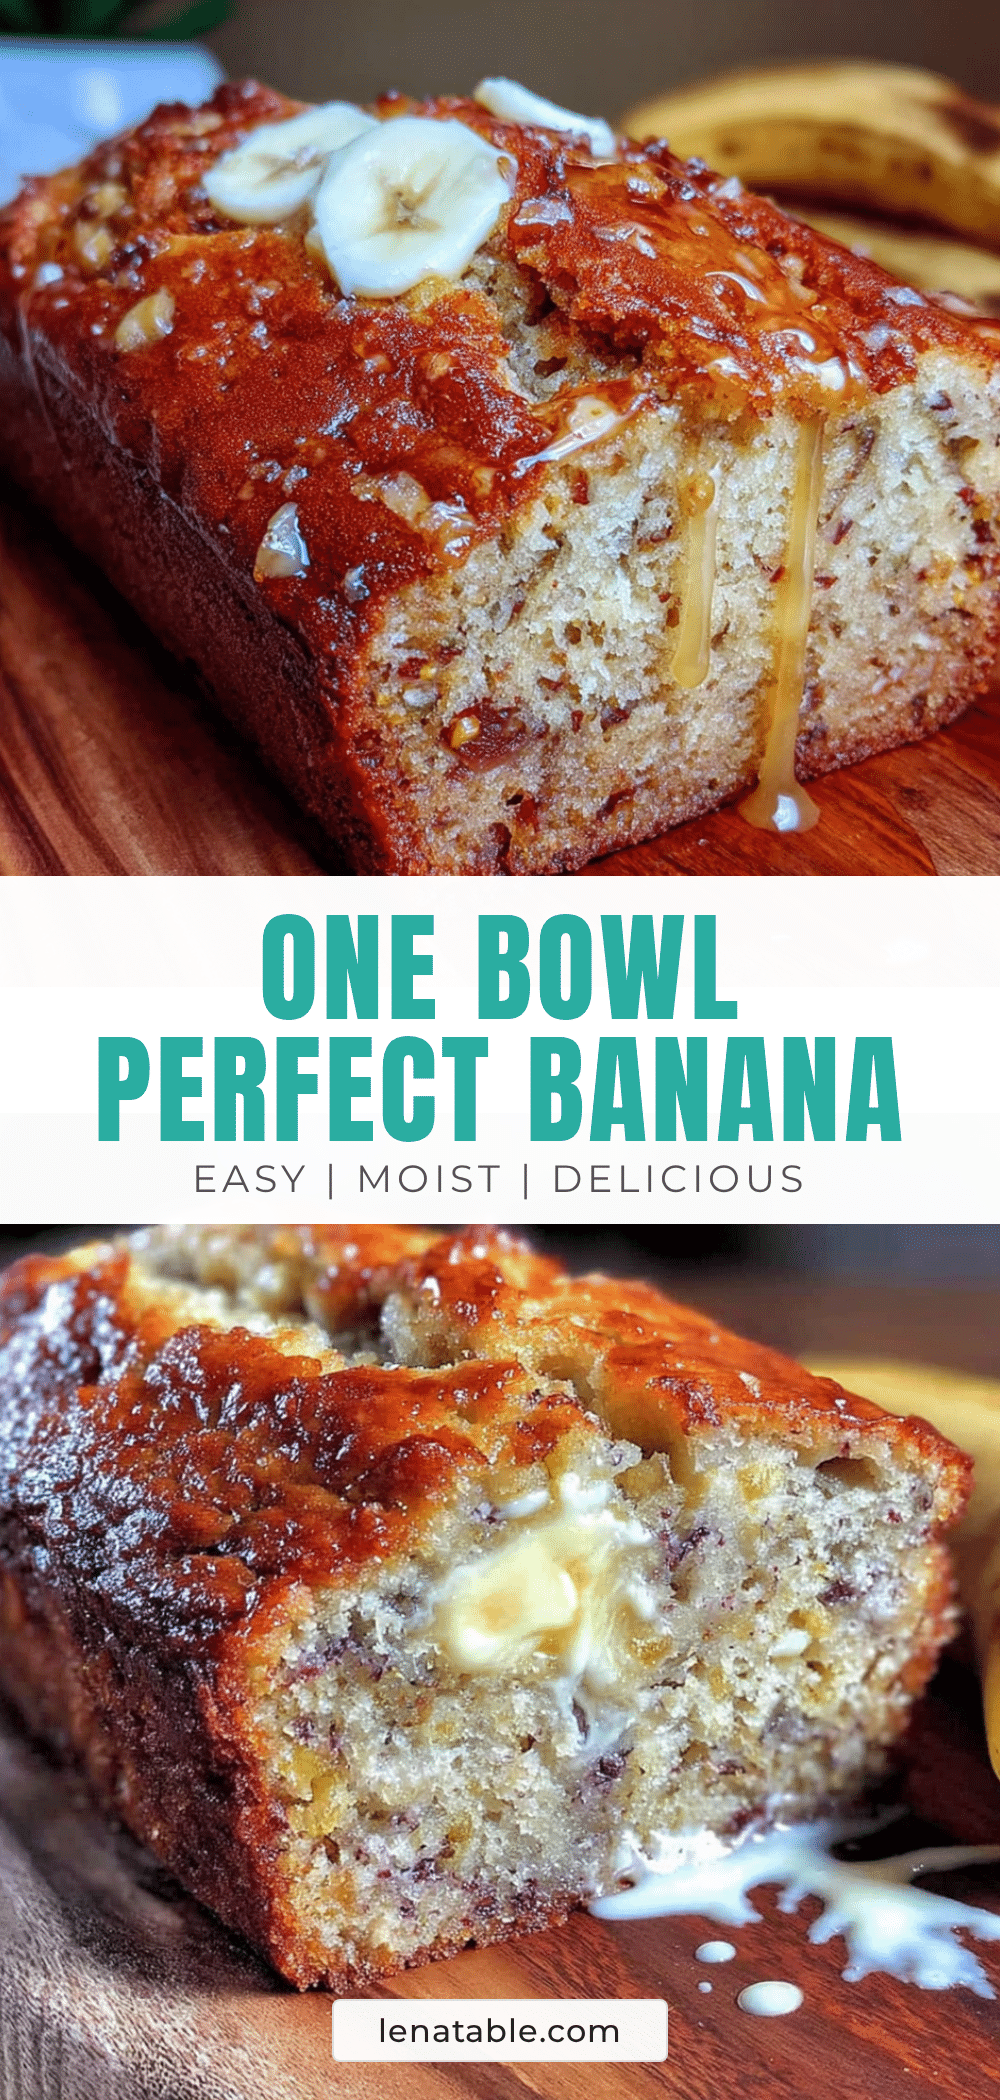
Easy One-Bowl Banana Bread: Best No-Mixer Recipe
This easy one-bowl banana bread requires no mixer and uses simple ingredients for a moist, tender crumb. It’s the perfect comfort food that tastes like coming home.
- Prep Time: 10 minutes
- Cook Time: 50-60 minutes
- Total Time: 1 hour 10 minutes to 1 hour 20 minutes
- Yield: 10 servings 1x
- Category: Dessert
- Cuisine: American
Ingredients
- 3 large ripe bananas, mashed (about 1 ½ cups or 340g)
- ⅓ cup (75g) unsalted butter, melted
- ¾ cup (150g) granulated sugar
- 1 large egg, at room temperature
- 1 teaspoon vanilla extract
- 1 ½ cups (190g) all-purpose flour
- 1 teaspoon baking soda
- ½ teaspoon salt
- ½ teaspoon ground cinnamon (optional)
Instructions
- Preheat your oven to 350°F (175°C). Grease a 9×5-inch loaf pan with butter or non-stick spray, or line it with parchment paper.
- Mash the bananas in a large mixing bowl with a fork until mostly smooth with a few small chunks.
- Add the melted butter and sugar to the mashed bananas and stir until well combined.
- Add the egg and vanilla extract, stirring gently until fully incorporated.
- Sprinkle the flour, baking soda, salt, and cinnamon (if using) over the wet mixture. Stir only until no streaks of flour remain; do not overmix.
- Let the batter rest for 10 minutes at room temperature.
- Pour the batter into the prepared pan and spread evenly. Tap the pan gently on the counter to release air bubbles.
- Bake for 50-60 minutes, or until a toothpick inserted into the center comes out clean or with a few moist crumbs. If the top browns too quickly, tent with foil for the last 10-15 minutes.
- Cool in the pan for 10 minutes, then transfer to a cooling rack to cool completely before slicing (about 1 hour).
Notes
Let the batter rest for 10 minutes before baking for a more tender crumb. Do not overmix. For high altitude (over 3,000 feet), reduce sugar by 2 tablespoons, increase flour by 2 tablespoons, and reduce baking soda to ¾ teaspoon. The bread tastes even better on the second day.
Nutrition
- Serving Size: 1 slice
- Calories: 220
- Sugar: 18
- Sodium: 220
- Fat: 8
- Saturated Fat: 5
- Carbohydrates: 35
- Fiber: 2
- Protein: 3
Keywords: banana bread, easy banana bread, one-bowl banana bread, no mixer banana bread, moist banana bread, simple banana bread


