Love this? Save it for later!
Share the inspiration with your friends
The school bake sale was in twelve hours and I’d completely forgotten. My son’s note about it was buried under a stack of art projects on the counter, and when I finally found it, my heart just sank. Everyone else would be bringing elaborate cupcakes with buttercream rosettes, or those fancy decorated cookies that look like they belong in a bakery window. I had a bag of pumpkin seeds from our carving session two weeks ago, a little bit of cinnamon, and a pantry that was looking pretty sparse. Honestly, I almost just sent him with store-bought granola bars. But then I remembered that time my neighbor brought in a bowl of spiced seeds to a potluck and they vanished in minutes. I figured it was worth a shot, even if it felt like a total underdog move. I tossed those seeds with butter, sugar, and cinnamon, popped them in the oven, and hoped for the best. The kitchen smelled incredible, like a fall candle had exploded, but I still wasn’t convinced.
When my son came home from school the next day, he was practically bouncing. He told me his class had a taste-testing contest after the sale, and his seeds won. Won! Against all those fancy frosted cupcakes. I mean, I was stunned. He said the other kids kept coming back for handfuls, and even the teacher asked for the recipe. That’s when I knew I had stumbled onto something special. These Homemade Cinnamon Sugar Pumpkin Seeds aren’t just a snack; they’re a little miracle of resourcefulness. They’re crunchy, sweet, and have that warm cinnamon kick that makes you feel all cozy inside. Maybe you’ve been there—scrambling for a contribution at the last minute, feeling like you’re showing up empty-handed. This is your save. It’s the recipe that turns a pantry afterthought into the star of the show.
I keep making them because they remind me that you don’t need a ton of fancy ingredients or hours of prep to create something people genuinely love. It’s just a simple, honest snack that happens to be absolutely irresistible. And the best part? It’s a total crowd-pleaser, from picky kids to grown-ups who swear they’re not into seeds. Let me tell you, once you try these, you’ll never throw away pumpkin seeds again.
Why You’ll Love This Recipe
I’ve tested this recipe more times than I can count, tweaking the sugar ratio and the baking time until it was just right. I’m not a professional chef or anything, but I’ve learned a thing or two from my kitchen experiments, and I can tell you with confidence that this is the best version. It’s the kind of snack that feels like a treat but doesn’t break the bank or require a special trip to the store. Here’s why it works so well for families:
- Quick & Easy: From start to finish, you’re looking at about 25 minutes. Most of that is hands-off baking time, so you can get dinner started or help with homework while the oven does the work.
- Simple Ingredients: You probably have everything you need right now. Pumpkin seeds, butter, sugar, cinnamon, and a pinch of salt. That’s it. No weird extracts or hard-to-find spices.
- Perfect for Busy Weeknights: When the after-school munchies hit and you need something fast that isn’t junk, these seeds are a lifesaver. They’re also great for lunchboxes, road trips, or just munching while you watch a movie.
- Crowd-Pleaser: I’ve brought these to playdates, family gatherings, and even a book club meeting (don’t ask). They disappear every single time. Kids love the sweetness, and adults appreciate the crunch.
- Unbelievably Delicious: The combination of crunchy seeds, melted butter, and a cinnamon-sugar coating is pure comfort food. It’s like a warm hug in a bowl.
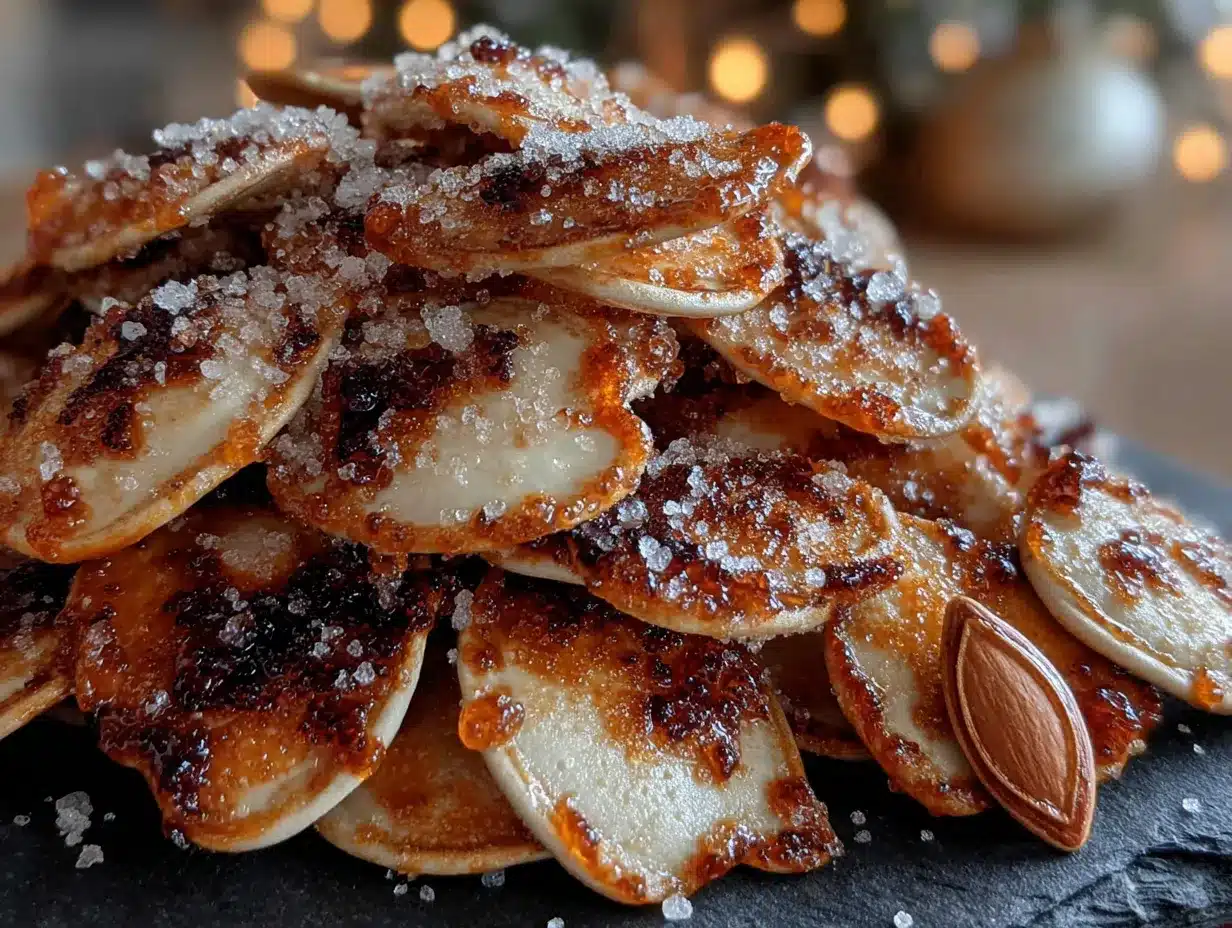
What makes this recipe different from the hundreds of other pumpkin seed recipes out there? It’s the technique. I’ve found that boiling the seeds briefly before roasting them makes them extra crunchy, not tough or chewy. And the coating? It’s perfectly balanced—sweet enough to satisfy a craving, but not so sugary that you feel guilty after a handful. This isn’t just another version of roasted seeds; it’s the one you’ll come back to again and again.
Honestly, this recipe is more than just a snack. It’s the kind of thing that makes you feel like a kitchen hero, even on a Tuesday night. It’s comfort food reimagined—healthier, faster, but with the same soul-soothing satisfaction. Perfect for impressing the kids without any stress, or turning a simple afternoon into something a little bit special.
What Ingredients You Will Need
This recipe uses simple, wholesome ingredients to deliver bold flavor and satisfying crunch without the fuss. Most of these are pantry staples, especially if you’ve just carved a pumpkin or two. Here’s what you’ll need:
For the Seeds
- 1 cup raw pumpkin seeds (also called pepitas, about 4 ounces) – You can use seeds straight from a pumpkin, but make sure they’re cleaned and dried. I prefer the ones from sugar pumpkins, as they tend to be plumper and more tender. If you’re buying them, look for raw, unsalted seeds.
- 2 tablespoons unsalted butter, melted – Butter adds richness and helps the coating stick. I use salted butter in a pinch and just skip the added salt. For a dairy-free option, you can use coconut oil or vegan butter.
- 2 tablespoons granulated sugar – Regular white sugar gives the best crunch. You can use brown sugar for a deeper, molasses-like flavor, but the texture will be slightly softer.
- 1 teaspoon ground cinnamon – This is the star of the show. I recommend a good quality cinnamon, like Saigon or Ceylon, for a warmer, more aromatic flavor. Don’t skimp here—it makes a difference.
- 1/4 teaspoon salt – A little salt balances the sweetness and enhances the overall flavor. If you’re using salted butter, reduce this to a pinch or omit it entirely.
Optional Add-Ins
- 1/2 teaspoon vanilla extract – Adds a lovely warmth that complements the cinnamon. I sometimes add this when I’m feeling fancy.
- Pinch of nutmeg or allspice – For a more complex spice blend, like pumpkin pie spice. Just a tiny pinch goes a long way.
- 1 tablespoon maple syrup – You can swap the sugar for maple syrup for a more natural sweetener, but the seeds will be a bit stickier and less crunchy. I’ve tried it, and it’s good in a different way.
When choosing your pumpkin seeds, look for ones that are clean and free of any pumpkin guts. If you’re using fresh seeds from a pumpkin, rinse them thoroughly in a colander and pat them dry with a clean kitchen towel. Let them air dry for an hour or so before using. This step is important because wet seeds won’t get as crunchy. I’ve learned this the hard way after a batch of soggy seeds that nobody wanted to eat.
For substitutions, you can easily make this recipe gluten-free (it already is!) or nut-free. There are no common allergens here except dairy, which can be swapped as noted. If you’re watching your sugar intake, try using a sugar substitute like monk fruit sweetener, but keep in mind that the texture might be slightly different. I’ve found that the real sugar gives the best caramelization and crunch.
Equipment Needed
You don’t need any fancy gadgets for this recipe, which is part of its charm. Here’s what you’ll need:
- Baking sheet – A standard half-sheet pan works perfectly. Line it with parchment paper for easy cleanup. I’ve used foil in a pinch, but the seeds tend to stick a little more.
- Medium saucepan – For boiling the seeds. Any pot will do, but a medium size is easiest to handle.
- Mixing bowl – A medium bowl for tossing the seeds with butter and sugar. I use a glass or stainless steel bowl.
- Colander – For rinsing and draining the seeds. A fine-mesh strainer works even better.
- Measuring cups and spoons – Accuracy matters here, especially with the cinnamon and salt.
- Spatula or wooden spoon – For stirring the seeds on the baking sheet. A silicone spatula is great for scraping every bit of the butter mixture.
If you don’t have a baking sheet, you can use a cast-iron skillet or a casserole dish. Just keep an eye on the baking time, as different materials conduct heat differently. I once used a glass dish and the seeds took a few extra minutes to brown. Also, a note on parchment paper: it’s worth the investment. It makes cleanup a breeze and prevents the seeds from sticking. If you don’t have any, you can lightly grease the baking sheet with butter or cooking spray.
For budget-friendly options, skip the fancy cinnamon and use whatever you have. The recipe is forgiving. And if you don’t have a colander, a clean kitchen towel works to drain the seeds after boiling. Just be careful not to burn yourself.
Preparation Method
Let’s get cooking! This recipe is straightforward, but I’ll walk you through each step with some tips I’ve picked up along the way. You’ll have a crunchy, sweet snack in no time.
- Preheat your oven to 350°F (175°C). This is important because you want the oven hot and ready when the seeds go in. Line a baking sheet with parchment paper and set it aside.
- Bring a medium saucepan of water to a boil. Add the 1 cup of raw pumpkin seeds to the boiling water and let them cook for 10 minutes. Yes, you read that right—boil them first. This step is a game-changer. It softens the outer shell slightly, which allows the seeds to puff up and become extra crunchy during roasting. I was skeptical the first time I tried it, but now I never skip it. After 10 minutes, drain the seeds in a colander and pat them dry with a clean towel. They don’t need to be bone-dry, just not dripping wet.
- In a medium mixing bowl, combine the melted butter, sugar, cinnamon, and salt. Whisk it together until the sugar is mostly dissolved. If you’re using vanilla extract, add it now. The mixture should look like a thick, fragrant paste. I love the smell at this stage—it’s like autumn in a bowl.
- Add the boiled and dried pumpkin seeds to the bowl. Use a spatula to toss them until every seed is coated in the buttery cinnamon sugar mixture. Don’t rush this step. You want each seed to have a nice, even coating. I sometimes use my hands to mix, but be careful—the butter can be warm. Let the seeds sit in the bowl for a minute or two to absorb the flavor.
- Spread the coated seeds in a single layer on the prepared baking sheet. Try not to overlap them too much, or they’ll steam instead of roast. If you have a lot of seeds, use two baking sheets. I’ve made that mistake before, and the seeds on the bottom came out soft. Use a spatula to spread them evenly.
- Bake for 15-20 minutes, stirring halfway through. After about 8 minutes, pull the sheet out and give the seeds a good stir with a spatula. This ensures even browning. Keep an eye on them during the last few minutes—they can go from golden to burnt quickly. You’re looking for a deep golden brown color, and the kitchen should smell amazing. The seeds will also sound a bit hollow when you stir them. That’s how you know they’re done.
- Let the seeds cool completely on the baking sheet. This is crucial. As they cool, they’ll crisp up even more. If you try to eat them right away, they’ll be a little soft. I know it’s hard to resist, but trust me on this. Let them sit for at least 15-20 minutes. Once cool, they’ll be perfectly crunchy.
One more tip: if you notice some seeds are browning faster than others, it’s okay. Just stir them more frequently. Every oven is different, so your first batch might need a minute or two more or less. I’ve had ovens that run hot and others that are slow, so adjust accordingly. The first time I made these, I walked away for a minute and came back to a slightly smoky kitchen. Learn from my mistake—stay close!
Cooking Tips & Techniques
Over the years, I’ve learned a few tricks that make these seeds turn out perfect every time. Let me share some of them with you, including a couple of my own kitchen disasters.
Don’t skip the boil. I know it seems like an extra step, but boiling the seeds is the secret to that irresistible crunch. It hydrates the seeds, which then puff up in the oven. Without it, the seeds can be tough and chewy. I once tried to skip it to save time, and the result was a sad, chewy mess. Never again.
Watch your oven temperature. Every oven is a little different. If your oven runs hot, check the seeds at the 12-minute mark. If it’s cooler, they might need the full 20 minutes. I’ve learned to trust my nose more than the timer. When you smell that warm, toasty cinnamon aroma, they’re close.
Stir halfway through. This is non-negotiable. The seeds on the edges of the pan cook faster than those in the middle. Stirring ensures even browning and prevents burning. I use a thin spatula to flip them around. It takes just a few seconds and makes a huge difference.
Let them cool completely. This is the hardest part, especially with kids hovering around. But if you rush this step, you’ll end up with soft seeds. The cooling process is where the magic happens. I usually make these in the afternoon and let them sit while I make dinner. By the time we’re ready for a snack, they’re perfect.
Common mistake: too much sugar. It’s tempting to add extra sugar, but it can make the seeds sticky and cause them to burn. Stick to the recipe, and you’ll get that perfect candy-like coating. I learned this when I tried to double the sugar for a “special” batch and ended up with a burnt, sugary mess. Less is more here.
Multitasking tip: While the seeds are boiling, you can measure out your other ingredients. And while they’re roasting, you can clean up the kitchen or start dinner. It’s a great recipe to make alongside something else because the active time is so short.
Variations & Adaptations
This recipe is a fantastic base for all kinds of flavor experiments. Here are a few variations I’ve tried and loved:
- Spicy Cinnamon: Add a pinch of cayenne pepper or chili powder to the sugar mixture. It gives a warm, unexpected kick that adults will love. My husband is obsessed with this version. Start with 1/8 teaspoon and adjust from there.
- Maple Pecan: Swap the granulated sugar for 1 tablespoon of maple syrup and add 1/4 cup of chopped pecans to the baking sheet during the last 5 minutes. The nuts toast beautifully and add a lovely crunch. This is my go-to for holiday snacking.
- Pumpkin Pie Spice: Replace the cinnamon with 1 teaspoon of pumpkin pie spice (or a mix of cinnamon, nutmeg, ginger, and cloves). It tastes just like a pumpkin pie in seed form. Perfect for fall gatherings or Thanksgiving leftovers.
- Chocolate Drizzle: Once the seeds have cooled, melt some dark or white chocolate and drizzle it over the top. Let it set, then break into clusters. This turns them into a decadent treat that feels like dessert. I did this for a movie night once, and the kids went wild.
- Savory Sweet: Reduce the sugar to 1 tablespoon and add 1/2 teaspoon of smoked paprika and a pinch of garlic powder. It’s a sweet-savory combo that’s great on salads or just by the handful.
For dietary adaptations, you can easily make these vegan by using coconut oil instead of butter. I’ve also made them with a sugar substitute like erythritol, and while they were less crunchy, they were still delicious. If you’re avoiding nuts, skip the pecan variation. And for a lower-sugar option, use just 1 tablespoon of sugar and add a pinch of stevia. The seeds will be less sweet but still tasty.
Serving & Storage Suggestions
These seeds are incredibly versatile. Here’s how to serve and store them for maximum enjoyment.
Serving: I love serving them at room temperature, straight from the baking sheet. They’re perfect as an after-school snack, a party appetizer, or a crunchy topping for yogurt or oatmeal. For a fun presentation, pile them into a small bowl and set them out with other snacks like popcorn or pretzels. They also make a great topping for salads—just sprinkle a handful over a bed of greens with some dried cranberries and goat cheese. The sweet crunch is a lovely contrast.
Storage: Once the seeds are completely cool, transfer them to an airtight container. They’ll stay fresh and crunchy for up to two weeks at room temperature. I store mine in a mason jar on the counter. If you live in a humid climate, you might want to keep them in the refrigerator to maintain their crunch. I’ve also frozen them successfully for up to three months. Just let them come to room temperature before serving.
Reheating: If your seeds lose their crunch over time (it happens), you can refresh them in a 300°F (150°C) oven for 5 minutes. Let them cool again, and they’ll be crispy. I’ve done this a few times, and it works like a charm. Just don’t overdo it, or they might burn.
Flavor development: Honestly, these seeds taste even better the next day. The flavors meld together, and the crunch is at its peak. So if you can resist eating them all right away, you’re in for a treat. I often make a double batch just so we have some for later in the week.
Nutritional Information & Benefits
Here’s a rough estimate of the nutritional content per 1/4 cup serving (about 30 grams):
- Calories: 180
- Fat: 14g (mostly healthy unsaturated fats)
- Carbohydrates: 10g
- Fiber: 2g
- Protein: 7g
- Sugar: 5g
Pumpkin seeds are a nutritional powerhouse. They’re packed with magnesium, zinc, and iron, which are great for energy, immunity, and overall health. The healthy fats in the seeds are good for your heart and brain. And the cinnamon adds a dose of antioxidants, plus it may help with blood sugar regulation. This snack is a great way to get some extra nutrients into your kids without them even noticing.
This recipe is naturally gluten-free and can be made dairy-free and vegan with simple swaps. It’s also low in sugar compared to most store-bought snacks, which is a win for parents. Just be mindful of portion sizes if you’re watching your calorie intake. I like to portion them out into small bags for the kids’ lunches, so they don’t overdo it.
Conclusion
These Homemade Cinnamon Sugar Pumpkin Seeds are more than just a snack—they’re a little reminder that you don’t need a lot to create something wonderful. They’re born from a moment of panic, perfected through a few kitchen mishaps, and loved by everyone who tries them. Whether you’re scrambling for a last-minute bake sale contribution or just looking for a healthy-ish treat to satisfy a sweet tooth, this recipe delivers every single time.
I encourage you to make this recipe your own. Try the spicy version if you like a little heat, or go all out with a chocolate drizzle for a special occasion. The beauty of this snack is that it’s endlessly adaptable. And I’d love to hear how it goes! Drop a comment below and let me know your favorite variation, or share a photo of your crunchy creation. Don’t forget to save this recipe for your next pumpkin carving session—you’ll thank yourself later.
Thanks for stopping by, and happy snacking! Remember, the best recipes are the ones that make you smile, and these seeds definitely do that for me.
Frequently Asked Questions
Can I use pumpkin seeds from a can?
I don’t recommend it. Canned pumpkin seeds are usually cooked and salted, so they won’t have the same texture. Raw seeds from a fresh pumpkin or a bag from the store work best.
Why do I need to boil the seeds first?
Boiling softens the outer shell and helps the seeds puff up during roasting, giving you that perfect, crunchy texture. It’s a simple step that makes a big difference.
Can I make these in an air fryer?
Yes! Preheat your air fryer to 300°F (150°C). Cook the coated seeds for 10-12 minutes, shaking the basket halfway through. Keep an eye on them, as air fryers can cook faster than ovens.
How do I get the seeds extra crunchy?
Make sure you boil them for the full 10 minutes, dry them well before coating, and let them cool completely on the baking sheet after roasting. Storing them in an airtight container also helps maintain the crunch.
My seeds came out soft. What went wrong?
This usually happens if they weren’t boiled long enough, or if they were crowded on the baking sheet. Next time, spread them in a single layer and make sure your oven is fully preheated. You can also try baking them for a few extra minutes.
Pin This Recipe!
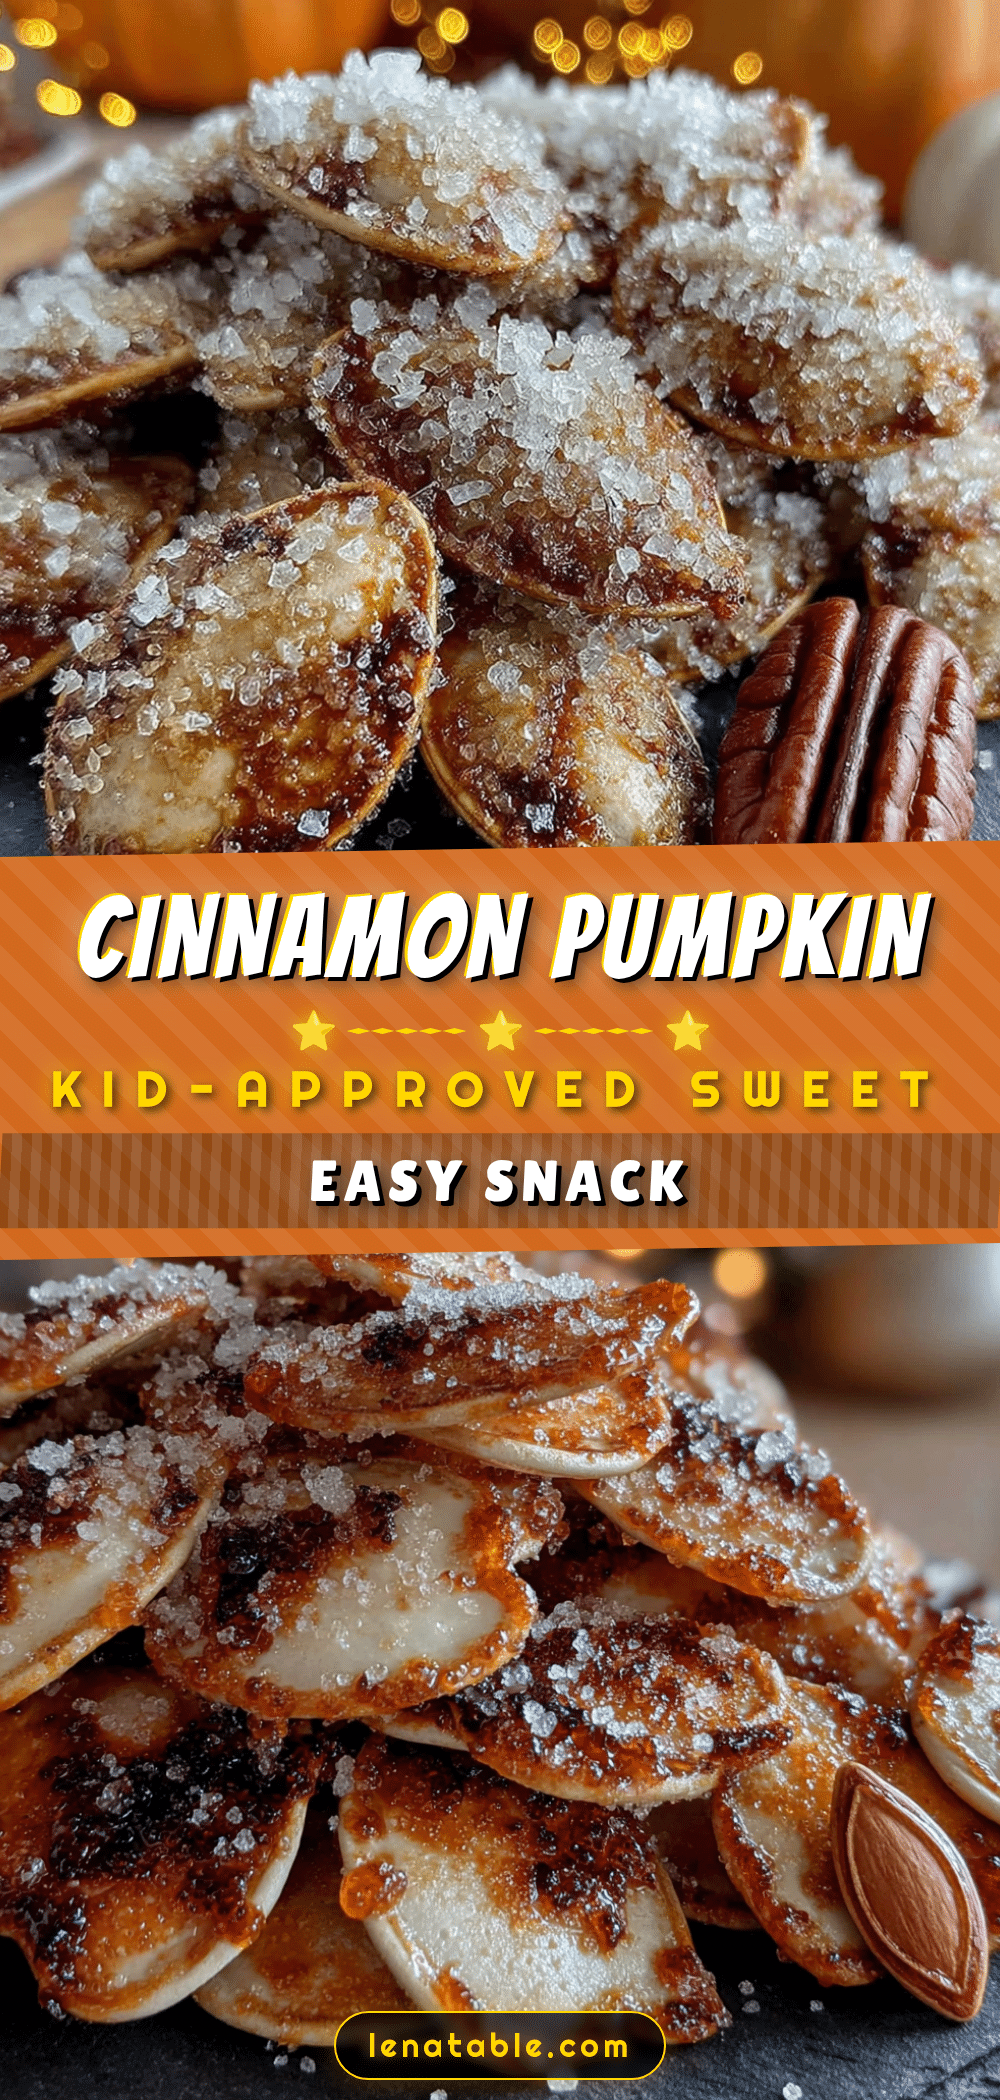
Homemade Cinnamon Sugar Pumpkin Seeds: Easy Kid-Approved Snack
These Homemade Cinnamon Sugar Pumpkin Seeds are a crunchy, sweet, and irresistible snack that turns a pantry afterthought into the star of the show. Perfect for last-minute bake sales, after-school munchies, or any occasion, this easy recipe is a crowd-pleaser that kids and adults love.
- Prep Time: 10 minutes
- Cook Time: 15-20 minutes
- Total Time: 25-30 minutes
- Yield: 4 servings 1x
- Category: Snack
- Cuisine: American
Ingredients
- 1 cup raw pumpkin seeds (pepitas, about 4 ounces)
- 2 tablespoons unsalted butter, melted
- 2 tablespoons granulated sugar
- 1 teaspoon ground cinnamon
- 1/4 teaspoon salt
- 1/2 teaspoon vanilla extract (optional)
- Pinch of nutmeg or allspice (optional)
- 1 tablespoon maple syrup (optional)
Instructions
- Preheat your oven to 350°F (175°C). Line a baking sheet with parchment paper and set aside.
- Bring a medium saucepan of water to a boil. Add the raw pumpkin seeds and boil for 10 minutes. Drain in a colander and pat dry with a clean towel.
- In a medium mixing bowl, combine the melted butter, sugar, cinnamon, and salt. Whisk until the sugar is mostly dissolved. If using vanilla extract, add it now.
- Add the boiled and dried pumpkin seeds to the bowl. Toss with a spatula until every seed is evenly coated.
- Spread the coated seeds in a single layer on the prepared baking sheet. Avoid overlapping.
- Bake for 15-20 minutes, stirring halfway through, until the seeds are deep golden brown and fragrant.
- Let the seeds cool completely on the baking sheet (about 15-20 minutes) before serving. They will crisp up as they cool.
Notes
Boiling the seeds before roasting is key for extra crunch. Let seeds cool completely to achieve maximum crispiness. For a dairy-free option, use coconut oil or vegan butter. For a lower-sugar version, reduce sugar to 1 tablespoon and add a pinch of stevia. Store in an airtight container at room temperature for up to two weeks.
Nutrition
- Serving Size: 1/4 cup (about 30 gr
- Calories: 180
- Sugar: 5
- Sodium: 150
- Fat: 14
- Saturated Fat: 4
- Carbohydrates: 10
- Fiber: 2
- Protein: 7
Keywords: cinnamon sugar pumpkin seeds, roasted pumpkin seeds, easy snack, kid-approved, fall snack, healthy snack, gluten-free, dairy-free option


