Love this? Save it for later!
Share the inspiration with your friends
My neighbor across the hall, Mrs. Gable, is eighty-three and has opinions about everything, especially food. Last November, I was wrestling a turkey into the oven, flour on my cheek, sweat on my brow, and she knocked on my door holding a cutting board piled high with cheese, salami, and a little dish of honey. “You’re doing too much,” she said, setting it on my counter. “Kids don’t want a turkey lecture. They want this.” She gestured at the board—a chaotic, beautiful mess of things to pick at. “Put out the board first. Let them graze while you finish the bird. Everyone’s happy.” I was skeptical, honestly. My grandmother’s Thanksgiving had a script. But I put out that board, and my kids—who usually eye the green bean casserole like it’s a science experiment—descended on it like little wolves. They ate cubes of cheddar, salami roses, and apple slices dipped in honey. They were happy, I was less stressed, and the turkey? It turned out fine. Maybe you’ve been there—the chaos of a big family meal, trying to please everyone while the gravy threatens to scorch. This board is the answer. It’s not fancy, it’s not fussy, and honestly, it’s the best thing I’ve added to our Thanksgiving table. It lets the kids feel in charge of their own plate, and it buys you the time you need to pull everything else together.
Why You’ll Love This Recipe
This isn’t just a snack platter. It’s a strategy for surviving Thanksgiving with your sanity intact. I’ve tested this board on my own picky eaters, my sister’s kids who only eat beige foods, and a pack of hungry teenagers after a football game. It works every time. Here’s why it’s a game-changer for a family on a budget:
- Keeps Kids Happy (and Busy): While you’re wrestling with the turkey or mashing potatoes, the kids can graze. It stops the “I’m hungry” whining before dinner even starts.
- Uses Affordable Ingredients: No need for fancy prosciutto or expensive cheeses. Cubed cheddar, pepperoni, and apple slices work beautifully and cost a fraction of a charcuterie board from a store.
- Picky Eater Approved: Kids can pick and choose what they like. It’s a no-pressure way to get them to try a grape, a piece of cheese, or a cracker with something new on it.
- Easy on the Cook: There’s no cooking involved. Just slicing, arranging, and putting things on a board. It’s the one dish that won’t stress you out.
- Leftovers Reheat Well: The cheese and crackers don’t need reheating, but the leftover turkey and ham from the board? Perfect for sandwiches the next day.
- It’s a Crowd-Pleaser: Honestly, I’ve seen adults stand by this board for the entire cocktail hour. It’s not just for kids—it’s for everyone who wants a little something before the big meal.
This isn’t another recipe you’ll forget. It’s the one that saves your Thanksgiving table from chaos and turns it into a happy, manageable gathering.
What Ingredients You Will Need
This recipe uses simple, budget-friendly ingredients that you can find at any grocery store. The key is to think about colors, textures, and things kids actually like. No one is judging you for using string cheese—trust me, the kids will love it.
- For the Cheeses:
- 8 ounces cheddar cheese, cut into cubes (a block is cheaper than pre-cut)
- 8 ounces mozzarella string cheese, each stick cut in half (fun for little hands)
- 4 ounces cream cheese, softened (for spreading on crackers)
- Optional: 4 ounces Colby Jack or Monterey Jack, cubed (mild and kid-friendly)
- For the Meats:
- 8 ounces salami, sliced (I recommend Gallo Salame for a good, affordable option)
- 6 ounces ham, sliced and rolled (use leftover holiday ham or deli ham)
- 6 ounces turkey, sliced and rolled (again, leftover or deli)
- Optional: 4 ounces pepperoni slices (always a hit with kids)
- For the Fruits & Veggies:
- 2 apples, sliced (Granny Smith or Honeycrisp—toss in lemon juice to prevent browning)
- 1 cup red seedless grapes, washed
- 1 cup baby carrots (crunchy and sweet)
- 1/2 cup cherry tomatoes (for the brave ones)
- Optional: 1/2 cup dried cranberries or raisins (adds a sweet, chewy element)
- For the Crunchy Bits:
- 1 box of crackers (butter crackers, wheat thins, or pretzel thins—whatever is on sale)
- 1 cup pretzel sticks or twists
- 1/2 cup goldfish crackers or cheese crackers (a non-negotiable for the kids)
- For the Dips & Spreads:
- 1/2 cup honey (for drizzling or dipping)
- 1/2 cup ranch dressing or yogurt-based dip (for the veggies)
- Optional: 1/4 cup hummus (for a healthier option)
- For the Fun Extras (Optional but Loved):
- 1/4 cup chocolate chips or M&Ms (a little sweet surprise)
- 1/4 cup mixed nuts (if no allergies—watch for little ones)
- Small bowls for dips and sticky items
Ingredient Tip: When you’re buying cheese, look for blocks instead of pre-shredded or pre-cubed. It’s cheaper, and you can cut it into fun shapes with cookie cutters if you’re feeling fancy. For the meats, ask the deli counter for thick slices—they hold up better on the board and are easier for little fingers to grab.
Equipment Needed
You don’t need a fancy wooden board to make this work. I’ve used a large baking sheet, a cutting board, and even a clean pizza pan in a pinch. Here’s what you’ll need:
- A Large Board or Platter: A wooden cutting board, a marble slab, or even a rimmed baking sheet lined with parchment paper works perfectly.
- Small Bowls: For dips, honey, and any loose items like cranberries or chocolate chips. Ramekins or small custard cups are great.
- A Sharp Knife: For cutting cheese and fruit. A paring knife works well for detail work.
- Cheese Slicer or Wire Cutter (Optional): If you’re using a block of hard cheese, a wire cutter makes neat slices. But a knife is fine.
- Toothpicks or Small Forks: For the meats and cheese cubes. It keeps little fingers from touching everything.
- Cookie Cutters (Optional): For cutting cheese slices into fun shapes like stars or turkeys. It’s a nice touch for kids.
Budget-Friendly Tip: Don’t buy a special board. I’ve used a rimmed baking sheet for years, and it works perfectly. The edges keep things from sliding off, which is a lifesaver with kids around.
Preparation Method
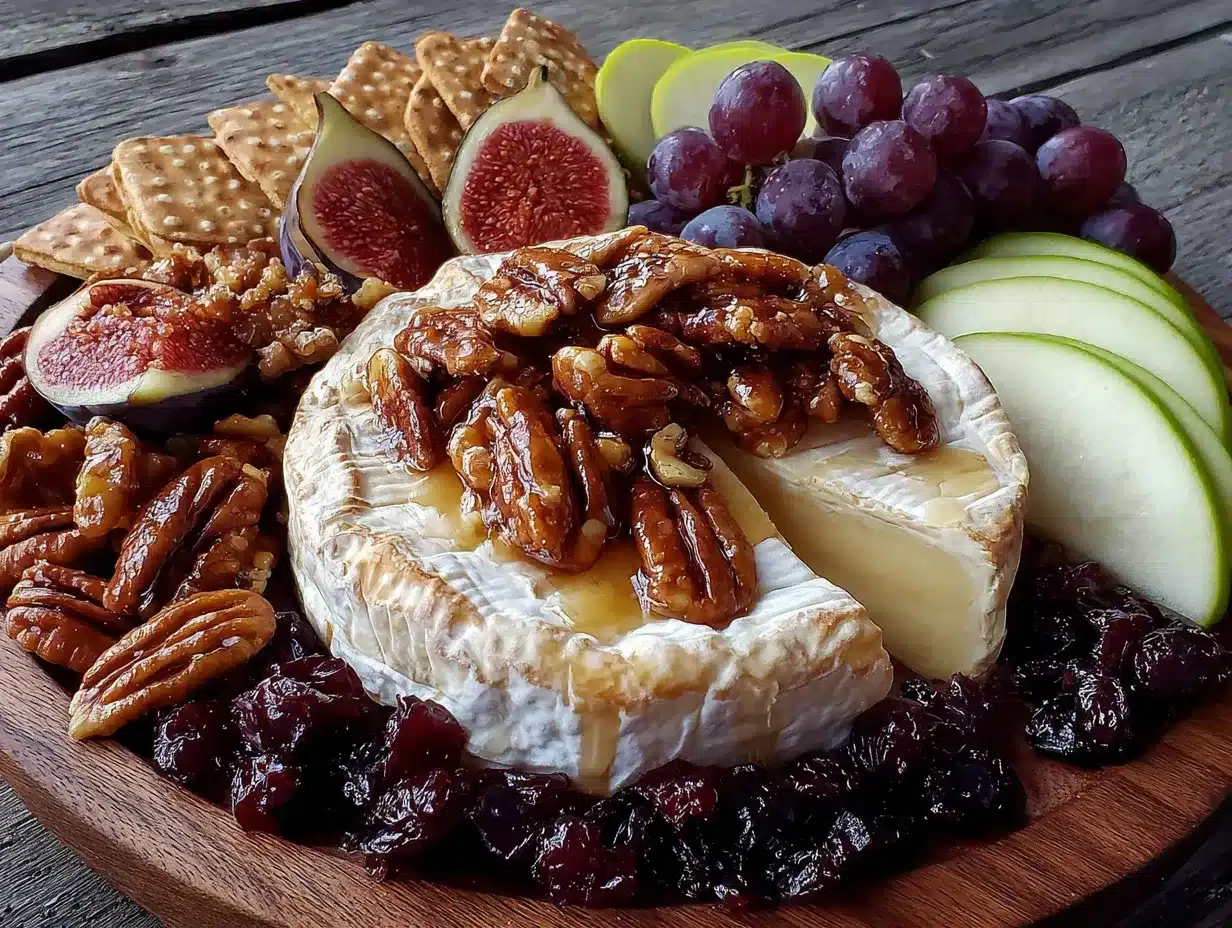
This is the easy part. There’s no baking, no boiling, no stress. Just a little bit of slicing and arranging. Set aside about 20 minutes before your guests arrive to put it together.
- Prep Your Cheeses: Cut your cheddar block into 1-inch cubes. If you’re using string cheese, cut each stick in half crosswise. For the cream cheese, let it sit out for 15 minutes to soften so it’s spreadable. Arrange the cheese in small piles around the board—don’t spread them out too much, or it’ll look empty.
- Roll the Meats: Take your salami, ham, and turkey slices. Roll each slice into a little tube or fold it into a quarter. For salami, you can make “salami roses” by overlapping three slices, folding them in half, and rolling them up. It sounds fancy, but it takes 10 seconds. Place the meat rolls in clusters on the board.
- Wash and Prep the Fruits & Veggies: Slice your apples and toss them in a little lemon juice to keep them from browning. Wash your grapes and baby carrots. If you’re using cherry tomatoes, leave them whole. Arrange these in small groups around the board, mixing colors for visual appeal.
- Add the Crunchy Bits: Pour your crackers, pretzels, and goldfish into the empty spaces on the board. Don’t be afraid to pile them up—kids love digging through a board to find their favorite cracker. Use small bowls for the goldfish if you’re worried about them rolling away.
- Fill the Dips: Spoon your honey, ranch dressing, and hummus into small bowls. Place them on the board or right next to it. I like to put the honey near the apple slices and the ranch near the carrots. It makes it easy for little hands to grab what they want.
- Add the Fun Extras: Sprinkle the chocolate chips or M&Ms in a small bowl or just scatter them in one corner. If you’re using nuts, put them in a bowl to avoid any spills. This is the part that makes kids’ eyes light up.
- Final Touches: Step back and look at your board. If there are any big empty spaces, fill them with extra crackers or grapes. The goal is to make it look abundant, not perfect. Stick a few toothpicks into the cheese cubes and meat rolls for easy grabbing.
Prep Note: If you’re making this ahead of time, cover the board with plastic wrap and store it in the fridge. Take it out 20 minutes before serving to let the cheese soften slightly. The crackers might get a little soft if left overnight, so add those just before serving.
Cooking Tips & Techniques
After making this board for three Thanksgivings now, I’ve learned a few things the hard way. Here are my best tips to make it a success:
- Don’t Overthink the Arrangement: I used to try to make everything look perfectly symmetrical. Then I realized kids don’t care about symmetry. They care about finding the cheese they like. Just pile things in clusters and let it be a little messy. It looks more inviting that way.
- Watch the Sticky Fingers: Kids will grab everything with their hands. That’s fine, but put out a stack of small napkins and maybe a wet wipe nearby. It saves your couch from grape juice stains.
- Keep It at Room Temperature: Cheese and meats taste better when they’re not ice cold. Take the board out of the fridge 20 minutes before you’re ready to serve. The cream cheese will be spreadable, and the salami will be more flavorful.
- Don’t Forget the Allergies: If you’re serving a crowd, check for nut allergies before adding almonds or peanuts. I once had a guest who couldn’t eat anything because I’d put peanut butter crackers on the board. Now I keep nuts in a separate bowl with a label.
- Use Leftovers Creatively: The day after Thanksgiving, any leftover cheese, meat, and crackers from this board can be turned into a lunch platter. Just add some leftover turkey, and you’ve got a post-Thanksgiving snack that feels new.
My Biggest Failure: The first time I made this, I put the honey in a shallow dish, and a toddler knocked it over. Honey everywhere. Now I use a small, heavy ramekin with a wide base. It’s harder to tip over, and it keeps the sticky mess contained.
Variations & Adaptations
This board is incredibly flexible. Here are a few ways to change it up based on what you have or who you’re feeding:
- Vegetarian Version: Skip the meats entirely and double up on cheese and veggies. Add some roasted chickpeas or edamame for protein. You can also include cubes of firm tofu marinated in soy sauce for a savory bite.
- Seasonal Twist: In the fall, swap the grapes for sliced pears and add a handful of roasted pumpkin seeds. In the summer, use fresh strawberries and blueberries instead of apples. The board can change with the seasons without losing its appeal.
- Gluten-Free Option: Use gluten-free crackers and pretzels. Most cheeses, meats, and fruits are naturally gluten-free, so this is an easy swap. Just check the labels on any dips or spreads.
- Sweet Tooth Version: Add a bowl of mini marshmallows, some chocolate-covered raisins, and a few caramel squares. Kids with a sweet tooth will head straight for this corner of the board.
- My Personal Favorite Variation: I once added a small bowl of warm, salted caramel sauce for dipping the apple slices. It was a huge hit with both kids and adults. Just make sure to put it in a heavy bowl so it doesn’t tip over.
Serving & Storage Suggestions
This board is best served at room temperature, right before the main meal. It’s designed to be a starter that keeps kids busy while you finish cooking. Here’s how to make it last:
- Serving Temperature: Serve the board at room temperature. If it’s been in the fridge, let it sit out for 20 minutes before serving. The cheese will be softer, and the meats will taste better.
- Presentation: Place the board in the center of the table or on a sideboard. Make sure there are small plates and napkins nearby. I like to put out a stack of small paper plates so kids can build their own little snack plate.
- Complementary Dishes: This board goes perfectly with a warm bowl of soup or a simple salad. It also pairs well with a glass of apple cider for the kids and a glass of wine for the adults.
- Storage: Any leftovers can be stored in the fridge. Separate the cheese, meats, and fruits into different containers. The crackers might get soft, so store them in a separate airtight bag. The board will keep for 2-3 days.
- Reheating: You don’t need to reheat anything on this board. Just take it out of the fridge and let it come to room temperature. If you have leftover dips, they can be stored in the fridge for up to a week.
- How Flavors Develop: Honestly, the board tastes best the day you make it. The fruits stay fresh, and the cheese is at its peak. Leftovers are great for snacking, but the textures are best on day one.
Nutritional Information & Benefits
This board is a balanced snack that offers a little bit of everything. Here’s a rough estimate for a serving size of about 1/8 of the board:
| Nutrient | Amount Per Serving |
|---|---|
| Calories | 350-400 |
| Protein | 18-22g |
| Carbohydrates | 25-30g |
| Fat | 20-25g |
| Fiber | 3-4g |
| Sugar | 15-18g (mostly from fruit and honey) |
Health Benefits: The cheese provides calcium and protein, which are great for growing kids. The fruits and veggies offer vitamins and fiber. The honey is a natural sweetener that’s better than processed sugar. If you’re watching your salt intake, go easy on the cured meats and pretzels.
Dietary Considerations: This board is naturally gluten-free if you use gluten-free crackers. It can be made vegetarian by skipping the meats. For a lower-sugar option, use plain yogurt as a dip instead of honey. Always check for nut allergies before adding nuts to the board.
Conclusion
This kid-friendly Thanksgiving charcuterie board has become a staple in my house, and I honestly can’t imagine a holiday without it. It’s the one dish that doesn’t require a recipe, doesn’t stress me out, and makes everyone—from the youngest to the oldest—happy. It gives you back time in the kitchen, and it gives the kids a sense of control over their own plate. If you’re feeding a crowd on a budget, this is your secret weapon. I’d love to hear how it works for you. Did your kids love the salami roses? Did you add something unexpected? Leave a comment below and tell me about your own board. And if you’re looking for more family-friendly ideas, check out our easy Thanksgiving side dishes that are just as budget-friendly. Happy Thanksgiving, and remember—the board doesn’t have to be perfect. It just has to be there.
Frequently Asked Questions
Can I make this board the night before?
Yes, you can prep most of the ingredients the night before. Cut the cheese, wash the fruit, and roll the meats. Store everything in separate containers in the fridge. Assemble the board about 30 minutes before serving. Add the crackers just before serving so they stay crunchy.
What if my kids don’t like cheese?
That’s okay! Focus on the things they do like. Add more fruit, crackers, and dips. You can also include small sandwiches or rolled-up tortillas with cream cheese. The goal is to have a variety so there’s something for everyone.
How do I keep the apple slices from turning brown?
Toss the apple slices in a little lemon juice or orange juice. It slows down the browning process. You can also use a fruit fresh product if you have it. Another trick is to keep the apple slices in a bowl of cold water with a splash of lemon juice until you’re ready to arrange them.
Can I use this board as a main meal for kids?
Absolutely. If you’re having a casual Thanksgiving or a smaller gathering, this board can be the main event for the kids. Just add more protein, like hard-boiled eggs or leftover turkey, and some whole-grain crackers. It’s a balanced meal that feels like a treat.
What’s the best way to serve this to a large group?
If you’re feeding more than 10 people, consider making two boards. One can be a “kid-friendly” board with the goldfish and string cheese, and the other can be an “adult” board with fancier cheeses and olives. It keeps things organized and makes everyone feel special.
Pin This Recipe!
Kid-Friendly Thanksgiving Charcuterie Board: Crowd-Pleasing Feast
A stress-free, budget-friendly charcuterie board designed to keep kids happy and busy while you finish cooking Thanksgiving dinner. This no-cook platter features kid-approved cheeses, meats, fruits, and crunchy snacks that let little ones build their own plates.
- Prep Time: 20 minutes
- Cook Time: 0 minutes
- Total Time: 20 minutes
- Yield: 8 servings 1x
- Category: Appetizer
- Cuisine: American
Ingredients
- 8 ounces cheddar cheese, cut into cubes
- 8 ounces mozzarella string cheese, each stick cut in half
- 4 ounces cream cheese, softened
- 4 ounces Colby Jack or Monterey Jack, cubed (optional)
- 8 ounces salami, sliced
- 6 ounces ham, sliced and rolled
- 6 ounces turkey, sliced and rolled
- 4 ounces pepperoni slices (optional)
- 2 apples, sliced (Granny Smith or Honeycrisp)
- 1 cup red seedless grapes, washed
- 1 cup baby carrots
- 1/2 cup cherry tomatoes
- 1/2 cup dried cranberries or raisins (optional)
- 1 box of crackers (butter crackers, wheat thins, or pretzel thins)
- 1 cup pretzel sticks or twists
- 1/2 cup goldfish crackers or cheese crackers
- 1/2 cup honey
- 1/2 cup ranch dressing or yogurt-based dip
- 1/4 cup hummus (optional)
- 1/4 cup chocolate chips or M&Ms (optional)
- 1/4 cup mixed nuts (optional)
Instructions
- Prep your cheeses: Cut cheddar block into 1-inch cubes. Cut string cheese sticks in half crosswise. Let cream cheese sit out for 15 minutes to soften. Arrange cheese in small piles around the board.
- Roll the meats: Roll salami, ham, and turkey slices into tubes or fold into quarters. For salami roses, overlap three slices, fold in half, and roll up. Place meat rolls in clusters on the board.
- Wash and prep fruits and veggies: Slice apples and toss in lemon juice to prevent browning. Wash grapes and baby carrots. Leave cherry tomatoes whole. Arrange in small groups around the board.
- Add crunchy bits: Pour crackers, pretzels, and goldfish into empty spaces on the board. Use small bowls for goldfish if needed.
- Fill the dips: Spoon honey, ranch dressing, and hummus into small bowls. Place on or near the board.
- Add fun extras: Sprinkle chocolate chips or M&Ms in a small bowl or scatter in one corner. Put nuts in a bowl to avoid spills.
- Final touches: Fill any empty spaces with extra crackers or grapes. Stick toothpicks into cheese cubes and meat rolls for easy grabbing.
Notes
Take board out of fridge 20 minutes before serving to let cheese soften. Add crackers just before serving to keep them crunchy. Use a heavy ramekin for honey to prevent tipping. For make-ahead, prep ingredients separately and assemble 30 minutes before serving. Leftovers keep 2-3 days in fridge.
Nutrition
- Serving Size: 1/8 of board
- Calories: 350400
- Sugar: 1518
- Sodium: 600800
- Fat: 2025
- Saturated Fat: 810
- Carbohydrates: 2530
- Fiber: 34
- Protein: 1822
Keywords: Thanksgiving charcuterie board, kid-friendly appetizer, holiday snack platter, easy Thanksgiving recipe, budget-friendly charcuterie, no-cook appetizer, kids Thanksgiving food