Love this? Save it for later!
Share the inspiration with your friends
I was standing in line at the hardware store, of all places, holding a single lightbulb and a bag of washers, when the woman in front of me turned around and started talking about cookies. Not just any cookies—specifically, a recipe for exactly six of them. She was probably in her seventies, had a measuring tape hanging around her neck like a stethoscope, and she looked at my empty shopping basket and said, “You look like someone who doesn’t need a dozen of anything.” She wasn’t wrong. I live alone, and the idea of twenty-four cookies sitting on my counter is less “treat” and more “temptation I cannot resist.” So there I was, in aisle four, learning how to make a perfect small batch of chocolate chip cookies from a woman who was buying caulk. She told me she’d been making this recipe since her kids left for college, and honestly, it sounded like the most practical, brilliant thing I’d ever heard.
That conversation stayed with me for weeks. I mean, here was a recipe designed for real life—for the Tuesday night when you just want three warm cookies and a cup of tea, not a baking project that takes over your whole kitchen. It felt like a secret, passed along by someone who understood that not every baking session needs to feed a crowd. Maybe you’ve been there, standing in your kitchen at nine o’clock at night, craving something sweet but not wanting to commit to a full batch of dough that will haunt you from the freezer for months. That’s exactly where this recipe lives.
I’ve tweaked it a little over time—added a pinch more salt, swapped in dark chocolate chips once when that’s all I had—but the heart of it is still hers. It’s the kind of cookie that comes together in one bowl, bakes in ten minutes, and leaves you with exactly enough to satisfy the craving without any leftovers to feel guilty about. The power went out halfway through my first attempt at making them, which forced me to bake them in a toaster oven, and you know what? They were still perfect. That’s when I knew this recipe was something special.
Why You’ll Love This Recipe
Let me tell you why this small-batch chocolate chip cookie recipe has become my absolute go-to, and why I think it will become yours too. I’ve tested this recipe at least a dozen times—sometimes on purpose, sometimes because I forgot an ingredient and had to start over—and it consistently delivers cookies that are crisp around the edges, soft in the middle, and absolutely loaded with chocolate in every single bite.
- Quick & Easy: From start to finish, you’re looking at about 20 minutes. No chilling the dough, no complicated steps. Just mix, scoop, and bake. Perfect for those weeknight cravings when you need something warm and sweet fast.
- Simple Ingredients: You probably have everything you need in your kitchen right now. Butter, sugar, an egg, flour, vanilla, baking soda, salt, and chocolate chips. No weird specialty ingredients or trips to three different stores.
- Perfect for Small Households: Whether you’re cooking for one, a couple, or just don’t want a mountain of cookies staring at you, this recipe makes exactly six. No waste, no temptation, no freezer space required.
- Crowd-Pleaser: I’ve brought these to small gatherings and watched people eat three before asking where the rest of the batch is. The texture is spot-on, and the flavor is that classic, nostalgic chocolate chip cookie taste we all grew up loving.
- Unbelievably Delicious: The ratio of butter to sugar to flour is dialed in perfectly. These cookies spread just the right amount, get that beautiful golden-brown edge, and stay soft and chewy in the center for days—if they last that long.
What makes this recipe different from every other chocolate chip cookie recipe out there? It’s the technique of using melted butter instead of creaming softened butter with sugar. This gives the cookies a denser, chewier texture that I personally prefer over the cakey kind. Plus, it saves you the step of waiting for butter to soften, which is a win for anyone who’s impatient (like me). This isn’t just another version of a chocolate chip cookie—it’s the version that respects your time, your craving, and your sanity on a busy weeknight.
What Ingredients You Will Need
This recipe uses simple, wholesome ingredients to deliver that classic chocolate chip cookie flavor and texture without any fuss. Every ingredient plays a specific role, and I’ve tested substitutions so you don’t have to guess.
- 4 tablespoons unsalted butter (melted and slightly cooled) — Butter is the backbone of flavor here. I use unsalted so I can control the salt level myself. Melting it gives the cookies that chewy, dense texture. If you only have salted butter on hand, just reduce the added salt to 1/8 teaspoon.
- 1/4 cup granulated sugar — This provides sweetness and helps with spreading and browning. Regular white sugar works perfectly.
- 1/4 cup packed light brown sugar — Brown sugar adds moisture and a hint of molasses flavor that makes these cookies taste more complex. I prefer light brown sugar, but dark brown sugar works too if you want a deeper flavor.
- 1 large egg yolk (room temperature) — Using just the yolk instead of the whole egg gives you a richer, chewier cookie without making the dough too wet. Save the egg white for an omelet tomorrow morning. Trust me on this one.
- 1/2 teaspoon vanilla extract — Pure vanilla extract makes a difference here. I’ve tried imitation vanilla in a pinch, and honestly, you can taste the difference. If you have vanilla bean paste, even better.
- 3/4 cup all-purpose flour — Spoon and level your flour for the best results. Scooping directly with the measuring cup packs in too much flour and gives you dry, cakey cookies. I learned this the hard way.
- 1/4 teaspoon baking soda — This helps the cookies spread and brown properly. Don’t skip it, and make sure your baking soda isn’t expired. A quick test: drop a little in vinegar, and if it fizzes, you’re good.
- 1/4 teaspoon salt — Salt balances the sweetness and enhances the chocolate flavor. I use fine sea salt. If you’re using kosher salt, you might need a bit more.
- 1/3 cup chocolate chips (plus a few extra for topping) — I use semi-sweet chocolate chips because they’re not too sweet and not too bitter. My personal favorite brand is Ghirardelli, but any good-quality chip works. You can also chop up a chocolate bar for those melty puddles of chocolate. If you’re using milk chocolate, consider reducing the sugar slightly.
One note on the egg: let it come to room temperature before you start. Cold egg yolk can seize the melted butter and make the dough greasy. Just set it on the counter while you gather your other ingredients, and it’ll be ready by the time you need it.
Equipment Needed
You don’t need a fancy kitchen to make these cookies. I’ve made them with the bare minimum and they turned out great. Here’s what you’ll need:
- Mixing bowl — Any medium-sized bowl works. I use a glass bowl because I can see if the butter and sugar are properly combined, but ceramic or metal is fine too.
- Whisk — For mixing the wet ingredients together. A fork works in a pinch if you don’t have a whisk.
- Rubber spatula or wooden spoon — For folding in the flour and chocolate chips. A spatula is gentler and helps avoid overmixing.
- Measuring cups and spoons — Accuracy matters with a small batch. I recommend using proper measuring cups for dry ingredients and liquid measuring cups for the vanilla (though it’s a small amount).
- Baking sheet — A small baking sheet or even a quarter-sheet pan works perfectly. I’ve used a toaster oven tray before and it worked fine.
- Parchment paper or silicone baking mat — This prevents sticking and makes cleanup a breeze. If you don’t have either, lightly grease the baking sheet with butter or non-stick spray.
- Cookie scoop or tablespoon — For portioning the dough evenly. A standard cookie scoop (about 1.5 tablespoons) gives you the perfect size. Two spoons work too.
- Cooling rack — Not strictly necessary, but it helps the cookies cool evenly without getting soggy bottoms. A plate works if you’re impatient like me.
I bought my cookie scoop at a dollar store three years ago, and it’s still going strong. You don’t need expensive equipment—just tools that do the job.
Preparation Method
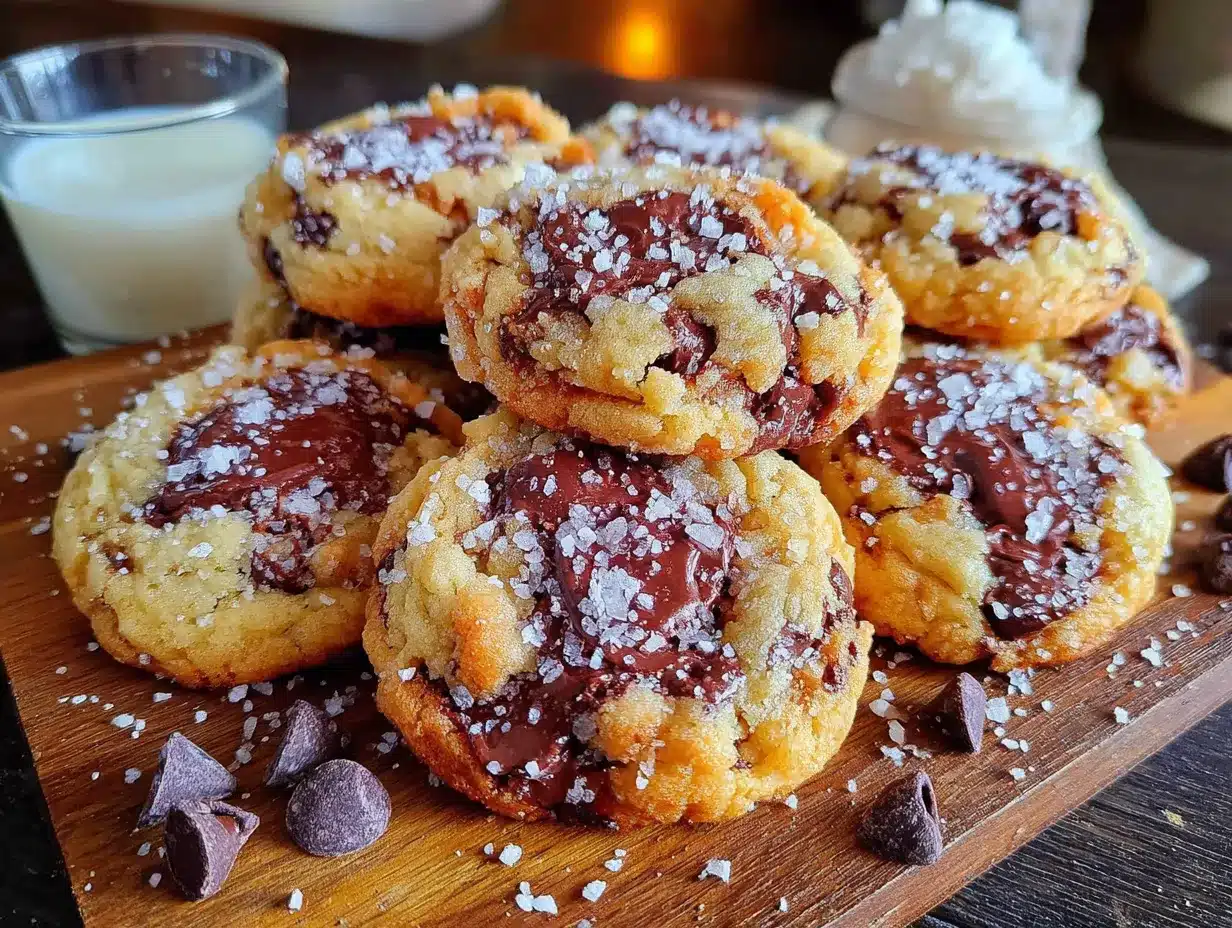
Alright, let’s get to the good part. Follow these steps, and you’ll have six perfect cookies in about 20 minutes. I’ve included all the little details that make the difference between good cookies and “I can’t stop eating these” cookies.
- Preheat your oven to 350°F (175°C). Line a small baking sheet with parchment paper or a silicone baking mat. If you’re using a toaster oven, preheat it the same way. Give it a full 10-15 minutes to come to temperature—a properly preheated oven is crucial for even baking.
- Melt the butter. Place the 4 tablespoons of unsalted butter in a microwave-safe bowl and microwave in 15-second bursts until just melted. You can also melt it in a small saucepan over low heat. Let it cool for 2-3 minutes—it should be warm but not hot. If it’s too hot, it will cook the egg yolk when you add it. I once made this mistake and ended up with scrambled egg chunks in my cookie dough. Not great.
- Mix the sugars and butter. In your mixing bowl, combine the melted butter, 1/4 cup granulated sugar, and 1/4 cup packed light brown sugar. Whisk vigorously for about 30 seconds until the mixture looks smooth and slightly thickened. It should smell like caramel at this point. This step is important—it helps dissolve the sugar and creates that crackly top on the cookies.
- Add the egg yolk and vanilla. Drop in the room-temperature egg yolk and 1/2 teaspoon vanilla extract. Whisk until everything is fully combined and the mixture looks glossy and smooth. This should take about 20 seconds. Don’t rush this step—properly emulsifying the wet ingredients ensures a uniform texture.
- Mix the dry ingredients separately. In a small bowl, whisk together 3/4 cup all-purpose flour, 1/4 teaspoon baking soda, and 1/4 teaspoon salt. This ensures the baking soda and salt are evenly distributed throughout the flour. I used to skip this step and add them directly, but I ended up with one cookie that was way too salty. Lesson learned.
- Combine wet and dry ingredients. Add the flour mixture to the butter mixture. Use a rubber spatula or wooden spoon to fold everything together gently. Mix just until you no longer see streaks of flour—about 10-15 strokes. Overmixing at this stage develops gluten and makes the cookies tough. A few lumps are totally fine.
- Fold in the chocolate chips. Add 1/3 cup chocolate chips and fold them in gently until they’re evenly distributed throughout the dough. The dough will be thick and slightly sticky—that’s exactly what you want. Reserve about 6-8 chocolate chips to press onto the tops of the cookies before baking for that bakery-style look.
- Portion the dough. Using a cookie scoop or a tablespoon, scoop out 6 equal portions of dough, each about 1.5 tablespoons. Place them on the prepared baking sheet, spacing them about 2 inches apart. They’ll spread a bit, but with only 6 cookies on a small sheet, you’ll have plenty of room. Press the reserved chocolate chips onto the tops of each dough ball.
- Bake. Place the baking sheet in the preheated oven and bake for 9-11 minutes. At 9 minutes, the edges should be golden brown and the centers should still look slightly soft and puffy. They will continue to set as they cool. For softer, chewier cookies, pull them at 9 minutes. For crispier cookies, go to 11 minutes. My sweet spot is 10 minutes exactly.
- Cool on the baking sheet. Let the cookies rest on the hot baking sheet for 5 minutes. This allows them to finish setting up without overbaking. After 5 minutes, transfer them to a cooling rack or a plate. If you try to move them too soon, they’ll fall apart. Patience, my friend.
Sensory cue: Your kitchen should smell like a bakery at this point. The edges should be a deep golden brown, and the centers should look slightly underdone but set. If you tap one gently, it should feel firm on the edges but soft in the middle. That’s the sign of a perfectly baked cookie.
One more tip: If you’re baking these in a toaster oven, keep an eye on them after 7 minutes. Toaster ovens can run hot and uneven, so rotate the pan halfway through if needed. I’ve had to learn this the hard way more than once.
Cooking Tips & Techniques
After making these cookies more times than I care to count, I’ve picked up a few tricks that make the process smoother and the results more consistent. Here’s what I’ve learned, sometimes through glorious success and other times through spectacular failure.
Use melted butter, not softened. This is the biggest game-changer for small-batch cookies. Melted butter gives you a denser, chewier cookie without the need for chilling. Plus, it’s faster. No waiting for butter to come to room temperature. Just melt and go.
Don’t skip the brown sugar. I know it’s tempting to just use white sugar if that’s all you have, but brown sugar adds moisture and that slight molasses flavor that makes chocolate chip cookies taste like chocolate chip cookies. If you’re out of brown sugar, you can make a quick substitute by mixing 1/4 cup white sugar with 1 teaspoon of molasses. It’s not perfect, but it works.
Weigh your flour if you can. I know not everyone has a kitchen scale, but if you do, 3/4 cup of all-purpose flour weighs about 90 grams. Scooping flour with the measuring cup can give you anywhere from 80 to 110 grams, which dramatically changes the texture of your cookies. If you’re using measuring cups, spoon the flour into the cup and level it off with a knife. Don’t scoop directly from the bag.
Let the dough rest if you have time. I know this recipe is designed for speed, but if you can let the portioned dough rest in the fridge for 15-20 minutes before baking, the cookies will be thicker and chewier. The flour has time to hydrate, and the butter firms up slightly, which reduces spreading. It’s not necessary, but it’s a nice upgrade when you have the extra time.
One mistake I made early on: I used a cold egg straight from the fridge. The cold yolk seized the melted butter, and the dough turned into a greasy, separated mess. The cookies spread into flat, oily puddles. Not my finest baking moment. Let that egg come to room temperature—it makes a real difference.
Timing strategy: While the oven is preheating, melt your butter and mix the wet ingredients. Then measure your dry ingredients. By the time the oven beeps, you’ll be ready to scoop and bake. This keeps the whole process under 20 minutes, start to finish.
Variations & Adaptations
One of the best things about this small-batch recipe is how easily it adapts to different tastes, dietary needs, and what you have in your pantry. Here are some variations I’ve tried and loved.
Dark Chocolate Lovers Version: Swap the semi-sweet chips for dark chocolate chunks (60-70% cacao). The bitterness of the dark chocolate pairs beautifully with the sweet, buttery cookie base. I’ve also added a sprinkle of flaky sea salt on top right when they come out of the oven, and honestly, it’s my favorite version. The salt cuts through the sweetness and makes the chocolate taste even richer.
Gluten-Free Adaptation: Substitute the all-purpose flour with a 1:1 gluten-free baking flour blend. I’ve used Bob’s Red Mill and King Arthur brands with great success. The texture is slightly more delicate, but the cookies still taste amazing. Just be careful not to overmix the dough, as gluten-free flours can get gummy. Also, let the dough rest for 5 minutes before scooping to give the flour time to absorb the liquid.
Add-In Variations: Feel free to get creative with your mix-ins. Instead of chocolate chips, try white chocolate chips and dried cranberries for a festive twist. Or use chopped pecans or walnuts for some crunch. I once made these with butterscotch chips and a handful of toasted coconut, and they disappeared in about five minutes. You can also reduce the chocolate chips to 1/4 cup and add 2 tablespoons of mini M&Ms for a colorful, fun version.
Vegan Option: Use vegan butter (I like Miyoko’s or Earth Balance) and replace the egg yolk with 1 tablespoon of aquafaba (the liquid from a can of chickpeas) mixed with 1 teaspoon of cornstarch. The texture won’t be exactly the same—slightly less chewy—but they’ll still be delicious and satisfy that cookie craving. I tested this for a friend who’s vegan, and she gave them a thumbs up.
Double the Batch: If you’re feeding more than one or two people, simply double all the ingredients. Use the whole egg instead of just the yolk (since you’ll have two yolks from two eggs, but using one whole egg plus one yolk works perfectly). Bake for the same amount of time, just use a larger baking sheet.
Serving & Storage Suggestions
These cookies are best enjoyed warm, straight from the oven, when the chocolate is still melty and the edges are perfectly crisp. But let’s be real—they’re pretty amazing at room temperature too.
Serving Temperature: Serve them slightly warm or at room temperature. If they’ve cooled completely, you can pop them in the microwave for 10 seconds to bring back that fresh-from-the-oven experience. Pair them with a cold glass of milk, a cup of coffee, or a mug of hot tea. For an extra treat, sandwich a scoop of vanilla ice cream between two cookies for the perfect mini ice cream sandwich.
Storage: Store any leftover cookies (if you have any) in an airtight container at room temperature for up to 3 days. Place a slice of bread in the container to keep them soft—the cookies will absorb moisture from the bread. Replace the bread slice every day if you’re storing them longer. I learned this trick from my grandmother, and it works like magic.
Freezing the Dough: This is my favorite hack. You can portion the dough into 6 balls, place them on a small baking sheet, and freeze them until solid (about 1 hour). Then transfer the frozen dough balls to a zip-top bag and store them in the freezer for up to 3 months. When you’re craving a single cookie, just bake one or two straight from the freezer, adding 1-2 minutes to the baking time. Fresh cookies in 12 minutes, anytime you want them. It’s dangerous knowledge, but I’m sharing it anyway.
Flavor Development: Honestly, these cookies taste even better the next day. The flavors meld together, and the texture becomes perfectly chewy all the way through. If you can resist eating them all on day one, you’re in for a treat on day two.
Nutritional Information & Benefits
Let’s be honest—these are cookies, not health food. But knowing what’s in them can help you enjoy them mindfully. Here’s the estimated nutritional breakdown for one cookie (based on 6 cookies per batch):
| Nutrient | Amount Per Cookie |
|---|---|
| Calories | 210 |
| Total Fat | 11g |
| Saturated Fat | 7g |
| Cholesterol | 45mg |
| Sodium | 150mg |
| Total Carbohydrates | 27g |
| Dietary Fiber | 1g |
| Sugars | 17g |
| Protein | 3g |
While these aren’t exactly a health food, there are a few bright spots. The butter provides vitamin A and healthy fats (in moderation, of course). Dark chocolate chips contain antioxidants called flavonoids, which have been linked to heart health. And if you use dark chocolate with a high cacao percentage, you’ll get even more of those benefits with less sugar.
For those with dietary considerations: This recipe contains gluten, dairy, and eggs. For a gluten-free version, see the variations section above. For a dairy-free version, use vegan butter and dairy-free chocolate chips. The egg yolk can be replaced as noted in the vegan option, though the texture will be slightly different.
My personal philosophy? These are a treat, meant to be enjoyed without guilt. One batch makes six cookies—that’s six moments of pure happiness. And honestly, that’s worth every calorie.
Conclusion
These quick small-batch chocolate chip cookies have become my go-to for so many reasons. They’re fast, they’re simple, and they deliver that perfect combination of crispy edges and soft, chewy centers that we all crave. But more than that, they represent something I think we all need more of: permission to enjoy something small and wonderful without overcommitting.
Whether you’re baking for yourself on a quiet Tuesday night, surprising your partner with a warm treat, or teaching a kid how to make their first batch of cookies, this recipe works. It’s forgiving, it’s adaptable, and it’s honestly just delicious. I’ve made it for myself more times than I can count, and every single time, those first few bites make me smile.
I’d love to hear how these turn out for you. Did you add your own twist? Did you manage to save any for the next day? Drop a comment below and let me know—I read every single one. And if you loved this recipe, share it with a friend who could use a little cookie magic in their life. After all, the best recipes are the ones we pass along.
Happy baking, my friend. You’ve got this.
Frequently Asked Questions
Can I use a whole egg instead of just the yolk?
Yes, you can use one whole egg instead of just the yolk, but the texture will be slightly different. The cookies will be a bit cakier and less chewy because egg whites add moisture and structure. If you’re doubling the recipe, using one whole egg plus one yolk gives you the best of both worlds.
Why did my cookies spread too much?
This usually happens for a few reasons: your butter was too warm when you mixed it, you used too little flour, or your baking sheet was too hot. Make sure your melted butter has cooled for a few minutes before adding the other ingredients. Also, double-check your flour measurement—spoon and level it rather than scooping directly. If your baking sheet is still warm from a previous batch, let it cool completely before adding new dough.
Can I make these cookies without an electric mixer?
Absolutely! This recipe is designed to be made by hand. A whisk for the wet ingredients and a rubber spatula for the dry ingredients are all you need. No stand mixer or hand mixer required. That’s part of what makes this recipe so quick and easy.
How do I know when the cookies are done baking?
The edges should be golden brown and the centers should look slightly soft and puffy. They will continue to set on the hot baking sheet for the first 5 minutes after you take them out of the oven. If you’re unsure, err on the side of underbaking—slightly underdone cookies are delicious, but overbaked cookies are dry and crumbly.
Can I use margarine instead of butter?
You can, but the results won’t be the same. Margarine has a higher water content than butter, which can make the cookies spread more and become greasy. If you need a dairy-free option, I recommend using a high-quality vegan butter stick (not the spreadable kind in a tub) for the best results. Butter gives the best flavor and texture by far.
Pin This Recipe!
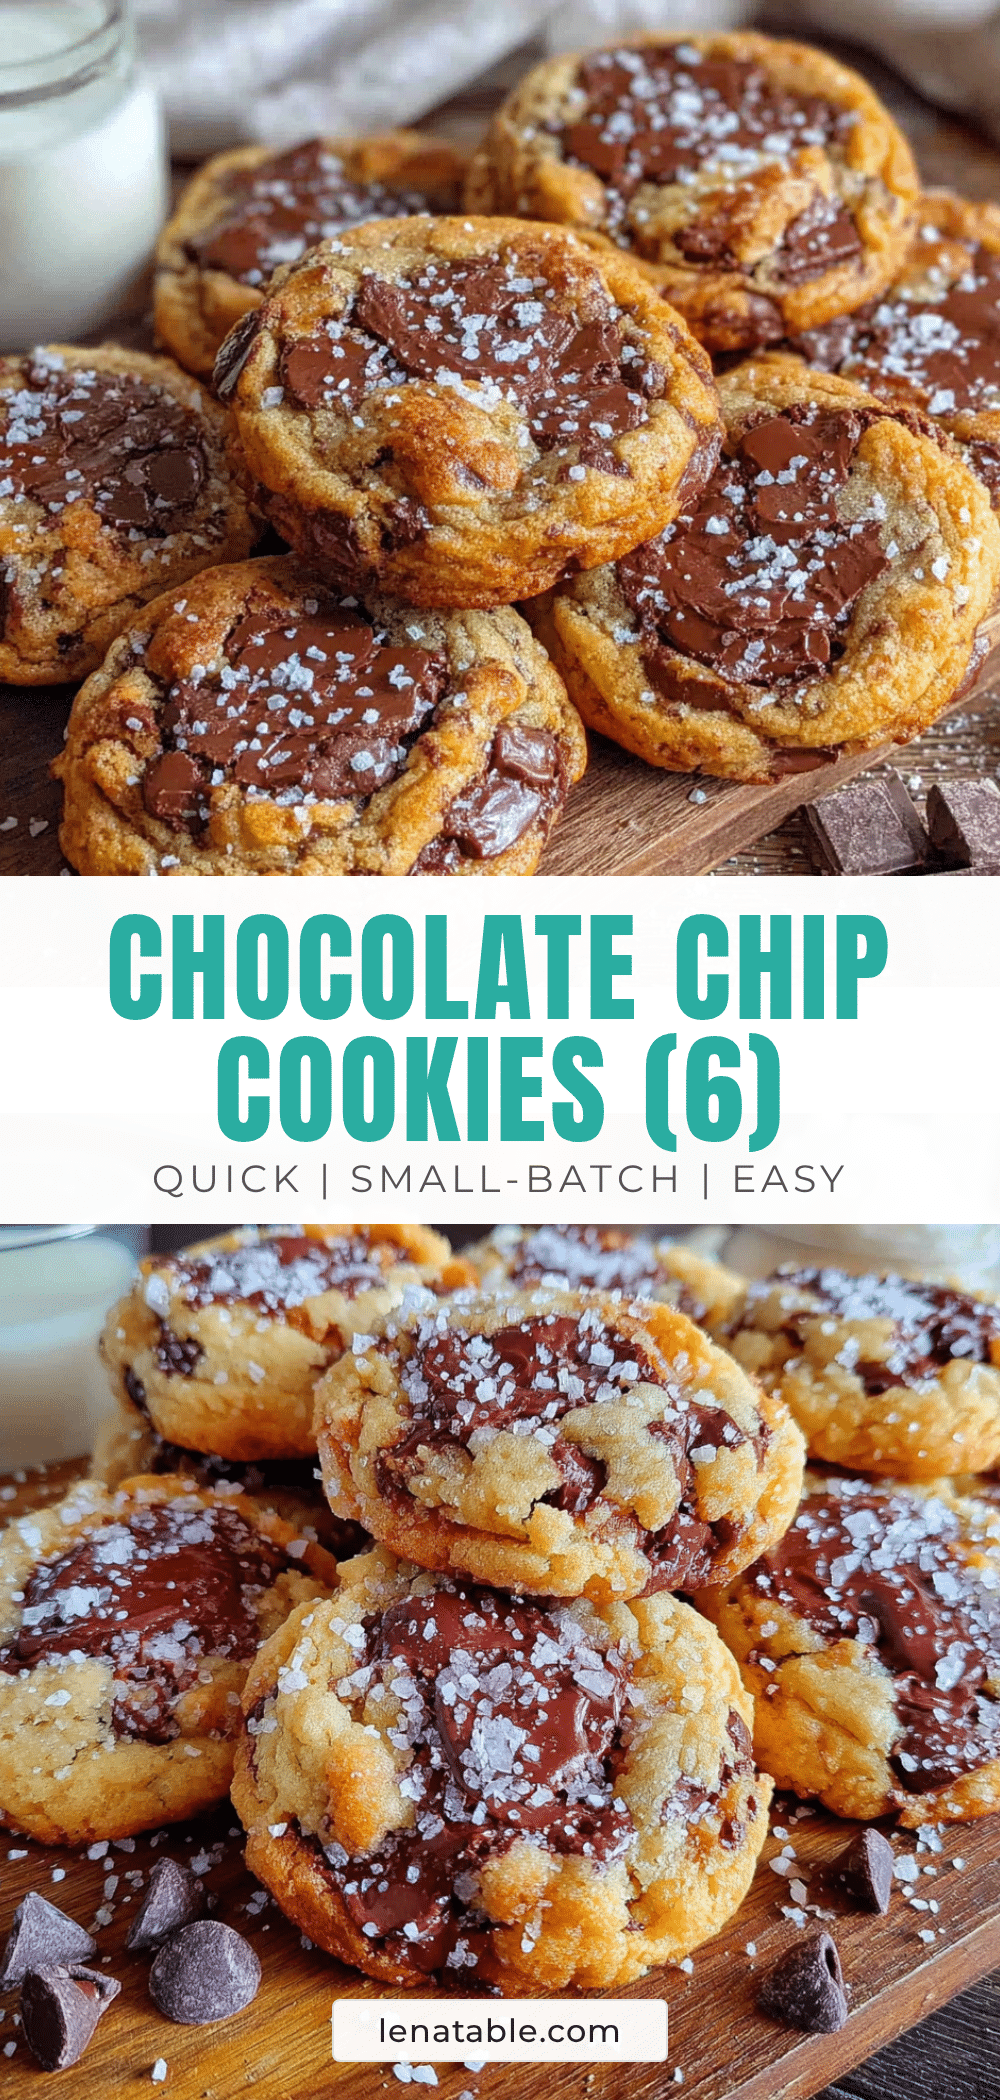
Make 6 Perfect Small-Batch Chocolate Chip Cookies

A quick and easy recipe for exactly six perfect chocolate chip cookies, with crispy edges and soft, chewy centers. Made with simple ingredients and ready in about 20 minutes, it’s ideal for small households or late-night cravings.
- Prep Time: 10 minutes
- Cook Time: 10 minutes
- Total Time: 20 minutes
- Yield: 6 cookies 1x
- Category: Dessert
- Cuisine: American
Ingredients
- 4 tablespoons unsalted butter, melted and slightly cooled
- 1/4 cup granulated sugar
- 1/4 cup packed light brown sugar
- 1 large egg yolk, room temperature
- 1/2 teaspoon vanilla extract
- 3/4 cup all-purpose flour, spooned and leveled
- 1/4 teaspoon baking soda
- 1/4 teaspoon salt
- 1/3 cup semi-sweet chocolate chips, plus extra for topping
Instructions
- Preheat your oven to 350°F (175°C). Line a small baking sheet with parchment paper or a silicone baking mat.
- Melt the butter in a microwave-safe bowl in 15-second bursts or in a small saucepan over low heat. Let it cool for 2-3 minutes until warm but not hot.
- In a mixing bowl, combine the melted butter, granulated sugar, and brown sugar. Whisk vigorously for about 30 seconds until smooth and slightly thickened.
- Add the room-temperature egg yolk and vanilla extract. Whisk until fully combined and glossy, about 20 seconds.
- In a small bowl, whisk together the flour, baking soda, and salt.
- Add the flour mixture to the butter mixture. Fold gently with a rubber spatula or wooden spoon just until no streaks of flour remain (10-15 strokes). Do not overmix.
- Fold in the chocolate chips until evenly distributed. Reserve 6-8 chips to press onto the tops of the cookies before baking.
- Scoop 6 equal portions of dough (about 1.5 tablespoons each) onto the prepared baking sheet, spacing them about 2 inches apart. Press reserved chocolate chips onto the tops.
- Bake for 9-11 minutes, until edges are golden brown and centers are still slightly soft and puffy. For chewier cookies, bake 9 minutes; for crispier, bake 11 minutes.
- Let the cookies rest on the baking sheet for 5 minutes, then transfer to a cooling rack or plate.
Notes
For thicker, chewier cookies, let the portioned dough rest in the fridge for 15-20 minutes before baking. If using a toaster oven, check after 7 minutes and rotate the pan halfway through. Store leftovers in an airtight container at room temperature for up to 3 days; place a slice of bread in the container to keep them soft. Dough balls can be frozen for up to 3 months and baked straight from the freezer, adding 1-2 minutes to the baking time.
Nutrition
- Serving Size: 1 cookie
- Calories: 210
- Sugar: 17
- Sodium: 150
- Fat: 11
- Saturated Fat: 7
- Carbohydrates: 27
- Fiber: 1
- Protein: 3
Keywords: small batch chocolate chip cookies, easy chocolate chip cookies, quick cookies, 6 cookies, one bowl cookies