Love this? Save it for later!
Share the inspiration with your friends
The neighborhood block party was in six hours and I had completely forgotten. Everyone else would be bringing their signature dishes—the kind people talk about for months. My neighbor Sarah was famous for her twice-baked potatoes. Across the street, the Johnsons always showed up with those mini quiches that disappeared in minutes. And me? I had a jar of active sourdough starter in my fridge, some bread flour, and a rosemary bush that was practically taking over my herb garden. Honestly, I almost didn’t go. But my husband gave me that look—the one that says “you have to bring something.” So I did what any reasonable person would do when panic sets in: I decided to make focaccia. With sourdough. In a few hours. Let me tell you, I was not confident about this at all.
I’d been maintaining my starter for about eight months at that point, but I’d never tried anything this ambitious on a time crunch. The dough came together in a sticky, shaggy mess that I was sure would never turn into anything edible. I stretched and folded it on my kitchen counter while the afternoon sun streamed through the window, casting shadows across my flour-dusted hands. At one point I knocked over my salt cellar—a ceramic owl my sister gave me—and spent five minutes picking salt crystals out of the dough. Maybe you’ve been there, that moment when you’re sure you’ve ruined everything but you just keep going because stopping isn’t an option.
I brought it to the party warm, still in the cast iron skillet I’d baked it in, with extra rosemary and flaky sea salt glistening on top. People actually stopped mid-conversation when I set it down. That focaccia with its golden, craggy surface and pillowy interior full of air pockets that caught pools of olive oil—it didn’t last ten minutes. And the funny thing is, I keep making it. Not because it won that block party, but because it taught me something about trusting the process. This sourdough focaccia recipe is now my go-to for everything from lazy Sunday afternoons to last-minute dinner parties. It’s forgiving, it’s beautiful, and it tastes like something you spent all day on—even when you didn’t.
Why You’ll Love This Recipe
Let’s be real for a second. There are a million focaccia recipes out there, so why should this one earn a permanent spot in your rotation? I’ve tested this sourdough focaccia recipe more times than I can count—probably close to thirty batches over the past year. I’ve made it in humid summers and dry winters, with young starters and mature ones, in glass pans and cast iron skillets. What I’ve learned is that this particular method produces consistently incredible results without requiring a culinary degree or a perfectly maintained sourdough starter.
- Quick & Easy: Don’t let the sourdough scare you. This comes together with about 15 minutes of active work. The rest is just waiting—and that waiting does all the heavy lifting for you.
- Simple Ingredients: Flour, water, salt, olive oil, your sourdough starter, rosemary, and sea salt. That’s it. No fancy grocery store trips required.
- Perfect for Any Occasion: Serve it alongside pasta for dinner, tear it apart for appetizers at a gathering, or eat it straight from the pan for breakfast with your coffee. I’ve done all three, no judgment here.
- Crowd-Pleaser: I’ve brought this to potlucks, holiday dinners, and casual get-togethers. It disappears every single time. Kids love the texture, adults love the flavor.
- Unbelievably Delicious: The combination of tangy sourdough, fruity olive oil, fragrant rosemary, and crunchy sea salt creates something genuinely addictive. The texture is what gets people—crispy on the bottom, chewy in the middle, with those irregular air pockets that make each bite slightly different.
What makes this sourdough focaccia recipe different from the rest is the technique. Instead of trying to rush the fermentation, we use a stretch-and-fold method during the first few hours that builds structure without knocking out all the gas bubbles. The long, cold proof in the refrigerator develops that signature sourdough tang while making the dough easier to handle. And the high hydration—around 85%—creates those gorgeous, irregular air pockets that make focaccia so satisfying to tear into. This isn’t just another bread recipe; it’s the one I turn to when I want to feel like a professional baker without actually having to be one.
What Ingredients You Will Need
This sourdough focaccia recipe uses simple, wholesome ingredients that work together to create something far greater than the sum of their parts. The magic happens through technique and time, not through a long list of hard-to-find items. Here’s everything you’ll need:
For the Dough
- Bread flour, 500 grams (about 4 cups) – I prefer King Arthur Bread Flour for its higher protein content, which gives the focaccia better structure and chew. All-purpose flour works in a pinch, but the texture won’t be quite as satisfying.
- Active sourdough starter, 150 grams (about ¾ cup) – Your starter should be bubbly and doubled in size, fed 4-8 hours before you start. A hungry starter won’t give you the same rise or flavor.
- Warm water, 400 grams (about 1¾ cups) – Aim for around 80°F (27°C). Too hot and you’ll kill the beneficial bacteria in your starter; too cold and fermentation will take forever.
- Extra-virgin olive oil, 60 grams (about ¼ cup) plus more for the pan – Use good quality here. This is a simple bread, and the olive oil flavor really comes through. I like California Olive Ranch for everyday baking.
- Fine sea salt, 10 grams (about 2 teaspoons) – I use fine sea salt for the dough because it dissolves more evenly than kosher salt. Don’t skip the salt—it controls fermentation and adds essential flavor.
For the Topping
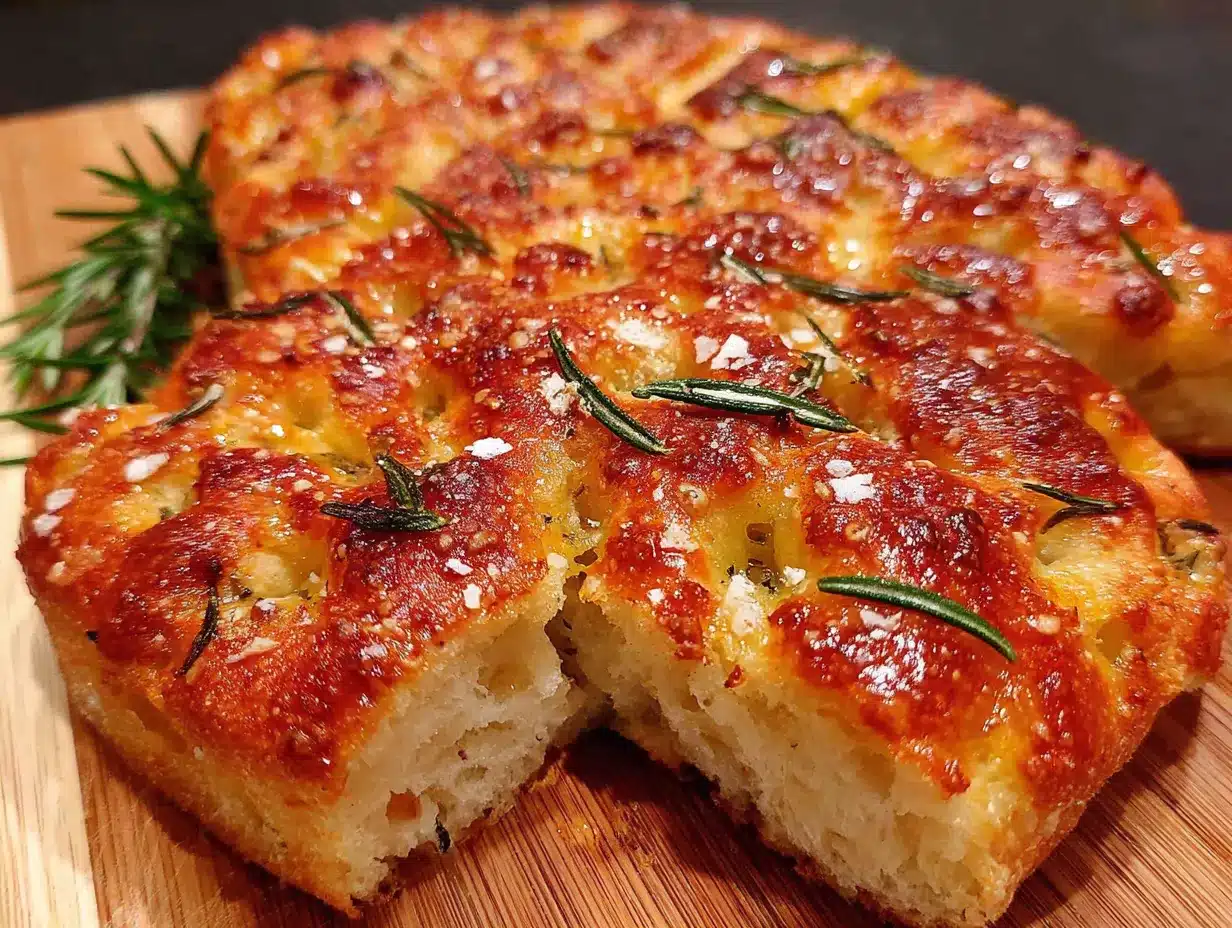
- Fresh rosemary, 2-3 sprigs, leaves removed and roughly chopped – Dried rosemary works if that’s what you have, but fresh gives a much more vibrant, aromatic flavor that really shines in this bread.
- Flaky sea salt, such as Maldon, about 1 tablespoon – This is non-negotiable in my opinion. The delicate crunch and burst of saltiness on top of the golden crust is what makes this focaccia unforgettable.
- Extra-virgin olive oil, 2-3 tablespoons for drizzling – Be generous here. The oil pools in the dimples you’ll make in the dough and creates those crispy, caramelized edges.
A quick note on substitutions: If you’re dairy-free, you’re already in luck—this recipe contains no dairy. For a gluten-free version, I’d recommend using a gluten-free bread flour blend, though I’ll be honest, the texture won’t be quite the same. If you don’t have fresh rosemary, try dried thyme or oregano instead, or even everything bagel seasoning for a fun twist. And if you don’t have a sourdough starter yet, you can use 1 teaspoon of active dry yeast mixed with the warm water and let it sit for 5 minutes before proceeding—but then it won’t be sourdough, will it?
Equipment Needed
One of the things I love about this sourdough focaccia recipe is that it doesn’t require a lot of fancy equipment. Here’s what you’ll actually need:
- Large mixing bowl – I use a stainless steel bowl, but glass or ceramic work just fine. You want something big enough that the dough has room to grow.
- Digital kitchen scale – This is the one piece of equipment I’d strongly recommend buying if you don’t have one. Baking by weight is so much more accurate than measuring by volume, especially with sourdough where hydration matters. A simple OXO scale costs about $20 and will last for years.
- Bench scraper – Not strictly necessary, but it makes handling the sticky dough so much easier. A plastic dough scraper costs around $5 and saves you from getting dough all over your hands.
- 9×13-inch baking pan or 10-inch cast iron skillet – I prefer a metal baking pan for the crispiest bottom crust. Glass pans work too, but they don’t conduct heat as well. Cast iron gives you amazing heat retention and a gorgeous crust.
- Plastic wrap or a damp kitchen towel – For covering the dough during proofing. I use reusable beeswax wrap now, but plastic wrap works perfectly.
- Cooling rack – Essential for letting the focaccia cool without getting soggy on the bottom. If you don’t have one, you can prop the pan up on its side, but a rack is better.
That’s really it. No stand mixer, no bread machine, no proofing basket. Just your hands, some patience, and a few basic kitchen tools.
Preparation Method
Making this sourdough focaccia is a two-day process, but don’t let that intimidate you. The active work is minimal—maybe 15 minutes total. The rest is just waiting for the dough to do its thing. Here’s how it works:
Day 1: Mix and Bulk Fermentation
- Mix the dough. In your large mixing bowl, combine 400 grams of warm water with 150 grams of active sourdough starter. Stir until the starter is mostly dissolved—it doesn’t need to be perfect. Add 500 grams of bread flour and mix with your hands or a dough whisk until no dry flour remains. The dough will be shaggy and sticky. Cover the bowl with plastic wrap or a damp towel and let it rest for 30 minutes. This is called autolyse, and it gives the flour time to absorb the water and start developing gluten naturally.
- Add the salt and oil. After the rest, sprinkle 10 grams of fine sea salt over the dough and drizzle in 60 grams of olive oil. Use your fingers to pinch and squeeze the salt and oil into the dough until it’s evenly incorporated. It will feel messy and slippery at first, but keep going—it comes together after a minute or two.
- Stretch and fold. This is the most important technique in this recipe. With wet hands (trust me, this helps), grab one side of the dough, stretch it up as far as it will go without tearing, and fold it over the top. Rotate the bowl a quarter turn and repeat. Do this four times total, so you’ve stretched and folded from all four sides. Cover the bowl and let it rest for 30 minutes.
- Repeat the stretch and fold. Do another round of four stretch-and-folds, again with wet hands. Cover and rest for 30 minutes. You’ll do this a total of 4-6 times over the next 2-3 hours. By the last round, you should notice the dough feeling smoother, stronger, and more elastic. It’s starting to hold its shape instead of just being a sticky puddle.
- Cold proof overnight. After the final stretch and fold, cover the bowl tightly with plastic wrap and place it in the refrigerator. Let it ferment slowly for 12-18 hours. This overnight rest develops the sourdough flavor and makes the dough much easier to handle. I usually do this step in the evening and come back to it the next morning.
Day 2: Shaping, Final Proof, and Baking
- Prepare your pan. The next morning, pour about 2 tablespoons of olive oil into your 9×13-inch baking pan. Use your fingers to spread it all over the bottom and sides. This isn’t just for flavor—it prevents the dough from sticking and helps create that crispy, golden crust.
- Transfer the dough. Gently coax the cold dough out of the bowl and into the oiled pan. It will be cold and somewhat stiff, which is exactly what you want. Don’t try to stretch it to the edges yet—just plop it in the center.
- Let it warm up and relax. Cover the pan with plastic wrap or a damp towel and let it sit at room temperature for 1 hour. The dough will slowly warm up and become more pliable. After an hour, use your fingertips to gently press the dough toward the edges of the pan. If it resists, let it rest another 30 minutes and try again. Be patient—pushing too hard will deflate all those beautiful air bubbles you’ve been building.
- Final proof. Once the dough is evenly spread in the pan, cover it again and let it proof at room temperature for 2-3 hours, or until it looks puffy and has nearly doubled in height. The time depends on your kitchen temperature—in a warm kitchen it might only take 2 hours; in a cooler one it could take 3 or more. Look for visual cues, not the clock.
- Dimple the dough. This is the fun part. Generously drizzle 2-3 tablespoons of olive oil over the surface of the dough. Then, using your fingertips, press straight down into the dough to create deep dimples across the entire surface. Don’t be shy—you want those wells to hold pools of oil and create the classic focaccia texture. The dough will deflate a bit, and that’s fine.
- Add the toppings. Sprinkle the chopped fresh rosemary evenly over the dimpled surface. Finish with a generous sprinkle of flaky sea salt—about 1 tablespoon. The salt should be visible and scattered, not clumped in one spot.
- Bake. Place the pan in a cold oven, then set the temperature to 425°F (218°C). Baking from a cold start gives the dough a final burst of oven spring as it heats up. Bake for 25-30 minutes, until the top is deep golden brown and the edges look crispy and caramelized. If you want an extra-dark crust, you can bake for another 3-5 minutes, but watch it closely.
- Cool. Remove the pan from the oven and let the focaccia cool in the pan for 5 minutes. Then transfer it to a wire rack (or just slide it out onto a cutting board) to cool for at least 15 minutes before cutting. I know it’s tempting to dig in immediately, but letting it cool sets the structure and improves the texture.
Cooking Tips & Techniques
After making this sourdough focaccia dozens of times, I’ve learned a few things the hard way. Here are the tips that will save you from my mistakes:
Use a young starter. For focaccia, I actually prefer my starter when it’s been fed about 4-6 hours before mixing—when it’s active and bubbly but hasn’t peaked yet. A very ripe starter can make the dough overly sour and weaken the gluten structure. If your starter smells strongly of acetone, it’s probably too hungry. Feed it and wait a few hours before using it.
Don’t skip the stretch and folds. I know it seems repetitive, but those stretch-and-fold sessions are what build the gluten network that traps gas and creates those beautiful air pockets. I once tried to rush this step and ended up with a flat, dense focaccia that was more like a cracker than bread. Take the time—your patience will be rewarded.
Wet hands are your friend. Sourdough dough at 85% hydration is sticky. Like, really sticky. Keep a small bowl of water nearby and wet your hands before every stretch and fold. It prevents the dough from sticking to you and makes the process so much less frustrating. I learned this after spending ten minutes trying to scrape dough off my fingers with a spatula.
Trust the visual cues. Every kitchen is different. My oven runs hot, yours might run cool. My kitchen is drafty in winter, yours might be toasty year-round. Instead of relying strictly on times, learn to read the dough. It should look puffy, jiggly, and full of tiny bubbles on the surface before baking. The finished focaccia should sound hollow when you tap the bottom.
Let it cool properly. This is the hardest tip to follow, but it’s crucial. Cutting into hot focaccia releases steam that makes the interior gummy. Give it at least 15-20 minutes on a cooling rack. The crust will stay crisp, the interior will set properly, and the flavors will be more pronounced. I’ve ruined more than one batch by being impatient.
Variations & Adaptations
One of the best things about this sourdough focaccia recipe is how adaptable it is. Here are some variations I’ve tried and loved:
Herb and Garlic Focaccia. Skip the rosemary and instead infuse your olive oil with 3-4 crushed garlic cloves for an hour before using it. Sprinkle the top with dried oregano, thyme, and a pinch of red pepper flakes. This version is incredible alongside any Italian dish.
Everything Bagel Focaccia. After dimpling the dough, sprinkle it generously with everything bagel seasoning—poppy seeds, sesame seeds, dried garlic, dried onion, and salt. This has become my husband’s favorite variation. It’s perfect for breakfast with cream cheese or as a sandwich bread.
Roasted Tomato and Olive Focaccia. Press halved cherry tomatoes and pitted Kalamata olives into the dimpled dough before baking. The tomatoes roast and caramelize in the oven, creating little pockets of sweetness. Add a sprinkle of fresh basil after baking for a Mediterranean twist.
Cheese Lover’s Focaccia. Sprinkle ½ cup of grated Parmesan or crumbled feta over the dough after dimpling. If you’re feeling indulgent, add some cubes of mozzarella too. Just be aware that cheese can make the bottom crust less crispy, so you might need to bake it a few minutes longer.
Whole Wheat Version. Substitute 200 grams of the bread flour with whole wheat flour. The texture will be denser and the flavor nuttier, but it’s still delicious. You might need to add an extra 25 grams of water since whole wheat flour absorbs more liquid.
I once made a batch with caramelized onions and fresh thyme for a friend’s birthday party, and people were literally fighting over the last piece. Don’t be afraid to experiment—focaccia is forgiving and rewards creativity.
Serving & Storage Suggestions
This sourdough focaccia is best served warm, within an hour or two of baking. The contrast between the crispy, oil-crusted exterior and the soft, airy interior is at its peak when it’s fresh. Here’s how I like to serve it:
As a side dish: Serve it alongside soups, stews, or pasta dishes. It’s perfect for sopping up every last drop of sauce. I especially love it with a big bowl of tomato basil soup or a hearty minestrone.
As an appetizer: Cut it into squares or strips and serve with a bowl of good olive oil mixed with balsamic vinegar for dipping. Add a side of olives and some prosciutto, and you’ve got an impressive antipasto platter with minimal effort.
For sandwiches: Slice the focaccia horizontally and use it as bread for sandwiches. The sturdy texture holds up well to fillings without getting soggy. My favorite is a simple caprese sandwich with fresh mozzarella, tomato, basil, and a drizzle of balsamic glaze.
Storage: If you have leftovers (unlikely, but possible), store them in an airtight container at room temperature for up to 2 days. Do not refrigerate—the cold will dry out the bread and make it stale faster. To reheat, pop it in a 350°F (175°C) oven for 5-7 minutes, or until warmed through and the crust crisps up again. You can also toast individual slices.
Freezing: This focaccia freezes beautifully. Wrap it tightly in plastic wrap, then in aluminum foil, and freeze for up to 3 months. To thaw, leave it at room temperature for about an hour, then reheat in a 350°F oven for 10 minutes. I often make a double batch and freeze one for later—it’s like having a secret weapon for unexpected guests.
One thing I’ve noticed is that the flavors actually develop more over the first day. The rosemary and olive oil meld together, and the sourdough tang becomes more pronounced. So if you can resist eating it all immediately, day-old focaccia is still absolutely delicious.
Nutritional Information & Benefits
While I wouldn’t call focaccia a health food, this sourdough version does have some nutritional advantages over commercial bread. The long fermentation process breaks down phytic acid, making the minerals in the flour more bioavailable. It also pre-digests some of the gluten, which can make it easier to digest for some people with mild sensitivities.
| Nutrient | Per Serving (1/8 of recipe) |
|---|---|
| Calories | 280 |
| Total Fat | 12g |
| Saturated Fat | 1.5g |
| Carbohydrates | 38g |
| Fiber | 2g |
| Protein | 7g |
| Sodium | 480mg |
The olive oil provides heart-healthy monounsaturated fats and antioxidants. Rosemary is rich in antioxidants and anti-inflammatory compounds. And the sourdough fermentation process produces beneficial lactic acid bacteria that support gut health. So while this bread is still a treat, it’s a treat that offers more than empty calories.
If you’re watching your sodium intake, you can reduce the flaky sea salt on top or omit it entirely. The dough itself contains a modest amount of salt that’s necessary for proper fermentation and structure.
Frequently Asked Questions
Can I use all-purpose flour instead of bread flour?
Yes, you can. The focaccia will still be delicious, but it won’t have quite the same chewy texture or height. Bread flour has more protein, which creates more gluten and gives the bread better structure. If you use all-purpose flour, you might want to reduce the water slightly to account for the lower protein absorption.
My dough is really sticky—is that normal?
Absolutely. This is a high-hydration dough, around 85%, which means it’s quite wet and sticky by design. That high water content is what creates those beautiful, irregular air pockets. Resist the urge to add more flour—instead, use wet hands when handling the dough and trust the stretch-and-fold process to develop the gluten.
Can I speed up the process and bake it the same day?
You can, but the flavor won’t be as complex. If you’re in a hurry, let the dough proof at room temperature for 6-8 hours instead of doing the overnight cold proof. The bread will still be good, but it will lack that distinctive sourdough tang. The overnight rest really is worth the wait.
Why didn’t my focaccia get those big air bubbles?
Several things could be happening. Your starter might not be active enough—it should be bubbly and doubled before you use it. You might be handling the dough too roughly during shaping, deflating the gas bubbles. Or your final proof might be too short. Give it more time and be gentler with the dough. Those bubbles come from patience and practice.
How do I know when my starter is ready to use?
A healthy, active starter should have doubled in size within 4-8 hours of feeding. It should look bubbly and frothy on top, with a pleasant tangy smell—not sour like vinegar or acetone. When you drop a spoonful into a glass of water, it should float. If it sinks, it needs more time or another feeding before you use it for baking.
Conclusion
If you’ve never made sourdough focaccia before, I hope this recipe gives you the confidence to try. It’s one of those rare breads that looks impressive but is actually incredibly forgiving—perfect for beginners and satisfying for experienced bakers alike. The combination of the tangy sourdough, fruity olive oil, fragrant rosemary, and crunchy sea salt creates something that feels special without requiring a full day in the kitchen.
What I love most about this recipe is how it slows me down. There’s something meditative about the stretch-and-fold process, about watching the dough transform over the course of a day. And that first bite, when you tear into that golden, crispy crust and find the soft, airy interior underneath—it’s genuinely rewarding. I’ve made this for birthday parties, quiet dinners, and lazy weekend mornings, and it never fails to bring a smile to people’s faces.
I’d love to hear how your focaccia turns out. Did you try a fun variation? Did you serve it with something amazing? Drop a comment below and let me know. And if you’re looking for more sourdough recipes to use up that starter, check out my sourdough discard crackers or my classic sourdough boule. Happy baking, friends!
Pin This Recipe!

Perfect Sourdough Focaccia Recipe: Best Easy Rosemary Bread
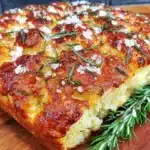
This easy sourdough focaccia recipe produces a golden, crispy crust with a pillowy interior full of air pockets. Made with simple ingredients and minimal active work, it’s perfect for any occasion and always a crowd-pleaser.
- Prep Time: 15 minutes
- Cook Time: 30 minutes
- Total Time: 12 hours 45 minutes (includes overnight proofing)
- Yield: 8 servings 1x
- Category: Bread
- Cuisine: Italian
Ingredients
- 500 grams (about 4 cups) bread flour
- 150 grams (about ¾ cup) active sourdough starter
- 400 grams (about 1¾ cups) warm water (80°F / 27°C)
- 60 grams (about ¼ cup) extra-virgin olive oil, plus more for the pan
- 10 grams (about 2 teaspoons) fine sea salt
- 2–3 sprigs fresh rosemary, leaves removed and roughly chopped
- 1 tablespoon flaky sea salt (such as Maldon)
- 2–3 tablespoons extra-virgin olive oil for drizzling
Instructions
- Mix the dough: In a large mixing bowl, combine 400 grams of warm water with 150 grams of active sourdough starter. Stir until the starter is mostly dissolved. Add 500 grams of bread flour and mix with your hands or a dough whisk until no dry flour remains. The dough will be shaggy and sticky. Cover the bowl with plastic wrap or a damp towel and let it rest for 30 minutes (autolyse).
- Add the salt and oil: After the rest, sprinkle 10 grams of fine sea salt over the dough and drizzle in 60 grams of olive oil. Use your fingers to pinch and squeeze the salt and oil into the dough until evenly incorporated.
- Stretch and fold: With wet hands, grab one side of the dough, stretch it up as far as it will go without tearing, and fold it over the top. Rotate the bowl a quarter turn and repeat. Do this four times total. Cover the bowl and let it rest for 30 minutes.
- Repeat the stretch and fold: Do another round of four stretch-and-folds, again with wet hands. Cover and rest for 30 minutes. Repeat this process a total of 4-6 times over the next 2-3 hours. By the last round, the dough should feel smoother, stronger, and more elastic.
- Cold proof overnight: After the final stretch and fold, cover the bowl tightly with plastic wrap and place it in the refrigerator. Let it ferment slowly for 12-18 hours.
- Prepare your pan: The next morning, pour about 2 tablespoons of olive oil into a 9×13-inch baking pan. Use your fingers to spread it all over the bottom and sides.
- Transfer the dough: Gently coax the cold dough out of the bowl and into the oiled pan. Don’t try to stretch it to the edges yet—just place it in the center.
- Let it warm up and relax: Cover the pan with plastic wrap or a damp towel and let it sit at room temperature for 1 hour. After an hour, use your fingertips to gently press the dough toward the edges of the pan. If it resists, let it rest another 30 minutes and try again.
- Final proof: Once the dough is evenly spread in the pan, cover it again and let it proof at room temperature for 2-3 hours, or until it looks puffy and has nearly doubled in height.
- Dimple the dough: Generously drizzle 2-3 tablespoons of olive oil over the surface of the dough. Then, using your fingertips, press straight down into the dough to create deep dimples across the entire surface.
- Add the toppings: Sprinkle the chopped fresh rosemary evenly over the dimpled surface. Finish with a generous sprinkle of flaky sea salt—about 1 tablespoon.
- Bake: Place the pan in a cold oven, then set the temperature to 425°F (218°C). Bake for 25-30 minutes, until the top is deep golden brown and the edges look crispy and caramelized.
- Cool: Remove the pan from the oven and let the focaccia cool in the pan for 5 minutes. Then transfer it to a wire rack to cool for at least 15 minutes before cutting.
Notes
Use a young starter (fed 4-6 hours before mixing) for best results. Don’t skip the stretch and folds—they build gluten structure. Wet hands make handling sticky dough easier. Trust visual cues over strict times. Let the focaccia cool properly before cutting to avoid a gummy interior.
Nutrition
- Serving Size: 1/8 of recipe
- Calories: 280
- Sodium: 480
- Fat: 12
- Saturated Fat: 1.5
- Carbohydrates: 38
- Fiber: 2
- Protein: 7
Keywords: sourdough focaccia, easy focaccia, rosemary bread, sourdough bread, homemade bread, Italian bread