Love this? Save it for later!
Share the inspiration with your friends
The fall bake sale was in twelve hours and I’d completely forgotten. Everyone else would be bringing those perfectly decorated pies with the crimped crusts and the lattice tops, the kind that look like they belong on a magazine cover. I had a half-can of pumpkin puree, a block of cream cheese that was about to expire, and a vague memory of a cookie I’d seen on the internet where you drag a toothpick through chocolate to make a spiderweb. Honestly, I was already mentally preparing my apology.
I called my neighbor, a woman named Carol who runs a small catering business out of her home. “Carol, I’m in trouble. I need a dessert that looks like I tried, but I have zero time and half the ingredients.” She laughed. “You’ve got pumpkin and cream cheese? Make the spiderweb bars. They look fancy, but they’re a cheat code.” She rattled off the proportions from memory, told me to use a butter knife for the web if I didn’t have a toothpick, and hung up before I could ask what “swirling” actually meant.
The power went out halfway through the first bake—just a flicker, but long enough to reset my oven timer. I had to guess the remaining time by the color of the edges. When I pulled them out, the top was slightly cracked and the spiderweb looked more like a confused scribble. I almost threw the whole pan in the trash. But I didn’t have time to start over, so I sliced them into bars, arranged them on a paper plate, and walked into that bake sale with my head down.
They were gone in twenty minutes. A woman I’d never met grabbed my arm and said, “You have to give me the recipe for those pumpkin cheesecake bars. That was the best thing here.” Maybe you’ve been there—that moment where the thing you almost gave up on becomes the thing everyone wants. That’s exactly how these Perfect Spiderweb Pumpkin Cheesecake Bars became my fall go-to. They look like you spent hours, but honestly, the hardest part is waiting for them to cool.
Why You’ll Love This Recipe
Let me tell you why these pumpkin cheesecake bars are different from every other fall dessert you’ve tried. I’ve tested this recipe about seven times now—once with low-fat cream cheese (don’t do it), once with a gluten-free crust (surprisingly good), and once when I forgot the sugar entirely (we don’t talk about that). Each trial taught me something, and this version is the result of all those little failures.
Here’s what makes these bars stand out:
- Quick & Easy: From start to oven in about 20 minutes. No water bath, no complicated folding, no tempering eggs. If you can stir, you can make these.
- Simple Ingredients: You probably have most of this in your pantry right now. The only “special” item is pumpkin puree, and that’s a fall staple anyway.
- Perfect for Fall Gatherings: These are my go-to for Thanksgiving potlucks, Halloween parties, and even those random Tuesday nights when you need something sweet.
- Crowd-Pleaser: I’ve watched kids who swear they hate pumpkin go back for seconds. The cream cheese layer is the secret weapon here—it mellows out the pumpkin flavor just enough.
- Unbelievably Delicious: The texture is what gets me every time. The crust stays buttery and crisp, the pumpkin layer is silky, and the cheesecake swirl is this creamy little surprise in every bite.
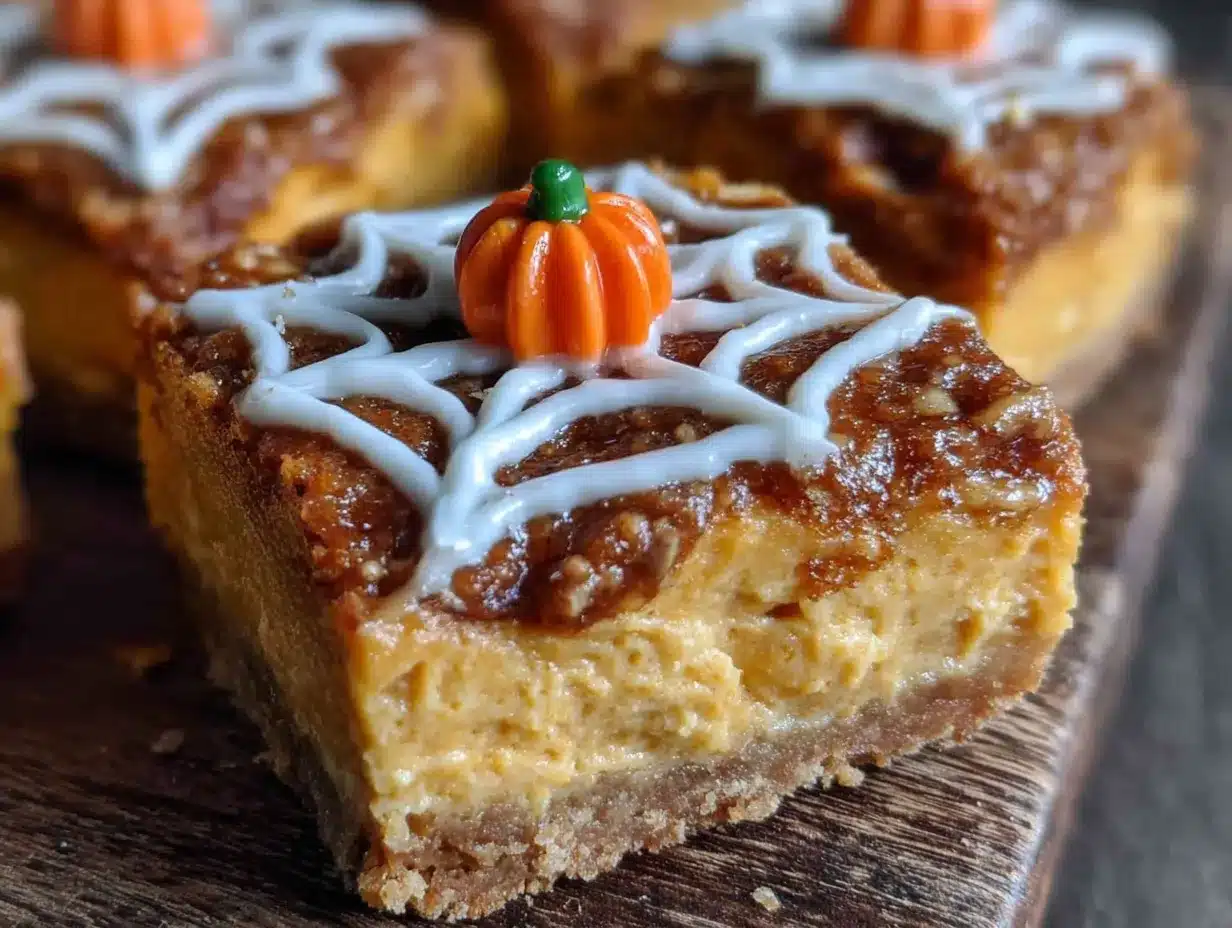
The trick that makes this recipe special is the way the spiderweb is created. Instead of using a piping bag (who has time to clean those?), you drop spoonfuls of cheesecake mixture onto the pumpkin layer and drag a knife through it. It sounds too simple, but the result is this gorgeous pattern that looks like you spent an hour on it. It’s comfort food with a little drama—the kind of dessert that makes people close their eyes after the first bite.
This isn’t just another pumpkin bar recipe. It’s the one you’ll make every year, the one people will ask for, the one that makes you look like a baking hero when really you just followed a few simple steps.
What Ingredients You Will Need
This recipe uses simple, wholesome ingredients to deliver that perfect balance of pumpkin spice and creamy cheesecake without any fuss. Most of these are pantry staples, especially if you do any fall baking.
For the Crust
- 1 ½ cups graham cracker crumbs (about 12 full sheets, crushed fine—I use a rolling pin and a zip-top bag)
- ¼ cup granulated sugar
- 6 tablespoons unsalted butter, melted (adds richness and helps the crust hold together)
- Pinch of salt (balances the sweetness)
For the Pumpkin Layer
- 1 can (15 oz) pumpkin puree (not pumpkin pie filling—make sure it’s 100% pure pumpkin; I prefer Libby’s for consistent texture)
- ½ cup granulated sugar
- ¼ cup packed light brown sugar
- 2 large eggs, room temperature
- ½ cup heavy cream (or full-fat coconut milk for a dairy-free option)
- 1 teaspoon vanilla extract
- 1 ½ teaspoons pumpkin pie spice (or 1 teaspoon cinnamon + ½ teaspoon ginger + ¼ teaspoon nutmeg + ¼ teaspoon cloves)
- ¼ teaspoon salt
For the Cheesecake Swirl (The Spiderweb)
- 8 oz cream cheese, softened to room temperature (use full-fat for best texture—low-fat gets grainy)
- ¼ cup granulated sugar
- 1 large egg yolk
- ½ teaspoon vanilla extract
A quick note on ingredient selection: Look for cream cheese that’s fresh and not near its expiration date. Older cream cheese can develop a slightly sour taste that throws off the whole dessert. For the pumpkin puree, I’ve tested this with store-brand and Libby’s, and Libby’s gives a smoother, less watery result. If you use a different brand, you might need to drain off any excess liquid before mixing.
For substitutions, you can swap the graham crackers with crushed digestive biscuits or even shortbread cookies for a different flavor profile. If you’re gluten-free, use gluten-free graham crackers or almond flour mixed with a little butter and sugar. The pumpkin layer is naturally gluten-free, so just watch the crust.
Equipment Needed
You don’t need a fancy kitchen to make these pumpkin cheesecake bars work. Here’s what you’ll actually use:
- 9×9-inch baking pan (an 8×8 works too, but the bars will be slightly thicker and need a few extra minutes in the oven)
- Parchment paper (non-negotiable—it makes lifting the bars out so much easier; leave a 2-inch overhang on two sides)
- Mixing bowls (one large, one medium, one small)
- Whisk and spatula (a rubber spatula is best for scraping every bit of that cheesecake mixture)
- Rolling pin or food processor (for crushing graham crackers; I’ve used a wine bottle in a pinch)
- Toothpick or butter knife (for creating the spiderweb pattern)
- Measuring cups and spoons
If you don’t have a 9×9 pan, you can use a 9-inch pie dish or even a small cast-iron skillet—just adjust the baking time and keep an eye on it. I’ve also made these in a 9×13 pan for thinner bars, and they work great for parties where you need more servings.
One tip I learned the hard way: use a metal pan, not glass. Glass pans hold heat longer and can overbake the edges before the center is set. A light-colored metal pan gives you the most even results.
Preparation Method
This is where the magic happens. Follow these steps, and you’ll have a pan of the most beautiful spiderweb pumpkin cheesecake bars you’ve ever seen.
Step 1: Preheat and Prep the Pan
Preheat your oven to 350°F (175°C). Line your 9×9-inch baking pan with parchment paper, leaving an overhang on two opposite sides. This will be your handle to lift the bars out later. Lightly spray the parchment with non-stick spray just to be safe.
Step 2: Make the Crust
In a medium bowl, combine 1 ½ cups graham cracker crumbs, ¼ cup granulated sugar, and a pinch of salt. Pour in 6 tablespoons melted butter and stir with a fork until the mixture looks like wet sand and holds together when you squeeze it. Press this mixture firmly into the bottom of your prepared pan. Use the bottom of a measuring cup to really pack it down—a loose crust will fall apart when you cut the bars. Bake for 10 minutes, then set aside to cool slightly. Leave the oven on.
Step 3: Make the Pumpkin Layer
In a large bowl, whisk together ½ cup granulated sugar and ¼ cup light brown sugar. Add 2 large eggs and whisk until smooth and slightly pale, about 1 minute. Add 1 can pumpkin puree, ½ cup heavy cream, 1 teaspoon vanilla, 1 ½ teaspoons pumpkin pie spice, and ¼ teaspoon salt. Whisk until everything is completely combined and silky. Don’t overmix—just until you don’t see any streaks. Pour this mixture over the pre-baked crust and spread it evenly with a spatula.
Step 4: Make the Cheesecake Swirl
In a small bowl, beat 8 oz softened cream cheese with ¼ cup granulated sugar until smooth and creamy. Add 1 egg yolk and ½ teaspoon vanilla and mix until just combined. You should have a thick, spreadable mixture with no lumps. If your cream cheese wasn’t fully softened, you’ll get tiny white flecks—it still tastes fine, but it won’t look as pretty.
Step 5: Create the Spiderweb Pattern
Here’s the fun part. Drop spoonfuls of the cheesecake mixture randomly over the pumpkin layer—about 8 to 10 dollops, spaced evenly. Don’t spread them. Take a butter knife or a toothpick and drag it through the dollops in a swirling motion. Start from the center and work your way out, or just make random swoops. The goal is to create those classic spiderweb lines. If you mess up, just swirl a few more times—it always looks good. I promise.
Step 6: Bake
Bake at 350°F (175°C) for 35 to 40 minutes. The edges should look set and slightly puffed, but the center will still jiggle a little when you shake the pan. That’s perfect—it will set as it cools. If the center looks liquid, give it 5 more minutes. Every oven is different, so trust the jiggle test over the timer.
Step 7: Cool and Chill
Let the bars cool on a wire rack for 1 hour at room temperature. Then transfer the pan to the refrigerator and chill for at least 3 hours, preferably overnight. This is the hardest step, I know. But if you cut them while they’re warm, you’ll get a messy puddle instead of clean bars. The chilling time is what gives you those perfect, Instagram-worthy slices.
Once chilled, lift the bars out using the parchment overhang. Place on a cutting board and slice into 16 squares. For clean cuts, wipe your knife between each slice with a damp paper towel.
Cooking Tips & Techniques
I’ve made this recipe more times than I care to admit, and I’ve collected a few lessons along the way. Here’s what I wish someone had told me the first time.
Don’t overmix the pumpkin layer. Overmixing incorporates too much air, which can cause cracks on the surface. You want a smooth, dense texture, not a fluffy one. Whisk just until the ingredients come together.
Room temperature ingredients matter. I know it’s annoying to wait for cream cheese and eggs to warm up, but cold cream cheese creates lumps that won’t smooth out no matter how hard you whisk. Leave them on the counter for 30 minutes before starting. If you’re in a hurry, place the cream cheese (still wrapped) in a bowl of warm water for 10 minutes.
The spiderweb technique is forgiving. I’ve seen tutorials where people use a toothpick to make perfect concentric circles. That’s beautiful, but it’s also stressful. I prefer the “messy swirl” method—just drag your knife in random arcs. It looks more organic and takes half the time.
Watch for overbaking. The biggest mistake I made early on was baking until the center was completely firm. By then, the edges were dry and the crust was too dark. Pull the pan when the center has a slight wobble—like Jell-O, not like liquid. It will firm up in the fridge.
Use a damp knife for clean cuts. This tip changed my bar game entirely. Run your chef’s knife under hot water, wipe it dry, then slice. The heat helps the knife glide through the cheesecake without dragging. Wipe and repeat between each cut.
Let them chill overnight if you can. Three hours is the minimum, but overnight gives the flavors time to meld. The pumpkin and cheesecake layers marry together, and the crust softens just enough to be tender without getting soggy. Trust me on this one.
Variations & Adaptations
One of the best things about this recipe is how easy it is to twist. Here are a few ways I’ve adapted it for different occasions and dietary needs.
Gluten-Free Version
Swap the graham cracker crust with a mixture of 1 ½ cups almond flour, ¼ cup melted butter, 2 tablespoons maple syrup, and a pinch of salt. Press and bake the same way. The almond flour crust is actually my favorite—it’s nutty and pairs beautifully with the pumpkin. Just note that it’s more delicate, so handle the bars gently when slicing.
Dairy-Free Version
Use dairy-free cream cheese (I’ve tested with Kite Hill and it works well) and replace the heavy cream with full-fat coconut cream. The texture will be slightly less rich, but the flavor is still fantastic. For the crust, use a vegan butter stick or coconut oil in place of regular butter.
Chocolate Spiderweb
For a more dramatic look, swap the cheesecake swirl with melted dark chocolate. Mix ¼ cup melted chocolate chips with 2 tablespoons cream cheese for a thicker swirl. The chocolate-pumpkin combo is surprisingly good—like a pumpkin truffle in bar form.
Extra Spicy Pumpkin
If you like your pumpkin desserts with a kick, add an extra teaspoon of ginger and a pinch of cayenne pepper to the pumpkin layer. The warmth sneaks up on you and makes the bars feel more grown-up. I made these for a Halloween party once and they were a hit with the adults.
Mini Spiderweb Bites
Use a mini muffin tin lined with paper liners for bite-sized versions. Press a small spoonful of crust into each cup, add the pumpkin mixture, and top with a tiny dollop of cheesecake. Bake for 15 to 18 minutes. These are perfect for parties where you want people to grab and go.
Serving & Storage Suggestions
These pumpkin cheesecake bars are best served cold, straight from the fridge. The texture is firmer, the flavors are more defined, and the spiderweb pattern stays crisp. If you prefer a softer texture, let them sit at room temperature for 10 minutes before serving.
For presentation, I like to arrange the bars on a white platter and dust them lightly with cinnamon or a sprinkle of flaky sea salt. The salt sounds weird, I know, but it balances the sweetness and makes the pumpkin flavor pop. You can also add a dollop of whipped cream and a tiny cinnamon stick for a more polished look.
These bars pair beautifully with hot apple cider, a spiced chai latte, or even a cup of black coffee. The richness of the cheesecake layer cuts through the tannins in coffee, and the pumpkin spice complements the warmth of chai. For a dessert spread, serve them alongside classic pumpkin pie or my spiced apple cider donuts for the ultimate fall dessert table.
Storage Instructions: Keep the bars in an airtight container in the refrigerator for up to 5 days. Place a sheet of parchment paper between layers to prevent sticking. The crust will soften slightly over time, but the flavor actually improves after a day or two.
Freezer Instructions: These freeze beautifully. Wrap individual bars tightly in plastic wrap, then place them in a freezer-safe bag or container. Freeze for up to 3 months. To thaw, transfer to the refrigerator overnight. Don’t thaw at room temperature—the condensation can make the crust soggy.
Reheating Tips: I don’t recommend reheating these bars. They’re designed to be served cold. If you absolutely want a warm dessert, microwave a single bar for 10 seconds—just enough to take the chill off without melting the cheesecake layer.
Nutritional Information & Benefits
Here’s the rough nutritional breakdown for one bar (based on 16 servings):
- Calories: 245
- Total Fat: 14g
- Saturated Fat: 8g
- Cholesterol: 75mg
- Sodium: 210mg
- Total Carbohydrates: 28g
- Dietary Fiber: 1g
- Sugars: 19g
- Protein: 4g
These numbers are estimates and will vary based on your specific ingredients and portion sizes.
On the health side, pumpkin is packed with vitamin A (over 200% of your daily needs per cup), which supports eye health and immune function. It’s also a good source of fiber and potassium. The cream cheese adds calcium and protein, though it’s definitely a treat, not a health food. I like to think of these bars as a “nutrient-dense indulgence”—you’re getting some good stuff along with the sugar and butter.
If you’re watching your sugar intake, you can reduce the sugar in the pumpkin layer to ⅓ cup without affecting the texture too much. The bars will be less sweet, but the pumpkin and spice flavors will shine through more clearly.
Potential allergens include dairy (cream cheese, butter, heavy cream), eggs, and gluten (graham crackers). The recipe can be adapted for dairy-free and gluten-free diets as noted in the variations section.
Conclusion
These Perfect Spiderweb Pumpkin Cheesecake Bars are the kind of recipe that makes you look like a baking genius without the stress. They’re simple enough for a weeknight craving but impressive enough for a holiday table. The spiderweb pattern adds that little bit of drama that makes people think you spent hours, when really you just dropped some cheesecake on top and dragged a knife through it.
I love this recipe because it reminds me that sometimes the best things come from a moment of panic and a half-empty pantry. It’s forgiving, flexible, and always delivers. Whether you’re making them for a Halloween party, a Thanksgiving potluck, or just because it’s Tuesday and you want something cozy, these bars will not let you down.
Now I want to hear from you! Have you tried making spiderweb patterns before? What’s your favorite fall dessert? Drop a comment below and let me know. And if you make these bars, tag me in your photos—I love seeing your creations. Happy baking, friends!
Frequently Asked Questions
Can I use pumpkin pie filling instead of pumpkin puree?
I wouldn’t recommend it. Pumpkin pie filling is already sweetened and spiced, so it will throw off the sugar and spice balance in this recipe. Stick with 100% pure pumpkin puree for the best results. If you only have pie filling, reduce the sugar by half and skip the pumpkin pie spice, but the texture might be a bit denser.
Why did my spiderweb pattern disappear during baking?
This happens if your cheesecake mixture is too thin or if you over-swirled. Make sure your cream cheese is fully softened and don’t beat too much air into it. Also, when you drag the knife, do it gently—you want to create lines, not blend the two layers together. If the pattern still fades, try chilling the pan for 10 minutes before baking to help the layers set.
Can I make these bars ahead of time?
Absolutely. In fact, they’re better made a day ahead. The chilling time allows the flavors to meld and the texture to set properly. You can make them up to 3 days in advance and keep them covered in the refrigerator. Just add any garnishes (like whipped cream or cinnamon dusting) right before serving.
How do I prevent the crust from getting soggy?
Pre-baking the crust for 10 minutes is the key. This creates a barrier that prevents the pumpkin mixture from soaking in. Also, make sure your pumpkin puree isn’t too watery—if it looks loose, spread it on a paper towel-lined plate for a few minutes to absorb excess moisture before mixing.
Can I double this recipe for a larger pan?
Yes! For a 9×13 pan, double all the ingredients and bake for 45 to 50 minutes. The bars will be slightly thinner, so check for doneness around the 40-minute mark. For a half-sheet pan (13×18), triple the recipe and bake for 30 to 35 minutes. Just keep an eye on the center jiggle—it’s your best indicator.
Pin This Recipe!
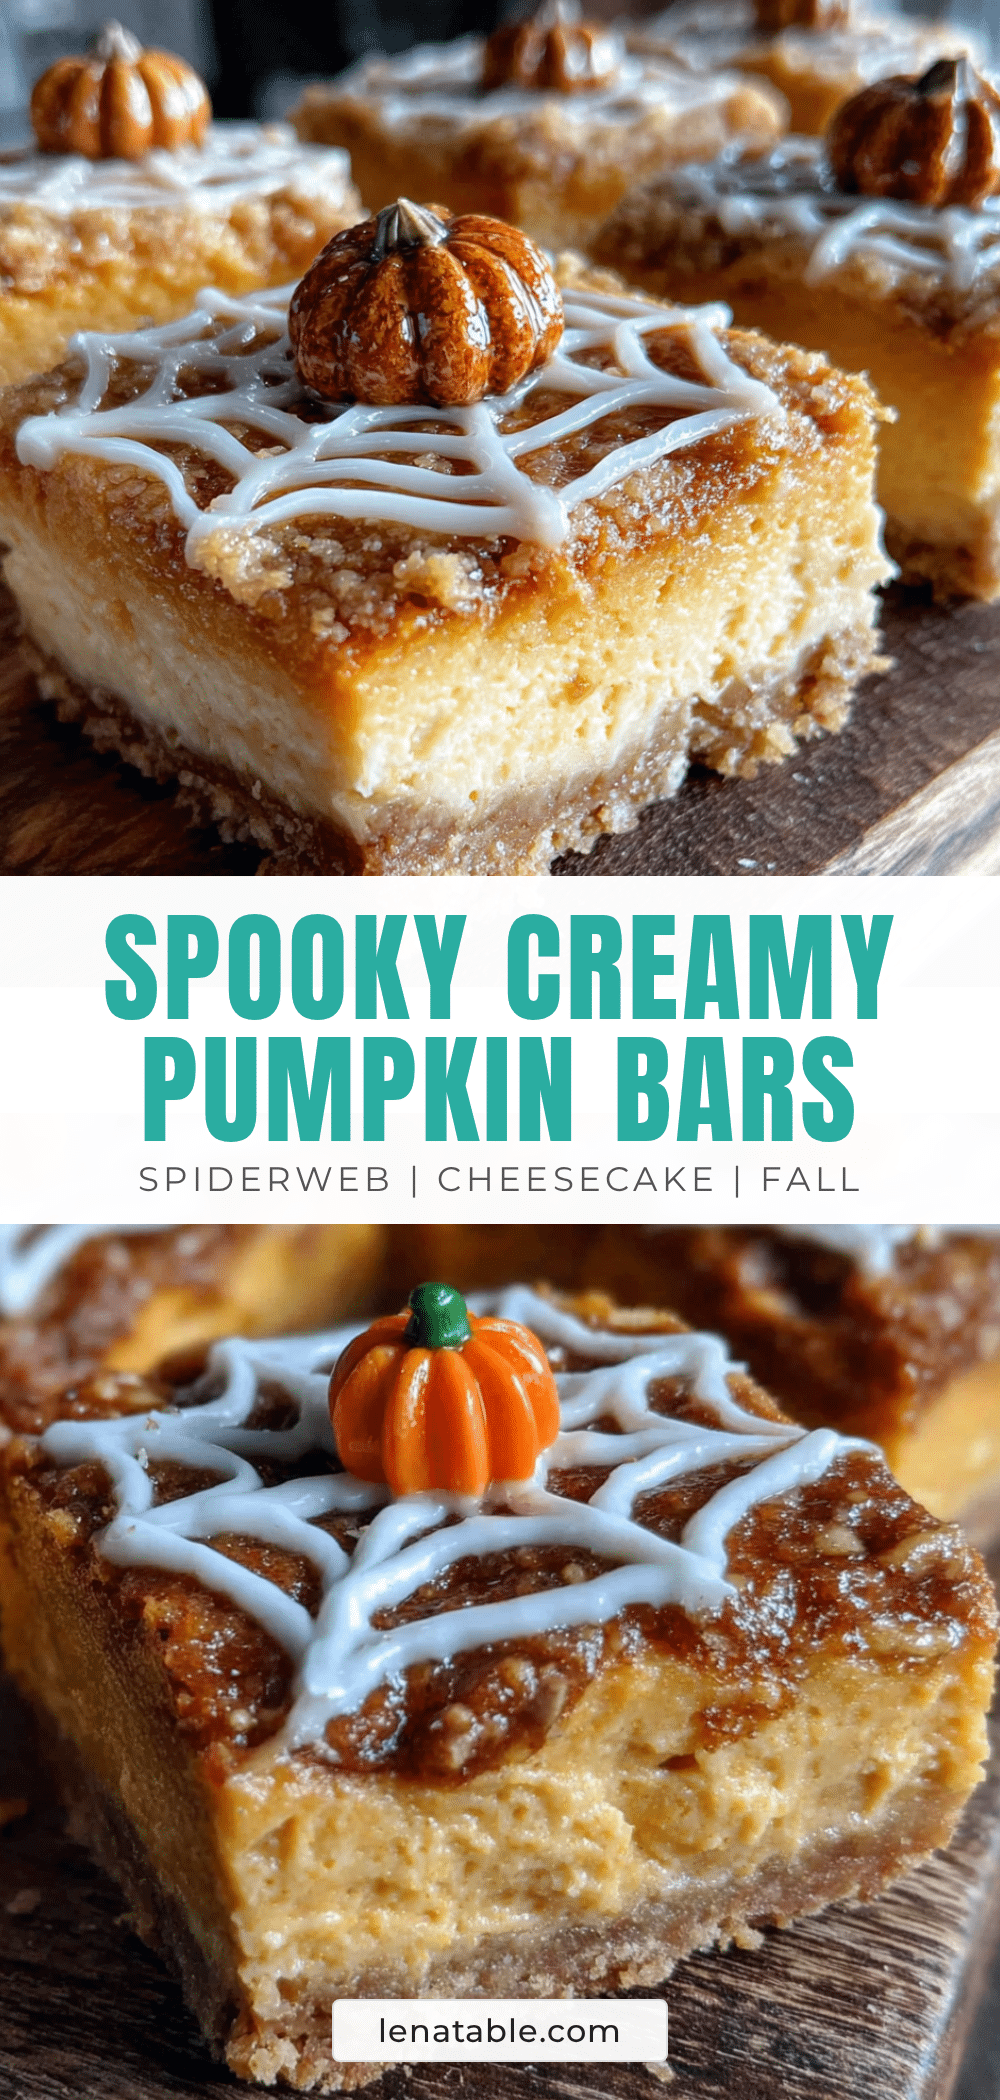
Perfect Spiderweb Pumpkin Cheesecake Bars: Easy & Best Fall Dessert
These pumpkin cheesecake bars feature a buttery graham cracker crust, a silky pumpkin layer, and a creamy cheesecake swirl that creates a stunning spiderweb pattern. They’re easy to make, perfect for fall gatherings, and always a crowd-pleaser.
- Prep Time: 20 minutes
- Cook Time: 35-40 minutes
- Total Time: 4 hours 55 minutes (including chilling)
- Yield: 16 bars 1x
- Category: Dessert
- Cuisine: American
Ingredients
- 1 ½ cups graham cracker crumbs (about 12 full sheets)
- ¼ cup granulated sugar
- 6 tablespoons unsalted butter, melted
- Pinch of salt
- 1 can (15 oz) pumpkin puree (not pumpkin pie filling)
- ½ cup granulated sugar
- ¼ cup packed light brown sugar
- 2 large eggs, room temperature
- ½ cup heavy cream (or full-fat coconut milk for dairy-free)
- 1 teaspoon vanilla extract
- 1 ½ teaspoons pumpkin pie spice (or 1 tsp cinnamon + ½ tsp ginger + ¼ tsp nutmeg + ¼ tsp cloves)
- ¼ teaspoon salt
- 8 oz cream cheese, softened to room temperature
- ¼ cup granulated sugar
- 1 large egg yolk
- ½ teaspoon vanilla extract
Instructions
- Preheat oven to 350°F (175°C). Line a 9×9-inch baking pan with parchment paper, leaving overhang on two sides. Lightly spray with non-stick spray.
- Make the crust: In a medium bowl, combine graham cracker crumbs, ¼ cup sugar, and a pinch of salt. Stir in melted butter until mixture resembles wet sand. Press firmly into the bottom of the prepared pan. Bake for 10 minutes, then set aside to cool slightly. Leave oven on.
- Make the pumpkin layer: In a large bowl, whisk together ½ cup granulated sugar and ¼ cup brown sugar. Add eggs and whisk until smooth and slightly pale, about 1 minute. Add pumpkin puree, heavy cream, vanilla, pumpkin pie spice, and ¼ teaspoon salt. Whisk until combined and silky. Pour over pre-baked crust and spread evenly.
- Make the cheesecake swirl: In a small bowl, beat cream cheese with ¼ cup sugar until smooth and creamy. Add egg yolk and ½ teaspoon vanilla, mix until just combined.
- Create the spiderweb pattern: Drop spoonfuls of cheesecake mixture randomly over the pumpkin layer (about 8-10 dollops). Use a butter knife or toothpick to drag through the dollops in a swirling motion to create spiderweb lines.
- Bake at 350°F (175°C) for 35-40 minutes. Edges should be set and slightly puffed, center should jiggle slightly when shaken.
- Cool on a wire rack for 1 hour at room temperature. Then refrigerate for at least 3 hours, preferably overnight.
- Lift bars out using parchment overhang. Place on cutting board and slice into 16 squares. Wipe knife clean between cuts for neat slices.
Notes
For clean cuts, use a damp knife. Chill overnight for best flavor and texture. The spiderweb pattern is forgiving—messy swirls look organic and beautiful.
Nutrition
- Serving Size: 1 bar
- Calories: 245
- Sugar: 19
- Sodium: 210
- Fat: 14
- Saturated Fat: 8
- Carbohydrates: 28
- Fiber: 1
- Protein: 4
Keywords: pumpkin cheesecake bars, spiderweb dessert, fall dessert, easy pumpkin bars, Halloween dessert, Thanksgiving dessert


