Love this? Save it for later!
Share the inspiration with your friends
I wasn’t supposed to be there, honestly. I’d stopped by to drop off a spare key for my neighbor while she was out of town, and her sister-in-law, a woman named Rosa I’d only met twice, answered the door. She wasn’t trying to impress me. She was in fuzzy slippers and a worn-out sweater, and she barely glanced up from what she was doing on the kitchen counter. But the smell—a rich, almost creamy chocolate scent mixed with something minty—hit me before I even got past the doorway. It stopped me cold.
“Oh, don’t mind me,” she said, waving a hand covered in chocolate. “I’m just making a mess.” She wasn’t. She was making something that looked like it belonged in a fancy bakery window. Little chocolate spheres sat on a tray, perfectly round and glossy, and she was casually piping what looked like a cloud of marshmallow fluff into the center of one. I just stood there, holding my car keys, completely frozen. “Want to try one?” she asked, like it was no big deal. Like she hadn’t just created the most beautiful thing I’d seen all winter.
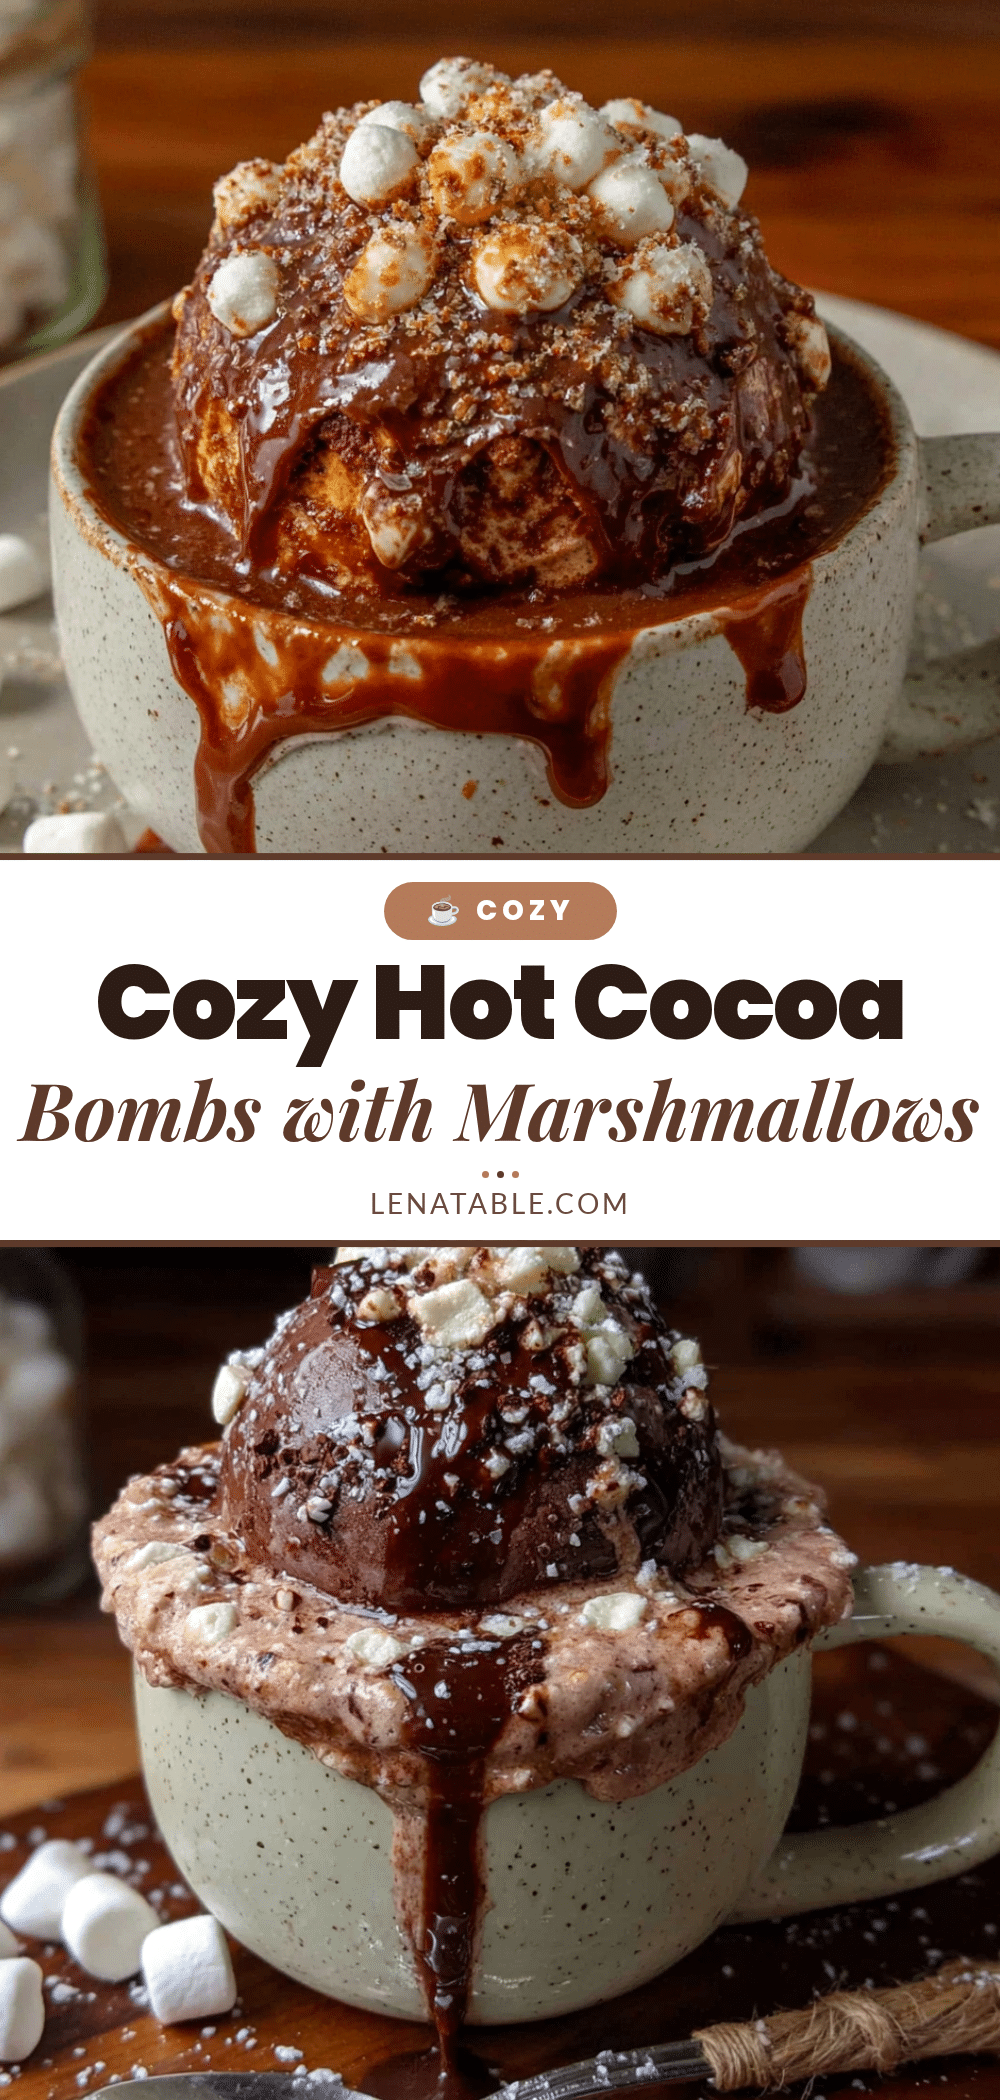
I nodded, and she dropped one of these little chocolate bombs into a mug, poured steaming milk over it, and I watched the whole thing bloom open like a magic trick. The chocolate melted, the marshmallows floated to the top, and honestly? It was the coziest thing I’d ever witnessed. I asked her for the recipe before I even took a sip. Maybe you’ve been there—where you see someone make something so simple yet so extraordinary, and you just know you have to learn how to do it yourself. That’s how these cozy hot cocoa bombs with marshmallows came into my life. And now, I get to share them with you.
Why You’ll Love This Recipe
Let’s face it—regular hot cocoa is great, but there’s something magical about watching a chocolate sphere melt into a pool of warm milk. It feels like a special occasion, even on a random Tuesday night. These cozy hot cocoa bombs with marshmallows are the kind of treat that makes you feel like you’re wrapped in a blanket, even when it’s freezing outside.
- Quick & Easy: Once you get the hang of melting and molding the chocolate, each bomb comes together in about 15 minutes. Perfect for a snowy afternoon project.
- Simple Ingredients: You only need a few things—good chocolate, hot cocoa mix, and marshmallows. No weird stuff you have to hunt down at a specialty store.
- Perfect for Gifting: These make the best homemade gifts for neighbors, teachers, or anyone who needs a little warmth. Pop them in a cute box with a tag, and you’re golden.
- Crowd-Pleaser: Kids go nuts for them, adults act all sophisticated, but everyone ends up with a huge smile on their face. It’s impossible not to love.
- Unbelievably Delicious: The combination of rich chocolate, creamy cocoa, and fluffy marshmallows is next-level comfort. I mean, you close your eyes after the first sip. It’s that good.
What makes this recipe different from every other hot cocoa bomb out there? It’s the little things. I use a specific melting technique that keeps the chocolate from seizing up, and I’ve tested the marshmallow-to-cocoa ratio about a dozen times to get it just right. This isn’t just another version—it’s my best version, born from a few cracked chocolate shells and some very messy countertops. Trust me, I’ve made all the mistakes so you don’t have to.
What Ingredients You Will Need
This recipe uses simple, wholesome ingredients to deliver that cozy, indulgent experience. You probably already have most of these in your kitchen, which is half the fun. Here’s what you’ll need to make these cozy hot cocoa bombs with marshmallows:
For the Chocolate Shells:
- 12 ounces semi-sweet chocolate chips (I prefer Ghirardelli or Guittard—they melt smooth and taste rich without being too sweet)
- 1 teaspoon coconut oil (optional, but helps thin the chocolate for easier molding and gives a nice shine)
For the Filling:
- 1/2 cup hot cocoa mix (use your favorite brand, or make your own with cocoa powder, sugar, and a pinch of salt)
- 1/4 cup mini marshmallows (the freeze-dried ones work best—they don’t add moisture that could melt the chocolate from the inside)
- Optional: 1/4 teaspoon peppermint extract (adds a festive twist, but leave it out if you want classic cocoa flavor)
For Assembly & Decoration:
- Additional melted chocolate (for sealing the bombs)
- Sprinkles, crushed candy canes, or drizzle (for decorating—make it your own!)
Ingredient Tips: Look for chocolate that’s at least 60% cacao for the best flavor. Milk chocolate works too, but it can be sweeter and a bit trickier to temper. If you’re using chocolate bars instead of chips, chop them finely so they melt evenly. For the hot cocoa mix, I’ve found that the ones with a little powdered milk in them taste creamier. And don’t skip the mini marshmallows—they’re the whole point of the “surprise” inside!
Substitution Guidance: Need a dairy-free option? Use dark chocolate chips (most are dairy-free) and a dairy-free hot cocoa mix. For a vegan version, check that your marshmallows are plant-based—Dandies makes great ones. If you’re avoiding sugar, you can use sugar-free chocolate chips, but be warned: they melt a little differently and might need extra coconut oil to stay smooth.
Equipment Needed
You don’t need a ton of fancy gear for this, which is honestly one of the best parts. Here’s what I use:
- Silicone sphere mold: A 2-inch diameter mold is perfect. I got mine on Amazon for under ten bucks, and it’s lasted through dozens of batches. If you don’t have one, you can use a mini muffin tin, but the spheres won’t be as round.
- Microwave-safe bowl: For melting the chocolate. Glass or ceramic works best—plastic can get too hot and mess with the chocolate’s texture.
- Pastry brush or small spoon: For spreading the chocolate inside the mold. A brush gives you a thinner, more even layer, but a spoon works in a pinch.
- Piping bag or small zip-top bag: For drizzling melted chocolate to seal the bombs. You can also just use a spoon, but a bag gives you way more control.
- Baking sheet: To hold the filled bombs while they set. Line it with parchment paper for easy cleanup.
- Rubber spatula: For scraping every last bit of melted chocolate. Waste not, want not!
Budget-Friendly Alternatives: If you’re just starting out, skip the piping bag and snip a tiny corner off a sandwich bag instead. No pastry brush? Use the back of a small spoon to spread the chocolate. The results might be a little rustic, but they’ll taste just as good.
Preparation Method
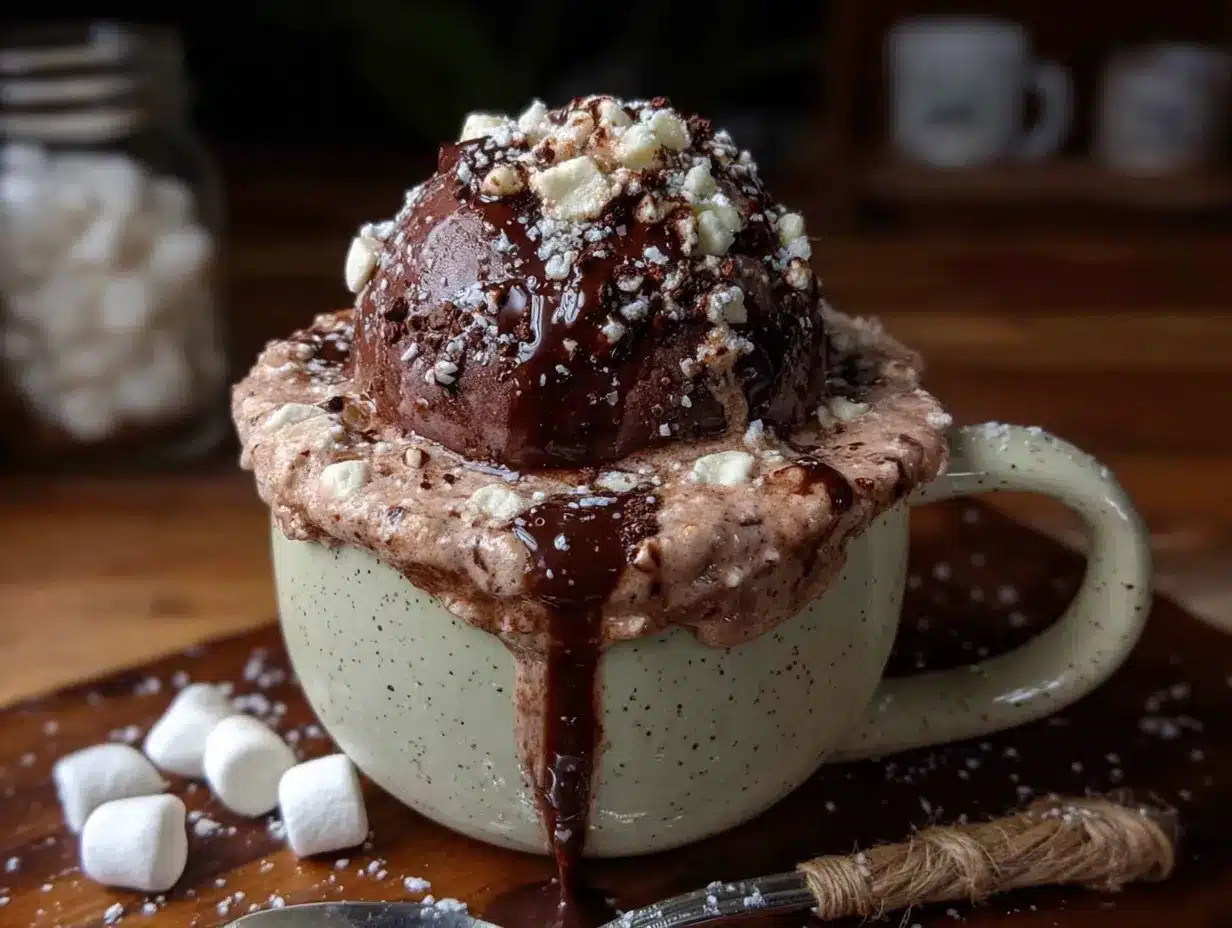
Alright, let’s get to the fun part. I’ve broken this down step-by-step so you don’t end up with a chocolatey mess like I did the first time. Take your time, and don’t rush the chocolate—it’s worth it.
- Melt the chocolate: Place the chocolate chips and coconut oil (if using) in a microwave-safe bowl. Microwave in 30-second intervals, stirring after each, until smooth. This usually takes about 1.5 to 2 minutes. Be careful not to overheat—burnt chocolate is sad chocolate. It should look glossy and feel warm, not hot, to the touch.
- Coat the molds: Spoon about a tablespoon of melted chocolate into each cavity of your silicone mold. Use your pastry brush or the back of a spoon to spread it up the sides, making sure you get an even layer. You want the edges to be slightly thicker than the bottom—this helps the shells hold their shape. Pop the mold in the freezer for 5 minutes to set. (Pro tip: I once forgot to freeze them and ended up with chocolate puddles. Don’t be me.)
- Add a second layer: After the first layer is firm, add another tablespoon of chocolate and spread it again. This double layer is what makes the bombs sturdy enough to handle. Freeze for another 5 minutes. The shells should look opaque and feel hard when you tap them.
- Remove the shells: Gently press on the bottom of each silicone cavity to pop the chocolate shells out. They should come out cleanly. If they stick, pop the mold back in the freezer for 2 more minutes. Handle them by the edges—your body heat can start melting them.
- Fill the bombs: Place half of the shells on a baking sheet lined with parchment paper. Spoon about 1 tablespoon of hot cocoa mix into each shell. Add a small handful of mini marshmallows (about 5-6 per bomb). If you’re using peppermint extract, add a tiny drop to the cocoa mix before sealing.
- Seal the bombs: Warm up your remaining melted chocolate (microwave for 15 seconds if it’s hardened). Dip the rim of an empty shell into the melted chocolate, then press it onto a filled shell. Gently twist to seal. Use a small piping bag or spoon to fill any gaps around the seam. Freeze for 10 minutes to set completely.
- Decorate: Once sealed, you can drizzle extra chocolate on top and add sprinkles, crushed candy canes, or a dusting of cocoa powder. I like to keep it simple with a drizzle and a few sparkly sprinkles—it looks like a snow globe. Let the decorations set at room temperature for about 15 minutes.
- Serve: To enjoy, place one bomb in a mug and pour 6-8 ounces of hot milk (dairy or non-dairy) over it. Watch it bloom! Stir until the chocolate is fully melted, then sip and smile.
Sensory Cues: When you’re spreading the chocolate, you’ll feel it start to thicken as it cools—that’s your cue to work quickly. The shells should look shiny, not dull. If they look matte, the chocolate is too thick and might crack. And when you pour the milk over the bomb? You’ll hear a soft crackling sound as the chocolate melts. That’s the sound of cozy.
Cooking Tips & Techniques
I’ve made these cozy hot cocoa bombs with marshmallows about twenty times now, and I’ve learned a few things the hard way. Here’s what I wish someone had told me:
Don’t skip the coconut oil. Even a tiny bit makes the chocolate flow better and gives the shells a beautiful shine. Without it, the chocolate can be too thick to spread evenly, and you’ll end up with lumpy shells. I learned this after my first batch looked like chocolate golf balls.
Work in a cool room. If your kitchen is warm, the chocolate will stay soft and the shells might collapse. I once made these in July with the AC broken, and let me tell you, it was a disaster. Keep your workspace cool, and if your hands are warm, wear food-safe gloves.
Freeze between steps. This is non-negotiable. Each time you add a layer of chocolate or seal a bomb, give it time in the freezer. It sets the chocolate fast and keeps the shells from cracking. I keep a little tray in my freezer just for this.
Check for cracks. Before you fill the shells, hold them up to the light. If you see any thin spots or cracks, add a little more melted chocolate to reinforce them. A cracked bomb will leak when you pour the milk, and nobody wants a puddle of cocoa mix in their mug.
Multitasking tip: While the shells are freezing, prep your hot cocoa mix and marshmallows. Have everything measured out so you can work fast when it’s time to fill. I also like to line my baking sheet with parchment paper ahead of time—it saves me from scrambling later.
Variations & Adaptations
One of the best things about these bombs is how easy they are to customize. Here are some of my favorite twists:
Peppermint Cocoa Bombs: Add 1/4 teaspoon of peppermint extract to the hot cocoa mix before filling. Crush up some candy canes and sprinkle them on top for decoration. It’s like a candy cane hug in a mug.
Spiced Mexican Hot Chocolate: Mix a pinch of cinnamon, a tiny pinch of cayenne, and a dash of nutmeg into the cocoa mix. The warmth of the spices pairs beautifully with the rich chocolate. I tried this on a whim one cold night, and now it’s my go-to.
Vegan & Dairy-Free Version: Use dairy-free dark chocolate chips (most are naturally dairy-free), a plant-based hot cocoa mix, and vegan marshmallows. Coconut milk is my favorite for pouring over the bomb—it’s creamy and adds a subtle sweetness.
Gourmet Touch: Add a teaspoon of caramel sauce or a few drops of orange extract to the filling. I once made a batch with a tiny square of dark sea salt caramel inside each bomb, and my friends still talk about it.
Mini Bombs: Use a smaller silicone mold (1-inch spheres) to make bite-sized versions. They’re perfect for kids or for serving at a party. Just reduce the filling amount and the milk when serving.
Serving & Storage Suggestions
These bombs are best enjoyed fresh, but they store beautifully if you need to make them ahead. Here’s how to handle them:
Serving: Serve the bombs at room temperature in a cozy mug. For the full experience, heat your milk until it’s steaming but not boiling—about 150°F. Pour it slowly over the bomb and watch it open up. I like to serve them with a peppermint stick for stirring. It’s like a little ceremony.
Storage: Store the finished bombs in an airtight container at room temperature for up to 2 weeks. Keep them away from heat and sunlight, or they’ll start to soften. If your house is warm, pop the container in the fridge—they’ll last for up to a month there.
Freezing: You can freeze the bombs for up to 3 months. Place them in a single layer in a freezer-safe container with parchment paper between layers. To serve, let them sit at room temperature for 10 minutes before pouring the milk. Don’t microwave them to thaw—it’ll ruin the chocolate.
Reheating: If you’ve stored your bombs and the chocolate looks a little dull, no worries—it’ll still melt beautifully in hot milk. The flavor actually deepens after a few days, so they might taste even better.
Flavor Development: The marshmallows stay fluffy for about a week. After that, they start to soften and meld with the cocoa mix, which isn’t a bad thing—it creates a creamier texture. Honestly, I kind of prefer them after a week.
Nutritional Information & Benefits
Let’s be real—these are a treat, not a health food. But they’re made with real ingredients, and that counts for something. Here’s a rough estimate per bomb (without milk):
| Nutrient | Amount per Bomb |
|---|---|
| Calories | 220-260 |
| Fat | 12-15g |
| Carbohydrates | 28-32g |
| Sugar | 22-26g |
| Protein | 3-5g |
| Fiber | 2-3g |
Health Highlights: Dark chocolate is rich in antioxidants and can help improve heart health in moderation. Cocoa also contains magnesium and iron. And hey, there’s something to be said for the mental health benefits of a warm, cozy drink on a cold day. It’s comfort food, plain and simple.
Dietary Considerations: This recipe can be made dairy-free, vegan, and gluten-free with simple substitutions. It’s not low-carb or sugar-free, but it’s made from scratch with ingredients you recognize. That’s a win in my book.
Conclusion
These cozy hot cocoa bombs with marshmallows are more than just a drink—they’re an experience. They’re the kind of thing that makes a snowy afternoon feel special, that turns a simple evening into a memory. I love them because they remind me of that day at Rosa’s house, standing in her kitchen in my coat, watching her work her magic without even trying. She didn’t know she was teaching me something that day, but she was.
Now it’s your turn. Make these for yourself, for your family, for your friends. Customize them however you like—add sprinkles, try different extracts, stuff them with caramel. The recipe is just a starting point. What matters is the warmth they bring.
I’d love to hear how yours turn out! Drop a comment below and tell me your favorite variation. Did you go with peppermint? Spiced? Something totally wild? Share a photo if you’ve got one—I love seeing your creations. And if you know someone who could use a little cozy in their life, send them this recipe. Let’s spread the warmth, one chocolate bomb at a time.
Frequently Asked Questions
Can I use milk chocolate instead of semi-sweet?
Absolutely! Milk chocolate will make the bombs sweeter and a bit softer. Just be careful when handling them—they can melt faster in warm hands. I’d recommend adding a little extra coconut oil to help them hold their shape.
Why are my chocolate shells cracking?
This usually happens if the chocolate is too thick or if you skipped the second layer. Make sure you’re using a thin, even coat and freezing between layers. If your chocolate seems thick, add a tiny bit more coconut oil next time.
Can I make these without a silicone mold?
You can, but it’s trickier. Try using a mini muffin tin, but the bombs won’t be perfectly round. You can also shape the chocolate over the back of a small spoon or use round ice cube trays. The silicone mold just makes it way easier.
How do I get the marshmallows to stay fluffy inside?
Use freeze-dried mini marshmallows instead of the soft, puffy kind. Freeze-dried marshmallows don’t have moisture, so they won’t make the cocoa mix clump or melt the chocolate from the inside. You can find them in the hot cocoa aisle or online.
Can I add coffee to the milk?
Yes, and it’s delicious! Make your hot milk with a shot of espresso or a tablespoon of instant coffee stirred in. It turns the bomb into a mocha, which is perfect for those mornings when you need an extra boost of cozy energy.
Pin This Recipe!
Cozy Hot Cocoa Bombs: Easy Homemade Recipe
These cozy hot cocoa bombs with marshmallows are a magical treat that bloom into a rich, creamy hot cocoa when hot milk is poured over them. Perfect for a snowy afternoon or as a homemade gift, they are quick to make with simple ingredients.
- Prep Time: 15 minutes
- Cook Time: 5 minutes
- Total Time: 30 minutes
- Yield: 6 servings 1x
- Category: Dessert
- Cuisine: American
Ingredients
- 12 ounces semi-sweet chocolate chips
- 1 teaspoon coconut oil (optional)
- 1/2 cup hot cocoa mix
- 1/4 cup mini marshmallows (freeze-dried preferred)
- 1/4 teaspoon peppermint extract (optional)
- Additional melted chocolate (for sealing)
- Sprinkles, crushed candy canes, or drizzle (for decorating)
Instructions
- Melt the chocolate: Place the chocolate chips and coconut oil (if using) in a microwave-safe bowl. Microwave in 30-second intervals, stirring after each, until smooth (about 1.5 to 2 minutes).
- Coat the molds: Spoon about 1 tablespoon of melted chocolate into each cavity of a silicone sphere mold. Use a pastry brush or the back of a spoon to spread it up the sides, ensuring an even layer. Freeze for 5 minutes.
- Add a second layer: After the first layer is firm, add another tablespoon of chocolate and spread it again. Freeze for another 5 minutes.
- Remove the shells: Gently press on the bottom of each silicone cavity to pop the chocolate shells out. Handle them by the edges.
- Fill the bombs: Place half of the shells on a baking sheet lined with parchment paper. Spoon about 1 tablespoon of hot cocoa mix into each shell. Add 5-6 mini marshmallows. If using peppermint extract, add a tiny drop to the cocoa mix.
- Seal the bombs: Warm up remaining melted chocolate. Dip the rim of an empty shell into the melted chocolate, then press it onto a filled shell. Gently twist to seal. Use a piping bag or spoon to fill any gaps. Freeze for 10 minutes.
- Decorate: Drizzle extra chocolate on top and add sprinkles, crushed candy canes, or a dusting of cocoa powder. Let decorations set at room temperature for about 15 minutes.
- Serve: Place one bomb in a mug and pour 6-8 ounces of hot milk over it. Stir until fully melted.
Notes
Use freeze-dried mini marshmallows to prevent moisture from melting the chocolate from the inside. Work in a cool room to keep the chocolate from staying soft. Freeze between steps to set the chocolate quickly. Check for cracks before filling and reinforce with extra melted chocolate if needed.
Nutrition
- Serving Size: 1 bomb
- Calories: 240
- Sugar: 24
- Sodium: 100
- Fat: 13.5
- Saturated Fat: 8
- Carbohydrates: 30
- Fiber: 2.5
- Protein: 4
Keywords: hot cocoa bombs, hot chocolate bombs, homemade hot cocoa, chocolate spheres, marshmallow, winter treat, gift idea